phxpaxos 项目的演示和实验
--放弃window后的第一个实验, 巨多坑
linux环境配置
helloworld@Vostro:~/Downloads/automake-1.14$ uname -a
Linux Vostro 5.3.0-40-generic #32~18.04.1-Ubuntu SMP Mon Feb 3 14:05:59 UTC 2020 x86_64 x86_64 x86_64 GNU/Linux
helloworld@Vostro:~$ cat /etc/lsb-release
DISTRIB_ID=Ubuntu
DISTRIB_RELEASE=18.04
DISTRIB_CODENAME=bionic
DISTRIB_DESCRIPTION="Ubuntu 18.04.4 LTS"
下载 phpaxos 源码
git clone https://github.com/Tencent/phxpaxos.git --recursive
下载过程中, 可能会报这样的错, 在运行git clone命令时很容易出现这个错误,这是下载的包太大,网速慢超时报错。
git clone https://github.com/Tencent/phxpaxos.git  --recursive
...
git clone error RPC failed:curl 56 GnuTLS recv error (-54):Error in the pull function
fatar: The remote end hung up unexpectedly
fatal : early EOF
fatal : index-pack failed
...
可通过更改设置解决, git config -l 查看配置
- httpBuffer加大
git config --global http.postBuffer 524288000

- 压缩配置
git config --global core.compression -1

- 修改配置文件.bashrc
export GIT_TRACE_PACKET=1
export GIT_TRACE=1
export GIT_CURL_VERBOSE=1
环境编译
依赖关系
看一下各目录的依赖关系。如下:
| 目录 | 编译对象 | 内部依赖 | 第三方库依赖 |
|---|---|---|---|
| 根目录 | libphxpaxos.a | 无 | protobuf,leveldb |
| plugin | libphxpaxos_plugin.a | libphxpaxos.a | glog |
| sample/phxelection | 可执行程序 | libphxpaxos.a,libphxpaxos_plugin.a | 无 |
| sample/phxecho | 可执行程序 | libphxpaxos.a,libphxpaxos_plugin.a | 无 |
| sample/phxkv | 可执行程序 | libphxpaxos.a,libphxpaxos_plugin.a | grpc |
| src/ut | 单元测试 | 无 | gtest,gmock |
注意: 如仅需使用libphxpaxos.a进行开发,只需要编译leveldb和protobuf。而如果希望使用我们的glog打日志插件模块,或者想尝试编译sample目录,或用于phxsql使用,则还需要编译libphxpaxos_plugin.a, 这个静态库依赖了glog。
编译 leveldb
进入third_party/leveldb目录。
下载 leveldb1.18版  https://github.com/google/leveldb/releases
make,编译完成后会在当前目录生成libleveldb.a文件。
mkdir lib建立一个lib目录,然后cd lib;ln -s ../libleveldb.a libleveldb.a建立一个软链,PhxPaxos通过lib这个目录来寻址静态库。
编译 protobuf
进入third_party/protobuf目录。
./autogen.sh
出错
helloworld@Vostro:~/Workspace/gopath/src/github.com/bingo/phxpaxos/third_party/protobuf$ ./autogen.sh
Google Mock not present.  Fetching gmock-1.7.0 from the web...
  % Total    % Received % Xferd  Average Speed   Time    Time     Time  Current
                                 Dload  Upload   Total   Spent    Left  Speed
  0     0    0     0    0     0      0      0 --:--:--  0:02:12 --:--:--     0curl: (7) Failed to connect to googlemock.googlecode.com port 443: Connection timed out
下载[gmoock](git clone https://github.com/paulsapps/gmock-1.7.0 ]) 到当前目录,或将third_party/目录下gmock文件夹,直接拷贝到third_party/protobuf文件夹下,再次执行 ./autogen.sh
出错
>>> configure.ac:93: error: possibly undefined macro: AC_PROG_LIBTOOL
      If this token and others are legitimate, please use m4_pattern_allow.
      See the Autoconf documentation.
>>> autoreconf: /usr/bin/autoconf failed with exit status: 1
下载 libtool libsysfs-dev
sudo apt install libtool libsysfs-dev
再次执行 ./autogen.sh
如果还是报错
libtoolize --copy --force
报错
helloworld@Vostro:~/Workspace/gopath/src/github.com/bingo/phxpaxos/third_party/protobuf$ ./autogen.sh
+ mkdir -p third_party/googletest/m4
+ autoreconf -f -i -Wall,no-obsolete
libtoolize: putting auxiliary files in '.'.
libtoolize: copying file './ltmain.sh'
libtoolize: putting macros in AC_CONFIG_MACRO_DIRS, 'm4'.
libtoolize: copying file 'm4/libtool.m4'
libtoolize: copying file 'm4/ltoptions.m4'
libtoolize: copying file 'm4/ltsugar.m4'
libtoolize: copying file 'm4/ltversion.m4'
libtoolize: copying file 'm4/lt~obsolete.m4'
Unescaped left brace in regex is illegal here in regex; marked by <-- HERE in m/${ <-- HERE ([^ 	=:+{}]+)}/ at /usr/local/bin/automake line 3930.
autoreconf: automake failed with exit status: 255
原因是Perl不支持以前的写法。
解决方法
编辑提示的文件xxx的行号xxx
例如 /usr/bin/automake 第 3930 行
将 - $text =~ s/${([^ =:+{}]+)}/substitute_ac_subst_variables_worker ($1)/ge;
修改为 - $text =~ s/$[{]([^ =:+{}]+)}/substitute_ac_subst_variables_worker ($1)/ge;
出现exit 0 即可
继续编译
./configure CXXFLAGS=-fPIC --prefix=[当前目录绝对路径], 这一步CXXFLAGS和--prefix都必须设置对。  可直接使用./configure CXXFLAGS=-fPIC --prefix=`pwd`
make && make install
编译完成后检查是否在当前目录成功生成bin,include,lib三个子目录。
编译 glog
进入third_party/glog目录。
./configure CXXFLAGS=-fPIC -prefix=[当前目录绝对路径], 这一步CXXFLAGS和-prefix都必须设置对。
sudo  make && sudo make install
编译完成检查是否在当前目录成功生成lib子目录,并检查在lib目录是否成功生成静态库libglog.a.
出错
>>> cd . && automake-1.14 --gnu
/bin/sh:line 4: automake-1.14: command not found
make: *** [Makefile.in] error 1
[root@localhost glog]# make && make install
 cd . && automake-1.14 --gnu
/bin/sh:line 4: automake-1.14: command not found
make: *** [Makefile.in] error 1
安装依赖
helloworld@Vostro:~/Downdown wget http://ftp.gnu.org/gnu/automake/automake-1.14.tar.gz
helloworld@Vostro:~/Downdown wget http://ftp.gnu.org/gnu/autoconf/autoconf-2.69.tar.gz
tar xvzf autoconf-2.69.tar.gz
cd autoconf-2.69
yum -y install libtool libsysfs-dev
./configure
make && make install

tar xvzf automake-1.14.tar.gz
cd automake-1.14
./configure
make && make install

automake --version
>>> automake (GNU automake) 1.14
Makefile:372: recipe for target 'aclocal.m4' failed
出错
 sudo make && sudo  make  install
 cd . && automake-1.14 --gnu
parallel-tests: error: required file './test-driver' not found
parallel-tests:   'automake --add-missing' can install 'test-driver'
Makefile:928: recipe for target 'Makefile.in' failed
make: *** [Makefile.in] Error 1
根据提示操作
sudo automake --add-missing
sudo  aclocal-1.14
sudo  make && sudo  make install
编译 PhxPaxos
进入PhxPaxos根目录。
./autoinstall.sh
make && make install (默认使用-O2编译优化参数,如需编译debug版本,则命令为make debug=y)
编译完成后检查是否在当前目录成功生成lib子目录,并检查在lib目录是否成功生成静态库libphxpaxos.a.
编译 PhxPaxos Plugin静态库
cd PhxPaxos/plugin
make && make install
至此,PhxPaxos Plugin静态库编译成功,检查上层lib目录下是否成功生成静态库libphxpaxos_plugin.a.
编译 gflags
源码已经跟随第一步下载到third_party/文件夹下,官网手册里没有编译它的步骤实乃大坑。因为不编译它,会在编译sample/phxecho中报错:
g++: error: /home/helloworld/Workspace/gopath/src/github.com/bingo/phxpaxos/third_party/leveldb/lib/libleveldb.a: No such file or directory
Makefile:36: recipe for target 'phxecho' failed
make: *** [phxecho] Error 1>>> g++: error:/root/git/phxpaxos/third_party/gflags/lib/libgflags.a:No such file or directory
编译
camke .
sudo make && sudo make install
三个sample 运行
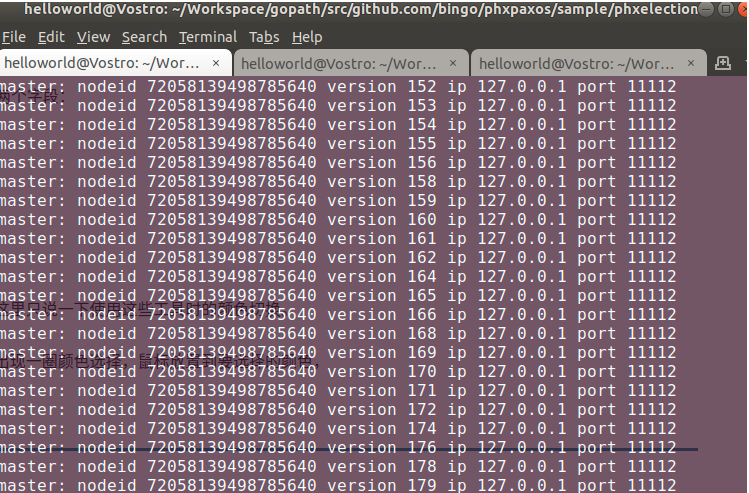
phxelection
介绍: This is very simple sample to use phxpaxos to election.
Check the code in election.cpp, that is really simple.
了解选举过程
$ sudo  make
$ ./phxelection 127.0.0.1:11111 127.0.0.1:11111,127.0.0.1:11112,127.0.0.1:11113
$ ./phxelection 127.0.0.1:11112 127.0.0.1:11111,127.0.0.1:11112,127.0.0.1:11113
$ ./phxelection 127.0.0.1:11113 127.0.0.1:11111,127.0.0.1:11112,127.0.0.1:11113
phxecho
helloworld@Vostro:~/Workspace/gopath/src/github.com/bingoaxos/sample/phxkv$ sudo  make
helloworld@Vostro:~/Workspace/gopath/src/github.com/bingoaxos/sample/phxkv$ mkdir log
#运行
$ ./phxecho  127.0.0.1:11111 127.0.0.1:11111,127.0.0.1:11112,127.0.0.1:11113
$ ./phxecho  127.0.0.1:11112 127.0.0.1:11111,127.0.0.1:11112,127.0.0.1:11113
$ ./phxecho  127.0.0.1:11113 127.0.0.1:11111,127.0.0.1:11112,127.0.0.1:11113
phxkv
直接make发现出错
--grpc_out: protoc-gen-grpc: Plugin failed with status code 1.
/home/helloworld/Workspace/gopath/src/github.com/bingo/phxpaxos/makefile.mk:58: recipe for target 'phxkv.grpc.pb.cc' failed
make: *** [phxkv.grpc.pb.cc] Error 1
原因: 缺少第三方依赖 grpc
编译 grpc
源码 grpc源码
git clone --recursive https://github.com/grpc/grpc.git
cd grpc
git submodule update --init
编译
make
出错
-
zlib 没有自动编译
检查是否第三方软件下载完全
$ git submodule update --init 发现无错误 #重新下载编译 $ cd third_party/ $ git clone https://github.com/madler/zlib.git $ cd zlib $ mdkir .build $ cd .build $ cmake .. $ make -
protobuf 出错
configure.ac:30: error: possibly undefined macro: AC_PROG_LIBTOOL
If this token and others are legitimate, please use m4_pattern_allow.
See the Autoconf documentation.
google出来的答案都是说, 安装下列软件,可是自己早下载过了,没有找到原因
sudo apt install libtool libgflags-dev libgtest-dev最后使用了之前编译好的 protobuf, 神奇的坑...
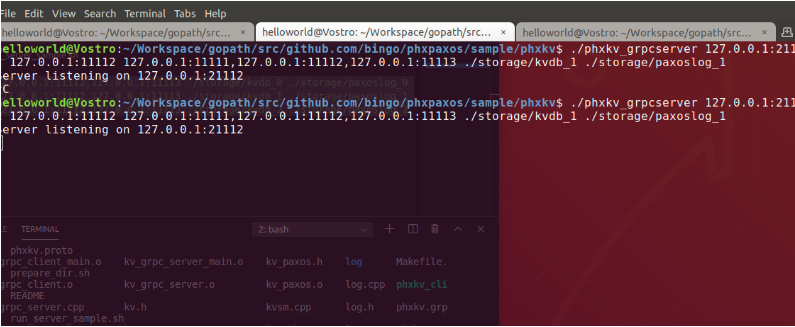
最后回到phxkv,运行例子
$ make
$ sh prepare.sh
$ #sample
#./phxkv_grpcserver 127.0.0.1:21111 127.0.0.1:11111 127.0.0.1:11111,127.0.0.1:11112,127.0.0.1:11113 ./storage/kvdb_0 ./storage/paxoslog_0
#./phxkv_grpcserver 127.0.0.1:21112 127.0.0.1:11112 127.0.0.1:11111,127.0.0.1:11112,127.0.0.1:11113 ./storage/kvdb_1 ./storage/paxoslog_1
#./phxkv_grpcserver 127.0.0.1:21113 127.0.0.1:11113 127.0.0.1:11111,127.0.0.1:11112,127.0.0.1:11113 ./storage/kvdb_2 ./storage/paxoslog_2

#client 测试
#./phxkv_client_tools 127.0.0.1:21112 put key_hello value_paxos 0
#./phxkv_client_tools 127.0.0.1:21112 getlocal key_hello
#./phxkv_client_tools 127.0.0.1:21112 getglobal key_hello
#./phxkv_client_tools 127.0.0.1:21112 delete key_hello 0

#./phxkv_client_tools 127.0.0.1:21111 put key_hello value_paxos 0
#./phxkv_client_tools 127.0.0.1:21111 getlocal key_hello
#./phxkv_client_tools 127.0.0.1:21111 getglobal key_hello
#./phxkv_client_tools 127.0.0.1:21111 delete key_hello 0

#./phxkv_client_tools 127.0.0.1:21113 put key_hello value_paxos 0
#./phxkv_client_tools 127.0.0.1:21113 getlocal key_hello
#./phxkv_client_tools 127.0.0.1:21113 getglobal key_hello
#./phxkv_client_tools 127.0.0.1:21113 delete key_hello 0

[注意]可能会遇到文件权限的原因,加上sudo就ok了