最近在测试app的时候经常要查看Android设备的基本信息,app的相关信息和重复性操作
使用adb可以直接使用命令操作,但是不太方便,我用Python的wx做了一个exe的小工具,方便在window下运行
1.代码如下
import wx,os
import datetime
import time
app = wx.App()
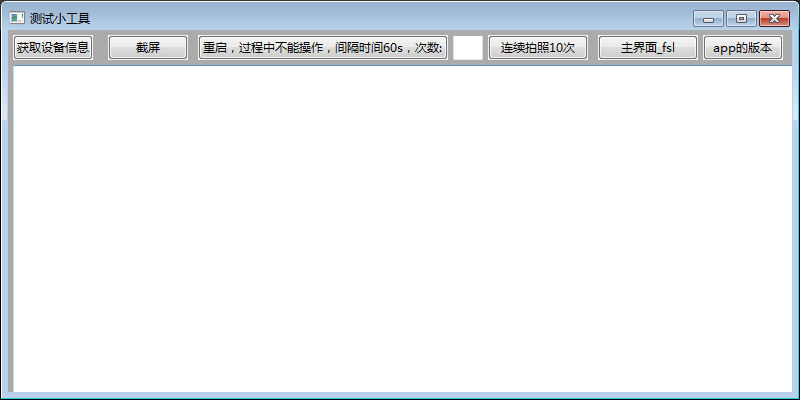
win = wx.Frame(None,title = "测试小工具", size=(800,400))
win.Show()
#获取设备信息的方法,使用os.popen是因为有返回,os.system没有
def huoqu(event):
cmd1 = "adb shell top -n 1 | findstr /i user"
cmd2 = "adb shell cat /proc/meminfo |findstr MemTotal"
cmd3 = "adb shell cat /proc/meminfo |findstr MemFree"
cmd4 = "adb shell dumpsys battery |findstr level"
cmd5 = "adb shell getprop ro.build.version.release"
cmd6 = "adb shell dumpsys window w |findstr / |findstr name="
file1 = os.popen(cmd1)
file2 = os.popen(cmd2)
file3 = os.popen(cmd3)
file4 = os.popen(cmd4)
file5 = os.popen(cmd5)
file6 = os.popen(cmd6)
power1 = file1.read()
power2 = file2.read()
power3 = file3.read()
power4 = file4.read()
power5 = file5.read()
power6 = file6.read()
contents.SetValue('cpu信息'+power1+'总内存'+power2+'剩余内存'+power3+'电量'+power4+'Android系统版本'+power5+'当前启动App的应用名和包名'+power6)
#截屏
def jieping(event):
t = datetime.datetime.now()
v = str(t.year)+'_'+str(t.month)+'_'+str(t.day)+'_'+str(t.hour)+'_'+str(t.minute)+'_'+str(t.second)
screen_name = v+'.png'
print(screen_name)
os.system('adb shell screencap -p /sdcard/%s' % (screen_name))
os.system('adb pull /sdcard/%s ./'% (screen_name))
os.system('adb shell rm /sdcard/%s'% (screen_name))
#重启
def chongqi(event):
for i in range(int(cishuContnts.GetValue())):
time.sleep(60)
cmd10 = "adb reboot"
os.system(cmd10)
#拍照
def paizhao(event):
for i in range(10):
cmd11 = "adb shell input keyevent 4"
os.system(cmd11)
time.sleep(2)
cmd12 = "adb shell input tap 0 200"
os.system(cmd12)
time.sleep(5)
huoquButton = wx.Button(win, label = '获取设备信息',pos = (5,5),size = (80,25))
huoquButton.Bind(wx.EVT_BUTTON, huoqu)
jiepingButton = wx.Button(win, label = '截屏',pos = (100,5),size = (80,25))
jiepingButton.Bind(wx.EVT_BUTTON,jieping)
chongqiButton = wx.Button(win, label = '重启,过程中不能操作,间隔时间60s,次数:',pos = (190,5),size = (250,25))
chongqiButton.Bind(wx.EVT_BUTTON,chongqi)
cishuContnts = wx.TextCtrl(win, pos = (445,5),size = (30,25))
paizhaoButton = wx.Button(win, label = '连续拍照10次',pos = (480,5),size = (100,25))
paizhaoButton.Bind(wx.EVT_BUTTON,paizhao)
yuansuButton = wx.Button(win, label = '主界面_fsl',pos = (590,5),size = (100,25))
versionButton = wx.Button(win, label = 'app的版本',pos = (695,5),size = (80,25))
chongqiButton.Bind(wx.EVT_BUTTON,chongqi)
contents = wx.TextCtrl(win, pos = (5,35),size = (800,400), style = wx.TE_MULTILINE | wx.HSCROLL)
app.MainLoop()
2.使用pycharm的Terminal下命令打包成exe(前面讲过)
3.双击exe即可运行。注意要安装adb工具,并配置环境变量