一、创建项目并导入依赖
<dependency>
<groupId>org.springframework.boot</groupId>
<artifactId>spring-boot-starter-security</artifactId>
</dependency>
<dependency>
<groupId>org.springframework.boot</groupId>
<artifactId>spring-boot-starter-web</artifactId>
</dependency>
<dependency>
<groupId>org.springframework.security.oauth</groupId>
<artifactId>spring-security-oauth2</artifactId>
<version>2.3.6.RELEASE</version>
</dependency>
<dependency>
<groupId>org.springframework.boot</groupId>
<artifactId>spring-boot-starter-data-redis</artifactId>
</dependency>
注:这里的oauth2不是springboot那个,这是springsecurity。
Oauth2一共有四种认证模式是
本篇是password的认证模式,用于前后端分离登陆
第三方登陆一般是授权码模式
二、相关配置和代码
注:授权服务器和资源服务器一般是分开来的,我这里就不分开了
2.1)application.properties
spring.redis.host=192.168.21.135
spring.redis.port=6379
spring.redis.database=0
spring.redis.password=520hufei520
2.2)创建授权服务
2.2.1)实现AuthorizationServiceConfigurerAdapter

@Configuration表示这个一个配置类
@EnableAuthorizationServer表示开启授权服务
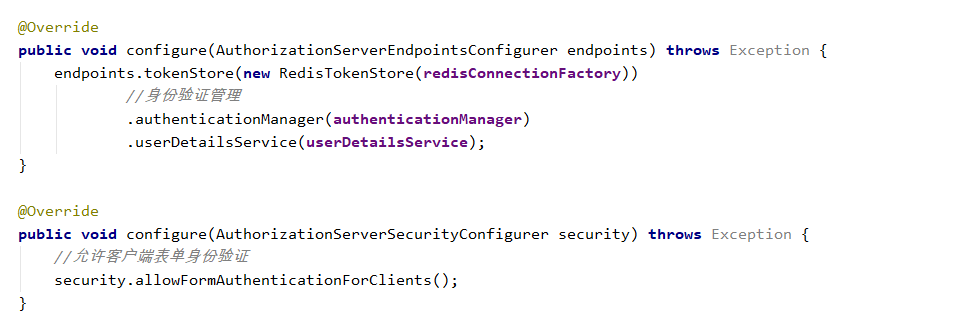
2.2.2)注入AuthenticationManager、RedisConnectionFactory、UserDetailsService
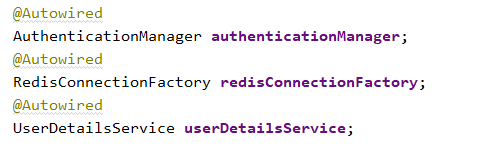
AuthenticationManager表示支持password认证模式
RedisConnectionFactory登陆成功后的token需要存在redis里面,因为redis里面有过期机制
UserDetailsService里面存放着用户信息
2.2.3)重写方法

2.3)创建资源服务
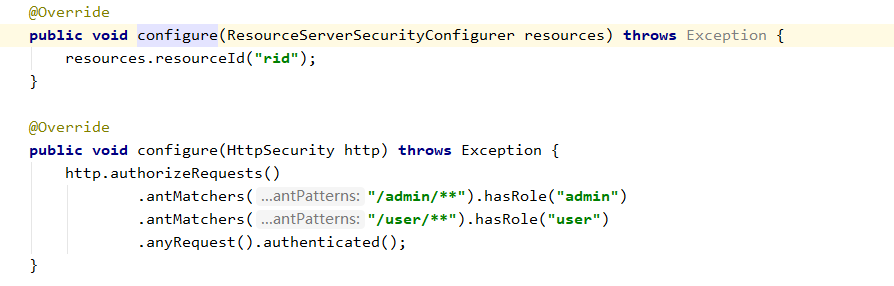
2.3.1)实现ResourceServerConfigurerAdapter

@configuration表示这是一个配置类
@enbaleResourceServer表示开启资源服务
2.3.2)重写方法
2.4)创建Security配置类
2.4.1)实现WebSecurityConfigurerAdapter

2.4.2)将授权服务需要的两个bean,提供给它
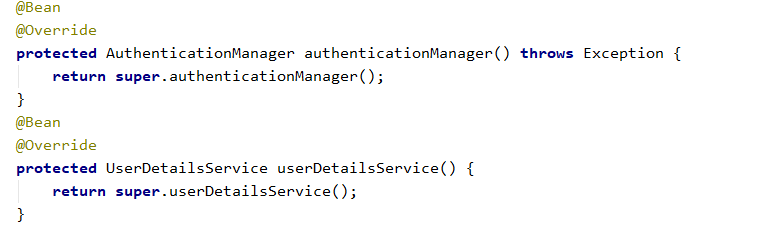
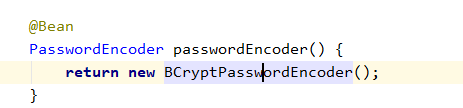
@Bean表示告诉方法,产生一个Bean对象,然后这个Bean对象交给Spring管理。产生这个Bean对象的方法Spring只会调用一次,随后这个Spring将会将这个Bean对象放在自己的IOC容器中。
@Bean和@Component作用一样都是将bean注册到spring容器中去
2.4.3)重写方法

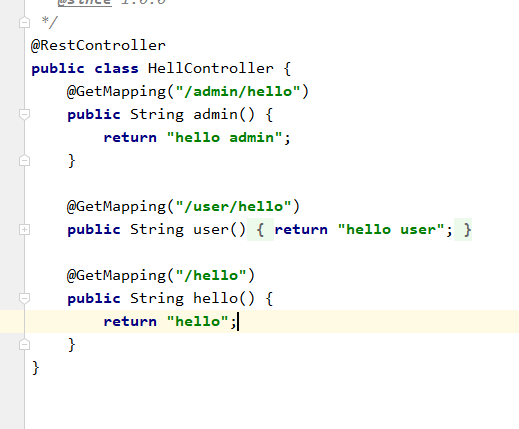
2.5)创建Controller
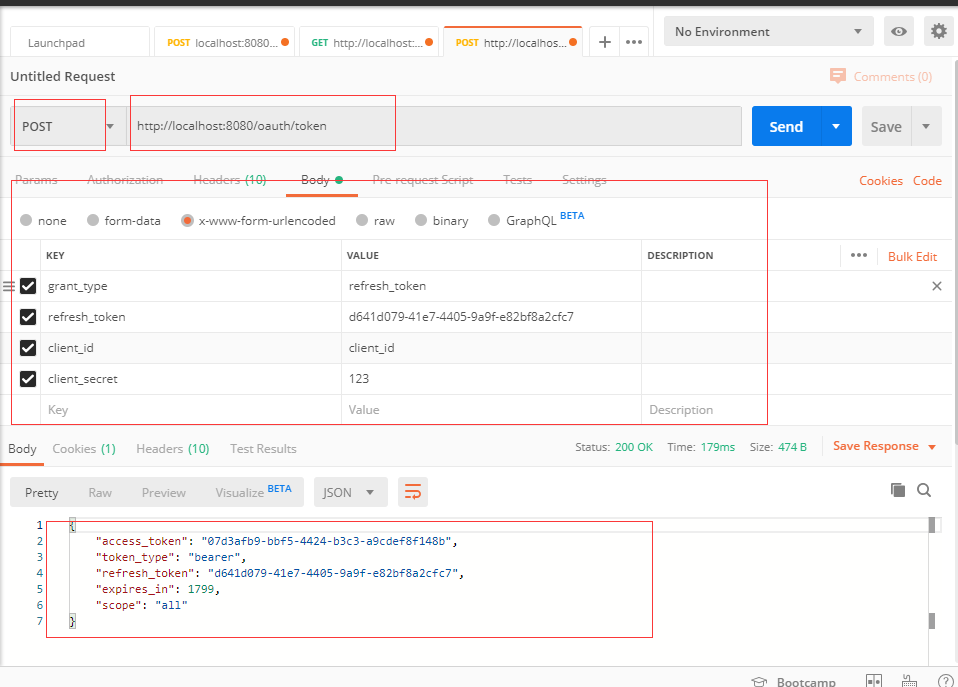
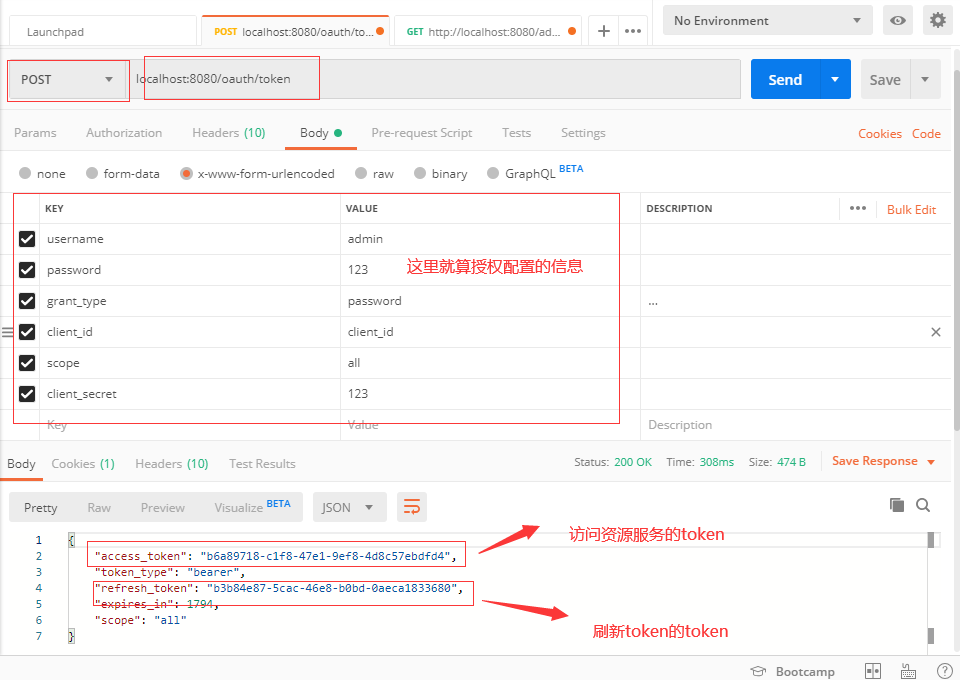
三、测试&效果图
3.1)获取访问资源服务的token
3.2)访问资源服务

3.3)刷新token