elasticsearch各节点操作
# 安装邮件发送客户端工具mailx
yum install -y mailx

# elasticsearch.yml 添加以下配置
xpack.notification.email.account:
    work:
        profile: standard
        email_defaults:
            from: sender@domain.com
        smtp:
            auth: true
            starttls.enable: false     # 使用TLS无法连接,原因未知
            host: smtp.exmail.qq.com   # 腾讯企业邮箱
            port: 21
            user: sender@domain.com

# 执行以下命令设置发送者的邮箱秘密
/usr/share/elasticsearch/bin/elasticsearch-keystore add xpack.notification.email.account.work.smtp.secure_password
- Enter value for xpack.notification.email.account.work.smtp.secure_password:

# 执行以下命令查看密码文件是否生成
/usr/share/elasticsearch/bin/elasticsearch-keystore list
- keystore.seed
- xpack.notification.email.account.work.smtp.secure_password

# 重启各节点的elasticsearch 服务
systemctl restart elasticsearch
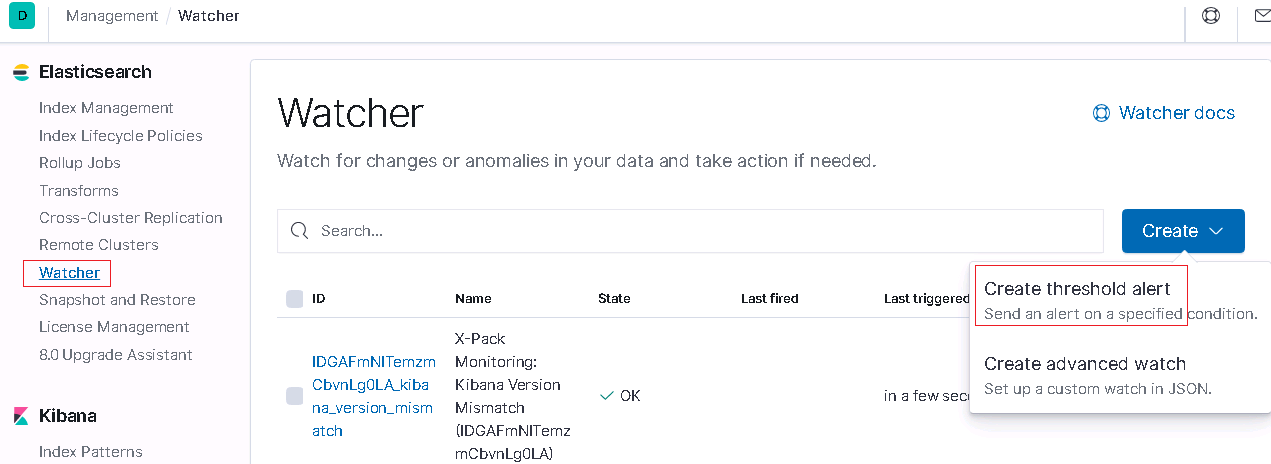
登录kibana配置watcher
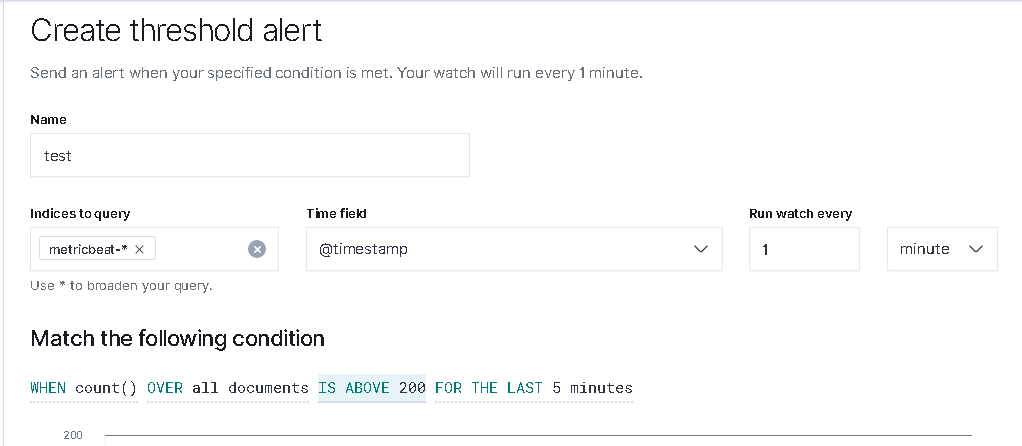

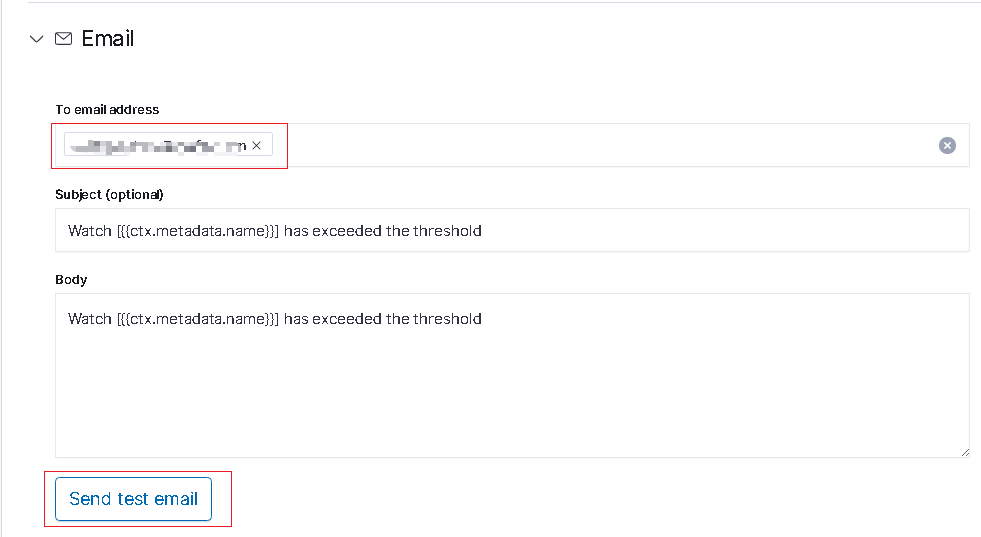
测试发送邮件
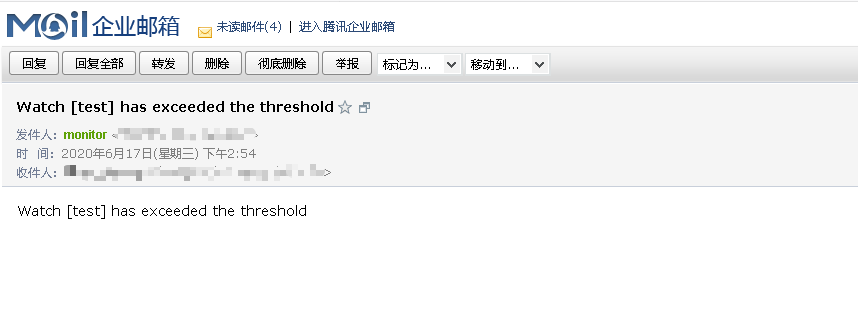
测试邮件接收