一、介绍
Elasticsearch是一个基于ApacheLucene(TM)的开源搜索引擎。在分布式系统中,应用数量众多,应用调用链复杂,常常使用ELK作为日志收集、分析和展示的组件。目前常用采集日志组合为EFK,使用Filebeat采集Spring Boot的应用日志输出到Logstash上,logstash再将日志输出到Elasticsearch上,最后展示到kibana上面。
二、Elasticsearch集群部署
1、服务器规划
|
系统 |
IP地址 |
主机名 |
服务版本 |
配置 |
|
CentOS 7.5 |
192.168.56.175 |
node1 |
Elasticsearch7.9.3 |
8C/16G |
|
CentOS 7.5 |
192.168.56.176 |
node2 |
Elasticsearch7.9.3 |
8C/16G |
|
CentOS 7.5 |
192.168.56.182 |
node3 |
Elasticsearch7.9.3 |
8C/16G |
2、软件下载
官方网站:https://www.elastic.co/cn/downloads/past-releases#elasticsearch
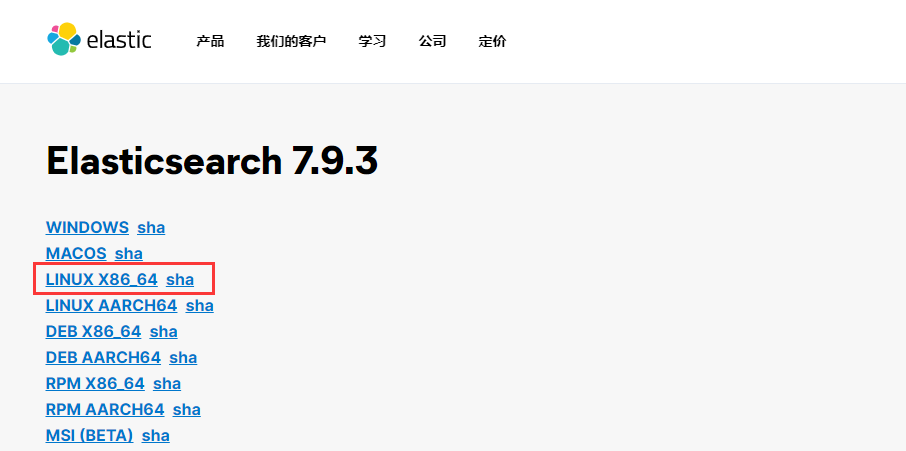
①命令下载
wget https://artifacts.elastic.co/downloads/elasticsearch/elasticsearch-7.9.3-linux-x86_64.tar.gz
②解压到指定目录
tar xf elasticsearch-7.9.3-linux-x86_64.tar.gz -C /app/
3、系统初始化
①内核参数调整
vim /etc/sysctl.conf
vm.max_map_count=655360
net.ipv4.tcp_syncookies=1
net.ipv4.tcp_tw_reuse=1
net.ipv4.tcp_tw_recycle=1
net.ipv4.tcp_fin_timeout=30
net.ipv4.ip_forward=1
sysctl -p  #修改完执行使其生效
②安装用户限制修改
vim /etc/security/limits.conf
#新增内容如下:
*    soft    nofile    655360
*    hard    nofile    655360
*    soft    memlock    unlimited
*    hard    memlock    unlimited
*    soft    nproc    65535
*    hard    nproc    65535
*    -    as    unlimited
③创建ES服务启动用户并授权
useradd es && chown -R es.es /app/elasticsearch-7.9.3
4、修改ES相关配置文件
①修改config/jvm.options 调整内存大小
[es@k8s-node1 elasticsearch-7.9.3]$ egrep -v "#|^$" config/jvm.options|head -2
-Xms2g
-Xmx2g
②修改elasticsearch自带jdk的路径变量
[es@k8s-node1 elasticsearch-7.9.3]$ egrep -v "#|^$" bin/elasticsearch|head -2
export JAVA_HOME=/app/elasticsearch-7.9.3/jdk  #所有节点都配置一样
export PATH=$JAVA_HOME/bin:$PATH
③修改 config/elasticsearch.yml配置集群参数
[es@k8s-node1 elasticsearch-7.9.3]$ egrep -v "#|^$" config/elasticsearch.yml
cluster.name: es-cluster #集群名称
node.name: node1  #节点名称
network.host: 192.168.56.175
http.port: 45000
transport.tcp.port: 45001
discovery.seed_hosts: ["192.168.56.175", "192.168.56.176", "192.168.56.182"] #集群主机列表
cluster.initial_master_nodes: ["192.168.56.175", "192.168.56.176", "192.168.56.182"] #可以被集群选举成主节点的成员列表
gateway.recover_after_nodes: 1
bootstrap.memory_lock: true
bootstrap.system_call_filter : false
http.cors.enabled : true
http.cors.allow-origin : "*"
http.cors.allow-methods : OPTIONS, HEAD, GET, POST, PUT, DELETE
http.cors.allow-headers : X-Requested-With,X-Auth-Token,Content-Type, Content-Length
#开启x-pack安全验证
xpack.security.enabled: true
xpack.security.transport.ssl.enabled: true
xpack.security.transport.ssl.verification_mode: certificate
xpack.security.transport.ssl.keystore.path: elastic-certificates.p12
xpack.security.transport.ssl.truststore.path: elastic-certificates.p12
#path.data: /path/to/data  #数据存储路径
#path.logs: /path/to/logs  #ES日志存储路径
说明:配置文件保持三台服务器一样(node.name要改成自己的)
④分发ES软件包
scp -rp elasticsearch-7.9.3 192.168.56.176:/app/
scp -rp elasticsearch-7.9.3 192.168.56.182:/app/
修改配置文件中node.name并且授权es用户目录权限
useradd es && chown -R es.es /app/elasticsearch-7.9.3
5、开启x-pack安全验证
①生成证书
[es@k8s-node1 elasticsearch-7.9.3]$ /app/elasticsearch-7.9.3/bin/elasticsearch-certutil cert -out config/elastic-certificates.p12 -pass ""
future versions of Elasticsearch will require Java 11; your Java version from [/app/jdk1.8.0_181/jre] does not meet this requirement
This tool assists you in the generation of X.509 certificates and certificate
signing requests for use with SSL/TLS in the Elastic stack.

The 'cert' mode generates X.509 certificate and private keys.
    * By default, this generates a single certificate and key for use
       on a single instance.
    * The '-multiple' option will prompt you to enter details for multiple
       instances and will generate a certificate and key for each one
    * The '-in' option allows for the certificate generation to be automated by describing
       the details of each instance in a YAML file

    * An instance is any piece of the Elastic Stack that requires an SSL certificate.
      Depending on your configuration, Elasticsearch, Logstash, Kibana, and Beats
      may all require a certificate and private key.
    * The minimum required value for each instance is a name. This can simply be the
      hostname, which will be used as the Common Name of the certificate. A full
      distinguished name may also be used.
    * A filename value may be required for each instance. This is necessary when the
      name would result in an invalid file or directory name. The name provided here
      is used as the directory name (within the zip) and the prefix for the key and
      certificate files. The filename is required if you are prompted and the name
      is not displayed in the prompt.
    * IP addresses and DNS names are optional. Multiple values can be specified as a
      comma separated string. If no IP addresses or DNS names are provided, you may
      disable hostname verification in your SSL configuration.

    * All certificates generated by this tool will be signed by a certificate authority (CA).
    * The tool can automatically generate a new CA for you, or you can provide your own with the
         -ca or -ca-cert command line options.

By default the 'cert' mode produces a single PKCS#12 output file which holds:
    * The instance certificate
    * The private key for the instance certificate
    * The CA certificate

If you specify any of the following options:
    * -pem (PEM formatted output)
    * -keep-ca-key (retain generated CA key)
    * -multiple (generate multiple certificates)
    * -in (generate certificates from an input file)
then the output will be be a zip file containing individual certificate/key files


Certificates written to /app/elasticsearch-7.9.3/config/elastic-certificates.p12

This file should be properly secured as it contains the private key for
your instance.

This file is a self contained file and can be copied and used 'as is'
For each Elastic product that you wish to configure, you should copy
this '.p12' file to the relevant configuration directory
and then follow the SSL configuration instructions in the product guide.
②分发证书
scp -rp elastic-certificates.p12 192.168.56.176:/app/elasticsearch-7.9.3/config/
scp -rp elastic-certificates.p12 192.168.56.182:/app/elasticsearch-7.9.3/config/
6、启动集群
①以es用户启动服务(三个节点执行)
su -c '/app/elasticsearch-7.9.3/bin/elasticsearch -d' es
②设置密码
确保主节点都启动完,执行jps可以查看
[root@k8s-node1 config]# /app/elasticsearch-7.9.3/bin/elasticsearch-setup-passwords interactive
future versions of Elasticsearch will require Java 11; your Java version from [/app/jdk1.8.0_181/jre] does not meet this requirement
Initiating the setup of passwords for reserved users elastic,apm_system,kibana,kibana_system,logstash_system,beats_system,remote_monitoring_user.
You will be prompted to enter passwords as the process progresses.
Please confirm that you would like to continue [y/N]y


Enter password for [elastic]:
Reenter password for [elastic]:
Enter password for [apm_system]:
Reenter password for [apm_system]:
Enter password for [kibana_system]:
Reenter password for [kibana_system]:
Enter password for [logstash_system]:
Reenter password for [logstash_system]:
Enter password for [beats_system]:
Reenter password for [beats_system]:
Enter password for [remote_monitoring_user]:
Reenter password for [remote_monitoring_user]:
Changed password for user [apm_system]
Changed password for user [kibana_system]
Changed password for user [kibana]
Changed password for user [logstash_system]
Changed password for user [beats_system]
Changed password for user [remote_monitoring_user]
Changed password for user [elastic]
③设置集群分片最大数
curl -XPUT  -u elastic:elastic -H "Content-Type: application/json" http://192.168.56.175:45000/_cluster/settings -d '{"transient": {"cluster": {"max_shards_per_node":10000}}}'
{"acknowledged":true,"persistent":{},"transient":{"cluster":{"max_shards_per_node":"10000"}}}[root@k8s-node1 config]#
④验证
[root@k8s-node1 config]# curl -u elastic:elastic http://192.168.56.175:45000/_cat/health?v
epoch      timestamp cluster    status node.total node.data shards pri relo init unassign pending_tasks max_task_wait_time active_shards_percent
1617093117 08:31:57  es-cluster green           3         3      2   1    0    0        0             0                  -                100.0%
状态为green,集群状态正常