整合步骤
1. 添加依赖
   <dependencies>
        <dependency>
            <groupId>org.springframework.boot</groupId>
            <artifactId>spring-boot-starter-web</artifactId>
        </dependency>
        <!-- 整合消息队列ActiveMQ -->
        <dependency>
            <groupId>org.springframework.boot</groupId>
            <artifactId>spring-boot-starter-activemq</artifactId>
        </dependency>

        <!-- 如果配置线程池则加入 -->
        <dependency>
            <groupId>org.apache.activemq</groupId>
            <artifactId>activemq-pool</artifactId>
        </dependency>
    </dependencies>
2. 开启jms支持
在springboot启动类上添加@EnableJms

3. 修改配置文件
在application.properties配置文件中添加
#####################################
# 默认只支持点对点模型
#####################################
#整合jms测试,安装在别的机器,防火墙和端口号记得开放
spring.activemq.broker-url=tcp://192.168.2.160:61616

#集群配置
#spring.activemq.broker-url=failover:(tcp://localhost:61616,tcp://localhost:61617)

spring.activemq.user=admin
spring.activemq.password=admin
#下列配置要增加依赖
spring.activemq.pool.enabled=true
spring.activemq.pool.max-connections=100
封装点对点和订阅发布模型的API
这里我只列出图片源代码在github上:https://github.com/woxbwo/is-springboot/tree/master/is-springboot-activemq
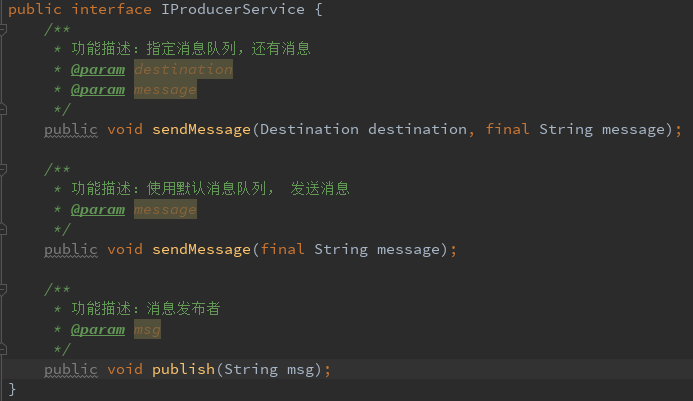
1. 接口:
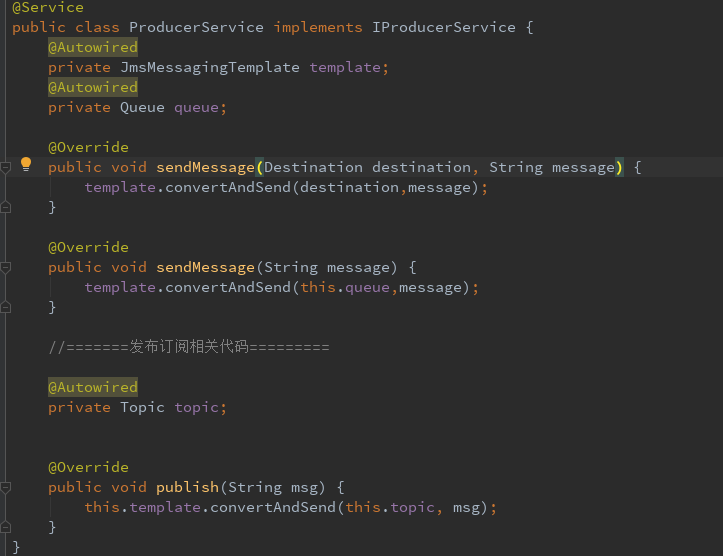
2. 实现类:
3. 将Topic和Queue交给Spring容器管理,添加配置

4. 添加测试触发条件controller

测试点对点模型
添加实时监听

使用postman发送请求:http://127.0.0.1:8010/api/v1/order?msg=HelloActiveMq
结果:

查看ActiveMQ管理界面

订阅发布模式测试
注意点:
1. 默认消费者并不会消费订阅发布类型的消息,这是由于springboot默认采用的是p2p模式进行消息的监听。修改配置:spring.jms.pub-sub-domain=true
2. @JmsListener如果不指定独立的containerFactory的话是只能消费queue消息。修改订阅者container:containerFactory="jmsListenerContainerTopic"

3. 需要给topic定义独立的JmsListenerContainer。此时需要在配置文件里面,注释掉 #spring.jms.pub-sub-domain=true

添加实时监听订阅者:
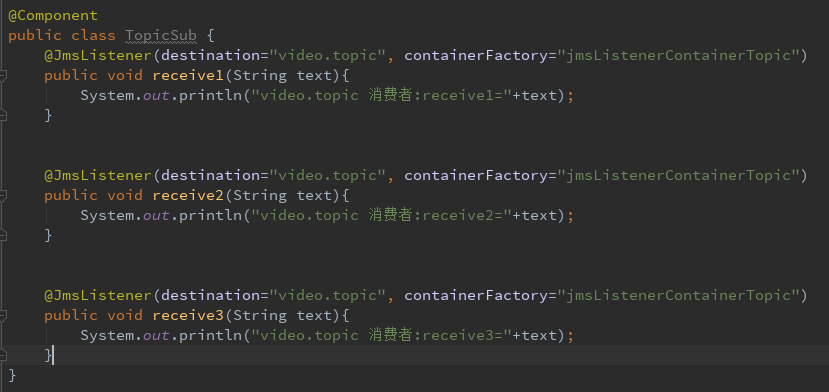
模拟三个订阅这
使用postman发送请求:http://127.0.0.1:8010/api/v1/topic?msg=HelloActiveMqTopic
测试结果:

查看ActiveMQ管理界面

源代码地址https://github.com/woxbwo/is-springboot/tree/master/is-springboot-activemq