图片上传在上篇博文中讲过。
这里主要是裁剪的实现,需要用到bitmapcutter组件。
jquery.bitmapcutter该插件由Jericho开发,它的主要作用是客户端裁图。
引入jquery库
<script language="javascript" type="text/javascript" src="/js/jquery1.4.2.min.js"></script>
引入jquery.bitmapcutter库及其相关样式
<script type="text/javascript" src="/javascript/jquery.bitmapcutter.js"></script>
<link rel="Stylesheet" type="text/css" href="/css/jquery.bitmapcutter.css" />
直接上代码:
js
    uploadOkHeadPhoto: function (file, response) {
        response = $.parseJSON(response);
        if (!response.IsSuccess) return;

        if (typeof (response.Data) == "string") {
            $("#target").attr("src", response.Data + "?_t=" + Math.random());
        }
        else if (response.Data.length == 1) {
            $("#target").attr("src", response.Data[0] + "?_t=" + Math.random());
        } else {
            var urlimg;
            var filename;
            if (response.Data.length > 1) {
                urlimg = response.Data[0].replace(""", "").replace(""", "");
                filename = urlimg.substring(urlimg.lastIndexOf("/") + 1);
                jcropimg.open(urlimg + "?_t=" + Math.random(), urlimg, response.Data[1]);
            }
        }
    },
上传完成后的回调用函数,open裁剪功能:
//剪裁图片
var jcropimg = {
    fileurl: "",
    fileposition: "",
    isCut: false,
    open: function (imgurl, fileurl, fileposition) {
        jcropimg.fileurl = fileurl;
        jcropimg.fileposition = fileposition;
        jcropimg.isCut = false;


        var dialog; dialogid = 'dlgw_dialog_jcropimg';
        var buttons = beehunt.getDefaultButtons();
        buttons[0].text = '确定';
        buttons[0].handler = function () {
            $("#uploadPicture").attr("src", fileurl + "?t=" + Math.random());
            $("#hidPicturePath").val(jcropimg.fileposition);
            $("#hidPictureUrl").val(jcropimg.fileurl);
            this.close();
        };
        dialog = beehunt.dialog({ id: dialogid, url: '/dialog/jcropimg?islogo=1&dialogid=' + dialogid + '&imgurl=' + imgurl + '&fileurl=' + fileurl, title: '裁剪',  '600', height: '600', buttons: buttons, grid: '' });
    }
};
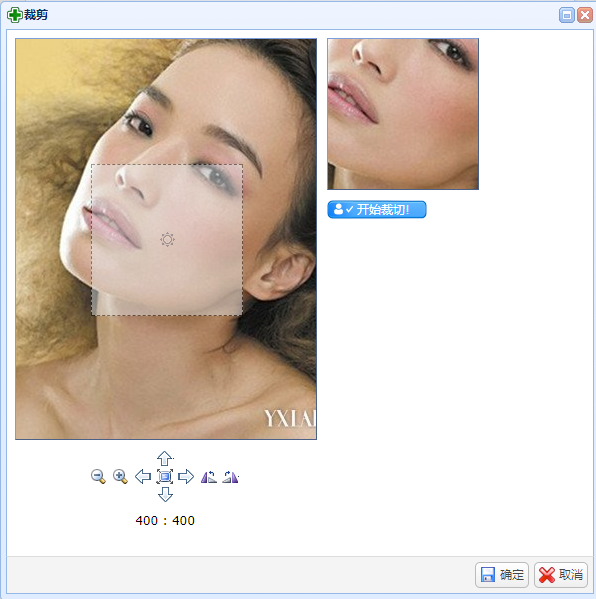
弹出裁剪dialog,如下图:

html代码:
 <!---裁剪图片 弹框-->
<form id="FrmJcropimg_Dialog" method="post">
    <table style="100%;">
        <tr>
            <td>
                <div class="img-container" style="text-align:center;min-300px;">
                    <img id="jcropimg" style="display:none;" />
                </div>
                <div id="container"></div>

                <div id="div_preview" style="display:none;text-align:center;vertical-align:middle;">
                    <br />
                    <p style="margin:0px;">裁剪后效果图如下</p>
                    <br />
                    <img id="preview" />
                    <br /><br />
                </div>
            </td>
        </tr>
    </table>
</form>
确保你的网页中有一个装下该插件的容器
<div id="container"></div>
html加载完成的js代码:
@*定义选中按钮OnPageLoad执行脚本*@
//照片裁剪代码
//src:原始大图的路径
//目标宽
//height:目标高
//newSrc:裁完以后,用于显示小图片的元素ID

@section OnPageLoad{
    <script type="text/javascript">
    $(function () {
        $("#jcropimg").attr("src", '@req_imgUrl');

        $("#container").html('');
        $("#jcropimg").attr("src", "").hide();

        var w = 150, h = 150;//  剪切
        var pw = '200px', ph = '270px', phh = '235px';//窗口

        $.fn.bitmapCutter({
            src: '@req_fileUrl',
            requesturl: '/api/scissors.axd',

            renderTo: $("#container"),
            cutterSize: {  w, height: h },
            onGenerated: function (newSrc) { //裁完并保存后返回保存后图片地址
                $("#preview").attr("src", newSrc + "?t=" + Math.random()).show();
                $("#div_preview").show();
                $("#container").hide();
                $(".jquery-bitmapcutter-newimg").hide();

                var dialog = $(top.window.document).find("#@req_dialogId").eq(0);
                dialog.css({ "width": "", "height": ph });
                dialog.find(".dialog-content").css({ "width": "", "height": phh });
                dialog.parent().next().css({ "width": pw, "height": ph });

                //dialog.parent().next().next().remove();
                //dialog.parent().next().remove();
                //dialog.parent().remove();
            },
            rotateAngle: 90
        });
    });
    </script>
}
注意,在这个插件中点击"开始裁切"后,它会裁切前上传,再返回小图的SRC,这里就涉及了上传插件的对接,这个插件名叫 BitmapCutter.Core,这是由国内一位工程师写的,当然如果你觉得不爽,你也可以定义自己的上传插件,不过我要提醒大家的是重写这些代码的代价是否划算。
请注意在jquery.bitmapcutter.js第423行
$.get('scissors.axd',{.....
这里给出了上传的路径,需要到web.config中做映射处理:
映射处理在Web.config中System.Web节:
<system.web>
<httpHandlers>
<add path="scissors.axd" verb="*" type="BitmapCutter.Core.HttpHandler.BitmapScissors,BitmapCutter.Core" validate="false"/>
</httpHandlers>
要做到这些,我们需要做以下工作:
1.在你的项目中引用BitmapCutter.Core.dll
2.修改Web.config中的System.Web节
好了,所有的工作差不多完成。
参考博文:
很棒的在线裁图工具jQuery1.4.2 + jquery.bitmapcutter.js + BitmapCutter.Core+的完美配合