ww可以根据DLG图批量生成假三维模型,这对于小区等特征相似的建筑物模型的构建是非常有用的。下面来看如何一步步实现假三维模型的加载:
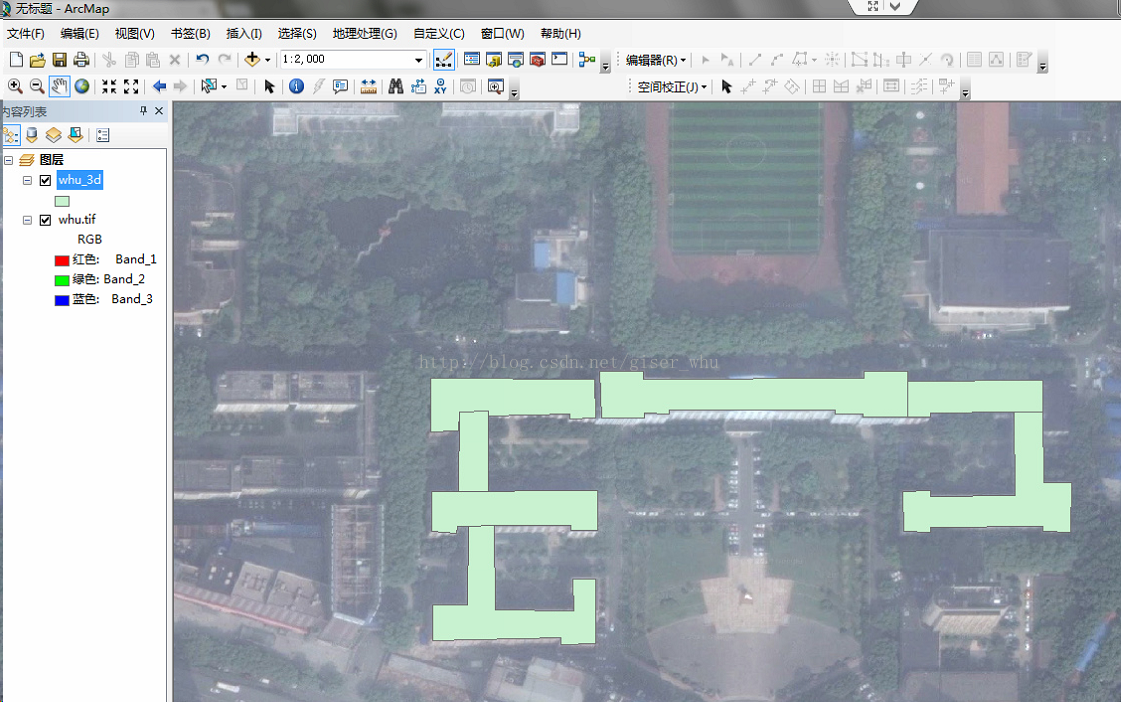
1、Shp文件的制作
首先在arcmap下数字化几个建筑物,并新建height字段存储建筑物的高度。

2、代码实现
- /**
- *
- * @方法名称: init3DModel ;
- * @方法描述: 导入简易三维模型 ;
- * @参数 :@param filePath :shp文件路径
- * @返回类型: void ;
- * @创建人:bluce;
- * @创建时间:2015年2月3日 下午6:10:22;
- * @throws
- */
- private void init3DModel(String filePath)
- {
- Shapefile shapefile = new Shapefile(filePath);
- RenderableLayer layer = new RenderableLayer();
- layer.setName("简易三维模型");
- layer.setPickEnabled(true);
- try
- {
- while (shapefile.hasNext())
- {
- ShapefileRecord record = shapefile.nextRecord();
- layer.addRenderable(makeShape(record));
- }
- wwPanel.getWorldWindowGLCanvas().getModel().getLayers()
- .add(layer);
- }
- finally
- {
- shapefile.close();
- }
- }
- /**
- *
- * @方法名称: makeShape ;
- * @方法描述: 根据shp文件每条记录创建模型 ;
- * @参数 :@param record
- * @参数 :@return
- * @返回类型: ExtrudedPolygon ;
- * @创建人:bluce;
- * @创建时间:2015年2月3日 下午6:11:08;
- * @throws
- */
- private ExtrudedPolygon makeShape(ShapefileRecord record)
- {
- String IMAGE_PATH = "F:\data\wwj\build123sm.jpg";
- Double height = null;
- String[] heightKeys = new String[]
- { "height", "Height", "HEIGHT" };
- for (String key : heightKeys)
- {
- Object o = record.getAttributes().getValue(key);
- if (o != null)
- {
- height = Double.parseDouble(o.toString());
- }
- }
- // 顶部属性
- ShapeAttributes capAttrs = new BasicShapeAttributes();
- capAttrs.setOutlineMaterial(Material.GRAY);
- capAttrs.setInteriorMaterial(Material.CYAN);
- // 边属性
- ShapeAttributes sideAttributes = new BasicShapeAttributes();
- sideAttributes.setInteriorMaterial(Material.LIGHT_GRAY);
- sideAttributes.setOutlineMaterial(Material.DARK_GRAY);
- sideAttributes.setImageSource(IMAGE_PATH);
- // 创建拉伸多边形
- VecBuffer vb = record.getPointBuffer(0);
- Polygon pgonAirspace = new Polygon(vb.getLocations()); // 根据点串构建多边形
- //纹理
- ArrayList<String> textures = new ArrayList<String>();
- for (int i = 0; i < pgonAirspace.getLocations().size(); i++)
- {
- textures.add(IMAGE_PATH);
- }
- ExtrudedPolygon polygon = new ExtrudedPolygon(
- pgonAirspace.getLocations(), height, textures);
- polygon.setCapAttributes(capAttrs);
- polygon.setSideAttributes(sideAttributes);
- polygon.setAltitudeMode(WorldWind.CLAMP_TO_GROUND);
- return polygon;
- }
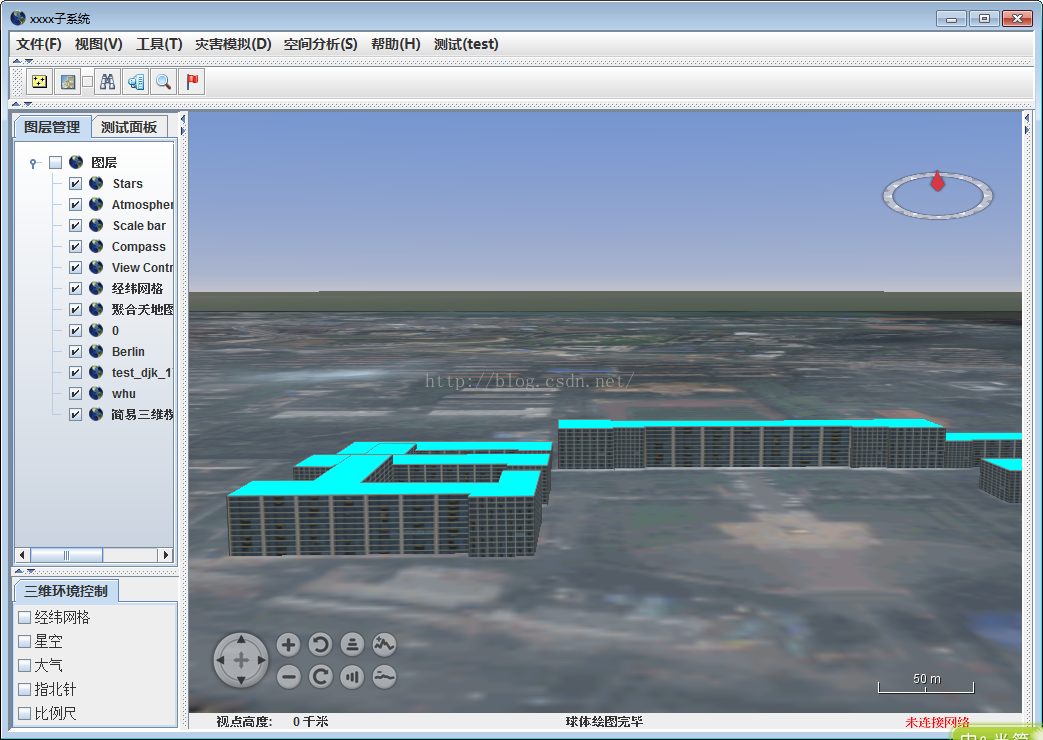
效果如下图所示:

3、问题
发现模型加载不了纹理啊,查了几遍不知道问题出在哪里,希望懂的朋友看到留言给指点下啊,不胜感激。
----------------------------------------------2015年7月26日----------------------------------------------
感谢Q_H_Wang提供的解决方案: 加载不上纹理的是因为 pgonAirspace.getLocations().获取的坐标集合第一个元素与最后一个一样造成的,除掉最后一个元素即可加载。所以只需在添加纹理的地方加个减一即可:
- ArrayList<String> textures = new ArrayList<String>();
- for (int i = 0; i < pgonAirspace.getLocations().size() - 1; i++)
- {
- textures.add(IMAGE_PATH);
- }