前言
附上绘图demo--https://github.com/yangfangxue/YFX_Quartz-2D
什么是Quartz2D?
Quartz 2D是一个二维图形绘制引擎,支持ios环境和Mac OS X环境。我们可以使用Quartz 2D API来实现许多功能如基本
路径的绘制、透明度、描影、绘制阴影、透明层、颜色管理、反锯齿、PDF文档生成和PDF元数据访问。在需要的时候,Quartz 2D
还可以借助图形硬件的功能。在Mac OS X中,Quartz 2D可以与其它图形图像技术混合使用,如Core Image、Core Video、
OpenGL、QuickTime。例如,通过使用 QuickTime的GraphicsImportCreateCGImage函数,可以用 Quartz从一个
QuickTime图形导入器中创建一个图像。
绘图
(1)CGContextRef 上下文--->画板
(2)画图的内容---->设置画图的内容
(3)把内容添加到上下文(画板)
(4)把内容画到画板上
基础知识
常用方法介绍
(1)CGContextRef 上下文--->画板
(2)路径
《1》UIBezierPath
《2》CGMutablePathRef 通过点绘制一个路径
《3》CGContextMoveToPoint 注意必须设置起始点
(3)画形状
《1》矩形 CGContextAddRect
《2》曲线 CGContextAddCurveToPoint
《3》圆形 CGContextAddEllipseInRect
《3.1》CGContextSetLineWidth 设置笔画宽度
《3.2》set 设置笔画的颜色
《3.3》setFill 划线区域范围的填充
《3.4》setStroke 设置笔画的颜色
《3.5》设置画笔填充样式
1.kCGPathFill 只填充
2.kCGPathStroke 画笔颜色
3.kCGPathFillStroke 既填充又有画笔颜色
(4)截图
《1》UIGraphicsBeginImageContextWithOptions 开始截图
《2》UIGraphicsGetImageFromCurrentImageContext() 获得当前图片上下文的图片--画图视图的layer上得到
《3》UIGraphicsEndImageContext 关闭图片上下文
《4》UIGraphicsBeginImageContext 开始获得图片上下文、
《5》CGContextStrokePath 把路径绘制到图片上下文
《6》直接把路径绘制到界面stroke
画线
(1)CGContextRef 上下文 ->画板
(2)路径 画图的内容
(3)CGContextAddPath把路径添加到上下文
(4)CGContextStrokePath把路径渲染到上下文
1.首先新建一个类 继承与UIView 我在这里给它命名为PaintingView
//所有画图的代码都写在drawRect里面
//1.在初始化这个类的对象的时候会调用 2.setNeedsDisplay
//以下我会写几种画直线 矩形 圆形 曲线以及画线简化 还有截屏保存到相册的方法 只需在drawRect用self调用一下即可
- (void)drawRect:(CGRect)rect {
    [super drawRect:rect];


}
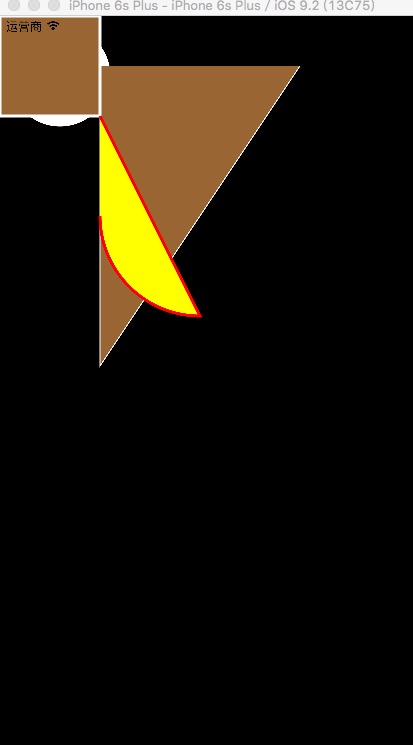
画直线
//画直线
- (void)addLine{
    //1.创建 画布 上下文
    //获得当前上下文 当做画布
    CGContextRef context =
    UIGraphicsGetCurrentContext();
    //2.创建画图的内容
    UIBezierPath *path = [UIBezierPath bezierPath];
    //point 中心点
    //x 中心点x
    //y 中心点y
    //y不变 x从小值 - 大值 横向直线
    //2.1
    [path moveToPoint:CGPointMake(100, 50)];
    //2.2添加其他点
    [path addLineToPoint:CGPointMake(100, 350)];
    [path addLineToPoint:CGPointMake(300, 50)];
    //2.3设置画笔的宽度
    path.lineWidth = 2;
    //2.4设置画笔颜色
//    [[UIColor whiteColor]set];
    [[UIColor whiteColor]setStroke];//画笔颜色为白色
    [[UIColor brownColor]setFill];//设置填充颜色
    //3.把画的内容<路径>添加到上下文<画布>
    CGContextAddPath(context, path.CGPath);
    //4.绘制 渲染 内容到上下文《画布》
//    CGContextStrokePath(context);
    //设置填充的样式
    CGContextDrawPath(context, kCGPathFillStroke);


}
画矩形
//添加矩形
- (void)addRect{

    //1.画布
    CGContextRef context =
    UIGraphicsGetCurrentContext();
    //2.内容
    CGContextAddRect(context, CGRectMake(0, 0, 100, 100));
//    [[UIColor redColor]set];
    [[UIColor whiteColor]setStroke];
    [[UIColor brownColor]setFill];
    //设置画笔宽度
    CGContextSetLineWidth(context, 3);
    //3.渲染
    //直接渲染矩形
//    CGContextStrokeRect(context, CGRectMake(0, 0, 100, 100));
    CGContextDrawPath(context, kCGPathFillStroke);
}
画圆形
//画圆形
- (void)addRound{

    //1.画布
    contextRef =
    UIGraphicsGetCurrentContext();
    //2.内容
    CGContextAddEllipseInRect(contextRef, CGRectMake(10, 10, 100, 100));
    [[UIColor whiteColor]set];
    //3.渲染到画布
    CGContextDrawPath(contextRef, kCGPathFillStroke);


}
画曲线
//画曲线
- (void)addCurve{
    //1.画布
    CGContextRef context =
    UIGraphicsGetCurrentContext();
    //2.内容
    UIBezierPath *path = [UIBezierPath bezierPath];
    [path moveToPoint:CGPointMake(100, 100)];
//    [path addCurveToPoint:CGPointMake(200, 150) controlPoint1:CGPointMake(300, 50) controlPoint2:CGPointMake(100, 100)];
    /*
     Center:中心点
     radius:半径
     startAngle:开始的弧度
     endAngle:结束的弧度
     clockwise:是顺时针 还是逆时针
     */
    [path addArcWithCenter:CGPointMake(200, 200) radius:100 startAngle:M_PI_2 endAngle:M_PI clockwise:YES];
    [[UIColor redColor]setStroke];
    [[UIColor yellowColor]setFill];
    //3.把内容添加到画布上
    CGContextAddPath(context, path.CGPath);
    //4.渲染
    CGContextDrawPath(context, kCGPathFillStroke);
}
画线简化
//画线简化
-(void)addLine2{
    //1.路径
    //2.画出内容

    UIBezierPath *path  = [UIBezierPath bezierPath];
    [path moveToPoint:CGPointMake(200, 200)];
    [path addLineToPoint:CGPointMake(200, 500)];
    [[UIColor whiteColor]set];
    [path stroke];
}
截屏--->需要注意的一点是这个方法首先不会在这个类中被自己所调用 是先有图才能截图的 所以我们需要把这个方法放到PaintingView.h中去声明一下 然ViewController中创建PaintingView的对象 用对象去调用这个方法即可.
//截屏
- (void)cutScreen{

    //1.获得一个图片的上下文(画布)
    //2.画布的上下文
    //3.设置截图的参数
    //3.5 截图
    //4.关闭图片的上下文
    //5.保存


    UIGraphicsBeginImageContext(self.frame.size);

    [self addRound];

    [self.layer renderInContext:contextRef];


    /*
     size 图片尺寸
     opaque 透明度  YES-->不透明  NO--->透明
     scale 比例
     */


    UIGraphicsBeginImageContextWithOptions(self.frame.size, YES, 1);
    //开始截图

    UIImage *image = UIGraphicsGetImageFromCurrentImageContext();

    //关闭截图上下文
    UIGraphicsEndImageContext();

    UIImageWriteToSavedPhotosAlbum(image, self, @selector(image:didFinishSavingWithError:contextInfo:), nil);
}
- (void)image:(UIImage *)image didFinishSavingWithError:(NSError *)error contextInfo:(void *)contextInfo{


}
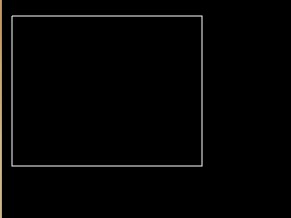
回到ViewController中创建Painting这个类的对象 调用截屏的方法
- (void)viewDidLoad {
    [super viewDidLoad];
    // Do any additional setup after loading the view, typically from a nib.

    PaintingView *view = [[PaintingView alloc]initWithFrame:self.view.frame];
    [self.view addSubview:view];

    [view cutScreen];


}
得到的效果图如下: