1、UE4的调试输出
//*1 调试输出*//
/*case a、快速使用 不设置log类别 默认为LogTemp*/
UE_LOG(LogTemp,Log,TEXT("Your message"));
UE_Log(LogTemp,Warning,TEXT("You Number type of float value is %f"),YourFloatTypeValue);
UE_Log(LogTemp,Error,TEXT("Your Number type of FString value is %s"),YourFStringTypeValue);
//Log:输出日志字体颜色为灰色 Warning:输出字体颜色为黄色 Error:输出字体颜色为红色

/*case b、设置自定义Log类别*/
//在YourCode.h文件中声明自定义Log类别@parm YourLog
DECLARE_LOG_CATEGORY_EXTERN(YourLog, Log, All);
//在YourCode.cpp文件中定义
DEFINE_LOG_CATEGORY(YourLog);
UE_LOG(YourLog, Log, TEXT("This is a message to yourself during runtime!"));

/*case c、触发严重中断 程序执行到此时会触发程序中断*/
UE_LOG(YourLog, Fatal, TEXT("This fringe case was reached! Debug this!"));
//log输出在output log面板中显示

/*case d、 向屏幕打印消息 显示在屏幕上*/
if(GEngine)
{
    GEngine->AddOnScreenDebugMessage(-1, 5.f, FColor::Red, TEXT("This is an on screen message!"));
    GEngine->AddOnScreenDebugMessage(-1, 5.f, FColor::Red, FString::Printf(TEXT("Some variable values: x: %f, y: %f"), x, y));
}
//我们可以在.cpp文件下进行如下宏定义以快速使用该方法
#define print(text) if (GEngine) GEngine->AddOnScreenDebugMessage(-1, 1.5, FColor::White,text)
2、在场景中查找对象
#include "EngineUtils.h"
/*case a、Actor 迭代*/
for (TActorIterator<AStaticMeshActor> ActorItr(GetWorld()); ActorItr; ++ActorItr)
{
    AStaticMeshActor *Mesh = *ActorItr;
}
/*case b、Object迭代*/
for (TObjectIterator<AActor> Itr; Itr; ++Itr)
{
    AActor *Component = *Itr;
}
//Object 迭代可以迭代的内容包括Actor可迭代的内容
3、射线的使用
//GetHitResultAtScreenPosition函数为引擎框架下APlayerController的方法
//顾名思义是以屏幕为起点向鼠标所在坐标发出射线,进行碰撞检测
//可查看APlayerController下此函数的定义
FVector2D cursorPosition(0,0);
this->GetMousePosition(cursorPosition.X, cursorPosition.Y);
FHitResult hitInfo(ForceInit);
FCollisionQueryParams collisionParms(false);
this->GetHitResultAtScreenPosition(cursorPosition,ECC_PhysicsBody,collisionParms,hitInfo);
//在此处理hitInfo;
/*GetWorld()->LineTraceSingleByObjectType等一系列函数用于处理更多的射线类功能,但APlayerController下已经封装好很多常用的方法。*/
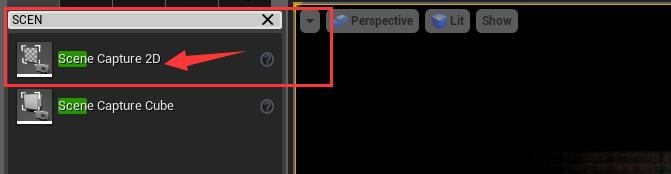
4、场景捕获组件的使用
将SceneCapture2D组件拖入场景
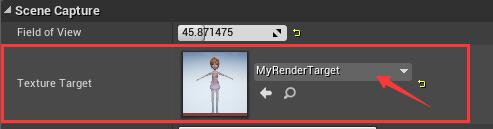
选中SceneCapture2D找到Texture Target属性 并为其赋值
/*此处实现将SceneCapture2D看到的视角复制到Texture中 */
/*方式一、 */
/*sceneCapture为SceneCapture2D组件的引用 */
/*renderTexture为上图所示textureTarget的引用*/
UTexture2D *Texture = UTexture2D::CreateTransient(TextureRenderTarget->SizeX,TextureRenderTarget->SizeY, PF_B8G8R8A8);
sceneCapture->GetCaptureComponent2D()->UpdateContent();
TArray<FColor> SurfData;
FRenderTarget *RenderTarget = renderTexture->GameThread_GetRenderTargetResource();
RenderTarget->ReadPixels(SurfData);
void* TextureData = Texture->PlatformData->Mips[0].BulkData.Lock(LOCK_READ_WRITE);
const int32 TextureDataSize = SurfData.Num() * 4;
FMemory::Memcpy(TextureData, SurfData.GetData(), TextureDataSize);
Texture->PlatformData->Mips[0].BulkData.Unlock();
Texture->UpdateResource();
/*方式二、*/
/*使用ConstructTexture2D函数,该函数每次返回的是同一块内存地址*/
sceneCapture->GetCaptureComponent2D()->UpdateContent();
Texture = renderTexture->ConstructTexture2D(this,"AlphaTex",EObjectFlags::RF_NoFlags,CTF_DeferCompression);
Texture->CompressionSettings = TextureCompressionSettings::TC_VectorDisplacementmap;
Texture->UpdateResource();
5、XML文件的使用
initgameValue.xml文件内容如下
需要在build.cs文件中添加模块”XmlParser”,在YourCode.h中包含XmlParser.h
<?xml version="1.0" encoding="UTF-8"?>
<Value>
    <ChildrenSex>Girl</ChildrenSex>
    <SceneIndex>0</SceneIndex>
</Value>
解析代码如下
#include "XmlParser.h"
/*写数据*/
    FXmlFile InitVariable(L"X:\initgameValue.xml");
    FXmlNode* root = InitVariable.GetRootNode();
    TArray<FXmlNode*> VarArray = root->GetChildrenNodes();
    VarArray[0]->SetContent("Your content");
    VarArray[1]->SetContent("Your content");
    InitVariable.Save(L"X:\initgameValue.xml");
    InitVariable.Clear();
/*读数据*/
    FXmlFile InitVariable(L"X:\initgameValue.xml");
    FXmlNode* root = InitVariable.GetRootNode();
    TArray<FXmlNode*> VarArray = root->GetChildrenNodes();
    FString tempContent=VarArray[0]->GetContent();
//一般情况下 文件加载路径不应该是绝对路径 我们可以使用FPaths::GameUserDir()得到项目路径根路径,从而便可以使用相对路径来进行配置文件的加载
6、UE4字符类型到基本数据类型的转换
UnrealString.h下的内联函数如下
/** Covert a string buffer to intrinsic types */
    inline void FromString(int8& OutValue,      const TCHAR* Buffer)    {   OutValue = FCString::Atoi(Buffer);      }
    inline void FromString(int16& OutValue,     const TCHAR* Buffer)    {   OutValue = FCString::Atoi(Buffer);      }
    inline void FromString(int32& OutValue,     const TCHAR* Buffer)    {   OutValue = FCString::Atoi(Buffer);      }
    inline void FromString(int64& OutValue,     const TCHAR* Buffer)    {   OutValue = FCString::Atoi64(Buffer);    }
    inline void FromString(uint8& OutValue,     const TCHAR* Buffer)    {   OutValue = FCString::Atoi(Buffer);      }
    inline void FromString(uint16& OutValue,    const TCHAR* Buffer)    {   OutValue = FCString::Atoi(Buffer);      }
    inline void FromString(uint32& OutValue,    const TCHAR* Buffer)    {   OutValue = FCString::Atoi64(Buffer);    }   //64 because this unsigned and so Atoi might overflow
    inline void FromString(uint64& OutValue,    const TCHAR* Buffer)    {   OutValue = FCString::Strtoui64(Buffer, nullptr, 0); }
    inline void FromString(float& OutValue,     const TCHAR* Buffer)    {   OutValue = FCString::Atof(Buffer);      }
    inline void FromString(double& OutValue,    const TCHAR* Buffer)    {   OutValue = FCString::Atod(Buffer);      }
    inline void FromString(bool& OutValue,      const TCHAR* Buffer)    {   OutValue = FCString::ToBool(Buffer);    }
例:
#include "UnrealString.h"
using namespace LexicalConversion;

FString temp = "3.1415926":
float outFloat; FromString(outFloat, *temp);
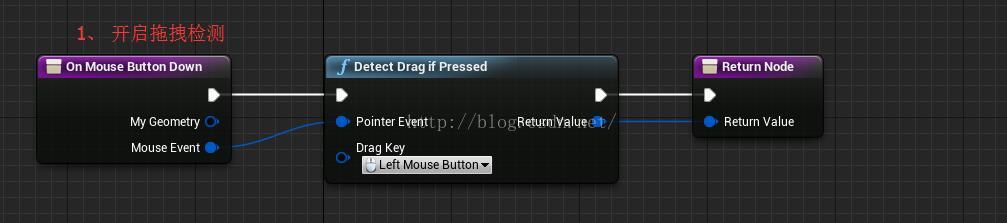
7、UMG拖拽图标的实现
a、重载On Mouse Button Down函数
新建UserWidget组件,在Graph事件图表中重载该函数实现检测是否触发拖拽事件
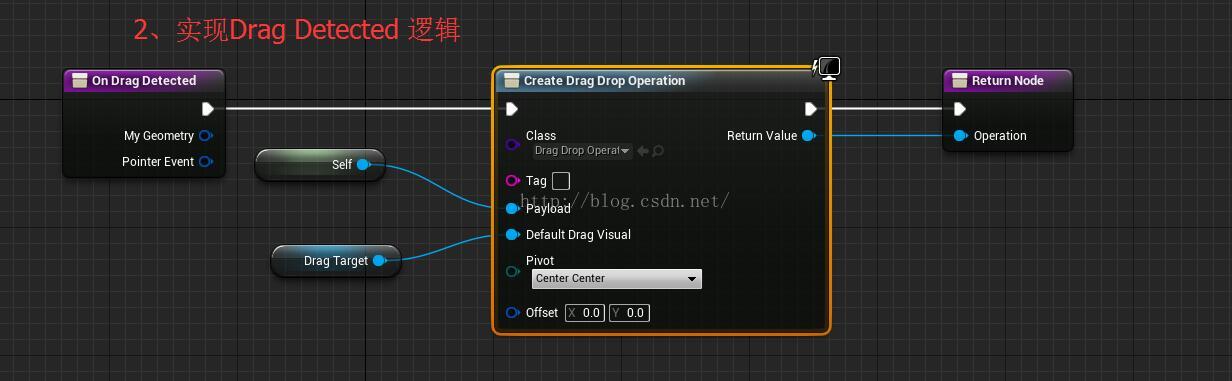
b、重载OnDrag Detected函数
重载OnDrag Detected函数,处理拖拽逻辑
@parm payload是用于传递的参数 会在On Drop函数中用到
@parm defaultdragvisual是用于拖拽时跟随的图标
c、重载On Drop函数
此时Operation中的Payload参数便是CreateDragDropOperation中的传递过来的Payload参数

8、UE4官方文档&Answer Hub
1、官方文档 :https://docs.unrealengine.com/latest/INT/
2、Answer Hub :https://answers.unrealengine.com/index.html
9、直接使用静态class生成Actor
// 直接使用静态class生成Actor
UClass* bbbWeaponClass = AMyWeapon::StaticClass();
if (bbbWeaponClass)
{
    AMyWeapon* bbbWeapon = World->SpawnActor<AMyWeapon>(bbbWeaponClass, this->GetActorLocation()+FVector(100,0,0), this->GetActorRotation(), SpawnInfo);
    if (bbbWeapon)
    {
    bbbWeapon->SpawnEffect(this->GetActorLocation());
    }
}
10.设置组件的Translation
// 设置组件的Translation
MeshComponent->RelativeLocation.Z = -100;
11、播放动画
FName animName = "/Game/Animations/Run.Run";
UAnimationAsset* runAnim = Cast<UAnimationAsset>(StaticLoadObject(UAnimationAsset::StaticClass(), NULL, *animName.ToString()));
MyWeaponActor->MeshComponent->PlayAnimation(runAnim, true);
12、生成粒子
// 生成粒子,并绑到模型指定骨骼上。(需要#include "EngineKismetLibraryClasses.h")
FName EffectName = "/Game/Particles/P_Sparks.P_Sparks";
UParticleSystem* MyEffect = Cast<UParticleSystem>(StaticLoadObject(UParticleSystem::StaticClass(), NULL, *EffectName.ToString()));
UParticleSystemComponent* PSC = UGameplayStatics::SpawnEmitterAtLocation(this, MyEffect, this->GetActorLocation());
FName tmpBone = "pelvis";
PSC->AttachTo(this->MeshComponent, tmpBone);
13、屏幕上打印文字
// 屏幕上打印文字(只有一行,多了会覆盖):
GEngine->AddOnScreenDebugMessage(0, 5.f, FColor::Yellow, FString("Hello World!!!") );
14、Spawn sound
// Spawn sound
UGameplayStatics::PlaySoundAtLocation( this, FractureEffect.Sound, Position );
15、Tick组的运行顺序:
//Tick组的运行顺序:
TG_PrePhysics
TG_StartPhysics
TG_DuringPhysics
TG_EndPhysics
TG_PostPhysics
16、// Actor出生流程
// Actor出生流程
SpawnActor-->PostSpawnInitialize-->
PostActorCreated
OnConstruction
PostActorConstruction-->

if (bWorldBegunPlay)
{
    PreInitializeComponents()
}
UpdateOverlaps();
if (bWorldBegunPlay)
{
    InitializeComponents();
    PostInitializeComponents();
    if (GetWorld()->bMatchStarted &&         !deferBeginPlayAndUpdateOverlaps)
    {
        BeginPlay();
    }
}
17、动画蓝图载入
//C++载入动画蓝图的方法
FName MM_0_Anim= "/Game/Character/MM_0/Anim/MM_AnimBP.MM_AnimBP";
//你动画蓝图的路径
UAnimBlueprint* AminClass;
AminClass = Cast<UAnimBlueprint>(StaticLoadObject(UAnimBlueprint::StaticClass(),NULL, *MM_0_Anim.ToString()));
Mesh3P->SetAnimInstanceClass(AminClass->GetAnimBlueprintGeneratedClass());
18、计时器
FTimerHandle B;
GetWorldTimerManager().SetTimer(B,this, &ADemoCharacter_Weapon::EndRoad, RoadTime, false);