NSURLConnection基本使用
一、NSURLConnection的常用类
(1)NSURL:请求地址
(2)NSURLRequest:封装一个请求,保存发给服务器的全部数据,包括一个NSURL对象,请求方法、请求头、请求体....
(3)NSMutableURLRequest:NSURLRequest的子类
(4)NSURLConnection:负责发送请求,建立客户端和服务器的连接。发送NSURLRequest的数据给服务器,并收集来自服务器的响应数据
使用NSURLConnection发送请求的步骤很简单
(1)创建一个NSURL对象,设置请求路径(设置请求路径)
(2)传入NSURL创建一个NSURLRequest对象,设置请求头和请求体(创建请求对象)
(3)使用NSURLConnection发送NSURLRequest(发送请求)

2.代码示例
(1)发送请求的三个步骤:

 1 //
 2 //  YYViewController.m
 3 //  01-NSURLConnection的使用(GET)
 4 //
 5 //  Created by apple on 15-08-01.
 6 //  Copyright (c) 2015年 itcase. All rights reserved.
 7 //
 8
 9 #import "YYViewController.h"
10 #import "MBProgressHUD+MJ.h"
11
12 @interface YYViewController ()
13 @property (weak, nonatomic) IBOutlet UITextField *username;
14 @property (weak, nonatomic) IBOutlet UITextField *pwd;
15 - (IBAction)login;
16
17 @end
18
19 @implementation YYViewController
20
21 - (IBAction)login {
22 //    1.提前的表单验证
23     if (self.username.text.length==0) {
24         [MBProgressHUD showError:@"请输入用户名"];
25         return;
26     }
27     if (self.pwd.text.length==0) {
28         [MBProgressHUD showError:@"请输入密码"];
29         return;
30     }
31 //    2.发送请求给服务器(带上账号和密码)
32     //添加一个遮罩,禁止用户操作
33 //    [MBProgressHUD showMessage:@"正在努力加载中...."];
34 //    GET请求:请求行请求头请求体
35 //
36 //    1.设置请求路径
37     NSString *urlStr=[NSString stringWithFormat:@"http://192.168.1.53:8080/MJServer/login?username=%@&pwd=%@",self.username.text,self.pwd.text];
38     NSURL *url=[NSURL URLWithString:urlStr];
39 //    2.创建请求对象
40     NSURLRequest *request=[NSURLRequest requestWithURL:url];
41 //    3.发送请求
42     //发送同步请求,在主线程执行
43     NSData *data=[NSURLConnection sendSynchronousRequest:request returningResponse:nil error:nil];
44     //(一直在等待服务器返回数据,这行代码会卡住,如果服务器没有返回数据,那么在主线程UI会卡住不能继续执行操作)
45     NSLog(@"--%d--",data.length);
46 }
47 @end
模拟器情况:

打印服务器返回的信息:

 1 //
 2 //  YYViewController.m
 3 //  01-NSURLConnection的使用(GET)
 4 //
 5 //  Created by apple on 15-08-01.
 6 //  Copyright (c) 2015年 itcase. All rights reserved.
 7 //
 8
 9 #import "YYViewController.h"
10 #import "MBProgressHUD+MJ.h"
11
12 @interface YYViewController ()
13 @property (weak, nonatomic) IBOutlet UITextField *username;
14 @property (weak, nonatomic) IBOutlet UITextField *pwd;
15 - (IBAction)login;
16
17 @end
18
19 @implementation YYViewController
20
21 - (IBAction)login {
22 //    1.提前的表单验证
23     if (self.username.text.length==0) {
24         [MBProgressHUD showError:@"请输入用户名"];
25         return;
26     }
27     if (self.pwd.text.length==0) {
28         [MBProgressHUD showError:@"请输入密码"];
29         return;
30     }
31 //    2.发送请求给服务器(带上账号和密码)
32     //添加一个遮罩,禁止用户操作
33     [MBProgressHUD showMessage:@"正在努力加载中...."];
34
35 //
36 //    1.设置请求路径
37     NSString *urlStr=[NSString stringWithFormat:@"http://192.168.1.53:8080/MJServer/login?username=%@&pwd=%@",self.username.text,self.pwd.text];
38     NSURL *url=[NSURL URLWithString:urlStr];
39
40 //    2.创建请求对象
41     NSURLRequest *request=[NSURLRequest requestWithURL:url];
42
43 //    3.发送请求
44     //3.1发送同步请求,在主线程执行
45 //    NSData *data=[NSURLConnection sendSynchronousRequest:request returningResponse:nil error:nil];
46     //(一直在等待服务器返回数据,这行代码会卡住,如果服务器没有返回数据,那么在主线程UI会卡住不能继续执行操作)
47
48     //3.1发送异步请求
49     //创建一个队列(默认添加到该队列中的任务异步执行)
50 //    NSOperationQueue *queue=[[NSOperationQueue alloc]init];
51     //获取一个主队列
52     NSOperationQueue *queue=[NSOperationQueue mainQueue];
53     [NSURLConnection sendAsynchronousRequest:request queue:queue completionHandler:^(NSURLResponse *response, NSData *data, NSError *connectionError) {
54         NSLog(@"--block回调数据--%@---%d", [NSThread currentThread],data.length);
55         //隐藏HUD,刷新UI的操作一定要放在主线程执行
56         [MBProgressHUD hideHUD];
57
58         //解析data
59         /*
60         {"success":"登录成功"}
61         {"error":"用户名不存在"}
62         {"error":"密码不正确"}
63          */
64         NSDictionary *dict=[NSJSONSerialization JSONObjectWithData:data options:NSJSONReadingMutableLeaves error:nil];
65         NSLog(@"%@",dict);
66
67         //判断后,在界面提示登录信息
68         NSString *error=dict[@"error"];
69         if (error) {
70             [MBProgressHUD showError:error];
71         }else
72         {
73             NSString *success=dict[@"success"];
74             [MBProgressHUD showSuccess:success];
75         }
76     }];
77     NSLog(@"请求发送完毕");
78 }
79 @end
模拟器情况(注意这里使用了第三方框架):

打印查看:

 1  NSOperationQueue *queue=[NSOperationQueue mainQueue];
 2     [NSURLConnection sendAsynchronousRequest:request queue:queue completionHandler:^(NSURLResponse *response, NSData *data, NSError *connectionError) {
 3         //当请求结束的时候调用(有两种结果,一个是成功拿到数据,也可能没有拿到数据,请求失败)
 4         NSLog(@"--block回调数据--%@---%d", [NSThread currentThread],data.length);
 5         //隐藏HUD,刷新UI的操作一定要放在主线程执行
 6         [MBProgressHUD hideHUD];
 7
 8         //解析data
 9         /*
10         {"success":"登录成功"}
11         {"error":"用户名不存在"}
12         {"error":"密码不正确"}
13          */
14         if (data) {//请求成功
15             NSDictionary *dict=[NSJSONSerialization JSONObjectWithData:data options:NSJSONReadingMutableLeaves error:nil];
16             NSLog(@"%@",dict);
17
18             //判断后,在界面提示登录信息
19             NSString *error=dict[@"error"];
20             if (error) {
21                 [MBProgressHUD showError:error];
22             }else
23             {
24                 NSString *success=dict[@"success"];
25                 [MBProgressHUD showSuccess:success];
26             }
27         }else   //请求失败
28         {
29             [MBProgressHUD showError:@"网络繁忙,请稍后重试!"];
30         }
31
32     }];
   //解析data
        /*
        {"success":"登录成功"}
        {"error":"用户名不存在"}
        {"error":"密码不正确"}
         */
要监听服务器返回的data,所以使用<NSURLConnectionDataDelegate>协议
常见大代理方法如下:
 1 #pragma mark- NSURLConnectionDataDelegate代理方法
 2
 3 //当接收到服务器的响应(连通了服务器)时会调用
 4
 5 -(void)connection:(NSURLConnection *)connection didReceiveResponse:(NSURLResponse *)response
 6
 7 //当接收到服务器的数据时会调用(可能会被调用多次,每次只传递部分数据)
 8
 9 -(void)connection:(NSURLConnection *)connection didReceiveData:(NSData *)data
10
11 //当服务器的数据加载完毕时就会调用
12
13 -(void)connectionDidFinishLoading:(NSURLConnection *)connection
14
15 //请求错误(失败)的时候调用(请求超时断网没有网,一般指客户端错误)
16
17 -(void)connection:(NSURLConnection *)connection didFailWithError:(NSError *)error
使用异步方法发送get请求的代码示例:
  1 //
  2 //  YYViewController.m
  3 //  01-NSURLConnection的使用(GET)
  4 //
  5 //  Created by apple on 15-8-01.
  6 //  Copyright (c) 2015年. All rights reserved.
  7 //
  8
  9 #import "YYViewController.h"
 10 #import "MBProgressHUD+MJ.h"
 11
 12 @interface YYViewController ()<NSURLConnectionDataDelegate>
 13 @property (weak, nonatomic) IBOutlet UITextField *username;
 14 @property (weak, nonatomic) IBOutlet UITextField *pwd;
 15 @property(nonatomic,strong)NSMutableData *responseData;
 16 - (IBAction)login;
 17
 18 @end
 19
 20 @implementation YYViewController
 21
 22 - (IBAction)login {
 23 //    1.提前的表单验证
 24     if (self.username.text.length==0) {
 25         [MBProgressHUD showError:@"请输入用户名"];
 26         return;
 27     }
 28     if (self.pwd.text.length==0) {
 29         [MBProgressHUD showError:@"请输入密码"];
 30         return;
 31     }
 32 //    2.发送请求给服务器(带上账号和密码)
 33     //添加一个遮罩,禁止用户操作
 34     [MBProgressHUD showMessage:@"正在努力加载中...."];
 35
 36 //
 37 //   2.1设置请求路径
 38     NSString *urlStr=[NSString stringWithFormat:@"http://192.168.1.53:8080/MJServer/login?username=%@&pwd=%@",self.username.text,self.pwd.text];
 39     NSURL *url=[NSURL URLWithString:urlStr];
 40
 41 //   2.2创建请求对象
 42 //    NSURLRequest *request=[NSURLRequest requestWithURL:url];//默认就是GET请求
 43     //设置请求超时
 44     NSMutableURLRequest *request=[NSMutableURLRequest  requestWithURL:url];
 45     request.timeoutInterval=5.0;
 46
 47 //   2.3.发送请求
 48  //使用代理发送异步请求(通常应用于文件下载)
 49     NSURLConnection *conn=[NSURLConnection connectionWithRequest:request delegate:self];
 50     [conn start];
 51     NSLog(@"已经发出请求---");
 52 }
 53
 54 #pragma mark- NSURLConnectionDataDelegate代理方法
 55 /*
 56  *当接收到服务器的响应(连通了服务器)时会调用
 57  */
 58 -(void)connection:(NSURLConnection *)connection didReceiveResponse:(NSURLResponse *)response
 59 {
 60     NSLog(@"接收到服务器的响应");
 61     //初始化数据
 62     self.responseData=[NSMutableData data];
 63 }
 64
 65 /*
 66 *当接收到服务器的数据时会调用(可能会被调用多次,每次只传递部分数据)
 67 */
 68 -(void)connection:(NSURLConnection *)connection didReceiveData:(NSData *)data
 69 {
 70     NSLog(@"接收到服务器的数据");
 71     //拼接数据
 72     [self.responseData appendData:data];
 73         NSLog(@"%d---%@--",self.responseData.length,[NSThread currentThread]);
 74 }
 75
 76 /*
 77  *当服务器的数据加载完毕时就会调用
 78  */
 79 -(void)connectionDidFinishLoading:(NSURLConnection *)connection
 80 {
 81     NSLog(@"服务器的数据加载完毕");
 82     //隐藏HUD
 83     [MBProgressHUD hideHUD];
 84
 85     //处理服务器返回的所有数据
 86     NSDictionary *dict=[NSJSONSerialization JSONObjectWithData:self.responseData options:NSJSONReadingMutableLeaves error:nil];
 87
 88     //判断后,在界面提示登录信息
 89     NSString *error=dict[@"error"];
 90     if (error) {
 91         [MBProgressHUD showError:error];
 92     }else
 93     {
 94         NSString *success=dict[@"success"];
 95         [MBProgressHUD showSuccess:success];
 96     }
 97     NSLog(@"%d---%@--",self.responseData.length,[NSThread currentThread]);
 98 }
 99 /*
100  *请求错误(失败)的时候调用(请求超时断网没有网,一般指客户端错误)
101  */
102 -(void)connection:(NSURLConnection *)connection didFailWithError:(NSError *)error
103 {
104 //     NSLog(@"请求错误");
105     //隐藏HUD
106     [MBProgressHUD hideHUD];
107     [MBProgressHUD showError:@"网络繁忙,请稍后重试!"];
108 }
109 @end
打印查看:

补充:
(1)数据的处理
在didReceiveData:方法中,拼接接收到的所有数据,等所有数据都拿到后,在connectionDidFinishLoading:方法中进行处理
(2)网络延迟
在做网络开发的时候,一定要考虑到网络延迟情况的处理,可以在服务器的代码设置一个断点模拟。
在服务器代码的登录方法中设置断点

设置请求的最大延迟

模拟器情况:

打印查看:

三、NSMutableURLRequest
NSMutableURLRequest是NSURLRequest的子类,常用方法有
设置请求超时等待时间(超过这个时间就算超时,请求失败)- (void)setTimeoutInterval:(NSTimeInterval)seconds;
设置请求方法(比如GET和POST)- (void)setHTTPMethod:(NSString *)method;
设置请求体- (void)setHTTPBody:(NSData *)data;
设置请求头- (void)setValue:(NSString *)value forHTTPHeaderField:(NSString *)field;
多线程断点下载
说明:本文介绍多线程断点下载。项目中使用了苹果自带的类,实现了同时开启多条线程下载一个较大的文件。因为实现过程较为复杂,所以下面贴出完整的代码。
实现思路:下载开始,创建一个和要下载的文件大小相同的文件(如果要下载的文件为100M,那么就在沙盒中创建一个100M的文件,然后计算每一段的下载量,开启多条线程下载各段的数据,分别写入对应的文件部分)。

项目中用到的主要类如下:

完成的实现代码如下:
主控制器中的代码:
 1 #import "YYViewController.h"
 2 #import "YYFileMultiDownloader.h"
 3
 4 @interface YYViewController ()
 5 @property (nonatomic, strong) YYFileMultiDownloader *fileMultiDownloader;
 6 @end
 7
 8 @implementation YYViewController
 9 -  (YYFileMultiDownloader *)fileMultiDownloader
10 {
11     if (!_fileMultiDownloader) {
12         _fileMultiDownloader = [[YYFileMultiDownloader alloc] init];
13         // 需要下载的文件远程URL
14         _fileMultiDownloader.url = @"http://192.168.1.200:8080/MJServer/resources/jre.zip";
15         // 文件保存到什么地方
16         NSString *caches = [NSSearchPathForDirectoriesInDomains(NSCachesDirectory, NSUserDomainMask, YES) lastObject];
17         NSString *filepath = [caches stringByAppendingPathComponent:@"jre.zip"];
18         _fileMultiDownloader.destPath = filepath;
19     }
20     return _fileMultiDownloader;
21 }
22
23 - (void)viewDidLoad
24 {
25     [super viewDidLoad];
26
27 }
28
29 - (void)touchesBegan:(NSSet *)touches withEvent:(UIEvent *)event
30 {
31     [self.fileMultiDownloader start];
32 }
33
34 @end
自定义一个基类
YYFileDownloader.h文件
 1 #import <Foundation/Foundation.h>
 2
 3 @interface YYFileDownloader : NSObject
 4 {
 5     BOOL _downloading;
 6 }
 7 /**
 8  * 所需要下载文件的远程URL(连接服务器的路径)
 9  */
10 @property (nonatomic, copy) NSString *url;
11 /**
12  * 文件的存储路径(文件下载到什么地方)
13  */
14 @property (nonatomic, copy) NSString *destPath;
15
16 /**
17  * 是否正在下载(有没有在下载, 只有下载器内部才知道)
18  */
19 @property (nonatomic, readonly, getter = isDownloading) BOOL downloading;
20
21 /**
22  * 用来监听下载进度
23  */
24 @property (nonatomic, copy) void (^progressHandler)(double progress);
25
26 /**
27  * 开始(恢复)下载
28  */
29 - (void)start;
30
31 /**
32  * 暂停下载
33  */
34 - (void)pause;
35 @end
YYFileDownloader.m文件
1 #import "YYFileDownloader.h"
2
3 @implementation YYFileDownloader
4 @end
下载器类继承自YYFileDownloader这个类
YYFileSingDownloader.h文件
 1 #import "YYFileDownloader.h"
 2
 3 @interface YYFileSingleDownloader : YYFileDownloader
 4 /**
 5  *  开始的位置
 6  */
 7 @property (nonatomic, assign) long long begin;
 8 /**
 9  *  结束的位置
10  */
11 @property (nonatomic, assign) long long end;
12 @end
YYFileSingDownloader.m文件
  1 #import "YYFileSingleDownloader.h"
  2 @interface YYFileSingleDownloader() <NSURLConnectionDataDelegate>
  3 /**
  4  * 连接对象
  5  */
  6 @property (nonatomic, strong) NSURLConnection *conn;
  7
  8 /**
  9  *  写数据的文件句柄
 10  */
 11 @property (nonatomic, strong) NSFileHandle *writeHandle;
 12 /**
 13  *  当前已下载数据的长度
 14  */
 15 @property (nonatomic, assign) long long currentLength;
 16 @end
 17
 18 @implementation YYFileSingleDownloader
 19
 20 - (NSFileHandle *)writeHandle
 21 {
 22     if (!_writeHandle) {
 23         _writeHandle = [NSFileHandle fileHandleForWritingAtPath:self.destPath];
 24     }
 25     return _writeHandle;
 26 }
 27
 28 /**
 29  * 开始(恢复)下载
 30  */
 31 - (void)start
 32 {
 33     NSURL *url = [NSURL URLWithString:self.url];
 34     // 默认就是GET请求
 35     NSMutableURLRequest *request = [NSMutableURLRequest requestWithURL:url];
 36     // 设置请求头信息
 37     NSString *value = [NSString stringWithFormat:@"bytes=%lld-%lld", self.begin + self.currentLength, self.end];
 38     [request setValue:value forHTTPHeaderField:@"Range"];
 39     self.conn = [NSURLConnection connectionWithRequest:request delegate:self];
 40
 41     _downloading = YES;
 42 }
 43
 44 /**
 45  * 暂停下载
 46  */
 47 - (void)pause
 48 {
 49     [self.conn cancel];
 50     self.conn = nil;
 51
 52     _downloading = NO;
 53 }
 54
 55
 56 #pragma mark - NSURLConnectionDataDelegate 代理方法
 57 /**
 58  *  1. 当接受到服务器的响应(连通了服务器)就会调用
 59  */
 60 - (void)connection:(NSURLConnection *)connection didReceiveResponse:(NSURLResponse *)response
 61 {
 62
 63 }
 64
 65 /**
 66  *  2. 当接受到服务器的数据就会调用(可能会被调用多次, 每次调用只会传递部分数据)
 67  */
 68 - (void)connection:(NSURLConnection *)connection didReceiveData:(NSData *)data
 69 {
 70     // 移动到文件的尾部
 71     [self.writeHandle seekToFileOffset:self.begin + self.currentLength];
 72     // 从当前移动的位置(文件尾部)开始写入数据
 73     [self.writeHandle writeData:data];
 74
 75     // 累加长度
 76     self.currentLength += data.length;
 77
 78     // 打印下载进度
 79     double progress = (double)self.currentLength / (self.end - self.begin);
 80     if (self.progressHandler) {
 81         self.progressHandler(progress);
 82     }
 83 }
 84
 85 /**
 86  *  3. 当服务器的数据接受完毕后就会调用
 87  */
 88 - (void)connectionDidFinishLoading:(NSURLConnection *)connection
 89 {
 90     // 清空属性值
 91     self.currentLength = 0;
 92
 93     // 关闭连接(不再输入数据到文件中)
 94     [self.writeHandle closeFile];
 95     self.writeHandle = nil;
 96 }
 97
 98 /**
 99  *  请求错误(失败)的时候调用(请求超时断网没有网, 一般指客户端错误)
100  */
101 - (void)connection:(NSURLConnection *)connection didFailWithError:(NSError *)error
102 {
103
104 }
105
106 @end
设计多线程下载器(利用HMFileMultiDownloader能开启多个线程同时下载一个文件)
一个多线程下载器只下载一个文件
YYFileMultiDownloader.h文件
1 #import "YYFileDownloader.h"
2
3 @interface YYFileMultiDownloader : YYFileDownloader
4
5 @end
YYFileMultiDownloader.m文件
1 #import "YYFileMultiDownloader.h"
2 #import "YYFileSingleDownloader.h"
3
4 #define YYMaxDownloadCount 4
5
6 @interface YYFileMultiDownloader()
7 @property (nonatomic, strong) NSMutableArray *singleDownloaders;
8 @property (nonatomic, assign) long long totalLength;
9 @end
10
11 @implementation YYFileMultiDownloader
12
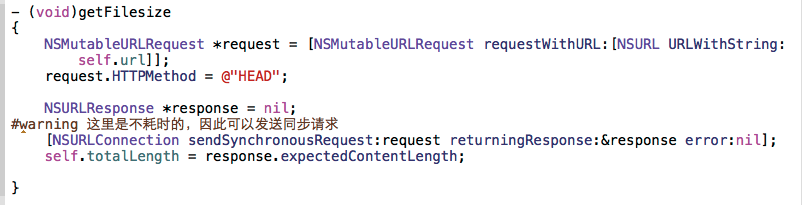
13 - (void)getFilesize
14 {
15 NSMutableURLRequest *request = [NSMutableURLRequest requestWithURL:[NSURL URLWithString:self.url]];
16 request.HTTPMethod = @"HEAD";
17
18 NSURLResponse *response = nil;
19 #warning 这里要用异步请求
20 [NSURLConnection sendSynchronousRequest:request returningResponse:&response error:nil];
21 self.totalLength = response.expectedContentLength;
22 }
23
24 - (NSMutableArray *)singleDownloaders
25 {
26 if (!_singleDownloaders) {
27 _singleDownloaders = [NSMutableArray array];
28
29 // 获得文件大小
30 [self getFilesize];
31
32 // 每条路径的下载量
33 long long size = 0;
34 if (self.totalLength % YYMaxDownloadCount == 0) {
35 size = self.totalLength / YYMaxDownloadCount;
36 } else {
37 size = self.totalLength / YYMaxDownloadCount + 1;
38 }
39
40 // 创建N个下载器
41 for (int i = 0; i<YYMaxDownloadCount; i++) {
42 YYFileSingleDownloader *singleDownloader = [[YYFileSingleDownloader alloc] init];
43 singleDownloader.url = self.url;
44 singleDownloader.destPath = self.destPath;
45 singleDownloader.begin = i * size;
46 singleDownloader.end = singleDownloader.begin + size - 1;
47 singleDownloader.progressHandler = ^(double progress){
48 NSLog(@"%d --- %f", i, progress);
49 };
50 [_singleDownloaders addObject:singleDownloader];
51 }
52
53 // 创建一个跟服务器文件等大小的临时文件
54 [[NSFileManager defaultManager] createFileAtPath:self.destPath contents:nil attributes:nil];
55
56 // 让self.destPath文件的长度是self.totalLengt
57 NSFileHandle *handle = [NSFileHandle fileHandleForWritingAtPath:self.destPath];
58 [handle truncateFileAtOffset:self.totalLength];
59 }
60 return _singleDownloaders;
61 }
62
63 /**
64 * 开始(恢复)下载
65 */
66 - (void)start
67 {
68 [self.singleDownloaders makeObjectsPerformSelector:@selector(start)];
69
70 _downloading = YES;
71 }
72
73 /**
74 * 暂停下载
75 */
76 - (void)pause
77 {
78 [self.singleDownloaders makeObjectsPerformSelector:@selector(pause)];
79 _downloading = NO;
80 }
81
82 @end
补充说明:如何获得将要下载的文件的大小?
文件的上传
说明:文件上传使用的时POST请求,通常把要上传的数据保存在请求体中。本文介绍如何不借助第三方框架实现iOS开发中得文件上传。
由于过程较为复杂,因此本文只贴出部分关键代码。
主控制器的关键代码:
YYViewController.m
 1 #import "YYViewController.h"
 2
 3 #define YYEncode(str) [str dataUsingEncoding:NSUTF8StringEncoding]
 4
 5 @interface YYViewController ()
 6
 7 @end
 8
 9 @implementation YYViewController
10
11 - (void)viewDidLoad
12 {
13     [super viewDidLoad];
14     // Do any additional setup after loading the view, typically from a nib.
15 }
16
17 - (void)upload:(NSString *)name filename:(NSString *)filename mimeType:(NSString *)mimeType data:(NSData *)data parmas:(NSDictionary *)params
18 {
19     // 文件上传
20     NSURL *url = [NSURL URLWithString:@"http://192.168.1.200:8080/YYServer/upload"];
21     NSMutableURLRequest *request = [NSMutableURLRequest requestWithURL:url];
22     request.HTTPMethod = @"POST";
23
24     // 设置请求体
25     NSMutableData *body = [NSMutableData data];
26
27     /***************文件参数***************/
28     // 参数开始的标志
29     [body appendData:YYEncode(@"--YY
")];
30     // name : 指定参数名(必须跟服务器端保持一致)
31     // filename : 文件名
32     NSString *disposition = [NSString stringWithFormat:@"Content-Disposition: form-data; name="%@"; filename="%@"
", name, filename];
33     [body appendData:YYEncode(disposition)];
34     NSString *type = [NSString stringWithFormat:@"Content-Type: %@
", mimeType];
35     [body appendData:YYEncode(type)];
36
37     [body appendData:YYEncode(@"
")];
38     [body appendData:data];
39     [body appendData:YYEncode(@"
")];
40
41     /***************普通参数***************/
42     [params enumerateKeysAndObjectsUsingBlock:^(id key, id obj, BOOL *stop) {
43         // 参数开始的标志
44         [body appendData:YYEncode(@"--YY
")];
45         NSString *disposition = [NSString stringWithFormat:@"Content-Disposition: form-data; name="%@"
", key];
46         [body appendData:YYEncode(disposition)];
47
48         [body appendData:YYEncode(@"
")];
49         [body appendData:YYEncode(obj)];
50         [body appendData:YYEncode(@"
")];
51     }];
52
53     /***************参数结束***************/
54     // YY--

55     [body appendData:YYEncode(@"--YY--
")];
56     request.HTTPBody = body;
57
58     // 设置请求头
59     // 请求体的长度
60     [request setValue:[NSString stringWithFormat:@"%zd", body.length] forHTTPHeaderField:@"Content-Length"];
61     // 声明这个POST请求是个文件上传
62     [request setValue:@"multipart/form-data; boundary=YY" forHTTPHeaderField:@"Content-Type"];
63
64     // 发送请求
65     [NSURLConnection sendAsynchronousRequest:request queue:[NSOperationQueue mainQueue] completionHandler:^(NSURLResponse *response, NSData *data, NSError *connectionError) {
66         if (data) {
67             NSDictionary *dict = [NSJSONSerialization JSONObjectWithData:data options:NSJSONReadingMutableLeaves error:nil];
68             NSLog(@"%@", dict);
69         } else {
70             NSLog(@"上传失败");
71         }
72     }];
73 }
74
75 - (void)touchesBegan:(NSSet *)touches withEvent:(UIEvent *)event
76 {
77     // Socket 实现断点上传
78
79     //apache-tomcat-6.0.41/conf/web.xml 查找 文件的 mimeType
80 //    UIImage *image = [UIImage imageNamed:@"test"];
81 //    NSData *filedata = UIImagePNGRepresentation(image);
82 //    [self upload:@"file" filename:@"test.png" mimeType:@"image/png" data:filedata parmas:@{@"username" : @"123"}];
83
84     // 给本地文件发送一个请求
85     NSURL *fileurl = [[NSBundle mainBundle] URLForResource:@"itcast.txt" withExtension:nil];
86     NSURLRequest *request = [NSURLRequest requestWithURL:fileurl];
87     NSURLResponse *repsonse = nil;
88     NSData *data = [NSURLConnection sendSynchronousRequest:request returningResponse:&repsonse error:nil];
89
90     // 得到mimeType
91     NSLog(@"%@", repsonse.MIMEType);
92     [self upload:@"file" filename:@"itcast.txt" mimeType:repsonse.MIMEType data:data parmas:@{
93                                                                                               @"username" : @"999",
94                                                                                               @"type" : @"XML"}];
95 }
96
97 @end
补充说明:
文件上传请求数据格式

部分文件的MIMEType
