最近发现了一个比较好用的代理客户端,比较智能;名字叫clash:
- https://github.com/Dreamacro/clash
- https://github.com/yichengchen/clashX
- https://github.com/Fndroid/clash_for_windows_pkg
关于配置教程,可以参考:
关键步骤:
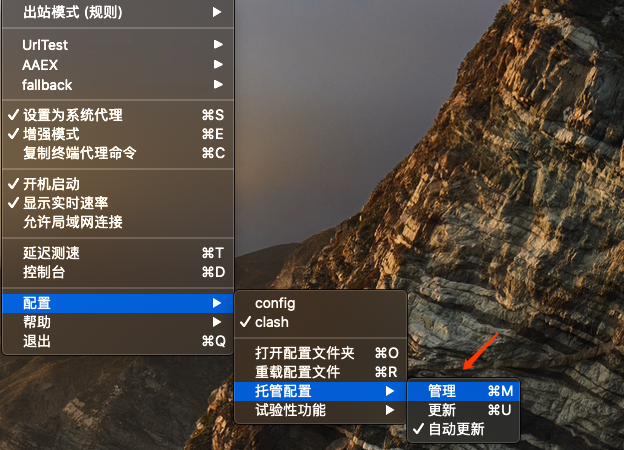
其他的功能,使用就比较简单了,使用过ss的应该很快可以上手;使用过Proxifier的同学,应该很明白;
Linux版本:
建议下载 0.17.0版本;新版本改动比较大,很多厂商的配置文件还跟不上,导致不能识别;我们不得不自己修改配置文件很麻烦;
参考教程:https://www.cnblogs.com/sueyyyy/p/12424178.html
下载链接:https://github.com/Dreamacro/clash/releases/tag/v0.17.1
daemon 设置:https://github.com/Dreamacro/clash/wiki/clash-as-a-daemon
web控制台: http://clash.razord.top 和 http://yacd.haishan.me/ 可选; 原理是 js 和 本地socket通信;
clash-go 支持的restful API:https://github.com/Dreamacro/clash/wiki/external-controller-API-reference,大家可以使用crul自行调试;
创建图标:/usr/share/applications/Clash.desktop
[Desktop Entry]
 Version=0.17.1
 Name=Clash
 Comment=A rule-based tunnel in Go
 Exec=/home/yaowen/clash/clash-linux-amd64-v0.17.1 -f /home/yaowen/clash/config.yaml
 Icon=/home/yaowen/clash/logo.png
 Terminal=true
 Type=Application
 Categories=Network
 Encoding=UTF-8
# Terminal = true 表示弹出终端
之后,需要设置系统全局代理;
clash 控制台仓库:https://github.com/Dreamacro/clash-dashboard
扩展链接:
windows使用proxifier全局代理 - 配置可用; windows10 配置全局代理 走 socks5
保持更新,转载请注明出处;更多内容请关注cnblogs.com/xuyaowen