参考:使用Visual Studio 2017作为Linux C++开发工具
前言
最近在学Gtest单元测试框架,由于平时都是使用Source Insight写代码,遇到问题自己还是要到Linux下gdb调试,还是没有Visual Studio下调试工具那么直观。VS很强大,但是那毕竟是给MS家族产品用的,而且即便是C++项目,VS下开发的项目也没法直接拿到Linux下运行。VS2017推出的跨平台特性很好的解决了这个问题。你可以在保留VS强大功能的前提下,使用远程Linux主机上的gdb进行调试、运行代码。借着学习Gtest的机会,自己搭建环境亲自测试了一把,还真是强大,MS大法好。
关于远程Linux主机的说明
这里的远程Linux主机大多数人会想到类似于阿里云、腾讯云上面的云虚拟机,上面运行着Linux系统。但是最为学习使用,大多数人是不具备这样条件的,我们可以自己在WMware workstation中建立Linux虚拟机,然后物理机远程访问那台虚拟机,后面的例子就是这么实现的。还有一种做法也很值得推荐,2017年10月份微软FCU更新推出了WSL,利用那个也可以实现远程Linux主机功能,微软官方也很推荐这种做法。
搭建开发环境
Linux development with C++ in Visual Studio 一文介绍了使用VS跨平台特新需要做的准备工作。你也可以参考下面的视频:
准备实验代码
整个开发过程中,代码依赖的库、头文件都在远程Linux主机上。实验涉及到的代码如下
sample.cpp


#include "sample.h"

// Returns n! (the factorial of n).  For negative n, n! is defined to be 1.
int Factorial(int n) {
    int result = 1;
    for (int i = 1; i <= n; i++) {
        result *= i;
    }

    return result;
}

// Returns true iff n is a prime number.
bool IsPrime(int n) {
    // Trivial case 1: small numbers
    if (n <= 1) return false;

    // Trivial case 2: even numbers
    if (n % 2 == 0) return n == 2;

    // Now, we have that n is odd and n >= 3.

    // Try to divide n by every odd number i, starting from 3
    for (int i = 3; ; i += 2) {
        // We only have to try i up to the square root of n
        if (i > n / i) break;

        // Now, we have i <= n/i < n.
        // If n is divisible by i, n is not prime.
        if (n % i == 0) return false;
    }

    // n has no integer factor in the range (1, n), and thus is prime.
    return true;
}
sample.h
#ifndef _SAMPLE_H_
#define _SAMPLE_H_

// Returns n! (the factorial of n).  For negative n, n! is defined to be 1.
int Factorial(int n);

// Returns true iff n is a prime number.
bool IsPrime(int n);

#endif
sample_unittest.cpp
#include <limits.h>
#include "sample.h"
#include "gtest/gtest.h"
namespace {

    TEST(FactorialTest, Negative) {
        // This test is named "Negative", and belongs to the "FactorialTest"
        // test case.
        EXPECT_EQ(1, Factorial(-5));
        EXPECT_EQ(1, Factorial(-1));
        EXPECT_GT(Factorial(-10), 0);
    }

    TEST(FactorialTest, Zero) {
        EXPECT_EQ(1, Factorial(0));
    }

    TEST(FactorialTest, Positive) {
        EXPECT_EQ(1, Factorial(1));
        EXPECT_EQ(2, Factorial(2));
        EXPECT_EQ(6, Factorial(3));
        EXPECT_EQ(40320, Factorial(8));
    }

    // Tests IsPrime()
    TEST(IsPrimeTest, Negative) {
        EXPECT_FALSE(IsPrime(-1));
        EXPECT_FALSE(IsPrime(-2));
        EXPECT_FALSE(IsPrime(INT_MIN));
    }

    TEST(IsPrimeTest, Trivial) {
        EXPECT_FALSE(IsPrime(0));
        EXPECT_FALSE(IsPrime(1));
        EXPECT_TRUE(IsPrime(2));
        EXPECT_TRUE(IsPrime(3));
    }

    TEST(IsPrimeTest, Positive) {
        EXPECT_FALSE(IsPrime(4));
        EXPECT_TRUE(IsPrime(5));
        EXPECT_FALSE(IsPrime(6));
        EXPECT_TRUE(IsPrime(23));
    }
}  // namespace
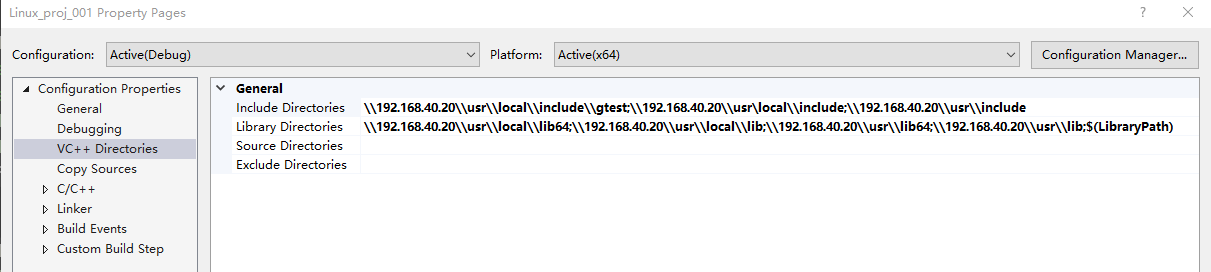
如果你的代码中涉及到三方库,像我这里涉及到Gtest的libgtest.a、libgtest_main.a,静态库动态库无所谓,关键是位置。默认三方库会放在/usr/local下面,VS这一端如果不做相应设置的化可能会找不到头文件、库文件。Visual studio 2017 cross platform library linking 这篇文章中指出可以使用“IP+目录”的方式指定VC++依赖目录,这里面有个小问题,就是\和的问题,参考The "MakeClCommandLine" task failed unexpectedly. 最终我的实验环境设置如下:
1. \<Board IP Address>lib dir into Project->Configuration Properties->VC++ Directories->Library Directories
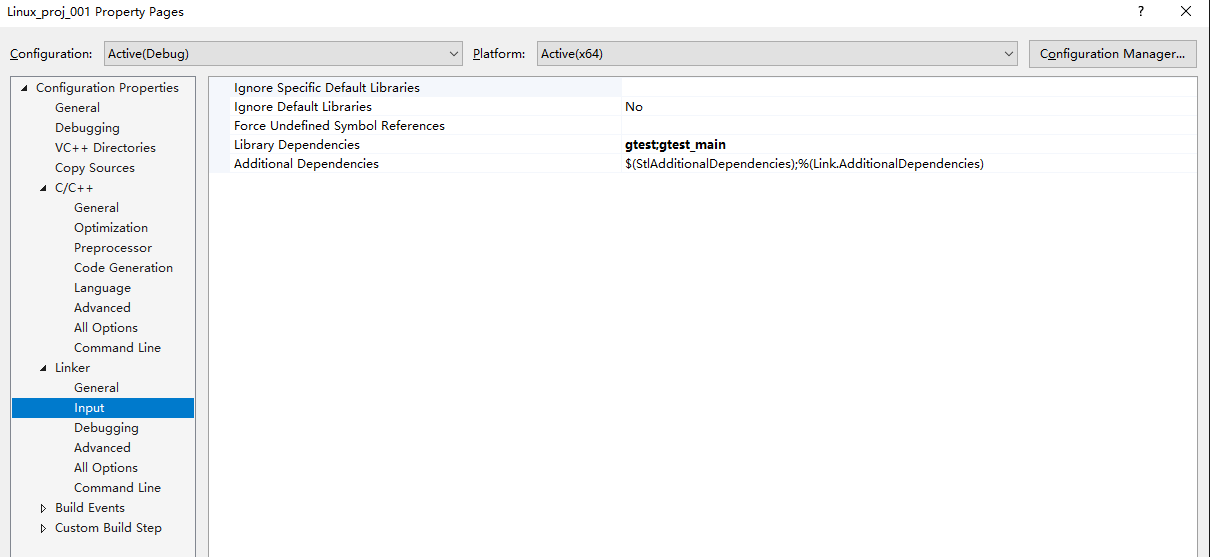
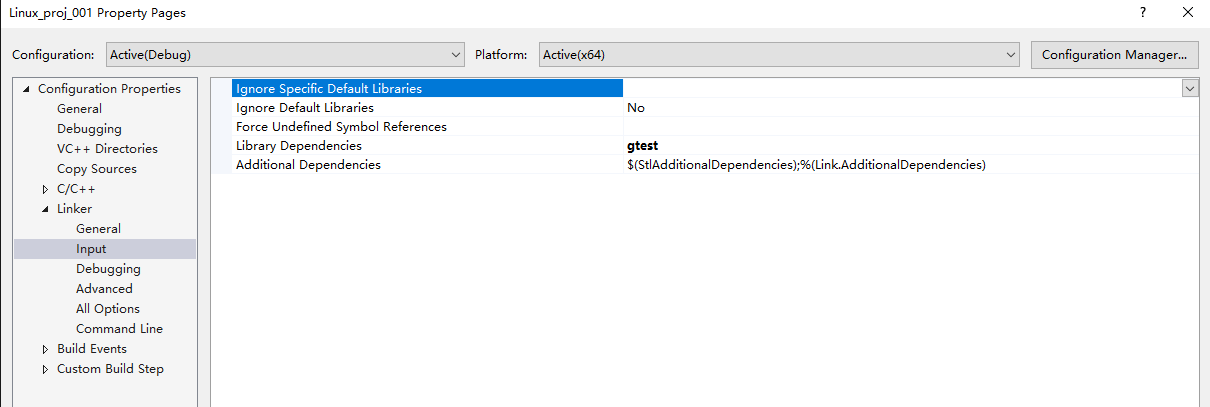
2. lib file into Project->Configuration Properties->->Linker->Input
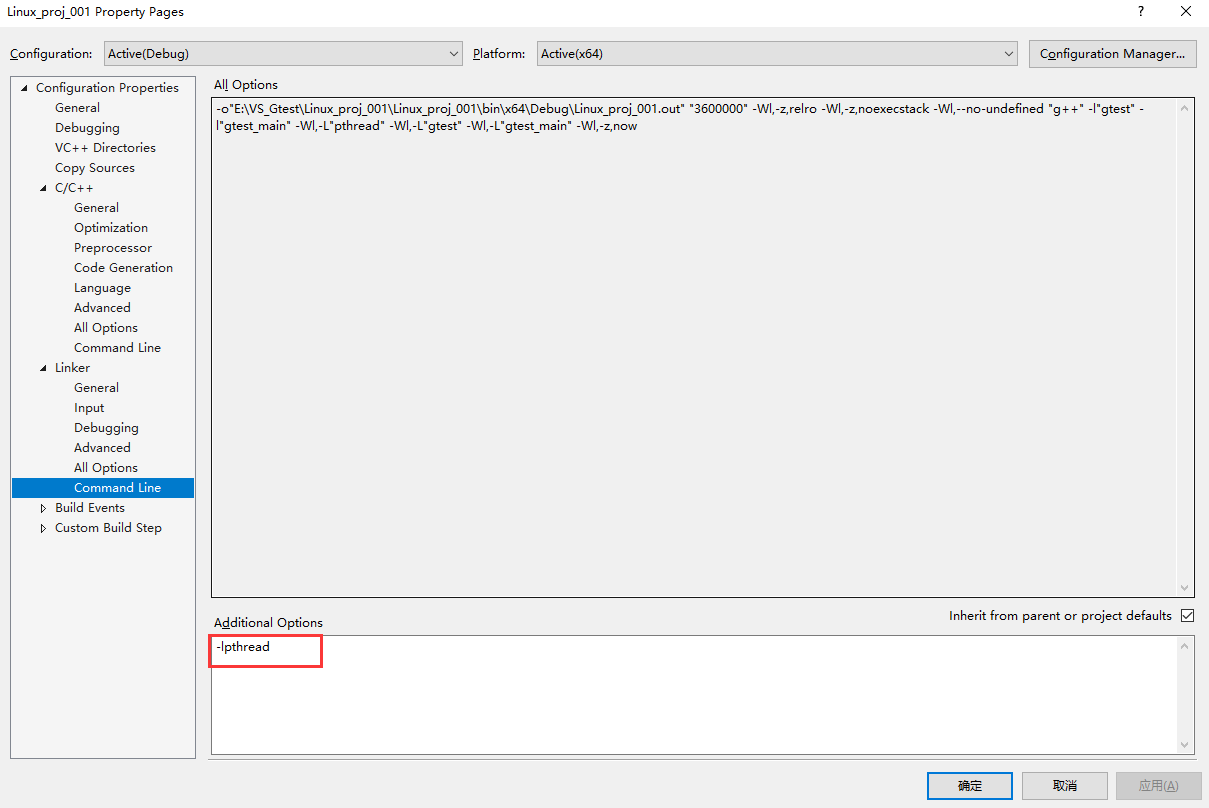
3. -lpthread to Project->Configuration Properties->Linker->Command
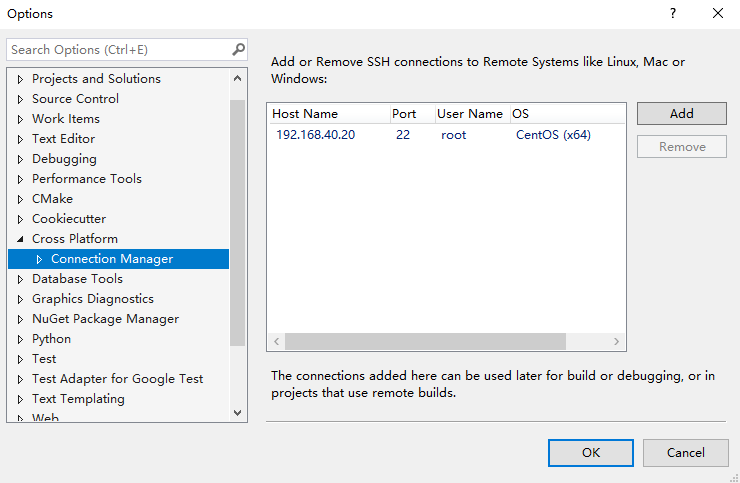
当你在VS2017中开发时,如果Linux上环境有变化,比如安装、卸载了软件,这可能会影响到头文件、库文件。最好在connection manager中重连一次远程Linux主机
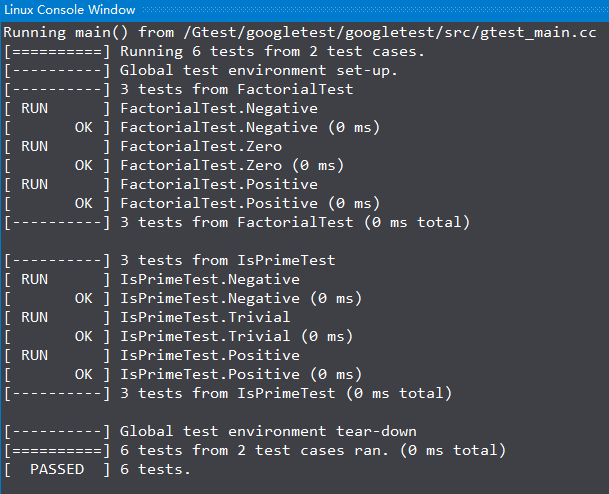
一切准备就绪,Build->Build Solution,Debug->Start Debug开始运行。你可能会发现在传统的Output窗口并没有你想要的输出,毕竟我们运行的是Linux程序,要想看输出结果需要在Debug->Linux Console下查看
补充一点
看过上面的代码,你可能会疑问,怎么没有main入口函数? Gtest中libgtest_main.a为我们实现了一个main函数,前面截图 Project->Configuration Properties->->Linker->Input 中指定包含了libgtest_main.a库。不过没有啥特殊理由的化,还是建议把自己写个main函数,同时修改Project->Configuration Properties->->Linker->Input ,删掉对libgtest_main.a的包含。
main.cpp
#include <cstdio>
#include <gtest/gtest.h>
int main(int argc, char** argv) {
    testing::InitGoogleTest(&argc, argv);
    return RUN_ALL_TESTS();
}
Build->Build Solution,Debug->Start Debug输出结果与上面Linux Console Window输出一样,不在截图。
如果单纯想使用Gtest框架,可以不用上面那么麻烦。当然上面啰里啰唆介绍一堆,目的并不仅仅是演示Gtest使用那么简单,但凡涉及到三方库的Linux项目都可以使用上面方法在VS2017像进行开发调试。下面针对VS2017对Gtest的支持再单独说下
方式一:使用VS2017自带的Gtest框架
这种方式对Windows下开发的程序员可能会比较有用,感觉上可以主项目利用交叉平台特性远程在Linux上开发,Gtest项目使用VS2017本地支持。没测试过,感觉理论上可行。
方式二:使用NuGet Packages
我没测试过