2.绘制矢量图
1.不要在style中给canvas设置宽高 会有位移差
2.
|
1
2
3
4
|
//获取元素var c=document.getElementById("c")//获取绘图环境var c=c.getContext("2d") |
fillRect() 绘制一个填充的方块 默认颜色是黑色
strokeRect() 绘制带边框的方块
绘制线条
moveTo() 绘制线段起点
lineTo() 绘制线段的领点
每个线条只能有一个 moveTo可以有多个 lineTo
stroke() 绘制线段
beginPath() closePath() 二者同时出现 将绘制路径闭合(起始点 结尾点首位相连)
Rect() 绘制方块
clearRect(0,0,width,height)清楚画布
save() restore() 二者成对出现 中间属性样式只影响内部,不影响外部
1.画圆
|
1
2
3
4
5
6
|
c.closePath()c.fill()c.restore()c.moveTo(200,200)c.arc(200,200,150,0,360*Math.PI/180,true)c.stroke() |
200,200是圆形坐标 50是半径
0是起始弧度 Math.PI是结束弧度
true是逆时针 flase是顺时针
注意:角度有正负之分 顺时针角度是正的,逆时针角度是负的
2.画布的平移和旋转
平移translate 画布大小位置不变 起始坐标变了
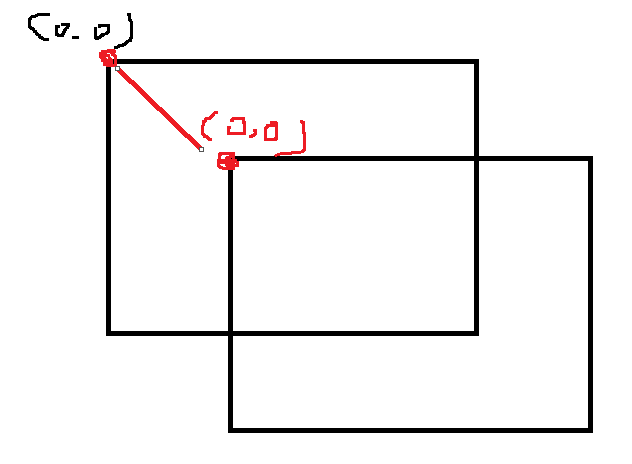 相当于坐标平移
rotate() 画布的旋转都是以00起始点为中心点旋转
scale(0.5,0.5) 画布的缩放 就是将画布向后移动 跟人的视距就变远了 近大远小
|
1
2
3
|
c.fillStyle='lightpink'c.scale(0.5,0.5)c.fillRect(0,0,100,100) |
画布中插入图片
|
1
2
3
4
5
6
7
8
9
10
11
|
//获取元素 var c=document.getElementById("c") //获取绘图环境 var c=c.getContext("2d") var img=new Image; img.src="img/02.jpg" img.onload=function(){ c.drawImage(img,10,20,160,200) } |
插入字体
|
1
2
3
4
5
|
//字体大小 样式 c.font="30px imapct" c.fillText("全站最强",200,200) //字体空心 c.strokeText("Big smile!",200,200) |
svg
svg绘制矢量图
svg使用xml格式绘制图形
svg要有一个根节点 叫svg标签 相当于html
|
1
2
3
4
5
6
7
|
<svg xmlns="http://www.w3.org/2000/svg" version="1.1"> <circle cx="100" cy="50" r="40" stroke="black" stroke-width="2" fill="red" /></svg><svg xmlns="http://www.w3.org/2000/svg" version="1.1" width="500px" height="400px"></svg> |
svg如果不设置大小,默认占用面积 3008*150
1.定义矩形
rect标签有:
width height 矩形宽高
fill 定义矩形填充颜色(rgb值、颜色名或16进制)
stroke-width 定义矩形边框宽度
stroke 定义矩形边框以及颜色
x 定义矩形左侧位置(矩形到浏览器窗口左侧距离)
y 定义矩形顶端位置(矩形到浏览器窗口顶端位置)
fill-opacity 定义填充颜色透明度
stroke-opacity 定义边框颜色透明度
Rx Ry 可以使矩形产生圆角
|
1
2
|
<!--矩形--> <rect width="100px" height="100px" x="50" y="250" rx="20" ry="20" style="fill:pink;stroke- 5;stroke: red;"></rect> |
fill-opactty和opacity的区别?
fill-opacity只改变填充颜色透明度 opacity改变fill和stroke的透明度都改变
2.定义圆
circle cx cy 定义圆点的 x和y坐标。如果省略cx和cy,圆的中心会设置为(0,0)
r定义半径
|
1
2
3
|
<!--圆形--><circle cx="200" cy="200" r="50" style="stroke:"pink"; fill:'red';"></circle> |
3.定义椭圆
椭圆和圆很相似。不同之处在于椭圆有不同的x和y半径,而圆的x和y半径是相同的
ellipse cx cy定义圆中心的x,y坐标
rx 定义水平半径
ry 定义垂直半径
|
1
2
|
<!--椭圆--><ellipse cx="300" cy="340" rx="100" ry="50" style="fill: yellowgreen;"></ellipse> |
4.定义直线
line x1 y1 定义起始坐标 x2 y2定义结束坐标 必须结合 stroke
|
1
2
|
<!----直线----><line x1="150" y1="250" x2="100" y2="100" style="stroke: lawngreen;"></line><br><br> |
5.定义多边形
polygon poinits=“定义多边形每个角x和y坐标”
|
1
2
3
|
<!--定义多边形--><polygon points="240,10 330,190 290,210" style="fill: pink; stroke: red;"></polygon> |
6.定义曲线(折线)
polyline poinits“折点的坐标”
|
1
2
|
<!--曲线--><polyline points="0,40 40,40 40,80 80,80 80,120 120,120 120,160 "style="stroke-5 ; stroke: pink; fill: none; "> |
7.定义路径
d=“定义路径指令”
M 是起点坐标
L 是相邻点坐标
Z是让路径构成闭合回路
H代表水平划线 默认y轴上值一模一样
V 代表垂直的线条 默认x轴上值一样
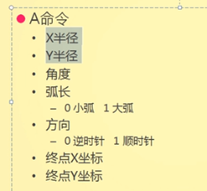
A 后面跟七个值
|
1
2
|
<!--定义路径--> <path id="path" d="M100 50 A60 60 0 1 0 300 50 " stroke="red" fill="none"></path> |
8.g 用于相关元素进行组合
|
1
2
3
4
|
<g fill="pink" stroke="black" cx="60" cy="50" transform="translate(100,50)"><circle r="30" ></circle><circle r="10" fill="blue" ></circle> </g> |
g身上的属性 子元素都会继承 但是g上的属性都必须显现属性,不是svg的私有属性,比如g上的圆心坐标不行
transform 转换svg中的一个属性 translate rotate scale
平移旋转 都是以起点 0 0 (svg的左上角) 点为参考点 而css3中以元素的中心点为参考点
text 用于定义文本 xy xy的值在字体左下角
|
1
2
|
<!----txte----><text stroke="blue" x="400" y="400" font-size="20" text-anchor="middle">哈哈哈哈</text> |
9.绘制图片
|
1
2
|
<!----image----><image x="80" y="80" width="100" height="100" xlink:href="02.jpg"></image> |
10.use 用于复制元素 xy
xy是相对原始元素的坐标位置 不是相对svg的00点坐标
|
1
2
3
|
<!----use----><circle cx="40" id="a" cy="40" r="10" translate="100,0" fill="blue"></circle><use x="10" y="10" xlink:href="#a"></use> |
11.animate 写在需要动画元素的中间
|
1
2
3
|
<circle cx="250" cy="310" r="15" fill="lightblue"><animate attributeName="cy" from="310" to="690" dur="2s" repeatCount="indefinite"></circle> |