前提本文使用的是lampp环境下自带的Apache服务
一、查看文件
查看文件确保目录中有Apache,我在这里使用的是用xampp自带apache
[root@besttest ~]# ll

二、配置文件
1、进入该目录
[root@besttest ~]# cd /opt/lampp/etc
2、查看目录中是否有httpd.conf文件
[root@besttest etc]# ls
3、修改httpd.conf
[root@besttest etc]# vi httpd.conf
4、按键盘insert建进行修改,将该段放到最末尾
(注意:以下代码在有的httpd.conf文件中都有,只要取消注释就好了,但是因为文件内容太多,我懒得找,所以我直接放在最末尾,也是一样的。)
<Location /server-status>
    SetHandler server-status
    Order deny,allow
#    Deny from all
    Allow from .localhost
</Location>
5、代码后边如果没有以下内容则添加,状态为on
ExtendedStatus On

6、按一下键盘esc建,再输入:wq进行保存
三、重启lampp
[root@besttest etc]# /opt/lampp/lampp restart
四、验证是否配置成功
1、输入下面的地址进行监控数据(192.168.0.133为本机IP)
http://192.168.0.133/server-status/?auto
2、出现以下内容说明就配置成功

五、Loadrunner配置
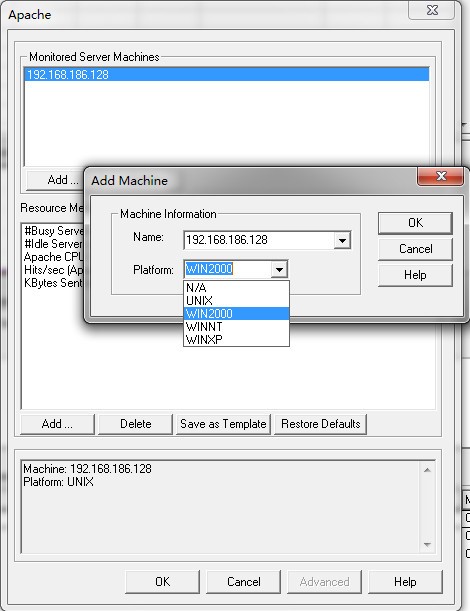
1、切换到LoadRunner的Controller中在Web Server Resource Graphs下双击Apache,右侧出现Apache视图
2、右击选择 Add Measurements,点击add,添加apache服务器IP地址、选择系统平台、选择需要监控的性能指标,确认。
六、错误分析
1、运行后发下有错误提示内容如下:
Monitor name :Apache. Parsing error, cannot find token: CPULoad. Measurement: CPULoad|192.168.0.108. Hints: 1) Such a measurement does not exist, or the html page may be different from the supported one. 2) Try to replace the Apache.cfg with appropriate Apache_<version>.cfg file in <Installation>datmonitors and rerun the application (entry point: CApacheMeasurement::NewData). [MsgId: MMSG-47479]
2、错误分析:
这是由于要监视Apache的版本提供的计数器与LoadRunner默认的计数器不一致导致的。
3、解决办法:
建议先关闭Controller,打开LR安装目录C:Program Files (x86)HPLoadRunnerdatmonitors下的apache.cfg文件(其它文件名类似Apache_<version>.cfg的是Apache监视配置的备份,只有apache.cfg是生效的):
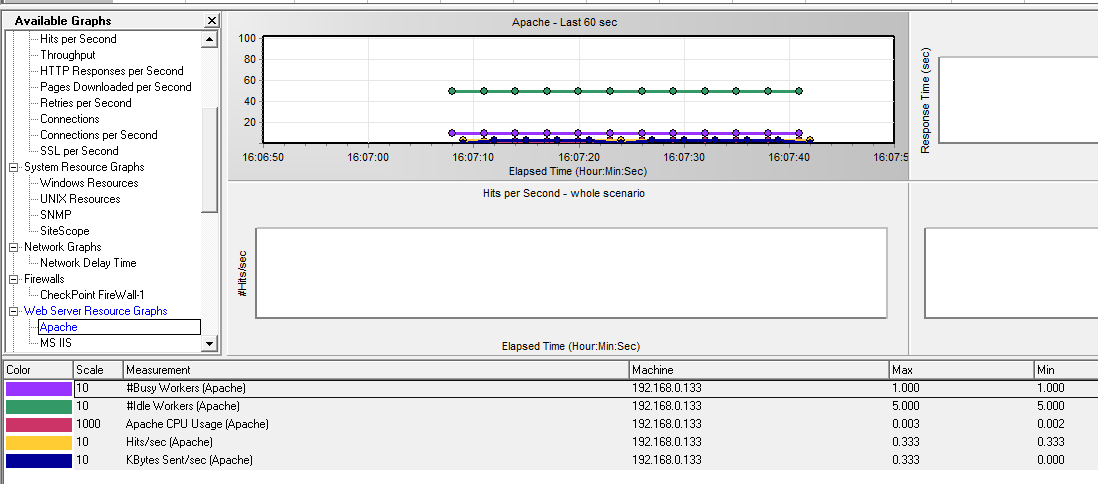
(1) 修改Counter0=IdleServers为Counter0=IdleWorkers,同时修改注释信息Label0=#Idle Servers (Apache)为Label0=#Idle Workers (Apache),描述信息也建议修改;
(2) 修改Counter4=BusyServers为Counter4=BusyWorkers,同时修改注释信息Label4=#Busy Servers (Apache)为Label4=#Busy Workers (Apache) ,描述信息也建议修改。
(3)然后保存并关闭该文件,重新打开Controller并添加计数器,这样监视就正常了。