helm相关术语
Helm
Helm 是一个命令行下的客户端工具。主要用于 Kubernetes 应用程序 Chart 的创建、打包、发布以及创建和管理本地和远程的 Chart 仓库。
Tiller(helm3已经没有了)
Tiller 是 Helm 的服务端,部署在 Kubernetes 集群中。Tiller 用于接收 Helm 的请求,并根据 Chart 生成 Kubernetes 的部署文件( Helm 称为 Release ),然后提交给 Kubernetes 创建应用。Tiller 还提供了 Release 的升级、删除、回滚等一系列功能。
Chart
Helm 的软件包,采用 TAR 格式。类似于 APT 的 DEB 包或者 YUM 的 RPM 包,其包含了一组定义 Kubernetes 资源相关的 YAML 文件。
Repoistory
Helm 的软件仓库,Repository 本质上是一个 Web 服务器,该服务器保存了一系列的 Chart 软件包以供用户下载,并且提供了一个该 Repository 的 Chart 包的清单文件以供查询。Helm 可以同时管理多个不同的 Repository。
Release
使用 helm install 命令在 Kubernetes 集群中部署的 Chart 称为 Release。
helm部署harbor
helm非常方便,我们一般只需要设置几个变量就可以启动起来,下面以部署harbor为例子
1.加入我们需要的仓库格式如下:

2.查看helm repo
[root@VM-0-15-centos ~]# helm repo list
NAME      URL
harbor    https://helm.goharbor.io
3.安装harbor,你会看到如下报错,原因是我的k8s集群版本可能有点老(我用的是minikube),因此我们可以把helm chart下载到本地进行修改
[root@VM-0-15-centos ~]# helm install harbor/harbor --generate-name
Error: unable to build kubernetes objects from release manifest: error validating "": error validating data: ValidationError(Deployment.spec.template.spec.containers[0]): unknown field "startupProbe" in io.k8s.api.core.v1.Container
4.下载harbor,这里harbor的版本为1.5.0
root@VM-0-15-centos ~]# helm pull harbor/harbor #前者harbor为仓库名称,后者harbor为包名
[root@VM-0-15-centos ~]# ls
harbor-1.5.0.tgz
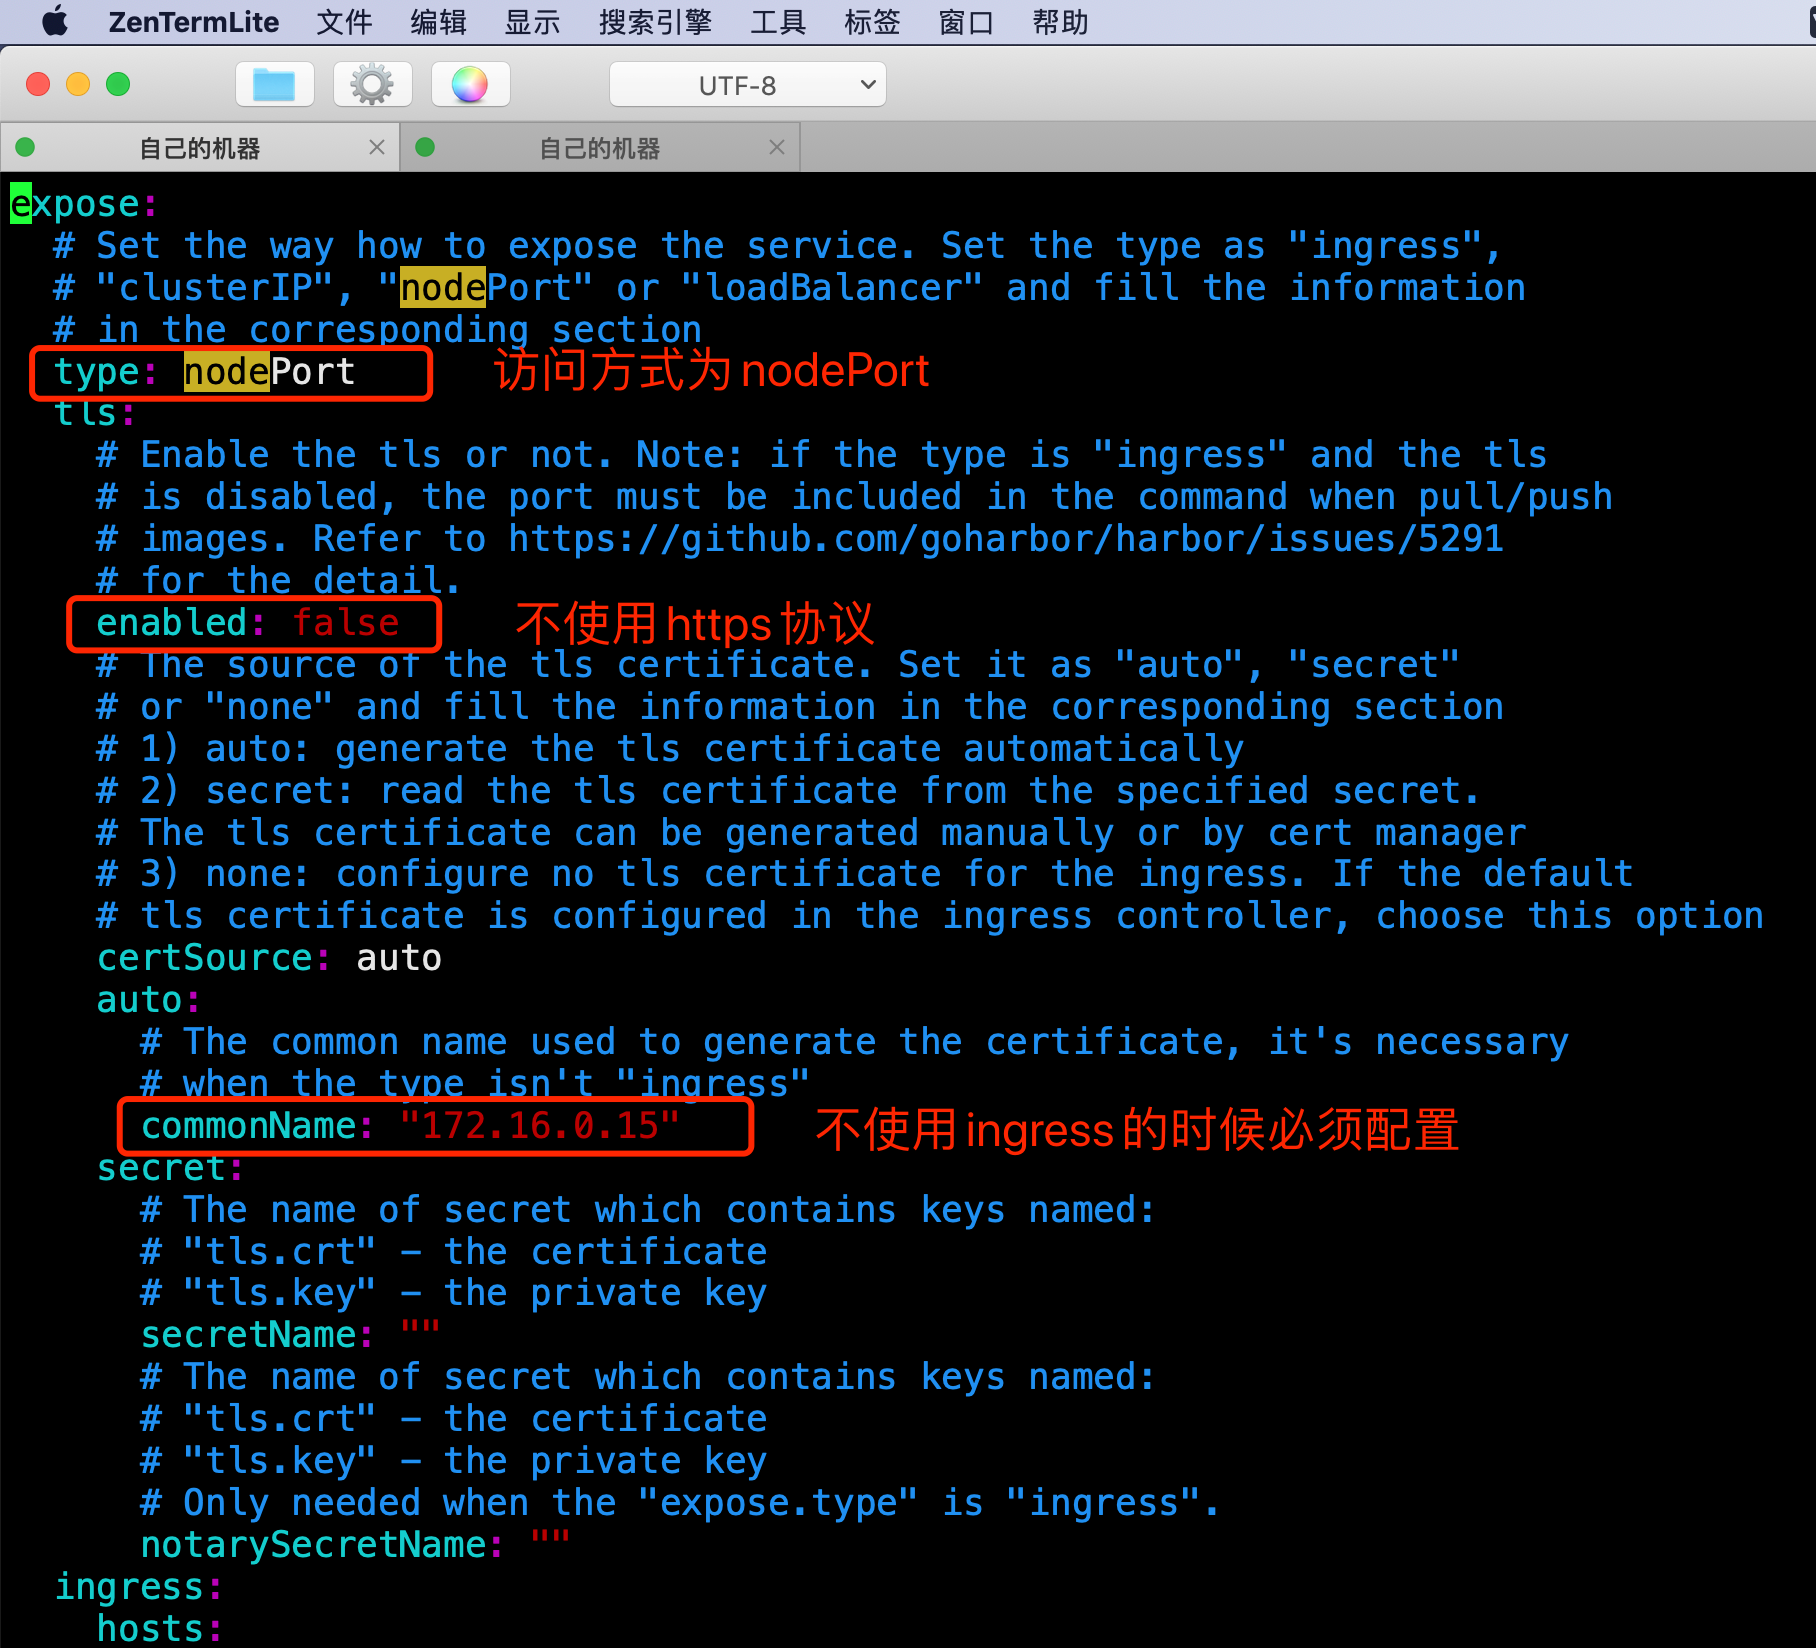
5.解压压缩包编辑如下文件
[root@VM-0-15-centos core]# pwd
/root/harbor/templates/core
[root@VM-0-15-centos core]# ls
core-cm.yaml  core-dpl.yaml  core-secret.yaml  core-svc.yaml  core-tls.yaml
[root@VM-0-15-centos core]# vim core-dpl.yaml
需要把这一段代码删除

6.在编辑values.yaml文件,修改为如下
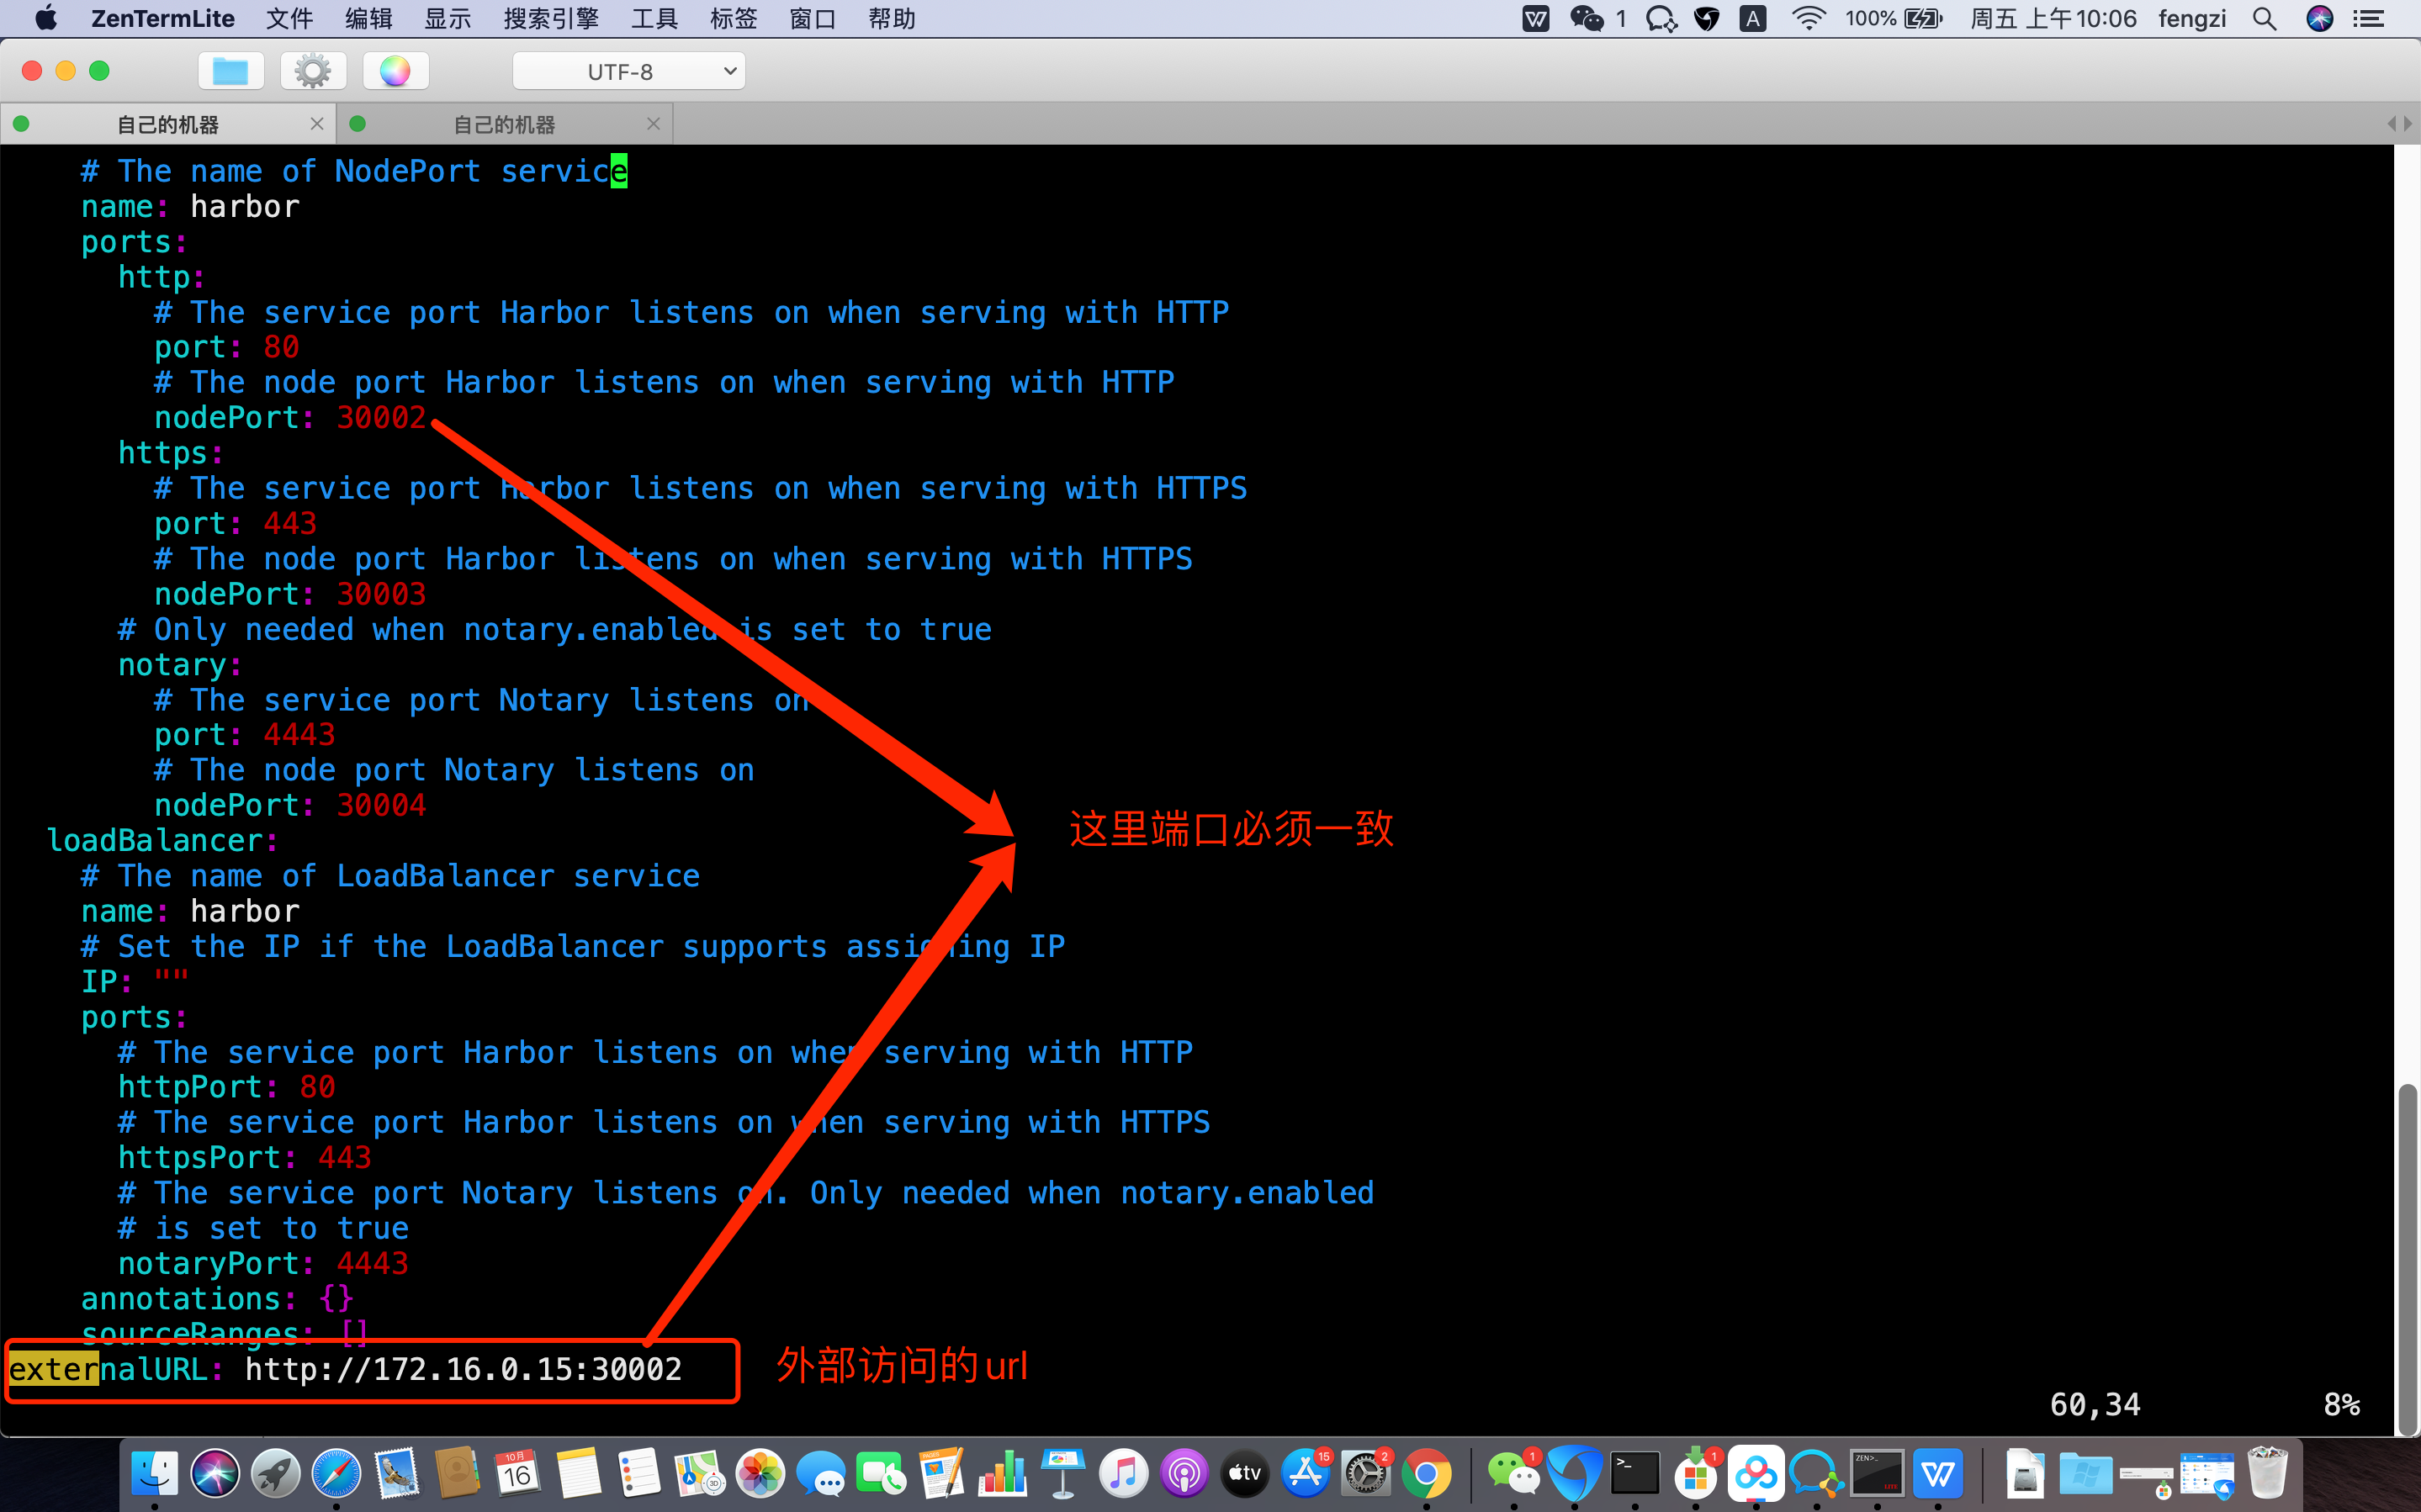
7.根据修改好的chart,我们进行部署
[root@VM-0-15-centos ~]# cd harbor/
[root@VM-0-15-centos harbor]# ls
cert  Chart.yaml  conf  LICENSE  README.md  templates  values.yaml
[root@VM-0-15-centos harbor]#
[root@VM-0-15-centos harbor]# helm install harbor ../harbor
NAME: harbor
LAST DEPLOYED: Fri Oct 16 10:09:41 2020
NAMESPACE: default
STATUS: deployed
REVISION: 1
TEST SUITE: None
NOTES:
Please wait for several minutes for Harbor deployment to complete.
Then you should be able to visit the Harbor portal at http://172.16.0.15:30002
For more details, please visit https://github.com/goharbor/harbor
8.查看harbor各个资源状态

9.没有问题了,我们可以打开浏览器验证

本地登录在验证一下
[root@VM-0-15-centos harbor]# vim /etc/docker/daemon.json
{
    "registry-mirrors":["https://registry.docker-cn.com","https://l10nt4hq.mirror.aliyuncs.com"],
    "insecure-registries": ["172.16.0.15:30003","172.16.0.15:30002"]
}


[root@VM-0-15-centos harbor]# docker login 172.16.0.15:30002
Authenticating with existing credentials...
WARNING! Your password will be stored unencrypted in /root/.docker/config.json.
Configure a credential helper to remove this warning. See
https://docs.docker.com/engine/reference/commandline/login/#credentials-store

Login Succeeded
ok,没有问题
自定义chart并打包上传到似有仓库harbor
我们用helm所下载的chart并部署,其实都是有人给我们定义好了一个模版,我们只需要添加变量就可以了,那么我们也可以自己写chart,然后推送到仓库上,供别人使用
1.我们先创建一个chart清单文件模版
[root@VM-0-15-centos ~]# helm create myapp
Creating myapp
[root@VM-0-15-centos ~]# ls
harbor  harbor-1.5.0.tgz  myapp
[root@VM-0-15-centos ~]# cd myapp/
[root@VM-0-15-centos myapp]# ls
charts  Chart.yaml  templates  values.yaml
说一下myapp下面每个文件的意义
Chart.yaml          # 包含了chart信息的YAML文件
LICENSE             # 可选: 包含chart许可证的纯文本文件
README.md           # 可选: 可读的README文件
values.yaml         # chart 默认的配置值
values.schema.json  # 可选: 一个使用JSON结构的values.yaml文件
charts/             # 包含chart依赖的其他chart
crds/               # 自定义资源的定义
templates/          # 模板目录, 当和values 结合时,可生成有效的Kubernetes manifest文件
templates/NOTES.txt # 可选: 包含简要使用说明的纯文本文件
我们可以在values填写相应的值,然后打包上传至harbor上就可以了,对于具体如何修改,需要熟悉go语言,所以,有兴趣的朋友可以自己查询,下面只做如何打包上传,步骤如下:
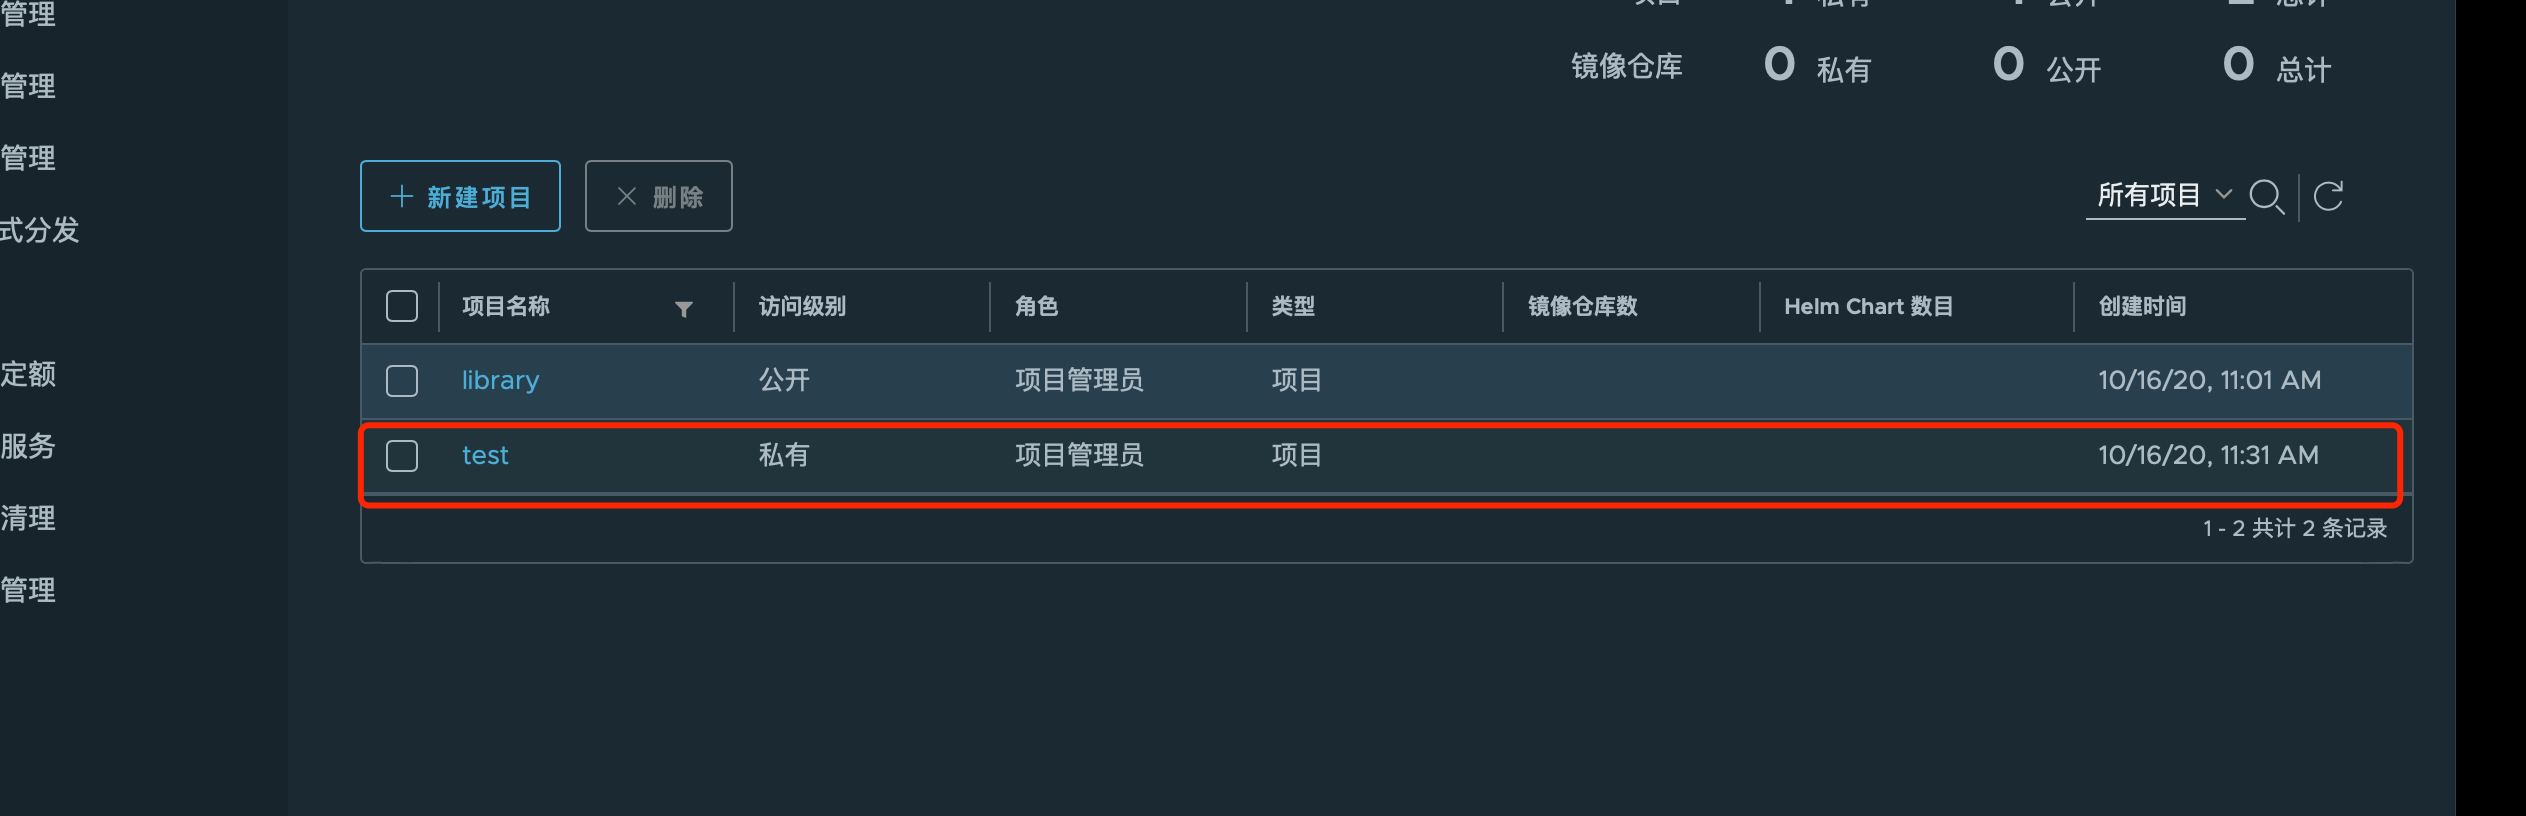
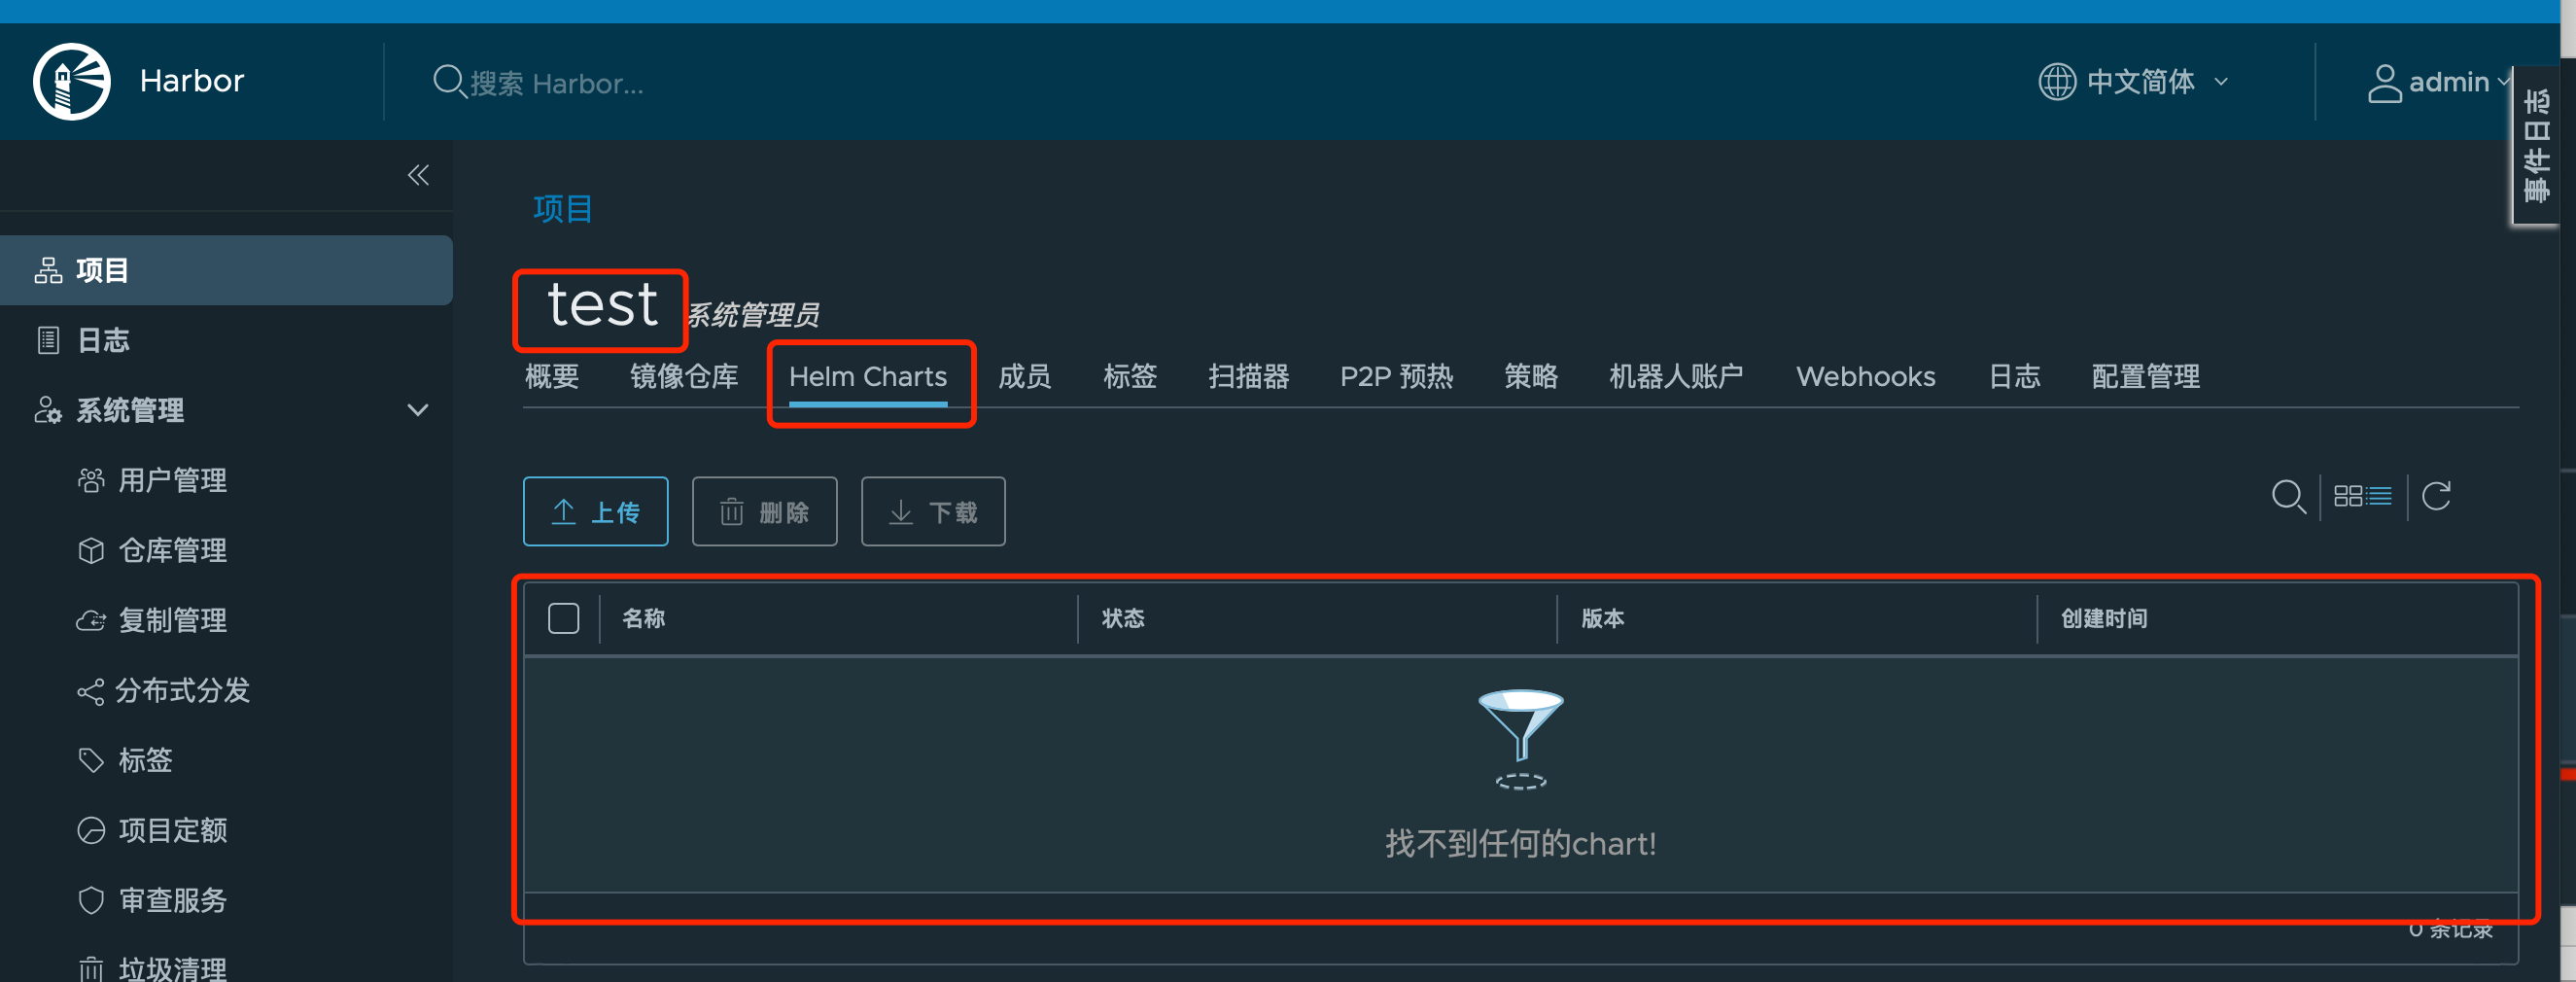
1.在harbor上创建chart仓库,可以看到下面chart仓库还没有chart
2.添加helm仓库到本地
[root@VM-0-15-centos ~]# helm repo add test http://172.16.0.15:30002/chartrepo/test --username admin --password Harbor12345
"test" has been added to your repositories
[root@VM-0-15-centos ~]# helm repo list
NAME      URL
harbor    https://helm.goharbor.io
test      http://172.16.0.15:30002/chartrepo/test
3.helm3默认不支持helm push了,所以需要下载push文件
[root@VM-0-15-centos ~]# wget https://github.com/chartmuseum/helm-push/releases/download/v0.9.0/helm-push_0.9.0_linux_amd64.tar.gz
4.把helmpush添加到环境变量中
[root@VM-0-15-centos ~]# cp bin/helmpush /usr/local/bin/
5.好了,现在可以上传咱们自定义的chart了
[root@VM-0-15-centos ~]# helmpush myapp/ test
Pushing myapp-0.1.0.tgz to test...
Done.
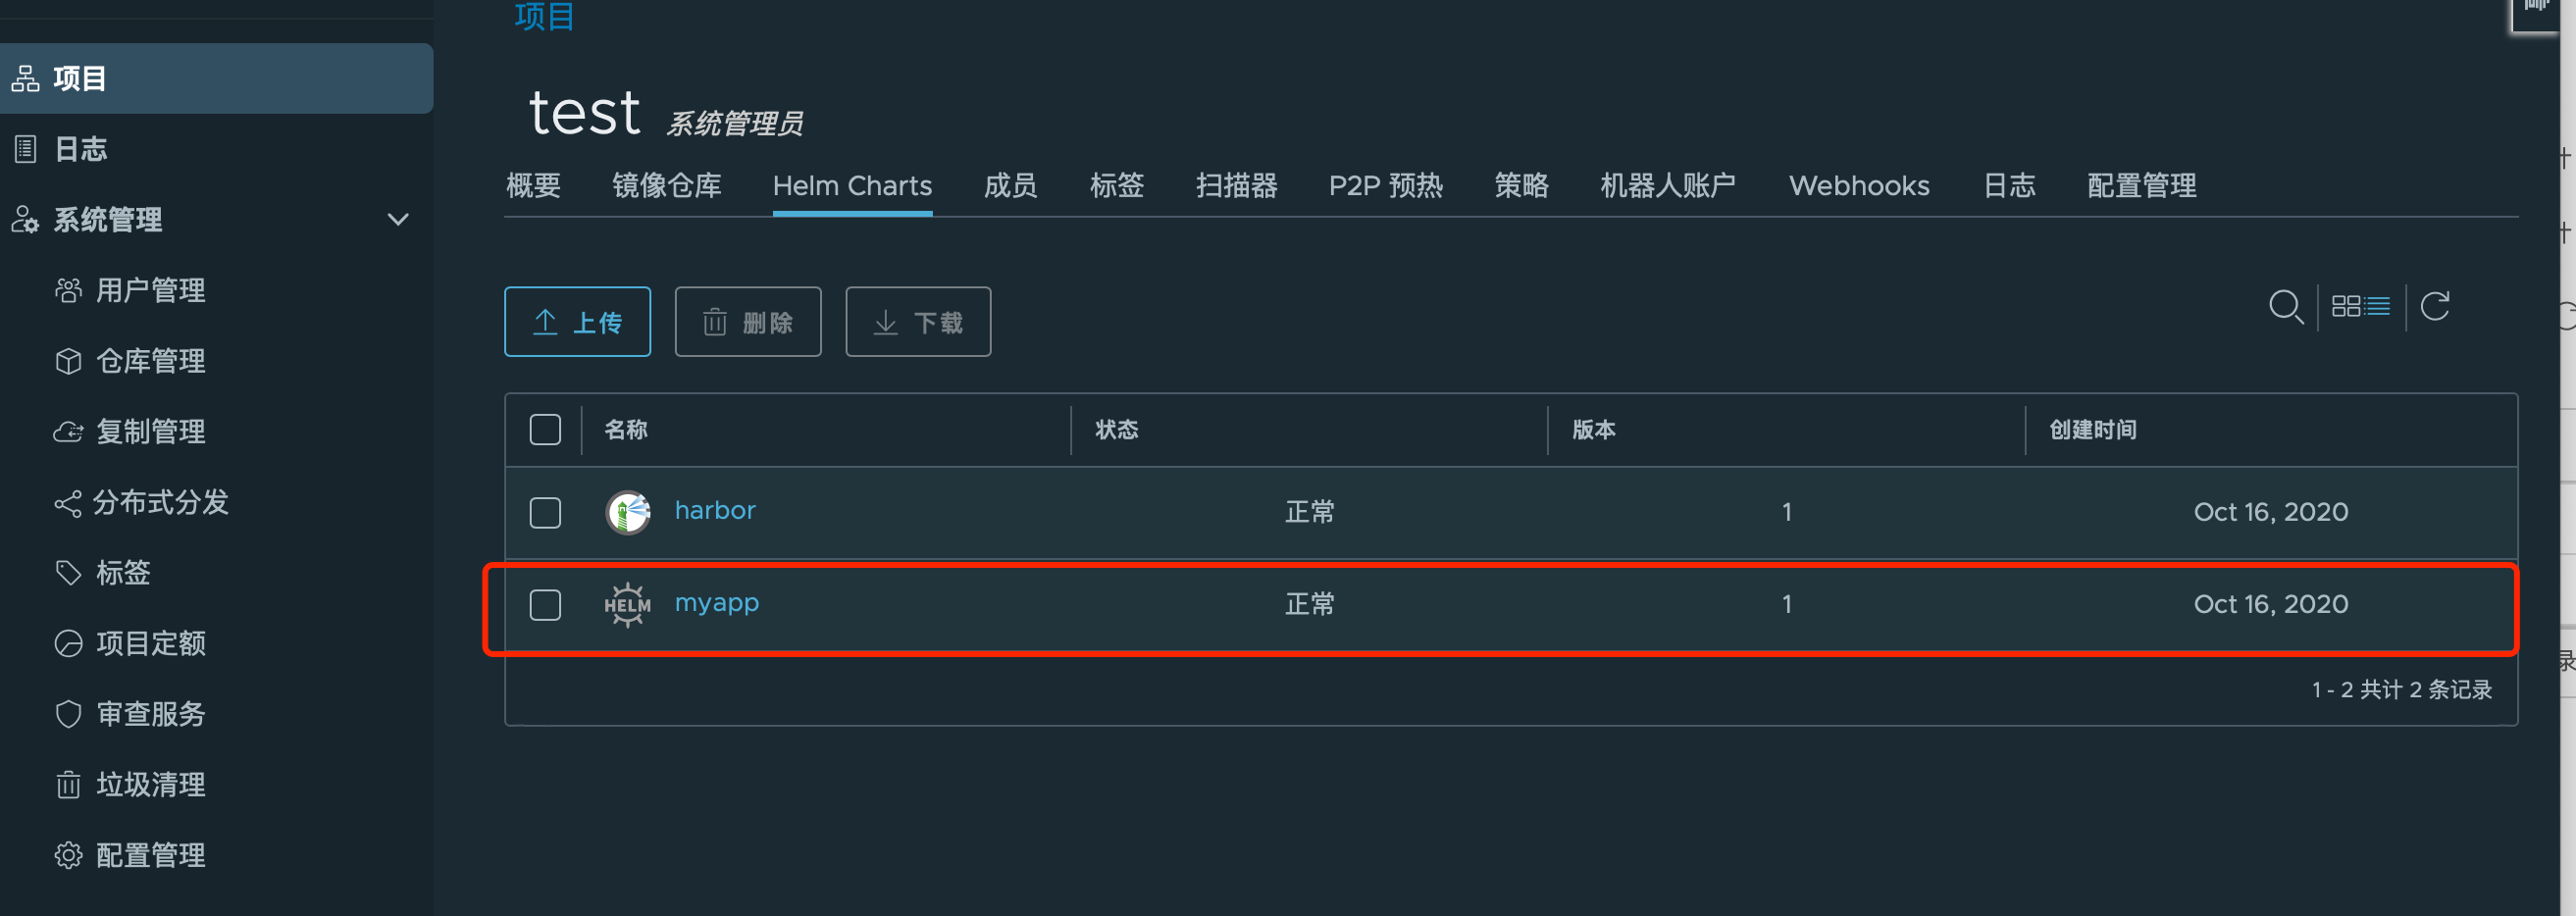
6.查看一下我们的harbor仓库看看有没有传上去,如下图可以看到,已经传上来了,ok
helm相关命令
helm repo list                         #查看仓库
helm ls                                 #查看release
helm install 仓库名/包名               #安装
helm template 仓库名/包名 > test.yaml        #把要安装的软件包注入到yaml文件中,然后可以kubectl apply -f来应用
helm uninstall release名字                #卸载release
helm repo add 自定义仓库名字 仓库路径         #添加仓库
helm repo remove 仓库名称                #删除仓库
helm lint 软件包目录                       #检查里面文件的语法
helm upgrade 仓库名/包名 或者 软件包名称        #更新helm之前部署的应用
helm create 名称                       #创建自定义chart
helm plugin add 插件网址                #安装插件,比如helmpush
helm pull 仓库名/包名                   #拉去helm镜像,一般为tgz结尾
helm status release名称                #查看release状态
helm version                            #查看helm版本
helm show values release名称             #查看release的values文件
helm show all release名称                 #查看release的所有信息
helm show chart release名称               #查看release中Chart信息
helm repo update                           #更新仓库信息
helm packages 路径                            #打包