thymeleaf是一种和FreeMarker类似,在后台生成UI的JAVA模板引擎,可以替代JSP。同时thymeleaf也是SpringBoot推荐的解决方案,在这里先不讨论优劣,只是简单介绍一下它的特点和简单的使用。
一 特点
- 允许定义多种类型模板
- HTML
- XML
- TEXT
- JAVASCRIPT
- CSS
- RAW
- 完整HTML5标志支持:Thymeleaf 3.0 不再是基于XML结构的。由于引入新的解析引擎,模板的内容格式不再需要严格遵守XML规范。即不在要求标签闭合,属性加引号等等。
- 片段(Fragment)表达式。
- 新的方言系统。
二 使用
1、 配置
首先在项目的pom.xml中添加依赖,因为Spring默认使用就是Thymeleaf模板引擎,因此只需要添加如下依赖即可。
<!-- Thymeleaf模板依赖配置 -->
<dependency>
    <groupId>org.springframework.boot</groupId>
    <artifactId>spring-boot-starter-thymeleaf</artifactId>
</dependency>PS:SpringBoot–1.5.8RELEASE默认为Thyleaf2.1版本,按照官方文档给的提示,将版本号改为3.0,方言改为2.1。不然可能会报一些异常。
By default, spring-boot-starter-thymeleaf uses Thymeleaf 2.1. If you
are using the spring-boot-starter-parent, you can use Thymeleaf 3 by
overriding the thymeleaf.version and thymeleaf-layout-dialect.version
properties, for example:

<properties>
    <thymeleaf.version>3.0.2.RELEASE</thymeleaf.version>
    <thymeleaf-layout-dialect.version>2.1.1</thymeleaf-layout-dialect.version>
</properties>
然后在application.yml中添加配置信息,当然在application.properties中也是一样的。最主要的就是开发的时候记得关闭缓存。
    thymeleaf:
        suffix: .html
        mode: HTML5
        encoding: UTF-8
        content-type: text/html
        #开发时关闭缓存,页面的更新
        cache: false
2、新建模板文件
在这里使用了变量${hello},会根据运行时后台传的参数替换这里的内容。
<!DOCTYPE html>
<html xmlns="http://www.w3.org/1999/xhtml" xmlns:th="http://www.thymeleaf.org"
xmlns:sec="http://www.thymeleaf.org/thymeleaf-extras-springsecurity3">
<head>
<title>Hello World!</title>
</head>
<body>
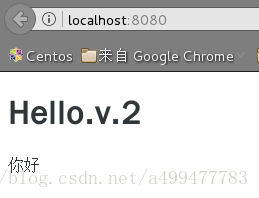
<h1 th:inline="text">Hello.v.2</h1>
<p th:text="${hello}"></p>
</body>
</html> 3、新建Controller
新建Controller,注意这里一定要用@Controller而不是@RestController 并且不能使用 @ResponseBody 注解
@Controller

publicclass TemplateController {

    @RequestMapping("/hello")
    public String Welcome(Model model){
        model.addAttribute("hello", "你好");
        return "hello";
    }
}