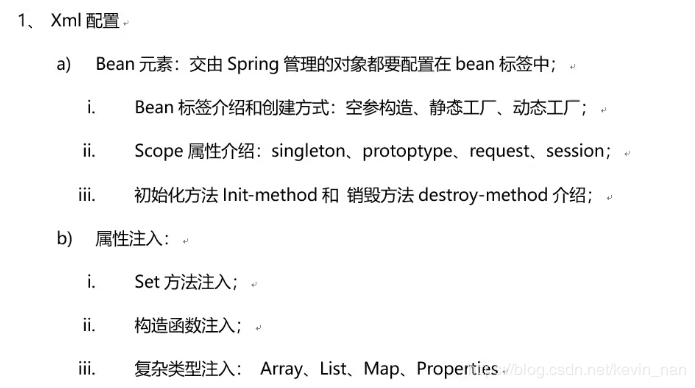
XML配置
name是起一个名字,我们可以通过这个name来利用容器获取对象
name可以使用特殊字符 名字也可以重复(但不推荐将多个对象名字命名为重复的) !!!
id与name作用相同 但不能重复 不支持特殊字符
<beans xmlns:xsi="http://www.w3.org/2001/XMLSchema-instance" xmlns="http://www.springframework.org/schema/beans" xsi:schemaLocation="http://www.springframework.org/schema/beans http://www.springframework.org/schema/beans/spring-beans.xsd ">
<bean name="user" class="com.hello.bean.User">
</bean>
</beans>
class是被管理对象的全包名,spring会通过这个包名来创建对象
空参构造
xml
value 什么都没有
<beans xmlns:xsi="http://www.w3.org/2001/XMLSchema-instance" xmlns="http://www.springframework.org/schema/beans" xsi:schemaLocation="http://www.springframework.org/schema/beans http://www.springframework.org/schema/beans/spring-beans.xsd ">
<bean name="user" class="com.hello.bean.User">
</bean>
</beans>
user
ps: public User() 改为带参构造会报错而不保留无参的话 会报错 要无参 要无参
package com.hello.bean;

public class User {
	public User() {
		System.out.println("空参构造方法调用");
	}
//	public User(int id, String name, String password) {
//
//	}
}
test
ApplicationContext 配置的所有bean都会在容器创建的时候被创建出来
如果配置bean较多,那么在创建容器的时候,会产生内存过大的问题;这种情况在机器硬件性能较为落后的时候体现比较明显
package com.hello.test;

import org.junit.jupiter.api.Test;
import org.springframework.context.ApplicationContext;
import org.springframework.context.support.ClassPathXmlApplicationContext;

import com.hello.bean.User;

public class hellotest {
	@Test
	public void Test1() {
		ApplicationContext application = new ClassPathXmlApplicationContext("applicationContext.xml");
		User u= (User)application.getBean("user");//xml中 对应调用类的name//要进行一次强制转换
	}
}
延迟加载
default默认值为false 还有value 为true(延迟加载)创建容器时不加载配置的bean对象,在获取的时候才创建
<beans xmlns:xsi="http://www.w3.org/2001/XMLSchema-instance" xmlns="http://www.springframework.org/schema/beans" xsi:schemaLocation="http://www.springframework.org/schema/beans http://www.springframework.org/schema/beans/spring-beans.xsd ">
<bean name="user" class="com.hello.bean.User" lazy-init="false">
<property name="id" value="11"/>
<property name="name" value="root"/>
<property name="password" value="88888888"/>

</bean>
</beans>
if value == true 采用 需要自己构造 如 User u = ac.getBean(User.class);他会自己调用容器里面的对象 也就是对象已经被初始化了
scope 配置
public class hellotest {
	@Test
	public void Test1() {
		ApplicationContext ac = new ClassPathXmlApplicationContext("applicationContext.xml");

		User u = ac.getBean(User.class);
		User u1 = ac.getBean(User.class);
		User u2 = ac.getBean(User.class);
	}
}
value = "singleton" 单例创建 也是默认值 只允许创建一个对象 下面创建的对象都是同一个地址 都是相同的

value="prototype"多例创建新的对象 创建三个都是同值 但是都是三个独立的对象 存在不同的内存里面

value = "request" 在web环境中,如果scope属性为request 那么这个对象被创建出来,他的生命周期会与request请求一致
value = "session"生命周期与session一致
初始化、销毁

<bean name="user" class="com.hello.bean.User" lazy-init="false" scope="prototype" init-method="useInit" />
然后在 对应的加载类中加入 init-method="useInit" useInit方法;
销毁:destroy-method="destory" 关闭容器对象后自己调用销毁
注意:如果用多例创建后 是交给自己保管,也是要自己销毁
Set注入
xml (在class 类里面加一个toString()) 几个注入值就要配几个set方法
<beans xmlns:xsi="http://www.w3.org/2001/XMLSchema-instance" xmlns="http://www.springframework.org/schema/beans" xsi:schemaLocation="http://www.springframework.org/schema/beans http://www.springframework.org/schema/beans/spring-beans.xsd ">
<bean name="user" class="com.hello.bean.User" lazy-init="false" scope="prototype">
<property name="id" value="11"/>
<property name="name" value="root"/>
<property name="password" value="88888888"/>

</bean>
</beans>
注入引用类型
在user类型中注入引用类型 如 user增加一个宠物
则在user里面加入下面代码段
	private pet pet;
	public pet getPet() {
		return pet;
	}
	public void setPet(pet pet) {
		this.pet = pet;
	}
然后在xml中增加 ref类型
<beans xmlns:xsi="http://www.w3.org/2001/XMLSchema-instance" xmlns="http://www.springframework.org/schema/beans" xsi:schemaLocation="http://www.springframework.org/schema/beans http://www.springframework.org/schema/beans/spring-beans.xsd ">
<bean name="user" class="com.hello.bean.User" lazy-init="false" scope="prototype">
<property name="id" value="11"/>
<property name="name" value="root"/>
<property name="password" value="88888888"/>
<property name="pet" ref="dog"></property>
</bean>
<bean name="dog" class="com.hello.bean.pet">
<property name="color" value="黑色"/>
<property name="petType" value="二哈"></property>
</bean>

</beans>
构造方法的注入
constructor-arg和property的区别:https://blog.csdn.net/u012887385/article/details/54617534
生成一个全变量的构造函数constructor-arg 给这种注入使用
非构造函数 则采用property
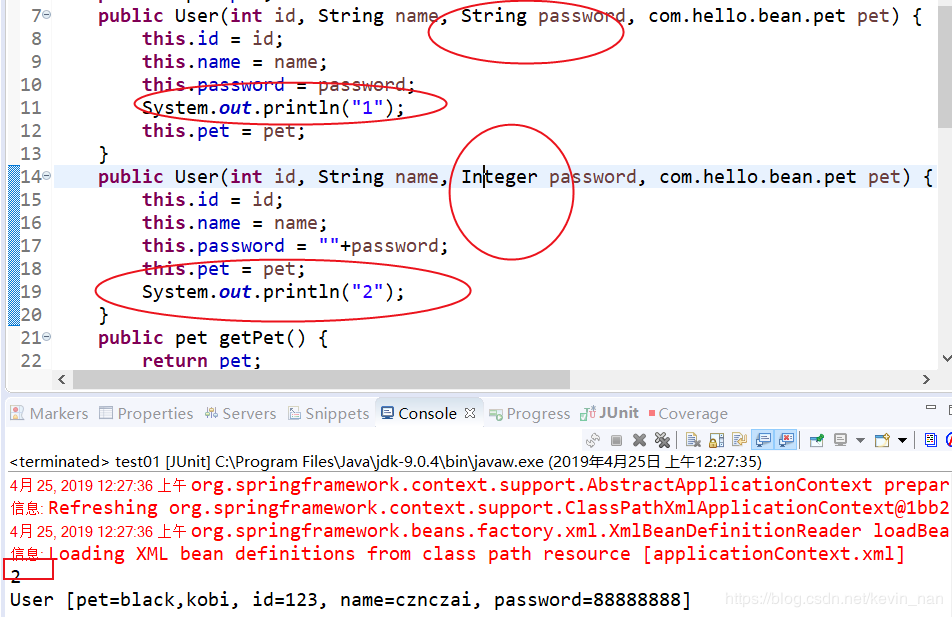
通过type进行设置
又如果构造方法不一样可以采用X来说明是那个位置
复杂类型注入
向容器内注入
package ssm;

import java.util.*;
public class ssm_spring {
	private Object[] array;
	private Set set;
	private Map map;
	private List list;
	private Properties prop;
	public Object[] getArray() {
		return array;
	}
	public void setArray(Object[] array) {
		this.array = array;
	}
	public Set getSet() {
		return set;
	}
	public void setSet(Set set) {
		this.set = set;
	}
	public Map getMap() {
		return map;
	}
	public void setMap(Map map) {
		this.map = map;
	}
	public List getList() {
		return list;
	}
	public void setList(List list) {
		this.list = list;
	}
	public Properties getProp() {
		return prop;
	}
	public void setProp(Properties prop) {
		this.prop = prop;
	}
	@Override
	public String toString() {
		return "ssm_spring [array=" + Arrays.toString(array) + ", set=" + set + ", map=" + map + ", list=" + list
				+ ", prop=" + prop + "]";
	}
}
配置
<beans xmlns:xsi="http://www.w3.org/2001/XMLSchema-instance" xmlns="http://www.springframework.org/schema/beans" xsi:schemaLocation="http://www.springframework.org/schema/beans http://www.springframework.org/schema/beans/spring-beans.xsd ">
<bean id="dog" class="com.hello.bean.pet">
<property name="color" value="black"/>
<property name="petType" value="kobi"/>
</bean>
<bean id="collection" class="ssm.ssm_spring">
<property name="array">
<array>
  <value>123</value>
   <value>789</value>
  <ref bean="dog"/>
  </array>
  </property>
</bean>
</beans>
另外map方法的配置
<property name="map">
 <map>
 <entry key="password" value="88888888"></entry>
 <entry key="username" value="123456" />
 </map>
 </property>
properties的配置 《导入之后就可以遍历出来》
 <property name="prop">
 <props>
 <prop key="password">88888888</prop>
 </props>
 </property>
注解配置
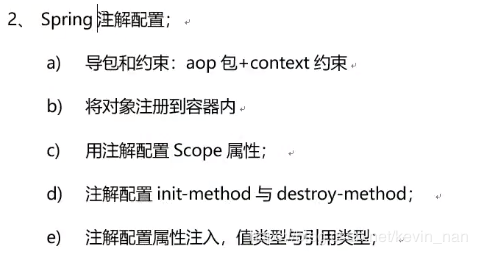
开启逐渐注解开发 也就是说不用在xml文件上编写 直接在java文件的对应的方法名那里编写 @XXXXXXX
首先要导入context.xsd文件
才能使用context标签
<beans xmlns:xsi="http://www.w3.org/2001/XMLSchema-instance"
	xmlns="http://www.springframework.org/schema/beans"
	xmlns:context="http://www.springframework.org/schema/context"
	xsi:schemaLocation="http://www.springframework.org/schema/beans http://www.springframework.org/schema/beans/spring-beans.xsd
		http://www.springframework.org/schema/context http://www.springframework.org/schema/context/spring-context-4.3.xsd">
<!-- 会扫描该包下以及所有子包的所有注解 将对应包当成组件-->
<context:component-scan base-package="com.hello.bean"/>
</beans>
import org.springframework.stereotype.Component;

//<bean name="user" class="com.hello.bean.User">等同于下面的语句
@Component("user")//named user
public class User {
........
}
另外还有几个跟类似功能的层
@Component("user")//named user
@Controller() //对应web层
@Service() //对应service层
@Repository//对应dao层
单例多例的配置
@component("user")
@Scope(scopeName="prototype")//多例单例scope用法 //默认单例  prototype为多例
public class User{
......
}
初始化配置~
@PostConstruct()//在构造方法后调用 初始化
	public void init() {
		System.out.println("初始化");
	}
销毁配置
@PreDestroy()
	public void destroy() {
		System.out.println("销毁");
	}
(过程发现的笔记 本人看, pet 没有注入值 导致NULLPOINTEXCPETION)个人觉得是9.0新版本的问题
public class User {
	@Value(value="1")//破坏了封装性 这里注入还要set方法干嘛
	private int id;
@Value(value="1")
	public void setId(int id) {
		this.id = id;
	}
}
public class user{
private pet pet ;
public pet getPet() {
		return pet;
	}
	@Autowired//自动装箱操作 将pet.java的value配置导入到该项目内
	public void setPet(pet pet) {
		this.pet = pet;
	}
}

pet.java
@Conponent("cat")
public class pet{
private String petType;
private String color;
public String getPetType() {
	return petType;
}
@Value("咖啡猫")
public void setPetType(String petType) {
	this.petType = petType;
}
public String getColor() {
	return color;
}
@Value("咖啡色")
public void setColor(String color) {
	this.color = color;
}

}
如果xml 一个对象有两种属性 注解会报错 混淆了
//context里面包含cat的配置
<context:component-scan base-package="com.hello.bean"/>
<bean name="dog" class="com.hello.bean.pet">
<property name="petType" value="二哈"></property>
<property name="color" value="yellow"></property>
手动指定
@Resource(name="dog")
	public void setPet(pet pet) {
		this.pet = pet;
	}

JUnit4/5的问题看:https://blog.csdn.net/linmengmeng_1314/article/details/80044496
包冲突java.lang.NoSuchMethodError: org.springframework.util.ClassUtils.isPresent(Ljava/lang/String;Ljava/l
https://blog.csdn.net/robert_lizhiqiang/article/details/39997621
no tests found with test runner “Junit5” 包出错的问题 哪个包弄错了 或冲突了
被这些包气死 老是弄错包
居然导包出错真的是 spring 有点东西
JUnit测试提示Java.lang.Exception: No runnable methods
https://blog.csdn.net/sinat_34104446/article/details/82781936(JUnit导包错误 ~~~)
测试单元JUnit
就省了applicationContext的配置
切记ref 哪个xml 不要删了还不知道 导致报错 ~~~
<beans xmlns:xsi="http://www.w3.org/2001/XMLSchema-instance"
	xmlns="http://www.springframework.org/schema/beans"
	xsi:schemaLocation="http://www.springframework.org/schema/beans http://www.springframework.org/schema/beans/spring-beans.xsd ">

	<bean name="user" class="com.hello.bean.User"
		scope="prototype">
		<property name="id" value="11" />
		<property name="name" value="root" />
		<property name="password" value="88888888" />
		<property name="pet" ref="dog"></property>
	</bean>
	<bean name="dog" class="com.hello.bean.pet">
		<property name="color" value="黑色" />
		<property name="petType" value="二哈"></property>
	</bean>
</beans>
import javax.annotation.Resource;
import org.junit.Test;
import org.junit.runner.RunWith;
import org.springframework.test.context.ContextConfiguration;
import org.springframework.test.context.junit4.SpringJUnit4ClassRunner;
import com.hello.bean.pet;
@RunWith(SpringJUnit4ClassRunner.class)
@ContextConfiguration("classpath:applicationContext3.xml")
public class JUnit {
	@Resource(name="dog")
	private pet pet;
	@Test
	public void Test1() {
		System.out.println(pet.toString());
	}
}
导入其他xml文件的方法
<import resource="/applicationContext.xml"/>