1.添加mvn依赖
修改pom.xml加入
<dependency>
    <groupId>io.springfox</groupId>
    <artifactId>springfox-swagger2</artifactId>
    <version>2.5.0</version>
</dependency>
<dependency>
    <groupId>io.springfox</groupId>
    <artifactId>springfox-swagger-ui</artifactId>
    <version>2.5.0</version>
</dependency>
2.创建配置类
在Application.java同级创建Swagger2的配置类Swagger2
package com.tydt.decision;

import org.springframework.context.annotation.Bean;
import org.springframework.context.annotation.Configuration;
import springfox.documentation.builders.ApiInfoBuilder;
import springfox.documentation.builders.PathSelectors;
import springfox.documentation.builders.RequestHandlerSelectors;
import springfox.documentation.service.ApiInfo;
import springfox.documentation.service.Contact;
import springfox.documentation.spi.DocumentationType;
import springfox.documentation.spring.web.plugins.Docket;
import springfox.documentation.swagger2.annotations.EnableSwagger2;

@Configuration
@EnableSwagger2
public class Swagger2{
    @Bean
    public Docket createRestApi() {
        return new Docket(DocumentationType.SWAGGER_2).apiInfo(apiInfo())
                .select()
                .apis(RequestHandlerSelectors.basePackage("com.tydt.decision.controller"))
                .paths(PathSelectors.any()).build();
    }

    private ApiInfo apiInfo() {
        return new ApiInfoBuilder().title("Decision Manage Swagger RESTful APIs")
                .description("Decision API")
                .termsOfServiceUrl("http://swagger.io/")
                .contact(new Contact("Beibei", "127.0.0.1", "XXXXXXX@qq.com"))
                .version("1.0")
                .build();

    }

}
注:
- 如果出现下面情况
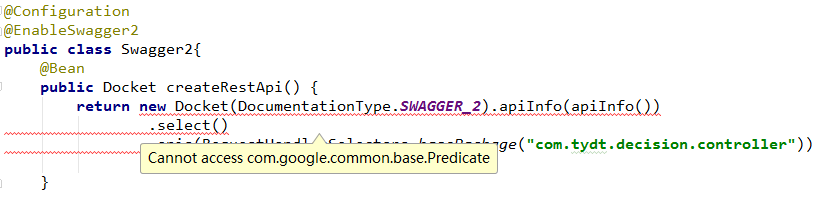
引入需要的包
但是启动时又出现Error creating bean with name 'apiDocumentationScanner' defined in URL
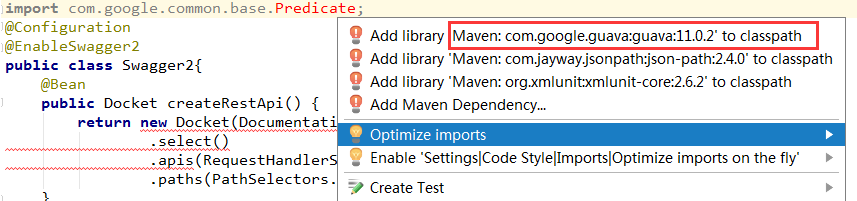
这是由于swagger依赖google的guava,需要添加依赖,而当前项目的guava版本与之不匹配,修改为
<dependency>
    <groupId>com.google.guava</groupId>
    <artifactId>guava</artifactId>
    <version>15.0</version>
</dependency>
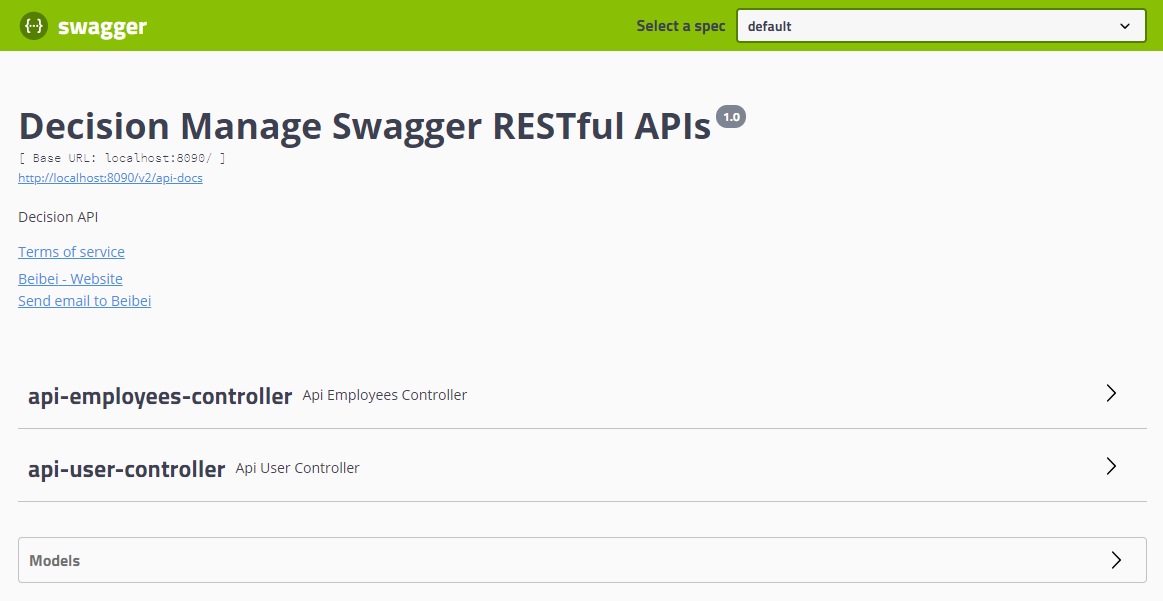
- http://localhost:8090/swagger-ui.html页面没显示
这是因为Spring Boot自动配置本身不会自动把/swagger-ui.html这个路径映射到对应的目录META-INF/resources/下面。加上这个映射即可
@Configuration
public class WebMvcConfig implements WebMvcConfigurer {

    ……
    public void addResourceHandlers(ResourceHandlerRegistry registry) {
        registry.addResourceHandler("swagger-ui.html")
                .addResourceLocations("classpath:/META-INF/resources/");
        registry.addResourceHandler("/webjars/**")
                .addResourceLocations("classpath:/META-INF/resources/webjars/");

    }
}
解决了上面出现的问题,访问http://localhost:8090/swagger-ui.html就能看到下面的页面了
说明:
(1)通过@Configuration注解,让Spring来加载该类配置
(2)再通过@EnableSwagger2注解来启用Swagger2
(3)通过createRestApi函数创建Docket的Bean之后,apiInfo()用来创建该Api的基本信息
(4)select()函数返回一个ApiSelectorBuilder实例用来控制哪些接口暴露给Swagger来展现
(5)指定扫描的包路径来定义,会扫描该包下所有Controller定义的API,并产生文档内容,除了用@ApiIgnore指定的
(6)通过@ApiOperation注解来给API增加说明
(7)通过@ApiImplicitParams
(8)@ApiImplicitParam注解来给参数增加说明