配置中心服务
以下为我的学习笔记
参考B站学习视频https://www.bilibili.com/video/av93813318?p=74
一、为什么要有分布式配置中心
将单体应用服务拆分成一个个子服务,每个服务的粒度相对较小,因此系统中将会出现大量的服务。而每个服务都有必要的配置信息,也就是说每个微服务都要带有一个application.yml,这样配置起来是十分麻烦的。所以一套集中式的、动态的配置管理设施是必不可少的。
spring cloud提供了ConfigServer 可以集中管理配置文件 来解决这个问题。
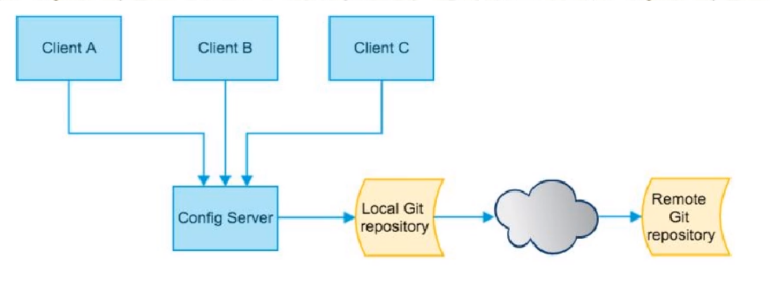
每个微服务都有配置中心进行配置,当git仓库的配置文件进行更改时,我们可以同步到本地仓,再更新配置中心,便可达到更新整个系统的配置。
分布式配置中心,也是一个独立的微服务应用。
二、编码操作
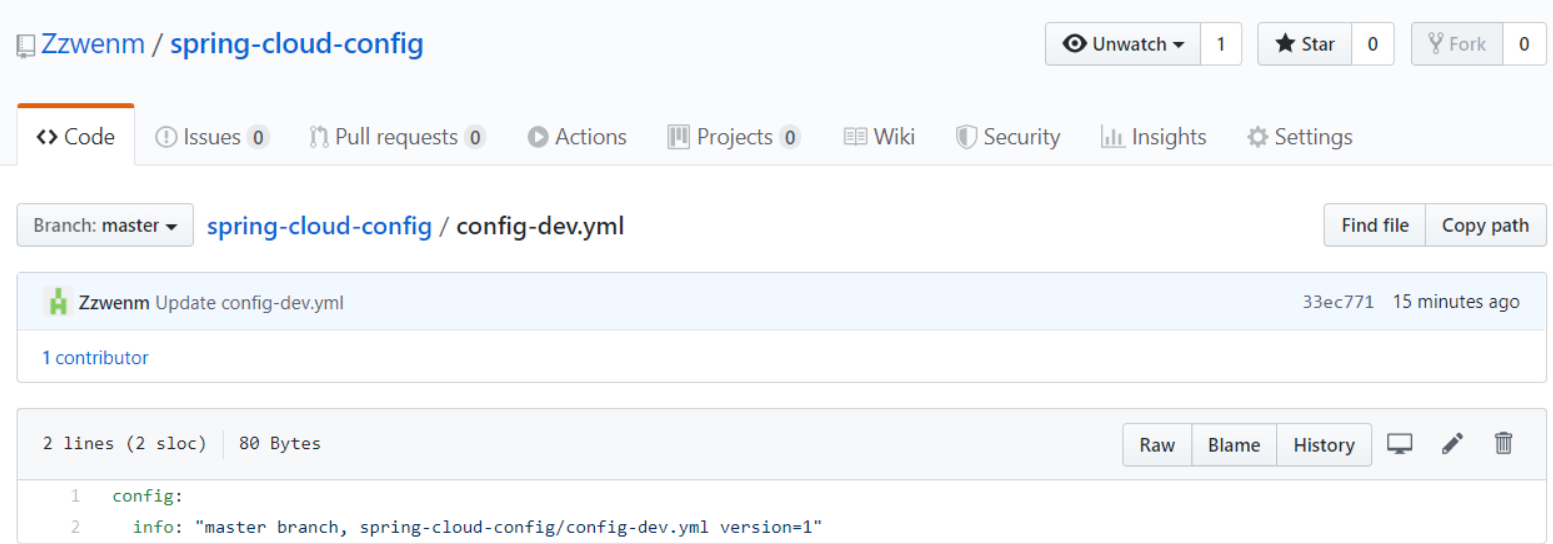
2.1 模拟运维人员修改Github仓库的配置文件
用自己的账号在Github上创建一个新的仓库,并上传配置文件到git仓。
注意确保idea配置好git。
可以参考https://www.cnblogs.com/hkgov/p/7694101.html


2.2 依赖
<dependency>
    <groupId>org.springframework.cloud</groupId>
    <artifactId>spring-cloud-config-server</artifactId>
</dependency>
<dependency>
    <groupId>org.springframework.cloud</groupId>
    <artifactId>spring-cloud-starter-netflix-eureka-client</artifactId>
    <version>2.2.2.RELEASE</version>
</dependency>
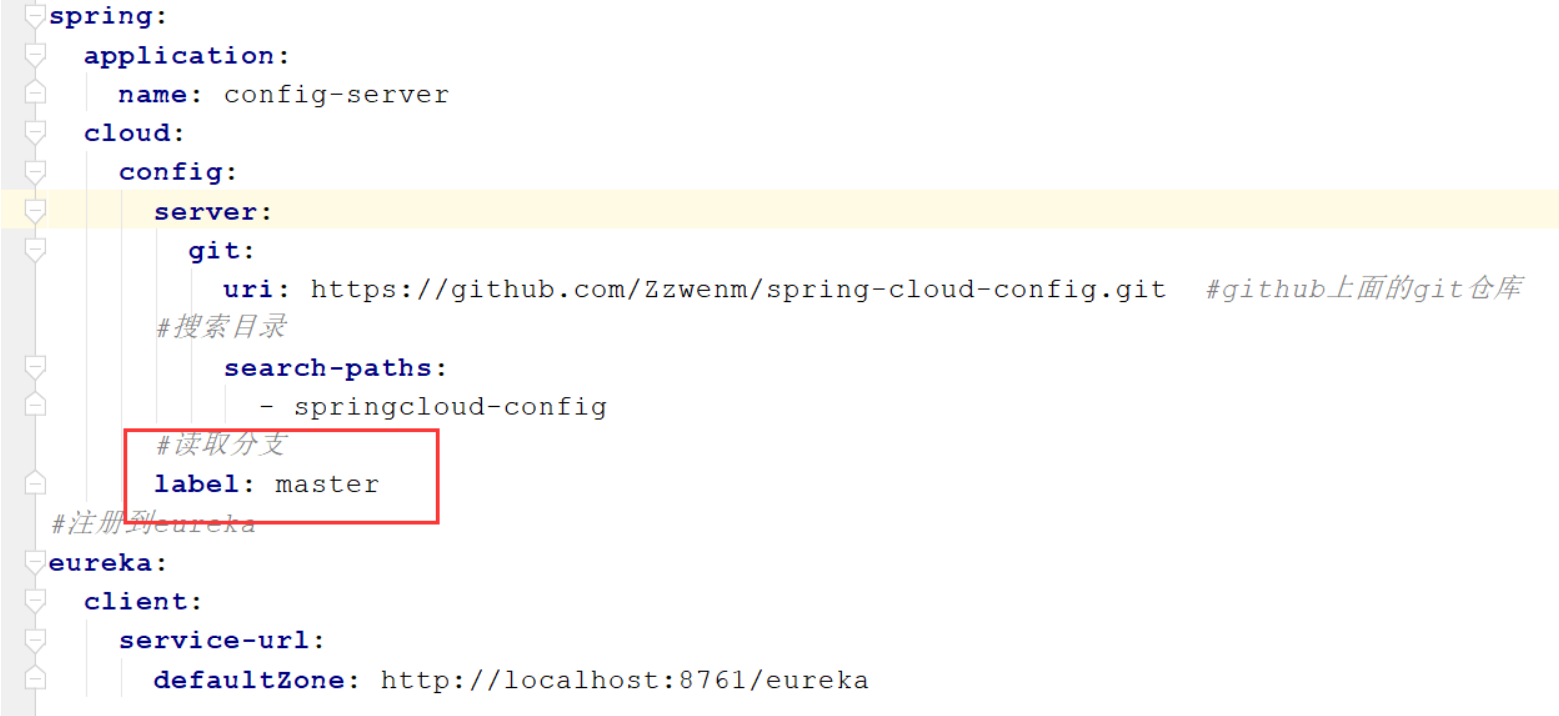
2.3 配置文件
server:
  port: 3344
spring:
  application:
    name: config-server
  cloud:
    config:
      server:
        git:
          uri: https://github.com/Zzwenm/spring-cloud-config.git  #github上面的git仓库
      #搜索目录
          search-paths:
            - springcloud-config
      #读取分支
      label: master
#注册到eureka
eureka:
  client:
    service-url:
      defaultZone: http://localhost:8761/eureka
2.4 主启动类
@EnableConfigServer
@SpringBootApplication
public class ConfigServerApplication {
    public static void main(String[] args) {
        SpringApplication.run(ConfigServerApplication.class, args);
    }
}
三、测试
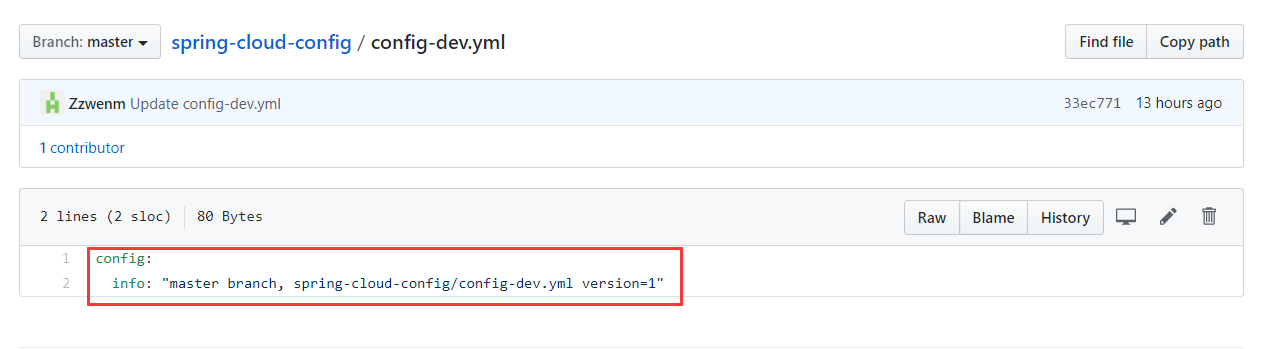
通过config-server拉取git仓库 master分支下的config-dev.yml 文件
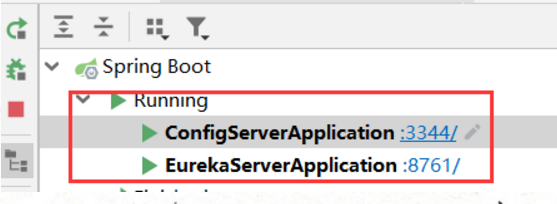
3.1 启动eureka-server 、config-server
3.2 访问
输入网址:localhost:3344/master/config-dev.yml

访问成功,证明可以通过spring cloud config 微服务从github上获取配置内容。
此时从Config Server 右侧的路已经打通。

四、配置读取规则
- 第一种
/{label}/{application}-{profile}.yml
{label} : git分支
{application} - {profile} : config-dev

 例如 读取master分支下的config-test配置文件
      /master/config-test.yml
  例如 读取dev分支下的config-dev配置文件
      /dev/config-dev.yml
- 第二种
/{application}-{profile}.yml
这种情况下会读取当前配置下已经配置好的label拼接成第一种进行读取。
- 第三种
同上的逆向操作
读取方式为json串
/{application}/{profile}[/{label}]

例如:
master下的config-dev.yml文件
/config/dev/master

五、 客户端操作

5.1导入依赖
<dependency>
    <groupId>org.springframework.cloud</groupId>
    <artifactId>spring-cloud-starter-config</artifactId>
    <version>2.2.2.RELEASE</version>
</dependency>
<dependency>
    <groupId>org.springframework.cloud</groupId>
    <artifactId>spring-cloud-starter-netflix-eureka-client</artifactId>
    <version>2.2.2.RELEASE</version>
</dependency>
5.2 配置文件使用bootstrap.yml
为什么用bootstrap.yml
application.yml是用户级的资源配置项。
bootstrap.yml是系统级的,优先级更高。
bootstrap.yml:
server:
  port: 3355
spring:
  application:
    name: config-client
  cloud:
    #config客户端配置
    config:
      label: master #分支
      name: config  #配置文件名称
      profile: dev  #配置文件后缀名称
      uri: http://localhost:3344 #配置中心地址
      #以上 为 从http://localhost:3344 master分支读取config-dev.yml配置文件
#注册到eureka
eureka:
  client:
    service-url:
      defaultZone: http://localhost:8761/eureka
5.3 主启动类
@EnableEurekaClient
@SpringBootApplication
public class EurekaConsumerApplication {

    public static void main(String[] args) {
        SpringApplication.run(EurekaConsumerApplication.class, args);
    }

}
5.4 controller
因为config-server是以REST接口的形式暴露配置信息下,所以我们可以用rest风格读取配置信息。
通过读取配置文件中的config.info来判断配置文件是否已经读取成功。因为在git仓下的config-dev.yml文件中有config.info
ConfigClientController:
@RestController
public class ConfigClientController {
    @Value("${config.info}")
    private String configInfo;

    @GetMapping("/configInfo")
    public String getConfigInfo(){
        return configInfo;
    }
}
5.5 启动测试:

5.6 访问 localhost:3355/configInfo
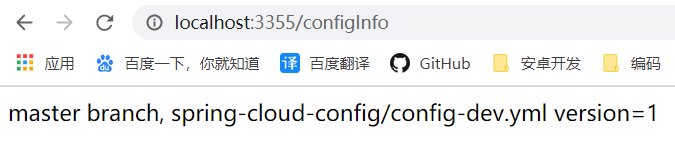
访问成功,说明实现了客户端访问configserver通过Github获取到了配置信息
六、分布式配置的动态刷新问题
客户端的动态刷新
当运维修改Github上的配置文件,对配置文件进行修改时。
刷新config-server会发现config-server配置中心立刻响应。
刷新config-client,发现客户端没有任何响应,除非自己重启或者重新加载。
6.1 引入actuator监控
<dependency>
    <groupId>org.springframework.boot</groupId>
    <artifactId>spring-boot-starter-actuator</artifactId>
    <version>2.2.5.RELEASE</version>
</dependency>
6.2 修改yml,暴露监控端口
#暴露监控端口
management:
  endpoints:
    web:
      exposure:
        include: "*"
6.3 Controller修改:
头部添加@RefreshScope
使其具备刷新功能
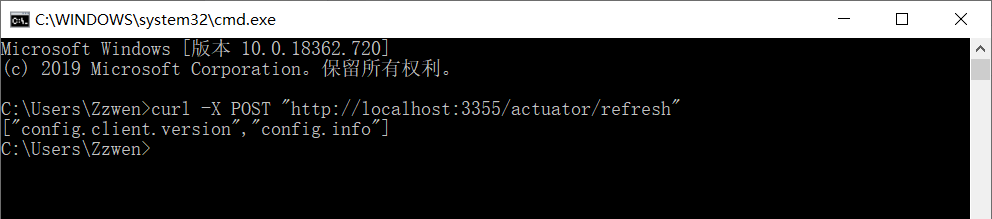
6.4 运维人员发送Post请求刷新3355(客户端)
cmd命令行操作
curl -X POST "http://localhost:3355/actuator/refresh"