一、
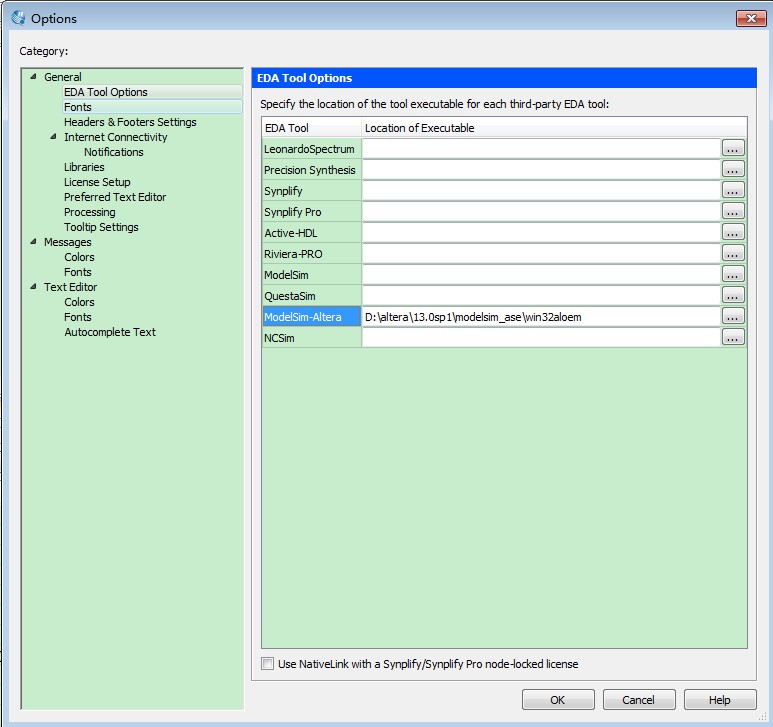
1. Go to the menu Tools > Options.
2. In the “General” category, select “EDA Tool Options”.
3. A dialogue box appears, where you can specify the location of the Modelsim-
Altera executable.
4. Specify the path to the directory with the executable of Modelsim-Altera.
5. Click “OK”.
二、新建一个quartus源文件、testbench文件
1、工程文件


 1 module XGA
 2 (
 3     input clk,
 4     input rst_n
 5 );
 6 reg    [15:0]    count    ;
 7 always @(posedge clk)
 8 begin
 9     if(!rst_n)
10     begin
11         count <=    0    ;
12     end
13     else
14     begin
15         count    <=    count    +    1    ;
16     end
17 end
18 endmodule
2、仿真测试文件
保存名为test_bench并将代码
 1 module test_bench
 2 (
 3     output reg clk,
 4     output reg rst_n
 5 );
 6 initial
 7 begin
 8     clk=0;
 9     rst_n=0;
10     #100
11     rst_n=1;
12 end
13
14 always
15 begin
16     #10 clk=~clk;
17 end
18
19 XGA i1
20 (
21     .clk(clk),
22     .rst_n(rst_n)
23 );
24
25 endmodule
拷入其中

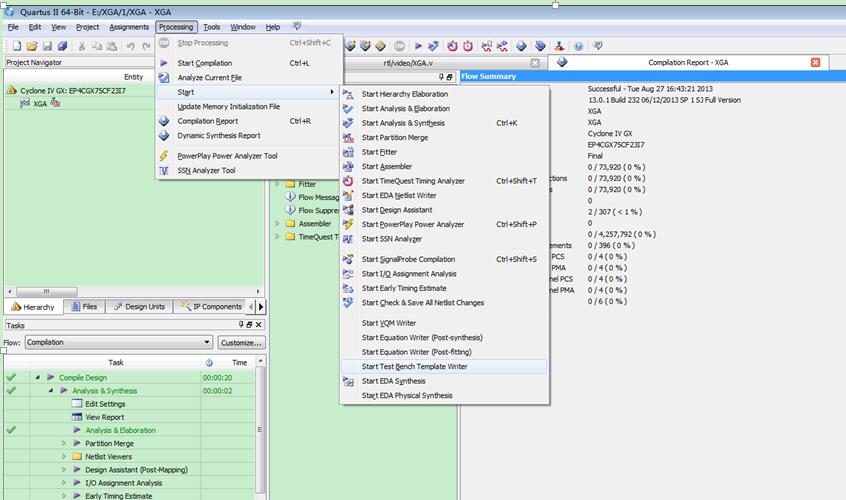
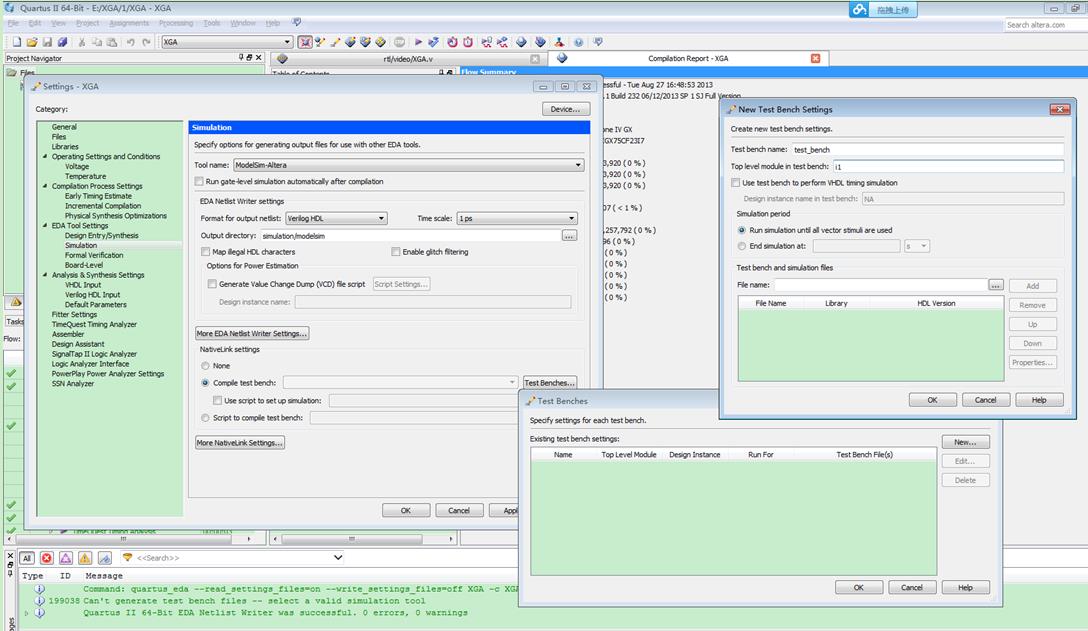
三、NativeLink Settings to configure Modelsim-Altera:
1. Go to the menu Assignments > Settings.
2. Under “EDA Tool Settings” choose “Simulation”.
simulation appears.
3. For Tool Name, choose “Modelsim-Altera”.
4. Select "verilog" as the "Format for Output Netlist"
5. Select "simulation/modelsim" as the "Output Directory".
6. Under NativeLink Settings, Choose "Compile test bench". Then click on "Test
Benches".
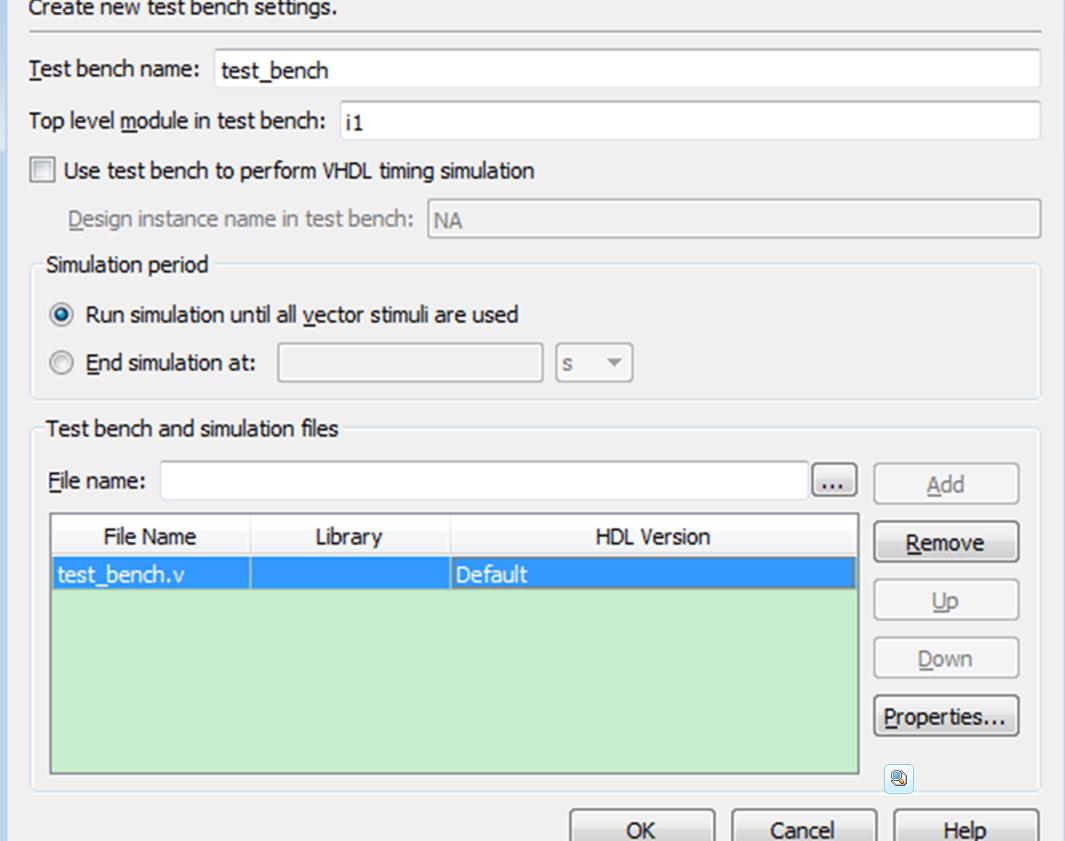
7. A new window appears, select "New".
选择文件
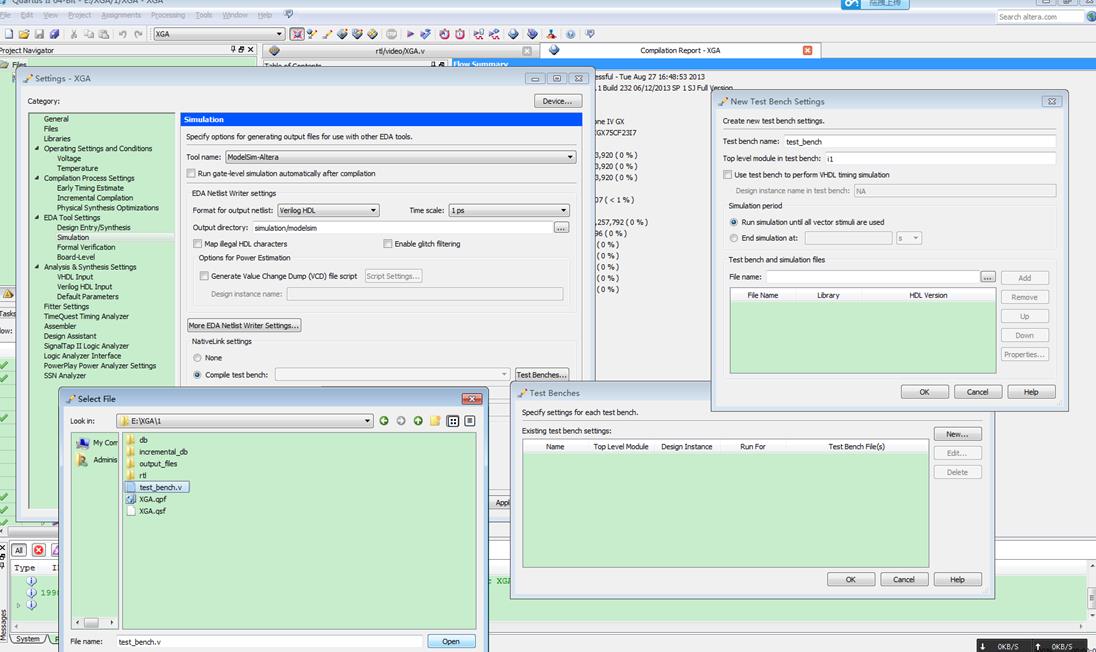
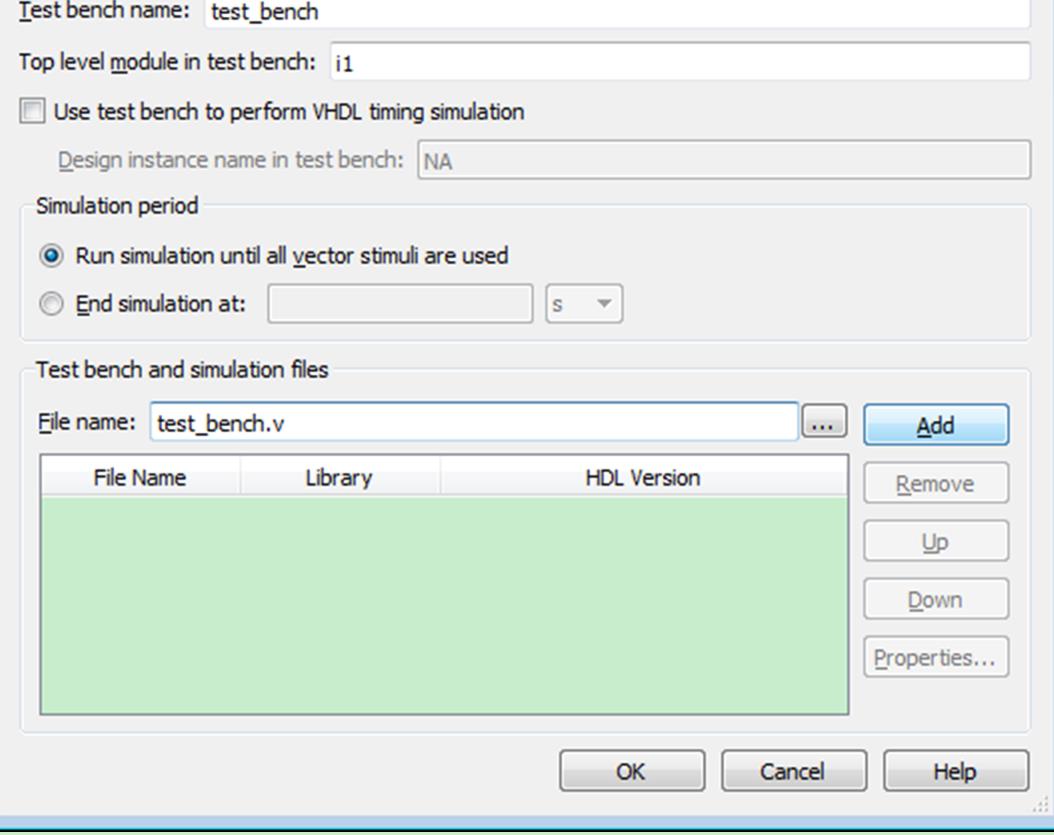
添加成功
四、链接modelsim-altera
Using the menu “Tools”, click “Run EDA Simulation Tool”, and then click
EDA Gate-level Simulation to automatically run the EDA simulator, compile
all necessary design files, and complete a simulation.
运行仿真。Tools>Run EDA Simulation Tool
其中,RTL Simulation是寄存器传输级仿真,它是理想化的仿真,不包含任何延时信息,通常用作功能检验,也称作前仿真或功能仿真;
Gate-Level Simulation是门级仿真,通常也称为后仿真或时序仿真,它包含逻辑电路、布局布线等延时信息,是对真实电路情况的仿真。要仿真门级仿真,需要在Fitter之后进行。
