整合准备
导入jar包:
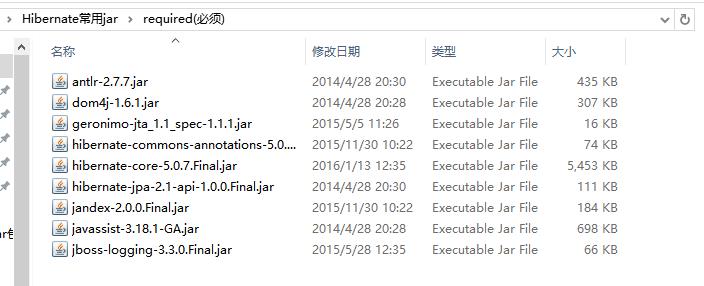
hibernate相关jar包

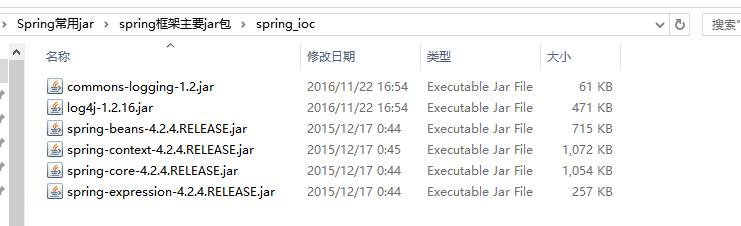
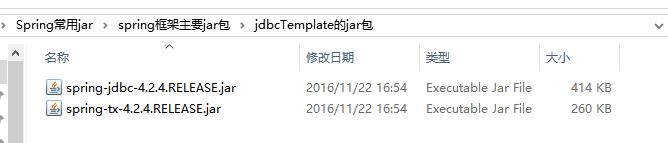
spring相关jar:
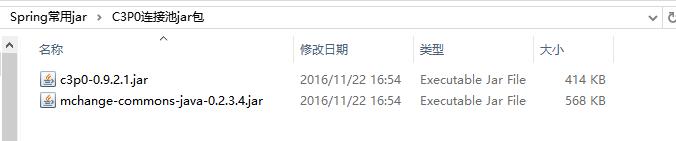

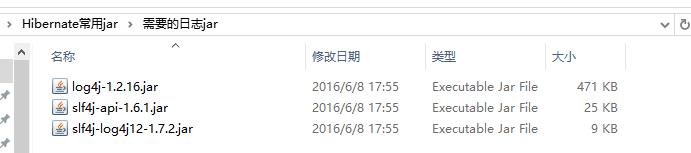
整合hibernate时需要的jar:

整合过程:
最终项目完成的功能:在服务器启动之后(spring监听技术实现) 自动把实体类对应的表 创建完成
web.xml文件中配置监听器(需要导入整合web项目的jar包):完成在服务器启动的时候自动加载spring核心配置文件
 1 <?xml version="1.0" encoding="UTF-8"?>
 2 <web-app version="2.5"
 3     xmlns="http://java.sun.com/xml/ns/javaee"
 4     xmlns:xsi="http://www.w3.org/2001/XMLSchema-instance"
 5     xsi:schemaLocation="http://java.sun.com/xml/ns/javaee
 6     http://java.sun.com/xml/ns/javaee/web-app_2_5.xsd">
 7   <welcome-file-list>
 8     <welcome-file>index.jsp</welcome-file>
 9   </welcome-file-list>
10
11   <listener>
12       <listener-class>org.springframework.web.context.ContextLoaderListener</listener-class>
13   </listener>
14   <context-param>
15       <param-name>contextConfigLocation</param-name>
16       <param-value>classpath:bean.xml</param-value>
17   </context-param>
18 </web-app>
创建实体类user和实体类关系映射文件user.hbm.xml
 1 package org.model;
 2
 3 public class User {
 4     private int id;
 5     private String name;
 6     private String address;
 7     public int getId() {
 8         return id;
 9     }
10     public void setId(int id) {
11         this.id = id;
12     }
13     public String getName() {
14         return name;
15     }
16     public void setName(String name) {
17         this.name = name;
18     }
19     public String getAddress() {
20         return address;
21     }
22     public void setAddress(String address) {
23         this.address = address;
24     }
25
26 }
 1 <?xml version="1.0" encoding="UTF-8"?>
 2 <!DOCTYPE hibernate-mapping PUBLIC
 3     "-//Hibernate/Hibernate Mapping DTD 3.0//EN"
 4     "http://www.hibernate.org/dtd/hibernate-mapping-3.0.dtd">
 5 <hibernate-mapping>
 6     <!-- name属性:实体类的全路径  table是将要创建的表名称 -->
 7     <class name="org.model.User" table="t_user">
 8         <id name="id" column="id">
 9             <!-- 自动生成主键 -->
10             <generator class="native"></generator>
11         </id>
12         <!-- 下面分别对实体类中的属性进行数据库映射  column属性可以省略不写  则 创建的表中的对应的字段名字就是 name属性的值 -->
13         <property name="name" column="name"></property>
14         <!-- 省略不写column属性  观察创建出的表的字段名称 -->
15         <property name="address"></property>
16     </class>
17 </hibernate-mapping>
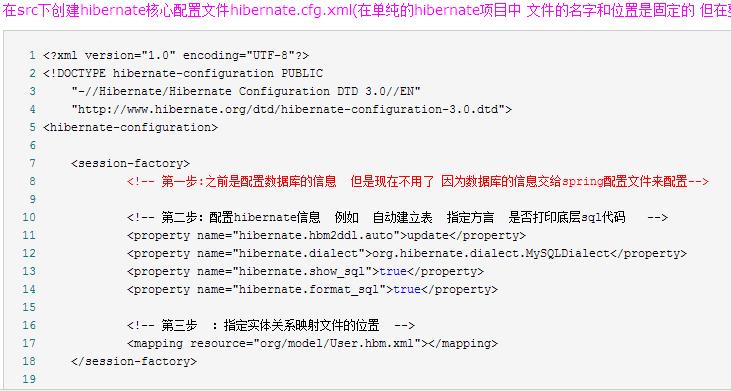
在src下创建hibernate核心配置文件hibernate.cfg.xml(在单纯的hibernate项目中 文件的名字和位置是固定的 但在整合的时候 该文件的位置和名称可以随意写 ):
 1 <?xml version="1.0" encoding="UTF-8"?>
 2 <!DOCTYPE hibernate-configuration PUBLIC
 3     "-//Hibernate/Hibernate Configuration DTD 3.0//EN"
 4     "http://www.hibernate.org/dtd/hibernate-configuration-3.0.dtd">
 5 <hibernate-configuration>
 6
 7     <session-factory>
 8             <!-- 第一步:之前是配置数据库的信息  但是现在不用了 因为数据库的信息交给spring配置文件来配置-->
 9
10             <!-- 第二步:配置hibernate信息  例如  自动建立表  指定方言  是否打印底层sql代码   -->
11             <property name="hibernate.hbm2ddl.auto">update</property>
12             <property name="hibernate.dialect">org.hibernate.dialect.MySQLDialect</property>
13             <property name="hibernate.show_sql">true</property>
14             <property name="hibernate.format_sql">true</property>
15
16             <!-- 第三步  :指定实体关系映射文件的位置  -->
17             <mapping resource="org/model/User.hbm.xml"></mapping>
18     </session-factory>
19
20 </hibernate-configuration>
在src下创建spring核心配置文件bean.xml:
 1 <?xml version="1.0" encoding="UTF-8"?>
 2 <beans xmlns="http://www.springframework.org/schema/beans"
 3     xmlns:xsi="http://www.w3.org/2001/XMLSchema-instance" xmlns:context="http://www.springframework.org/schema/context"
 4     xmlns:aop="http://www.springframework.org/schema/aop" xmlns:tx="http://www.springframework.org/schema/tx"
 5     xsi:schemaLocation="http://www.springframework.org/schema/beans
 6     http://www.springframework.org/schema/beans/spring-beans.xsd
 7     http://www.springframework.org/schema/context
 8     http://www.springframework.org/schema/context/spring-context.xsd
 9     http://www.springframework.org/schema/aop
10     http://www.springframework.org/schema/aop/spring-aop.xsd
11     http://www.springframework.org/schema/tx
12     http://www.springframework.org/schema/tx/spring-tx.xsd">
13     <!-- 配置c3p0链接池 -->
14     <bean id="c3p0" class="com.mchange.v2.c3p0.ComboPooledDataSource">
15         <property name="driverClass" value="com.mysql.jdbc.Driver"></property>
16         <property name="jdbcUrl" value="jdbc:mysql://localhost:3306/spring_sh"></property>
17         <property name="user" value="root"></property>
18         <property name="password" value="jay571018"></property>
19     </bean>
20
21
22
23
24     <!--
25         这里需要加载hibernate核心配置文件 并且要创建sessionfactory对象 之前的代码: // Configuration
26         cfg = new Configuration(); cfg.configure(); //这两行表示加载配置文件
27         //执行的过程:到src下面找到名称是hibernate.cfg.xml 把该文件放入这个//对象中 然后调用方法 执行加载配置文件
28          SessionFactory sessionFactory = cfg.buildSessionFactory();//创建factory对象
29     -->
30     <!--但是这里应该怎么配置呢? 框架给我们封装了一个sessionfactory对象 只需要配置就可以完成创建了
31         加载hibernate核心配置文件 并且向其中注入c3p0 创建sessionifactory对象
32         这个是由框架封装的sessioinfatory对象
33     -->
34     <bean id="sessionfactory" class="org.springframework.orm.hibernate5.LocalSessionFactoryBean">
35         <!-- 注入数据源 -->
36         <property name="dataSource" ref="c3p0"></property>
37         <!-- 指定hibernate核心配置文件的位置 否则不知道加载哪个配置文件 -->
38         <property name="configLocations" value="classpath:hibernate.cfg.xml"></property>
39     </bean>
40 </beans>
然后启动服务器:
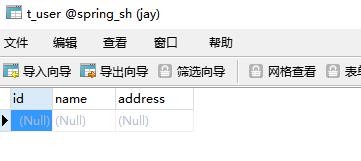
可以看到数据表自动创建了
另一种整合方式:没有hibernate.cfg.xml配置文件,即
中的信息,也在spring中进行配置
修改之前的配置截图:
hibernate核心配置文件:hibernate.cfg.xml

spring核心配置文件:applicationContext.xml

在spring封装的sessionfactory类中有以下2个属性:
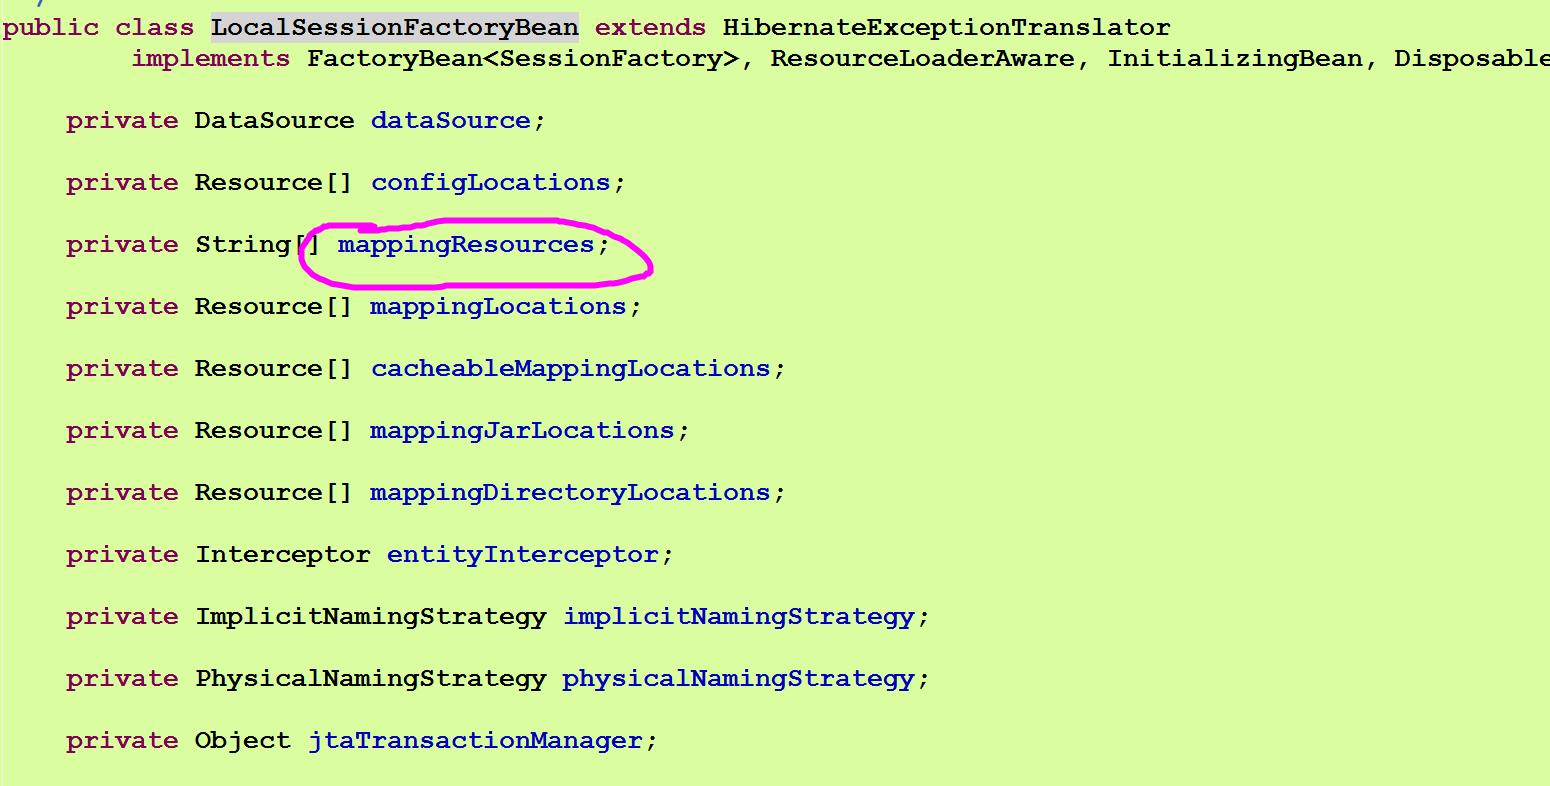

这两个属性就可以完成在spring核心配置文件中 配置hibernate基本信息以及指定对象关系映射文件的位置
所以,修改之后的截图:
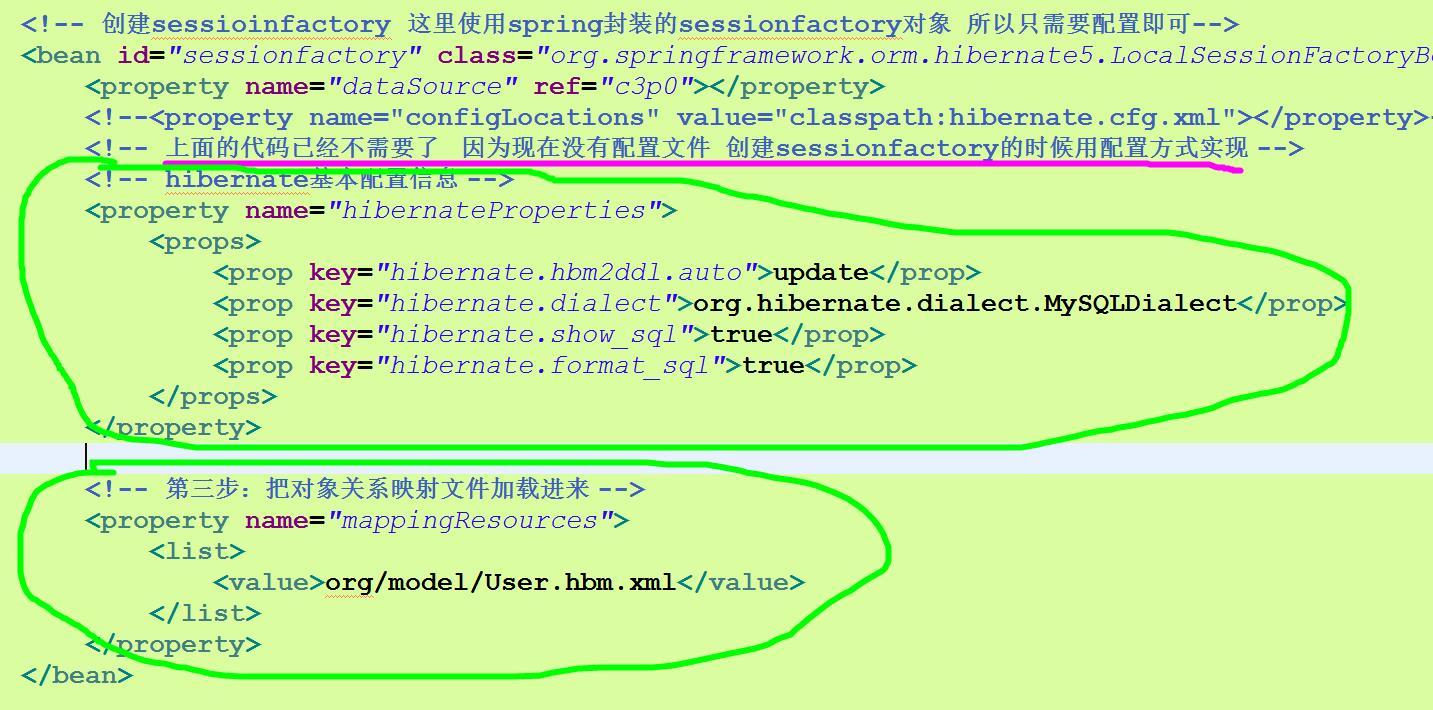
这样就删去了hibernate核心配置文件hibernate.cfg.xml