一、定义
注解:是一种标记式的配置方式,与XML配置文件不同,注解提供了更大的便捷性,易于维护修改,但是耦合度高。
本质:是一个继承了 Annotation 接口的接口,注解本身并没有什么作用,通过特殊方法解析才使得它起到它的作用。
二、注解实现IOC入门案例
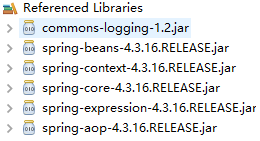
导入包:
代码实现:


 1 <?xml version="1.0" encoding="UTF-8"?>
 2 <beans xmlns="http://www.springframework.org/schema/beans"
 3     xmlns:xsi="http://www.w3.org/2001/XMLSchema-instance"
 4     xmlns:context="http://www.springframework.org/schema/context"
 5     xsi:schemaLocation="http://www.springframework.org/schema/beans
 6         http://www.springframework.org/schema/beans/spring-beans-4.2.xsd
 7         http://www.springframework.org/schema/context
 8         http://www.springframework.org/schema/context/spring-context-4.3.xsd">
 9
10     <context:component-scan base-package="cn.zwj"></context:component-scan>
11 </beans>
public interface TestService {
    void save();
}
 1 import org.springframework.stereotype.Service;
 2 import cn.zwj.service.TestService;
 3
 4 @Service
 5 public class TestServiceImpl implements TestService {
 6     @Override
 7     public void save() {
 8         System.out.println("保存用户--TestServiceImpl1");
 9     }
10
11 }
 1 import org.springframework.stereotype.Service;
 2 import cn.zwj.service.TestService;
 3
 4 @Service
 5 public class TestServiceImpl2 implements TestService {
 6     @Override
 7     public void save() {
 8         System.out.println("保存用户--TestServiceImpl2");
 9     }
10 }
 1 import org.springframework.beans.factory.annotation.Autowired;
 2 import org.springframework.stereotype.Component;
 3 import cn.zwj.service.TestService;
 4
 5 @Component
 6 public class TestClient {
 7     //1.声明一个父接口的引用
 8     private TestService testService;
 9
10     //2.使用set方法注入对象,我们将通过方法注入对象的方式称之为依赖注入
11     @Autowired
12     public void setTestService(TestService testService) {
13         this.testService = testService;
14     }
15
16     public void tryTest() {
17         testService.save();
18     }
19 }
 1 import org.springframework.context.support.ClassPathXmlApplicationContext;
 2
 3 import cn.zwj.client.TestClient;
 4
 5 public class Test {
 6     public static void main(String[] args) {
 7         ClassPathXmlApplicationContext context = new ClassPathXmlApplicationContext(
 8                 "classpath:test.xml");
 9         TestClient bean = context.getBean("testClient", TestClient.class);
10         bean.tryTest();
11         context.close();
12     }
13 }
从上面可以看出,注解减少了XML配置文件的编写,在各个类或类方法前添加了标记,使得代码看起来更加精简