近一周看了关于shiro的知识.这篇文章仅供完全没有了解过安全框架的人查阅.因为我也是第一次接触安全框架.本文通过三种类型的项目(javase,springmvc,springboot)来介绍shiro,关于细节的配置在这里不会过多描述,甚至不全面.这类的东西网上很多.首先我们考虑下,在一个生态环境良好的系统中,避免不了出现这样的场景,为了分别不同的用户,我们有账号密码,当然我们不能让用户每次发出请求都传入账号密码,所以我们会有登录,登录后通过session或者其他token的技术,在服务端保存用户的登录状态.我们假设这个系统是一个商城平台,平台订单的统计只能是管理员才可以查看.而查看商品则是普通用户或者管理员都可以查看,这就会产生角色.如果系统足够健壮,我们往往还需要更细粒度的控制,例如对订单管理员进行拆分,A类型的管理员可以对订单进行查看,B类型的管理员可以对订单进行修改和删除,这就产生的权限
用户 一对多 角色 一对多 权限
接下来,我们来分析下对于一个安全框架他必须要有的功能然后我们对应shiro中的组件
登录:Authentication 通过账户和密码
授权:Authorization 这个授权包括了 角色和权限
会话:Session Manager 用户登录后,我们要保持当前用户到内存中,不然我们是不是每次都要登录
缓存:Caching 当我们已经获取过用户的身份,角色,权限后.下次在需要不必再次查询
....以上为主要内容
然后我们在了解关于以上功能产生或者需要的类
安全管理器:SecurityManager shiro的核心,你要登陆验证等等都需要这个
用户/主体:Subject 当用户登录后,产生一个Subject到内存也就是Session Manager中,他代表当前用户,其中包含账户密码,角色,权限
数据源:Realm 我们从哪里拿到用户的信息.shiro给了我们几个默认的实现,其中包括从文件读取,从数据库读取,但是这些都需要我们按照他的规则,当然我们可以自定义realm
....以上内容我们只要关注的重点在于Realm 因为我们大多数会自定义Realm
javase使用shiro
 //登录用户,拿到角色判断角色的权限
    @Test
    public void testIsPermitted() {
        //1、获取SecurityManager工厂,此处使用Ini配置文件初始化SecurityManager
        Factory<SecurityManager> factory =
                new IniSecurityManagerFactory("classpath:shiro-permission.ini");
        //2、得到SecurityManager实例 并绑定给SecurityUtils
        SecurityManager securityManager = factory.getInstance();
        SecurityUtils.setSecurityManager(securityManager);
        //3、得到Subject及创建用户名/密码身份验证Token(即用户身份/凭证)
        Subject subject = SecurityUtils.getSubject();

        UsernamePasswordToken token = null;
     //判断是否登录
        if (!subject.isAuthenticated()) {
            token = new UsernamePasswordToken("zhang", "123");

        }


        subject.login(token);
        /*is不抛出异常*/
        //判断拥有权限:user:create
        Assert.assertTrue(subject.isPermitted("user:create"));
        //判断拥有权限:user:update and user:delete
        Assert.assertTrue(subject.isPermittedAll("user:update", "user:delete"));
        //判断没有权限:user:view
        Assert.assertFalse(subject.isPermitted("user:view"));

        /*check抛出异常*/
        //断言拥有权限:user:create
        subject.checkPermission("user:create");
        //断言拥有权限:user:delete and user:update
        subject.checkPermissions("user:delete", "user:update");
    }
[users]
zhang=123,common,admin
wang=123,common
[roles]
admin=user:create,user:delete,user:update,user:read
common=user:read
在配置文件中按照指定的规则配置用户名,密码,角色,然后在配置roles角色的权限.应该是比较好理解.但是实际的系统大多数需要从数据库取出数据
    @Test
    public void readIniRealmJdbc() throws Exception {
        //1、获取SecurityManager工厂,此处使用Ini配置文件初始化
        IniSecurityManagerFactory iniSecurityManagerFactory = new IniSecurityManagerFactory("classpath:shiro-jdbc-realm.ini");

        //2、得到SecurityManager实例 并绑定给SecurityUtils
        SecurityManager securityManager = iniSecurityManagerFactory.getInstance();

        //获取 SecurityManager 并绑定到 SecurityUtils,这是一个全局设置,设置一次即可;
        SecurityUtils.setSecurityManager(securityManager);

        //3、得到Subject及创建用户名/密码身份验证Token(即用户身份/凭证)
        Subject subject = SecurityUtils.getSubject();


        //账号密码验证器
        UsernamePasswordToken token = new UsernamePasswordToken("zhang", "123");
        try {
            //4、登录,即身份验证
            subject.login(token);
            //判断拥有角色:role1
            Assert.assertTrue(subject.hasRole("admin"));

            Assert.assertTrue(subject.isPermitted("user:update"));
            Assert.assertTrue(subject.isPermittedAll("user:update","user:create"));

        } catch (Exception e) {
            //5、身份验证失败
            System.out.println("登录认证失败:" + e.getMessage());
        }
        //6、退出
        subject.logout();
    }
jdbcRealm=org.apache.shiro.realm.jdbc.JdbcRealm

dataSource=com.alibaba.druid.pool.DruidDataSource

dataSource.driverClassName=com.mysql.cj.jdbc.Driver
dataSource.url=jdbc:mysql://localhost:3306/shiro?serverTimezone=GMT%2B8&characterEncoding=utf8&useUnicode=true&useSSL=false
dataSource.username=root
dataSource.password=root

jdbcRealm.dataSource=$dataSource
# 要加上,否则不会查询角色的权限
jdbcRealm.permissionsLookupEnabled=true
securityManager.realms=$jdbcRealm
这里我们使用jdbcRealm从数据库中查询用户角色和权限.在配置文件中我们可以看出,这里我们指定了数据源.其余的什么都没指定.这也就表达,这个jdbcRealm会自动查询数据库.并且使用固定的SQL语句

所以使用JDBCRealm必须按照shiro的表结构创建表和添加数据.
那么万一我们的数据表结构不是shiro指定的,这样我们就需要自定义Realm
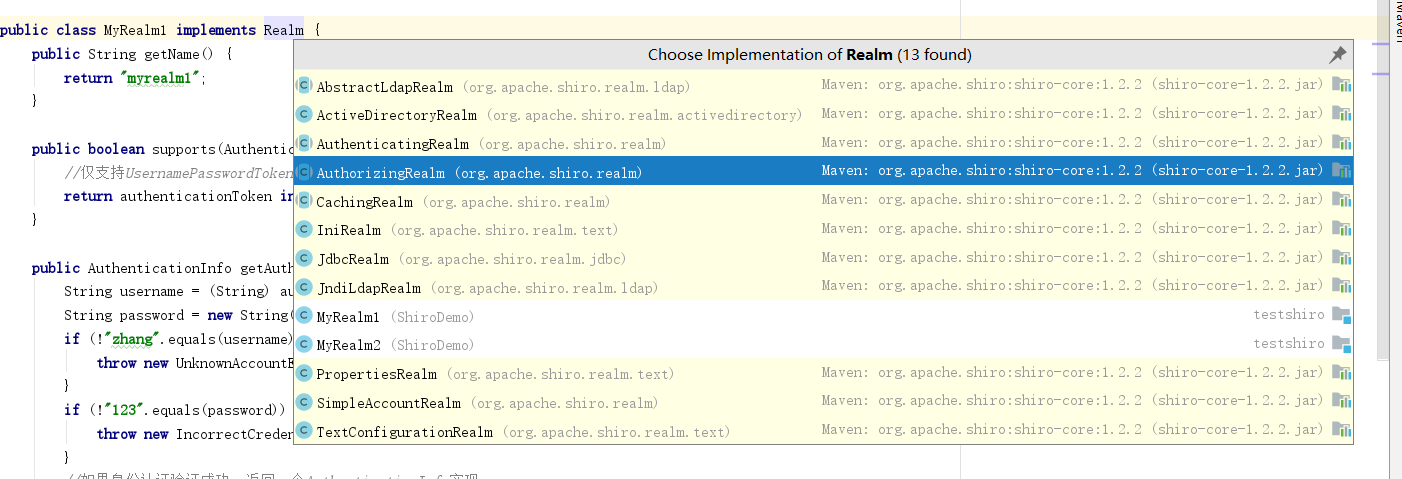
除了MyRealm1 和 MyRealm2其他都是shiro定义的Realm我们这里需要登录+授权所以选择AuthorizingRealm
import org.apache.shiro.authc.*;
import org.apache.shiro.authz.AuthorizationInfo;
import org.apache.shiro.authz.SimpleAuthorizationInfo;
import org.apache.shiro.realm.AuthorizingRealm;
import org.apache.shiro.subject.PrincipalCollection;

import java.util.ArrayList;
import java.util.HashSet;
import java.util.List;
import java.util.Set;

//这里有个小技巧,如果你选择自定义XXX首先你需要选择一个正确的父类,然后实现他的方法
//实现方法时,首先考虑这个方法要做什么,然后在看返回值,返回值要什么,你创建一个什么
//剩下的细节,创建的返回值需要设置什么这就要我们通过读源码,或者看框架实现的其他类是怎么做的
public class MyRealm3 extends AuthorizingRealm {

    protected AuthorizationInfo doGetAuthorizationInfo(PrincipalCollection principalCollection) {
        //创建返回值
        SimpleAuthorizationInfo simpleAuthorizationInfo = new SimpleAuthorizationInfo();
        //假装从数据库取出了用户角色
        List<String> roles = new ArrayList<String>();
        roles.add("admin");
        roles.add("common");
        //添加
        simpleAuthorizationInfo.addRoles(roles);
        //假装从数据库取出了权限
        Set<String> permissions = new HashSet<String>();
        permissions.add("user:update");
        permissions.add("user:create");
        //添加
        simpleAuthorizationInfo.setStringPermissions(permissions);
        return simpleAuthorizationInfo;
    }

    protected AuthenticationInfo doGetAuthenticationInfo(AuthenticationToken authenticationToken) throws AuthenticationException {

        //强制转换下
        UsernamePasswordToken usernamePasswordToken = (UsernamePasswordToken) authenticationToken;
        String username = usernamePasswordToken.getUsername();
        char[] password = usernamePasswordToken.getPassword();

        //此处假装我们从数据库查询账号密码
        //select username,password user_info where username = 'zhangsan'
        String dbUserName = "zhangsan";
        String dbPassword = "123";

        //这里是shiro对比密码的地方,给他指定的账号密码,然后在把当前的realm名字给他,他自己做对比
        SimpleAuthenticationInfo simpleAuthenticationInfo = new SimpleAuthenticationInfo(dbUserName,dbPassword,this.getName());

        return simpleAuthenticationInfo;
    }
}
  @Test
    public void customerRealm(){
        //1、获取SecurityManager工厂,此处使用Ini配置文件初始化
        IniSecurityManagerFactory iniSecurityManagerFactory = new IniSecurityManagerFactory("classpath:shiro-custom-realm.ini");

        //2、得到SecurityManager实例 并绑定给SecurityUtils
        SecurityManager securityManager = iniSecurityManagerFactory.getInstance();

        //获取 SecurityManager 并绑定到 SecurityUtils,这是一个全局设置,设置一次即可;
        SecurityUtils.setSecurityManager(securityManager);

        //3、得到Subject及创建用户名/密码身份验证Token(即用户身份/凭证)
        Subject subject = SecurityUtils.getSubject();


        //账号密码验证器
        UsernamePasswordToken token = new UsernamePasswordToken("zhangsan", "123");
        try {
            //4、登录,即身份验证
            subject.login(token);
//            //判断拥有角色:role1
            Assert.assertTrue(subject.hasRole("admin"));

            Assert.assertTrue(subject.isPermitted("user:update"));
            Assert.assertTrue(subject.isPermittedAll("user:update","user:create"));

        } catch (Exception e) {
            //5、身份验证失败
            System.out.println("登录认证失败:" + e.getMessage());
        }
        //6、退出
        subject.logout();
    }
#声明realm
myRealm3=ShiroDemo.MyRealm3

#指定securityManager的realms实现
securityManager.realms=$myRealm3
除了以上内容,我们还可以对realm进行加密和加盐.这种场景一般是,在用户注册账号后,用户的密码不是明文存在数据库的.这是当用户再次登录,那么我们需要对用户输入的账号密码进行加密加盐.此处我就不举例了.还有我们可以定义多个realm这种形式说白了,就像我们的拦截器一样.一个不够,搞多个.需要注意的,如果你有多个realm那么默认的校验规则是,只要有一个通过就会通过.这是因为securityManager.authenticator有一个authenticationStrategy.这个玩意有几种取值,默认是多个realm是或者的关系.你也可以设置authenticationStrategy为AllSuccessfulStrategy.这样就是全部需要通过.
这里推荐一篇文章写的是subject是如何保证唯一的 https://www.cnblogs.com/zhaosq/p/9921040.html
springmvc使用shiro
在web项目中,使用到shiro场景应该是最多的.我们来分析,当我们需要对系统的一个url做登录校验,角色校验或者细粒度的权限校验时.我们肯定是要做拦截器的.看一下配置
web.xml
<?xml version="1.0" encoding="UTF-8"?>
<web-app version="2.4" xmlns="http://java.sun.com/xml/ns/j2ee"
         xmlns:xsi="http://www.w3.org/2001/XMLSchema-instance"
         xsi:schemaLocation="http://java.sun.com/xml/ns/j2ee
  http://java.sun.com/xml/ns/j2ee/web-app_2_4.xsd">

    <display-name>Archetype Created Web Application</display-name>

    <!-- dispatcher servlet-->
    <servlet>
        <servlet-name>mvc-dispatcher</servlet-name>
        <servlet-class>org.springframework.web.servlet.DispatcherServlet</servlet-class>
        <load-on-startup>1</load-on-startup>
    </servlet>

    <servlet-mapping>
        <servlet-name>mvc-dispatcher</servlet-name>
        <url-pattern>/</url-pattern>
    </servlet-mapping>


    <filter>
        <filter-name>shiroFilter</filter-name>
        <filter-class>org.springframework.web.filter.DelegatingFilterProxy</filter-class>
    </filter>
    <filter-mapping>
        <filter-name>shiroFilter</filter-name>
        <url-pattern>/*</url-pattern>
    </filter-mapping>


    <context-param>
        <param-name>contextConfigLocation</param-name>
        <param-value>WEB-INF/spring-config.xml</param-value>
    </context-param>
    <!-- Spring监听器 管理bean-->
    <listener>
        <listener-class>org.springframework.web.context.ContextLoaderListener</listener-class>
    </listener>

</web-app>
springmvc配置
<?xml version="1.0" encoding="UTF-8"?>
<beans xmlns="http://www.springframework.org/schema/beans"
       xmlns:xsi="http://www.w3.org/2001/XMLSchema-instance"
       xmlns:mvc="http://www.springframework.org/schema/mvc"
       xmlns:context="http://www.springframework.org/schema/context"
       xsi:schemaLocation="http://www.springframework.org/schema/beans
    http://www.springframework.org/schema/beans/spring-beans.xsd
    http://www.springframework.org/schema/context
    http://www.springframework.org/schema/context/spring-context.xsd
    http://www.springframework.org/schema/mvc http://www.springframework.org/schema/mvc/spring-mvc.xsd ">

    <context:component-scan base-package="com.demo"/>

    <mvc:annotation-driven/>

    <bean class="org.springframework.web.servlet.view.InternalResourceViewResolver">
        <property name="viewClass" value="org.springframework.web.servlet.view.JstlView"/>
        <property name="prefix" value="/WEB-INF/views/"/>
        <property name="suffix" value=".jsp"/>
    </bean>
</beans>
spring管理bean
<?xml version="1.0" encoding="UTF-8"?>
<beans xmlns="http://www.springframework.org/schema/beans"
       xmlns:xsi="http://www.w3.org/2001/XMLSchema-instance"
       xsi:schemaLocation="http://www.springframework.org/schema/beans
                        http://www.springframework.org/schema/beans/spring-beans-3.1.xsd">

    <!-- 启用shrio授权注解拦截方式 -->
    <bean id="shiroFilter" class="org.apache.shiro.spring.web.ShiroFilterFactoryBean">
        <!-- 装配 securityManager -->
        <property name="securityManager" ref="securityManager"/>

        <!--未登录转发-->
         <property name="loginUrl" value="/hello"/>
        <!-- 具体配置需要拦截哪些 URL, 以及访问对应的 URL 时使用 Shiro 的什么 Filter 进行拦截.  -->
        <property name="filterChainDefinitions">
            <value>
                /pub=anon
                /get=authc
                /admin=roles[admin]
                /userdelete=perms[user:update]
            </value>
        </property>
    </bean>

    <!-- 配置进行授权和认证的 Realm -->
    <bean id="myRealm" class="com.demo.ShiroRealm"></bean>

    <!-- 配置 Shiro 的 SecurityManager Bean. -->
    <bean id="securityManager" class="org.apache.shiro.web.mgt.DefaultWebSecurityManager">
        <!--<property name="cacheManager" ref="cacheManager"/>-->
        <property name="realm" ref="myRealm"/>
    </bean>
</beans>
抛开springmvc的配置,但看web.xml和spring-config.xml 在web.xml配置了一个代理拦截器.而这个代理拦截器指向的是spring-config.xml中的shiroFilter这其实是spring使用的策略模式,对于spring来说,我们可以使用拦截器来进行权限校验,但是具体使用哪个拦截器需要我们指定.配置的shirofilter就用shiro配置springSecurity就用spring自己的权限工具.spring-config中的配置其实跟javase项目中差不多了,通过工厂类装配一个securityManager.在securityManager中配置Realm.自定义Realm我们稍后再看.先看shiroFilter中的filterChainDefinitions这里有很多属性,就是让我们确定,哪些具体的url需要拦截.具体需要的权限是什么.但是需要注意的是,所有对于角色和权限的过滤必须要先登录才可以.
Realm就比较简单,跟javase一样.
import org.apache.shiro.authc.*;
import org.apache.shiro.authz.AuthorizationInfo;
import org.apache.shiro.authz.SimpleAuthorizationInfo;
import org.apache.shiro.realm.AuthenticatingRealm;
import org.apache.shiro.realm.AuthorizingRealm;
import org.apache.shiro.realm.Realm;
import org.apache.shiro.subject.PrincipalCollection;

import java.util.ArrayList;
import java.util.HashSet;
import java.util.List;
import java.util.Set;

public class ShiroRealm extends AuthorizingRealm {
    @Override
    protected AuthenticationInfo doGetAuthenticationInfo(AuthenticationToken authenticationToken) throws AuthenticationException {

        UsernamePasswordToken usernamePasswordToken = (UsernamePasswordToken) authenticationToken;

        String username = usernamePasswordToken.getUsername();
        char[] password = usernamePasswordToken.getPassword();

        //此处取数据库查询账号密码
        String dbUserName = "zhangsan";
        String dbPassword = "123";

        SimpleAuthenticationInfo simpleAuthenticationInfo = new SimpleAuthenticationInfo(dbUserName,dbPassword,this.getName());
        return simpleAuthenticationInfo;
    }
    @Override
    protected AuthorizationInfo doGetAuthorizationInfo(PrincipalCollection principalCollection) {
        //创建返回值
        SimpleAuthorizationInfo simpleAuthorizationInfo = new SimpleAuthorizationInfo();
        //假装从数据库取出了用户角色
        List<String> roles = new ArrayList<String>();
        roles.add("admin");
        roles.add("user");
        //添加
        simpleAuthorizationInfo.addRoles(roles);
        //假装从数据库取出了权限
        Set<String> permissions = new HashSet<String>();
      //  permissions.add("user:update");
        permissions.add("user:create");
        //添加
        simpleAuthorizationInfo.setStringPermissions(permissions);
        return simpleAuthorizationInfo;
    }
}
import org.apache.shiro.SecurityUtils;
import org.apache.shiro.authc.UsernamePasswordToken;
import org.apache.shiro.authz.annotation.RequiresRoles;
import org.apache.shiro.mgt.SecurityManager;
import org.apache.shiro.subject.Subject;
import org.springframework.stereotype.Controller;
import org.springframework.web.bind.annotation.GetMapping;
import org.springframework.web.bind.annotation.ResponseBody;

@Controller
public class Hello {


    @ResponseBody
    @GetMapping("hello")
    public String hello() {
        return "hello please login";
    }

    @ResponseBody
    @GetMapping("success")
    public String sucess() {
        return "login-success";
    }

    @ResponseBody
    @GetMapping("err")
    public String err() {
        return "login-err";
    }

    @ResponseBody
    @GetMapping("pub")
    public String pub() {
        return "public-resource";
    }

    @ResponseBody
    @GetMapping("get")
    public String get() {
        return "login of get";
    }


    @GetMapping("admin")
    @ResponseBody
    public String adminread() {
        return "admin look!";
    }

    @GetMapping("userdelete")
    @ResponseBody
    public String userdelete() {
        return "delete perms look!";
    }

    @ResponseBody
    @GetMapping("login")
    public String login(String name, String password) {
        Subject subject = SecurityUtils.getSubject();
        if (subject.isAuthenticated()) {
            return "success";
        } else {
            UsernamePasswordToken usernamePasswordToken = new UsernamePasswordToken(name, password);
            try {
                subject.login(usernamePasswordToken);
                return "get";
            } catch (Exception e) {
                return "err";
            }
        }
    }

}
以上内容都是对shiro最低的配置.我们可以配置缓存,加密.也可以对subject进行配置.思考一个问题,在web情况下每个用户的线程都不一样.shiro不会依赖线程来确定subject.那么依赖什么呢?session中的jsession那么如果浏览器禁止cookie呢?再或者说,我们的系统提供的都是RESTful风格的API呢?
以下是截取源码中的一部分,有兴趣的可以自行查看源码

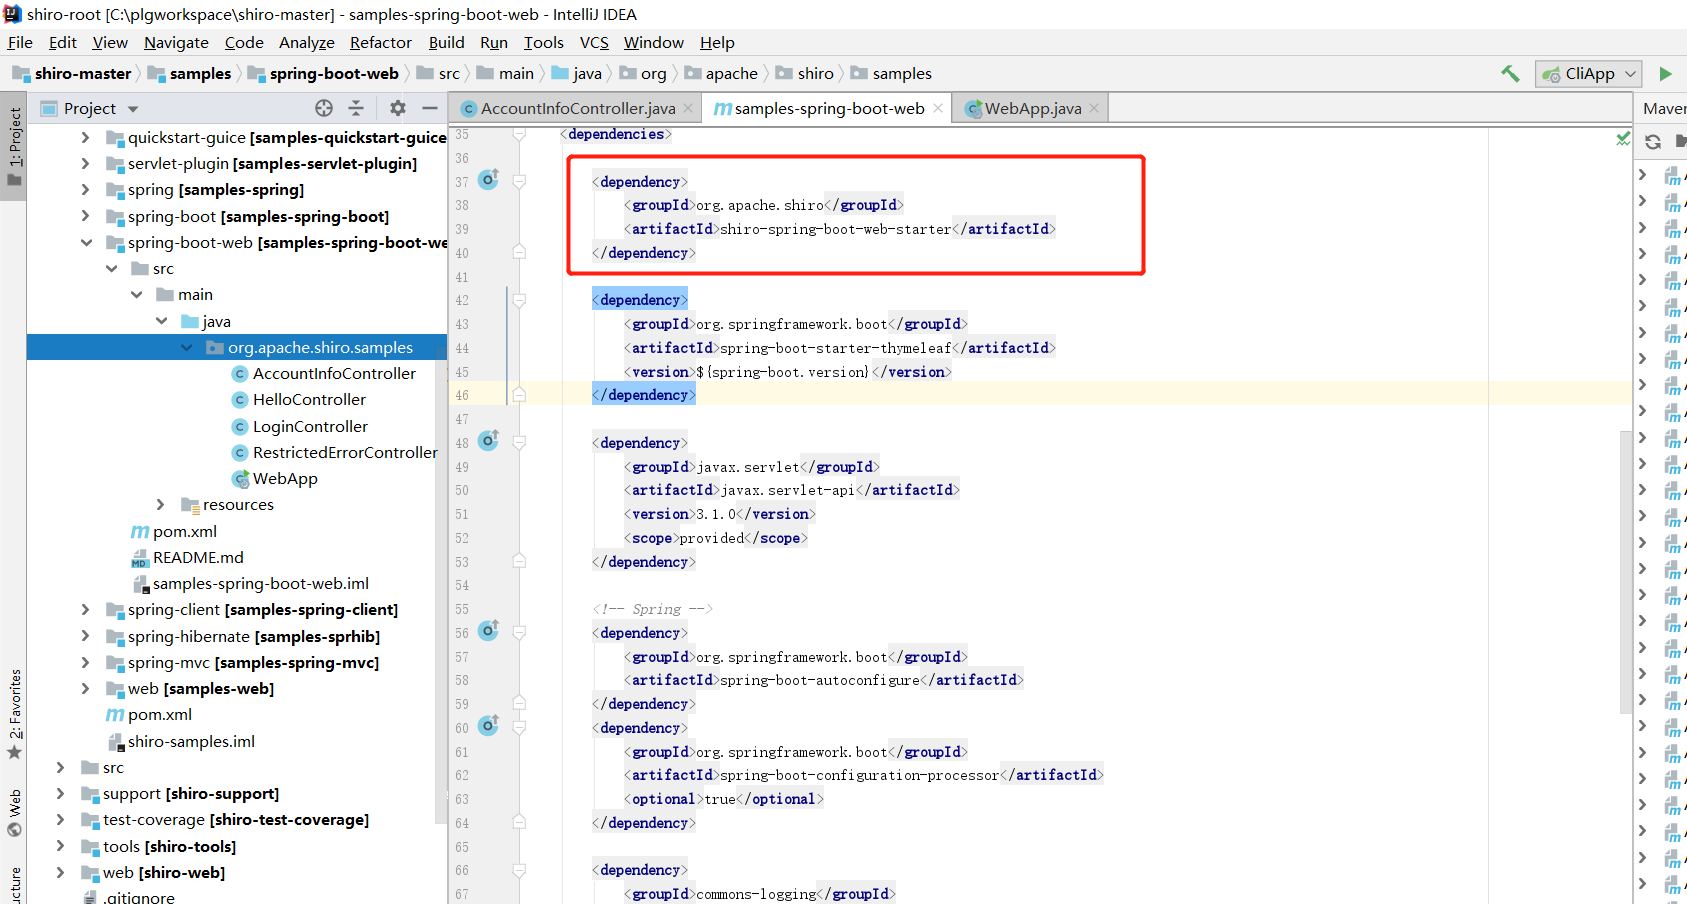
springboot使用shiro
springboot号称零配置文件,也是名不虚传的,一下内容是我在shrio官方文档下载的源码
导包
配置filter和realm

使用注解的方式实现权限控制

到此为止我们这次对shiro入门的了解就结束了.