图像卷积
矩阵的掩模操作,通常也叫做卷积操作,原理非常简单,这里不再赘述。
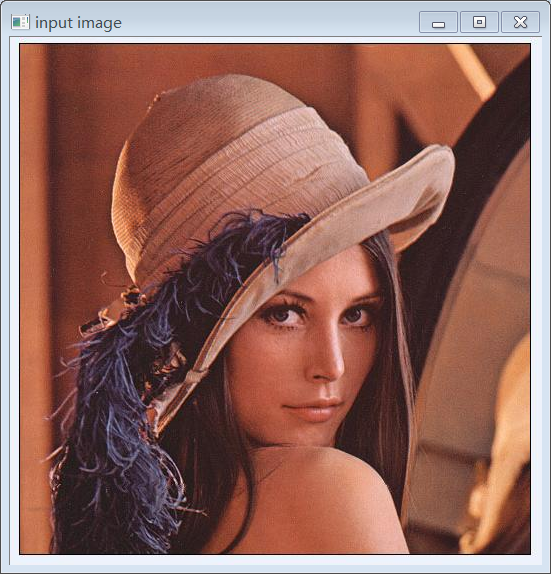
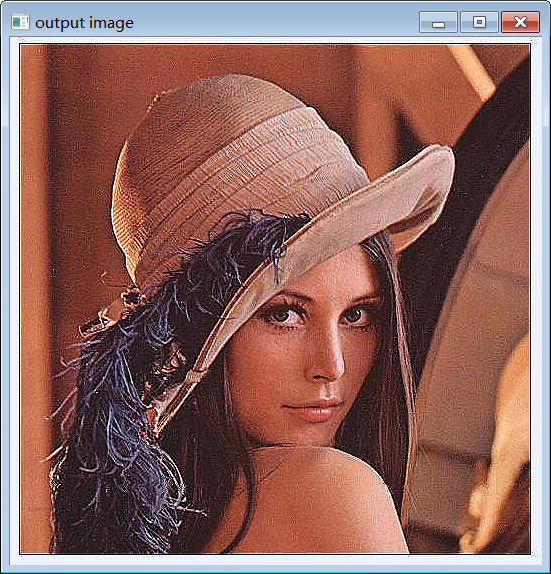
下面通过OpenCV进行图像卷积操作(最后效果是:增强图像)。
基于掩模矩阵操作:
首先介绍下,用到的函数filter2D().
函数功能:Convolves an image with the kernel.
函数原型: void filter2D( InputArray src, OutputArray dst, int ddepth,
InputArray kernel, Point anchor = Point(-1,-1),
double delta = 0, int borderType = BORDER_DEFAULT );
参数含义:
InputArray src: 输入图像
OutputArray dst:输出图像
int ddepth:目标图像深度
InputArray kernel:卷积核(或者说是相关核),一个单通道浮点数矩阵;如果您想将不同的内核应用于不同的通道,
可以使用split将图像分割成单独的颜色平面,并分别处理它们
Point anchor = Point(-1,-1):anchor anchor of the kernel that indicates the relative position of a filtered point within
the kernel; the anchor should lie within the kernel; default value (-1,-1) means that the anchor
is at the kernel center. 默认Point(-1,-1)即可,表示要进行卷积操作的点与核中心重合。
double delta=0 : 在图像像素存储之前,可以选择要添加到像素的值,默认为0.
int borderType = BORDER_DEFAULT : 边界像素处理方法,默认处理边界像素
代码演示:
 1 #include <opencv2/opencv.hpp>
 2 #include <iostream>
 3
 4 using namespace cv;
 5 using namespace std;
 6
 7 const char* input_title = "input image";
 8 const char* output_title = "output image";
 9
10 int main() {
11     Mat src, dst;
12
13     /*加载并显示图像*/
14     src = imread("D:/lena.png");
15     if (src.empty()) {  //图像如果没有加载,结束程序
16         cout << "could not found image...";
17         return -1;
18     }
19     namedWindow(input_title, CV_WINDOW_AUTOSIZE); //创建窗口
20     imshow(input_title, src); //显示原始图像
21
22     /*图像卷积操作*/
23     Mat kernel = (Mat_<char>(3, 3) <<
24                                     0, -1, 0,
25                                     -1, 5, -1,
26                                     0, -1, 0);  //图像增强模板
27     filter2D(src, dst, src.depth(), kernel);    //对图像进行卷积
28
29     /*显示图像卷积后的效果*/
30     namedWindow(output_title, CV_WINDOW_AUTOSIZE);
31     imshow(output_title, dst);
32
33     waitKey(0);
34     return 0;
35 }
效果图: