https://www.elastic.co/guide/index.html(推荐) ES官方英文原版文档,一般会更新到最新版本
https://www.elastic.co/cn/downloads/ ES下载地址
https://www.cnblogs.com/zhuwenjoyce/p/10632628.html 安装jdk1.8
下载 Elasticsearch6.7.0
cd /home/soft
wget https://artifacts.elastic.co/downloads/elasticsearch/elasticsearch-6.7.0.tar.gz 建议离线下载elasticsearch
tar -zxvf elasticsearch-6.7.0.tar.gz 解压
./bin/elasticsearch 尝试启动ES
备注: network.host: 0.0.0.0 如需远程连接ES,需修改elasticsearch.yml,把其中的network.host改成0.0.0.0
不能以root用户启动 can not run elasticsearch as root
useradd elastic 新建linux用户elastic
chown -R elastic:elastic elasticsearch-6.7.0 赋予elastic用户和组读写es目录权限
su elastic 从root用户切换到elastic用户
普通用户获取文件夹读写权限:
chmod 777 elasticsearch-6.7.0             赋予elastic用户目录所有权权限

或者加sudo命令:sudo chmod -R 777 elasticsearch-6.7.0

获得sudo命令使用权的方法  https://www.cnblogs.com/zox2011/archive/2013/05/28/3103824.html
cd elasticsearch-6.7.0/ 进入ES目录
./bin/elasticsearch 前台启动es,ctrl + c 终止。
./bin/elasticsearch -d 后台启动es,停止方法如下截图:

es启动和停止服务命令:
sudo systemctl daemon-reload
sudo systemctl enable elasticsearch.service
sudo systemctl start elasticsearch.service
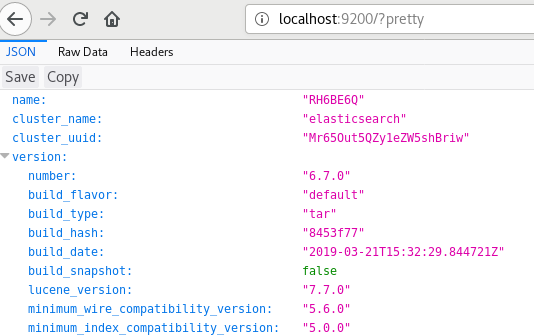
验证启动成功: http://localhost:9200/?pretty
有用的URL
| URL | |
| http://192.168.10.110:9200/ | 基本信息 |
| http://192.168.10.110:9200/_all/_search?pretty | 搜索引擎数据 |
| http://192.168.10.110:9200/_xpack/security/_authenticate?pretty | 权限信息 |
| http://192.168.10.110:9200/_license | 许可证信息 |
| http://192.168.10.110:9200/_xpack | xpack信息 |
| http://192.168.10.110:9200/_cluster/state?pretty | 集群信息 |
ES常见启动错误
ES安装目录/logs/elasticsearch.log可以查看启动日志。除了不能以root用户启动ES意外,还有3个常见启动错误:
ERROR: [3] bootstrap checks failed
[1]: max file descriptors [4096] for elasticsearch process is too low, increase to at least [65535]
[2]: max number of threads [3766] for user [elastic] is too low, increase to at least [4096]
[3]: max virtual memory areas vm.max_map_count [65530] is too low, increase to at least [262144]
[1][2]两个错误解决方法:
vim /etc/security/limits.conf
增加以下配置:
*                soft    nofile          65536
*                hard    nofile          65536
*                soft    nproc           4096
*                hard    nproc           4096
[3]解决方法:
vim /etc/sysctl.conf
vm.max_map_count=262144 增加这行配置
sysctl -p 重新生效配置文件sysctl.conf
cd ES安装目录
./bin/elasticsearch -d 后台启动,注意不要使用root用户启动。
浏览器打开验证:http://localhost:9200/_all/_search?pretty