Notification 的使用需要导入 3 个类
import android.app.PendingIntent;
import android.app.NotificationManager;
import android.app.Notification;
代码示例及说明
NotificationManager nm = (NotificationManager)getSystemService(Context.NOTIFICATION_SERVICE);
Notification n = new Notification(R.drawable.chat, "Hello,there!", System.currentTimeMillis());
n.flags = Notification.FLAG_AUTO_CANCEL;
Intent i = new Intent(arg0.getContext(), NotificationShow.class);
i.setFlags(Intent.FLAG_ACTIVITY_CLEAR_TOP|Intent.FLAG_ACTIVITY_NEW_TASK);
//PendingIntent
PendingIntent contentIntent = PendingIntent.getActivity(
        arg0.getContext(),
        R.string.app_name,
        i,
        PendingIntent.FLAG_UPDATE_CURRENT);

n.setLatestEventInfo(
        arg0.getContext(),
        "Hello,there!",
        "Hello,there,I'm john.",
        contentIntent);
nm.notify(R.string.app_name, n);
下面依次对每一段代码进行分析:
otificationManager nm = (NotificationManager)getSystemService(Context.NOTIFICATION_SERVICE);
创建 NotificationManager,其中创建的 nm 对象负责“发出”与“取消” Notification。
Notification n = new Notification(R.drawable.chat, "Hello,there!", System.currentTimeMillis());
n.flags = Notification.FLAG_ONGOING_EVENT;
创建 Notification ,参数依次为:icon的资源id,在状态栏上展示的滚动信息,时间。其中创建的 n 对象用来描述出现在系统通知栏的信息,之后我们将会看到会在 n 对象上设置点击此条通知发出的Intent。'
n.flags = Notification.FLAG_AUTO_CANCEL;
设置 n.flags 为 Notification.FLAG_AUTO_CANCEL ,该标志表示当用户点击 Clear 之后,能够清除该通知。
Intent i = new Intent(arg0.getContext(), NotificationShow.class);
i.setFlags(Intent.FLAG_ACTIVITY_CLEAR_TOP|Intent.FLAG_ACTIVITY_NEW_TASK);
创建一个Intent,该Intent使得当用户点击该通知后发出这个Intent
请注意,如果要以该Intent启动一个Activity,一定要设置 Intent.FLAG_ACTIVITY_NEW_TASK 标记。
Intent.FLAG_ACTIVITY_CLEAR_TOP :如果在当前Task中,有要启动的Activity,那么把该Acitivity之前的所有Activity都关掉,并把此Activity置前以避免创建Activity的实例
Intent.FLAG_ACTIVITY_NEW_TASK :系统会检查当前所有已创建的Task中是否有该要启动的Activity的Task,若有,则在该Task上创建Activity,若没有则新建具有该Activity属性的Task,并在该新建的Task上创建Activity。更多请参见 “ (转载)Android下Affinities和Task ”
PendingIntent contentIntent = PendingIntent.getActivity(
        arg0.getContext(),
        R.string.app_name,
        i,
        PendingIntent.FLAG_UPDATE_CURRENT);
PendingIntent 为Intent的包装,这里是启动Intent的描述,PendingIntent.getActivity 返回的PendingIntent表示,此PendingIntent实例中的Intent是用于启动 Activity 的Intent。PendingIntent.getActivity的参数依次为:Context,发送者的请求码(可以填0),用于系统发送的Intent,标志位。
其中 PendingIntent.FLAG_UPDATE_CURRENT 表示如果该描述的PendingIntent已存在,则改变已存在的PendingIntent的Extra数据为新的PendingIntent的Extra数据。
这里再简要说一下 Intent 与 PendingIntent 的区别:
Intent :意图,即告诉系统我要干什么,然后系统根据这个Intent做对应的事。如startActivity相当于发送消息,而Intent是消息的内容。
PendingIntent :包装Intent,Intent 是我们直接使用 startActivity , startService 或 sendBroadcast 启动某项工作的意图。而某些时候,我们并不能直接调用startActivity , startServide 或 sendBroadcast ,而是当程序或系统达到某一条件才发送Intent。如这里的Notification,当用户点击Notification之后,由系统发出一条Activity 的 Intent 。因此如果我们不用某种方法来告诉系统的话,系统是不知道是使用 startActivity ,startService 还是 sendBroadcast 来启动Intent 的(当然还有其他的“描述”),因此这里便需要PendingIntent。
n.setLatestEventInfo(
        arg0.getContext(),
        "Hello,there!",
        "Hello,there,I'm john.",
        contentIntent);
设置显示在通知下拉框中的信息,参数依次为:Context,标题,内容,PendingIntent。
nm.notify(R.string.app_name, n);
启动Notification,参数依次为:在你的程序中标识Notification的id值(用来区分同一程序中的不同Notifycation,如果程序中只有一个Notification那么这里随便你填什么都可以,不过类型必须要为int),要通知的Notification。
如何使自己的Notification像Android QQ一样能出现在 “正在运行的”栏目下面
其实很简单,只需设置Notification.flags = Notification.FLAG_ONGOING_EVENT;便可以了。
如何改变 Notification 在“正在运行的”栏目下面的布局
创建 RemoteViews 并赋给 Notification.contentView ,再把 PendingIntent 赋给 Notification.contentIntent 便可以了,如:
PendingIntent contentIntent = PendingIntent.getActivity(
    arg0.getContext(),
    R.string.app_name,
    i,
    PendingIntent.FLAG_UPDATE_CURRENT);

RemoteViews rv = new RemoteViews(Main.this.getPackageName(), R.layout.notification_view);
rv.setImageViewResource(R.id.image, R.drawable.chat);
rv.setTextViewText(R.id.text, "Hello,there,I'm john.");
n.contentView = rv;
n.contentIntent = contentIntent;

nm.notify(R.string.app_name, n);
注意,如果使用了contentView,那么便不要使用Notification.setLatestEventInfo。如果setLatestEventInfo在赋给 Notification.contentView 的代码之后,那么contentView的效果将被覆盖,显示的便是 setLatestEventInfo 的效果;如果 setLatestEventInfo 在 Notification.contentView 的代码之前,那么显示的便是 Notification.contentView 的效果,也就是说不管你想要setLatestEventInfo 或 contentView 的自定义效果,请保证始终只有一句设置代码,因为在最后一句绑定的时候,之前的设置contentView或setLatestEventInfo的代码都是完全没有必要的。
事例效果:


     NotificationManager mNotificationManager = (NotificationManager) myContext.getSystemService(NOTIFICATION_SERVICE);
            long when = System.currentTimeMillis();
            Notification notification = new Notification(resource, tickerText, when);
            /*
             * Notification.FLAG_AUTO_CANCEL ,该标志表示当用户点击 Clear 之后,能够清除该通知
             */
            notification.flags = Notification.FLAG_ONGOING_EVENT;
        notification.flags = Notification.FLAG_NO_CLEAR;  //永久存在,不能删除

       notification.defaults = Notification.DEFAULT_SOUND;  //声音
        notification.defaults = Notification.DEFAULT_LIGHTS;  //灯光
        notification.defaults = Notification.DEFAULT_VIBRATE;  //震动

            /*
             * 创建点击事件开启Activity对象
             *
             * 如果要以该Intent启动一个Activity,一定要设置 Intent.FLAG_ACTIVITY_NEW_TASK 标记
             * Intent.FLAG_ACTIVITY_CLEAR_TOP :如果在当前Task中,有要启动的Activity,
             * 那么把该Acitivity之前的所有Activity都关掉,并把此Activity置前以避免创建Activity的实例
             */
            Intent notificationIntent = new Intent(myContext, VoiceIdentifyActivity.class);
            notificationIntent.setFlags(Intent.FLAG_ACTIVITY_CLEAR_TOP|Intent.FLAG_ACTIVITY_NEW_TASK);

            /*
             * 点击启动Activity  和startActivity()同含义
             * 表示如果该描述的PendingIntent已存在,则改变已存在的PendingIntent的Extra数据为新的PendingIntent的Extra数据。
             */
            PendingIntent contentIntent = PendingIntent.getActivity(myContext, 0 , notificationIntent, PendingIntent.FLAG_UPDATE_CURRENT);
            notification.setLatestEventInfo(myContext, contentTitle, contentText,contentIntent);

            /*
             * 用mNotificationManager的notify方法通知用户生成标题栏消息通知
             */
            mNotificationManager.notify(R.string.app_name, notification);
Notification可以理解为通知的意思一般用来显示广播信息 用Notification就必须要用到NotificationManager
想用Notification一般有三个步骤,如下所示
① 一般获得系统级的服务NotificationManager。
调用Context.getSystemService(NOTIFICATION_SERVICE)方法即可返回NotificationManager实例
② 实例化Notification,并设置其属性
用Notification构造函数 public Notification(int icon, CharSequence tickerText, long when)构造Notification实例
③ 通过NotificationManager发通知就OK了
NotificationManager有两个方法:notify()发出通知 cancel(...)取消通知
下面通过一个代码实例来介绍一下Notification
先初始化notificationManager和notification两个成员变量
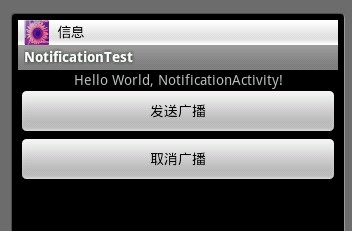

布局就不贴了 是两个Button 看看发送按钮
sendButton.setOnClickListener(new OnClickListener()
{

    @Override
    public void onClick(View v)
    {
        Intent intent = new Intent(NotificationActivity.this,NotificationActivity.class);
            PendingIntent pendingIntent = PendingIntent.getActivity(NotificationActivity.this, 0, intent, 0);
            notification.setLatestEventInfo(NotificationActivity.this, "你的一条信息", "来自张三的信息", pendingIntent);
            notificationManager.notify(ID,notification);
            notificationManager.notify(ID+1, notification);
    }
})
setLatestEventInfo(...)里面所传的参数的效果图:(见图二)通知里面有两条完全一样的消息,是的 你没看错,这是因为我用notificationManager notify(通知)了两次 而且ID不同,ID是int型是通知信息的标示符。虽然我上面两条信息是一模一样的,但由于ID的不同 , 所以Android还是会显示两条信息。
在此说一下参数pendingIntent的在setLatestEventInfo里所扮演的角色,是啥子意思呢?pendingIntent可以在另外的地方执行,不是立即意图。当用户点击扩展通知的时候 pendingIntent意图才开始执行,例如图二 我点击其中一个消息后,立马就进入另外一个Activity...
正如上面看到的那样,除了为notification设置图标,标题外还可以设置提示音,震动,闪光灯 详情请见我转的一片文章Notification使用详解.....
package com.study.android;

import android.app.Activity;
import android.app.Notification;
import android.app.NotificationManager;
import android.app.PendingIntent;
import android.content.Context;
import android.content.Intent;
import android.os.Bundle;
import android.view.View;
import android.view.View.OnClickListener;
import android.widget.Button;

public class MainActivity extends Activity {
    private Button startBtn;
    private Button cancelBtn;
    private static final int HELLO_ID = 1;
    NotificationManager mNotificationManager;
    Notification mNotification;
    /** Called when the activity is first created. */
    @Override
    public void onCreate(Bundle savedInstanceState) {
        super.onCreate(savedInstanceState);
        setContentView(R.layout.main);

        startBtn = (Button)findViewById(R.id.startBtn);
        cancelBtn = (Button)findViewById(R.id.cancelBtn);

        // ① 获取NotificationManager的引用
        String ns = Context.NOTIFICATION_SERVICE;
        mNotificationManager = (NotificationManager)this.getSystemService(ns);


        // ② 初始化Notification
        int icon = R.drawable.ic_launcher;
        CharSequence tickerText = "Hello";
        long when = System.currentTimeMillis();
        mNotification = new Notification(icon,tickerText,when);
        mNotification.defaults = Notification.DEFAULT_ALL;
        mNotification.flags |= Notification.FLAG_NO_CLEAR;
        mNotification.flags |= Notification.FLAG_SHOW_LIGHTS;
        // ③ 定义notification的消息 和 PendingIntent
        Context context = this;
        CharSequence contentTitle ="My notification";
        CharSequence contentText = "Hello World";
        Intent notificationIntent = new Intent(this,MainActivity.class);
        PendingIntent contentIntent = PendingIntent.getActivity(context, 0, notificationIntent,0 );
        mNotification.setLatestEventInfo(context, contentTitle, contentText, contentIntent);

        // ④ 把封装好的notification传入NotificationManager


        // 开启通知
        startBtn.setOnClickListener(new OnClickListener() {

            @Override
            public void onClick(View v) {
                mNotificationManager.notify(HELLO_ID,mNotification);

            }
        });

        // 取消通知
        cancelBtn.setOnClickListener(new OnClickListener() {

            @Override
            public void onClick(View v) {
                mNotificationManager.cancel(HELLO_ID);

            }
        });
    }
}