最近博客写的少了。
本篇介绍在安装ElasticSearch和head插件的过程中遇到的小问题,和一些日常使用的操作(简单搜索语法、分片管理)。
ElasticSearch
它是一个实时分布式搜索和分析引擎。它让你以前!所!未!有!的速度处理大数据成为可能。废话略过,详情这里。
安装
因为elasticsearch是Java写的,所以先要保证Java运行环境。
1.先来安装ElasticSearch
下载:
curl -L -O https://artifacts.elastic.co/downloads/elasticsearch/elasticsearch-5.*.*.zip
unzip elasticsearch-5.*.*.zip
或者
https://www.elastic.co/downloads/elasticsearch,直接下载并解压
运行elasticsearch,(这里下载的是5.0.1版本,5.*以后的版本对head插件的支持有所改变,后面说明):
➜ elasticsearch-5.0.1 ./bin/elasticsearch
相关执行命令:
➜  elasticsearch-5.0.1 ./bin/elasticsearch --help
starts elasticsearch

Option                Description
------                -----------
-E <KeyValuePair>     Configure a setting
-V, --version         Prints elasticsearch version information and exits
-d, --daemonize       Starts Elasticsearch in the background
-h, --help            show help
-p, --pidfile <Path>  Creates a pid file in the specified path on start
-q, --quiet           Turns off standard ouput/error streams logging in console
-s, --silent          show minimal output
-v, --verbose         show verbose output
* 注意,elasticsearch没有关闭服务命令,只能通过kill -9。
修改相关配置文件(配置文件详情):
➜  elasticsearch-5.0.1 vim config/elasticsearch.yml
cluster.name: zhengbin-application
http.port: 9200
#以上两项可改可不改
现在可以浏览器或者curl方式访问http://127.0.0.1:9200这个地址:
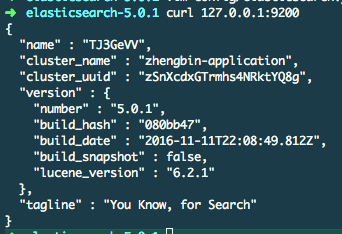
You Know, for Search~
2.再来安装ElasticSearch-head
网上很多博客的安装方式都是:
./bin/plugin install mobz/elasticsearch-head
但是5.*版本以上就不再支持这种方式,详情可以看elasticsearch-head官方README
下面按照这个README来:
git clone git://github.com/mobz/elasticsearch-head.git
cd elasticsearch-head
npm install
grunt server
open http://localhost:9100/
由于我用的是OSX,npm、grunt本身没有,下面安装这两个命令:
➜  elasticsearch-head git:(master) brew install node
➜  elasticsearch-head git:(master) npm install
➜  elasticsearch-head git:(master) npm install grunt
➜  elasticsearch-head git:(master) npm install -g grunt-cli
#验证一下:
➜  elasticsearch-head git:(master) grunt --version
grunt-cli v1.2.0
grunt v1.0.1
好了,准备就绪,在执行grunt server之前,需要修改elasticsearch.yml文件:
#增加对head插件的支持
http.cors.enabled: true
http.cors.allow-origin: "*"
打开浏览器,或直接命令:
➜  elasticsearch-head git:(master) grunt server
Running "connect:server" (connect) task
Waiting forever...
Started connect web server on http://localhost:9100
➜ elasticsearch-5.0.1 open http://127.0.0.1:9100
ES的日常使用
这里写的很清楚,不再啰嗦。
ES分片的管理
啥是分片?这里
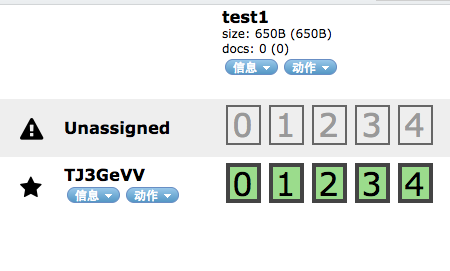
但是当我在线上环境创建索引后,发现分片并没有被自动分配到主、从节点上。
就像下图所示,索引test1有5个主分片,每个主分片对应一个副本分片,现在主分片都在创建索引的时候自动分配到了TJ3GeVV这个节点,但是还有5个副本分片没有利用,也就显示Unassigned状态。
如何在创建索引后动态分配分片:
http://10.4.245.71:9200/_cluster/reroute/
{
  "commands": [
    {
      "allocate": {
        "index": "wm_godview_disorderstatus",
        "shard": 1,
        "node": "waimai-dev233",
        "allow_primary": true
      }
    }
  ]
}
通过上面的方式可以分配未分配的分片。
reroute还有移动-‘move’,取消-‘cancel’参数可选:
"commands" : [ {
        "move" :
            {
              "index" : "test", "shard" : 0,
              "from_node" : "node1", "to_node" : "node2"
            }
        },
       "cancel" :
            {
              "index" : "test", "shard" : 0, "node" : "node1"
            }
        },
        {
          "allocate" : {
              "index" : "test", "shard" : 1, "node" : "node3"
          }
        }
    ]
ES新建模板
通过head插件:
