拦截器概述:
拦截器(Interceptor)是Struts2的核心组成部分,它可以动态的拦截Action调用的对象,类似于Servlet中的过滤器
Struts2拦截器是AOP的一种实现策略,它可以任意的组合Action提供的附加功能,而不需要修改Action的代码
开发者只需要提供拦截器的实体类,并将其配置在struts.xml中即可

配置拦截器:
<!-- 声明拦截器 -->
<interceptor name="interceptorname" class="">
<param name="paramName">paramValue</param>
</interceptor>
在上述代码中,name用来指定拦截器名字,class用来指定拦截器的实体类,在定义拦截器是可能会用到参数
这是需要<param>标签,name属性用来指定参数的名称,paramValue表示参数的值
拦截器栈:
在实际开发中,经常需要在执行Action之前执行多个拦截器动作,比如:登录,检查,日志等
这个时候我们就需要定义一个拦截器组执行,这个拦截器组就是拦截器栈
<interceptors>
<interceptor-stack name=””>
<interceptor-ref name=”拦截器名称” />
…
</interceptor-stack>
</interceptors>
实例代码
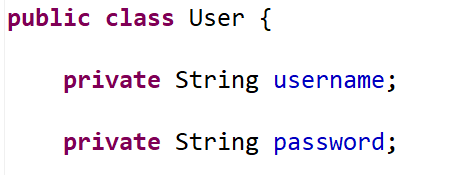
【1】编写pojo类
【2】编写Action类
public class LoginAction extends ActionSupport implements ModelDriven<User>{
private User user = new User();
@Override
public User getModel() {
// TODO Auto-generated method stub
return user;
}
public String execute(){
// 获取ActionContext
ActionContext context = ActionContext.getContext();
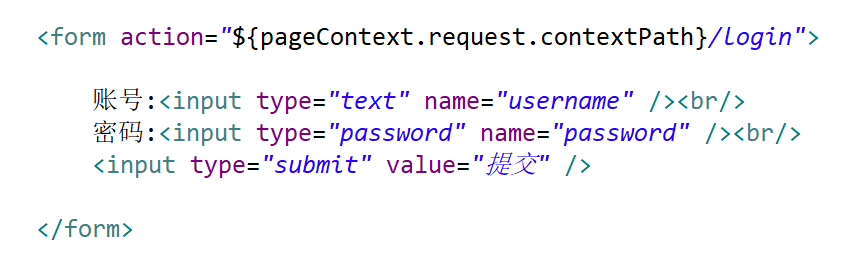
if("admin".equals(user.getUsername()) && "123.com".equals(user.getPassword())){
// 如果账号和密码正确 将数据存储到session中
context.getSession().put("user", user);
return SUCCESS;
}else{
context.put("msg", "您还没有登录!");
return INPUT;
}
}
}
public class BookAction extends ActionSupport{

    public String add(){
        System.out.println("增加");
        return SUCCESS;
    }

    public String del(){
        System.out.println("删除");
        return SUCCESS;
    }

    public String update(){
        System.out.println("修改");
        return SUCCESS;
    }

    public String find(){
        System.out.println("查询");
        return SUCCESS;
    }


}
【3】编写拦截器
public class InterceptorDemo extends AbstractInterceptor {

    @Override
    public String intercept(ActionInvocation invocation) throws Exception {

        // 得到ActionContext
        ActionContext actionContext = invocation.getInvocationContext();

        // 获取user对象
        Object user = actionContext.getSession().get("user");

        if(user != null){
            System.out.println("这里是拦截器...");
            return invocation.invoke(); // 继续向下执行
        }else{
            actionContext.put("msg","您还未登陆,请您先登录");
            return Action.LOGIN;      // 如果用户不存在,返回login值
        }

    }

}
public class InterceptorDemo2 extends AbstractInterceptor {

    @Override
    public String intercept(ActionInvocation invocation) throws Exception {

        // 得到ActionContext
        ActionContext actionContext = invocation.getInvocationContext();

        // 获取user对象
        Object user = actionContext.getSession().get("user");

        if(user != null){
            System.out.println("这里是拦截器2...");
            return invocation.invoke(); // 继续向下执行
        }else{
            actionContext.put("msg","您还未登陆,请您先登录");
            return Action.LOGIN;      // 如果用户不存在,返回login值
        }

    }

}
【4】编写配置文件
<struts>
    <package name="default" namespace="/" extends="struts-default">
        <interceptors>
            <interceptor name="lanjieqi" class="com.bdqn.cn.interceptor.InterceptorDemo" />
            <interceptor name="lanjieqi2" class="com.bdqn.cn.interceptor.InterceptorDemo2" />
            <interceptor-stack name="MyStack">
                <interceptor-ref name="lanjieqi" />
                <interceptor-ref name="lanjieqi2" />
            </interceptor-stack>
        </interceptors>
        <action name="login" class="com.bdqn.cn.action.LoginAction"  >
            <result>/main.jsp</result>
            <result name="input">/login.jsp</result>
        </action>
        <action name="book_*" class="com.bdqn.cn.action.BookAction" method="{1}" >
            <result>/success.jsp</result>
            <result name="login">/login.jsp</result>
            <!-- 测试拦截器 -->
            <interceptor-ref name="MyStack" />
        </action>
    </package>
</struts>
【5】编写jsp页面
(1)login.jsp
(2)main.jsp

(3)success.jsp

运行结果
