因为个人问题,耽误了文章的更新,实在抱歉。
本篇继续上篇,上篇讲述了如何写接口,本篇讲解如何调用接口。
在vue中,请求接口使用axios,类似于js中的ajax。axios请求分get和post,简单讲解一下用法。
这里提供一下数据,有需要的小伙伴复制使用
axios_demo.sql


# Host: localhost  (Version: 5.5.53)
# Date: 2020-04-08 15:42:51
# Generator: MySQL-Front 5.3  (Build 4.234)

/*!40101 SET NAMES utf8 */;

#
# Structure for table "axios_demo"
#

CREATE TABLE `axios_demo` (
  `stu_Id` int(11) NOT NULL AUTO_INCREMENT,
  `stu_name` varchar(255) DEFAULT NULL,
  `stu_sex` varchar(255) DEFAULT NULL,
  `stu_college` varchar(255) DEFAULT NULL,
  `stu_class` varchar(255) DEFAULT NULL,
  PRIMARY KEY (`stu_Id`)
) ENGINE=MyISAM AUTO_INCREMENT=2015807108 DEFAULT CHARSET=utf8;

#
# Data for table "axios_demo"
#

INSERT INTO `axios_demo` VALUES (2015101101,'王三男','男','农学院','园林15(1)班'),(2015307101,'王思楠','男','工程学院','土木15(1)班'),(2015407101,'王沂南','男','电气与信息学院','计算机15(1)班'),(2015407102,'王耳女','女','电气与信息学院','计算机15(1)班'),(2015507121,'王五女','女','人文与生命科技学院','生技15(1)班'),(2015607101,'王六女','女','会计学院','会计15(1)班'),(2015707121,'王七男','男','经济管理学院','经管15(1)班'),(2015807102,'王八男','男','理学院','信计15(1)班'),(2015807105,'1','1','1','1'),(2015807107,'2','2','2','2');
一、数据的请求方式:
GET请求:
1 axios.get('接口地址').then(res =>{
2   let data = res.data; // 接口读到的数据(获取方式并不固定)
3 }).catach(err =>{
4   console.log(err);
5 })
POST请求:
 1 this.$axios.post(
 2   '接口地址',
 3   {
 4     '接口参数'
 5   }
 6 ).then(res => {
 7   console.log('请求成功')
 8 }).catch(err =>{
 9   console.log('请求失败');
10 })
上篇讲到,我们已生成接口并请求成功,所以现在开始请求接口。接口为:http://localhost:3000/api/Stu/showStu。如图1所示。
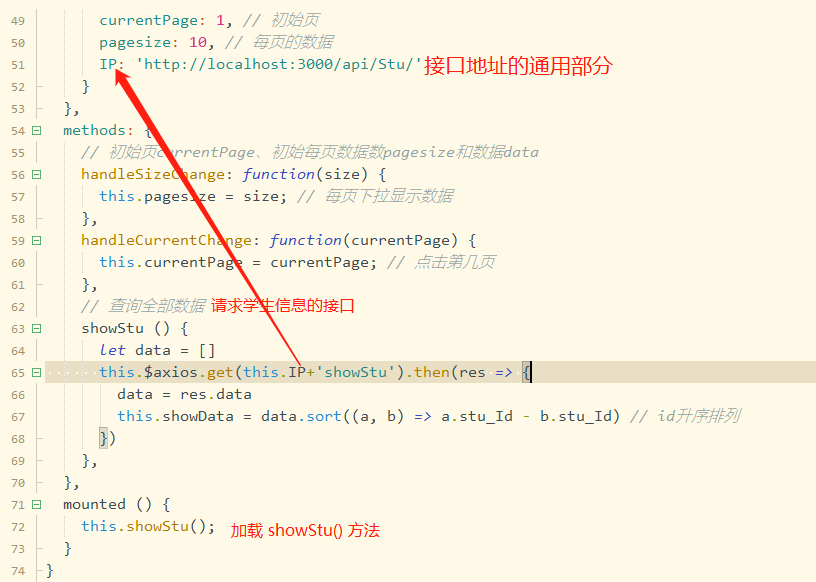
图1 请求信息图
界面如图2所示
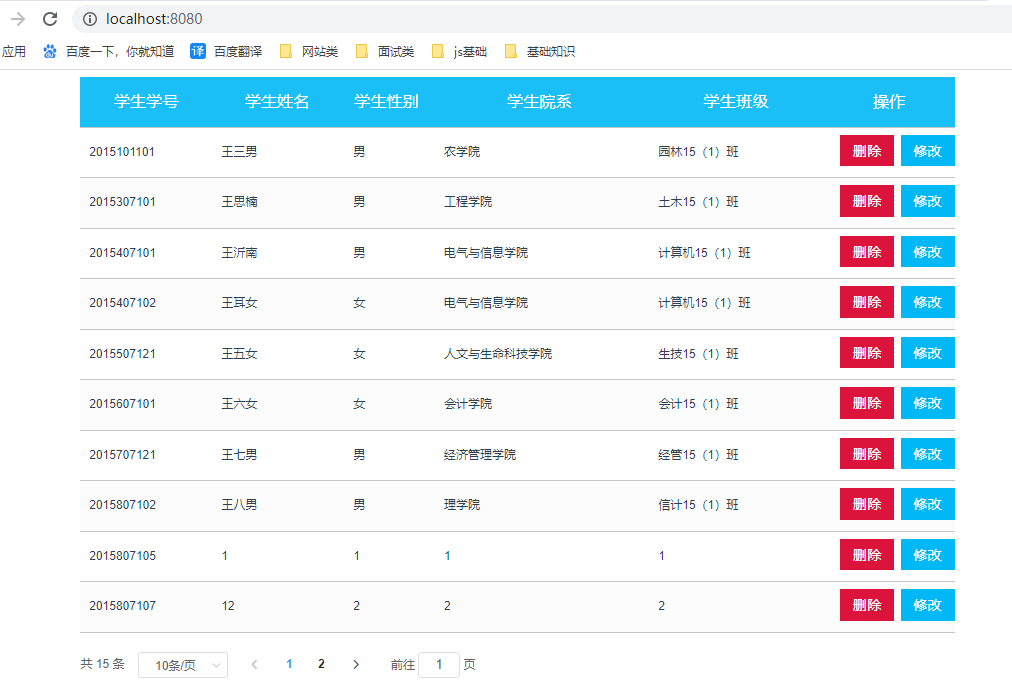
图2 学生信息图
代码如下:
1 // 查询全部数据
2     showStu () {
3       let data = []
4       this.$axios.get(this.IP+'showStu').then(res => {
5         data = res.data
6         this.showData = data.sort((a, b) => a.stu_Id - b.stu_Id) // id升序排列
7       })
8     },
获取到数据了,接下来就是对数据的增删改查了,第一步对数据进行添加
二、数据的操作:
前提:如果小伙伴看完第一章,知道接口的制作后,可进行下面阅读,不然会云里雾里的。
2.1、数据的添加:
原理简介:点击“添加”按钮,跳出弹窗,输入数据,点击“确定”,如果数据不为空,则调用 “添加数据” 的接口,数据添加成功,反之提醒数据不能为空。

图3 调用添加数据图
代码如下:
// 添加数据
      addStu() {
        const stu_name = this.stu_name // 双向绑定,把输入框里的值传给接口
        const stu_sex = this.stu_sex
        const stu_college = this.stu_college
        const stu_class = this.stu_class
        if (stu_name === '' && stu_sex === '' && stu_college === '' && stu_class === '') {
          alert('数据不能为空,至少填一项')
          return true
        } else {
          this.$axios.post(
            this.IP + 'addStu', {
              stu_name: stu_name,
              stu_sex: stu_sex,
              stu_college: stu_college,
              stu_class: stu_class
            }
          ).then(response => {
            this.showStu()
          })
        }
        this.showAdd = false
      }
2.2、数据的删除:
原理简介:删除数据时,根据id进行删除,所以调用接口时,只需要传入id就行。如图4调用删除数据接口图所示

图4 调用删除数据接口图
代码如下:
 1 // 删除前的判断,根据confirm的确认和取消,如果点击确认,则把id传给delStu()
 2       isDel(e) {
 3         let res = confirm("确认删除吗?");
 4         if (res == true) {
 5           this.popstu_Id = e
 6           this.delStu(e)
 7         } else {}
 8       },
 9
10       // 删除数据,通过isDel()传过来id进行删除
11       delStu(e) {
12         this.visible = false
13         const stu_Id = e
14         this.$axios
15           .post(
16             this.IP + 'delStu', {
17               stu_Id: stu_Id
18             }
19           )
20           .then(response => {
21             this.showStu()
22           })
23       },
2.3、数据的修改:
原理简介:修改数据时,选中该行,点击修改时将数据传给弹窗,修改完成后点击确定按钮,从而调用修改数据的接口。如图5调用修改数据接口图所示

图5 调用修改数据接口图
代码如下:
 1 // 临时存储修改的值,传到弹出层,供 updateStu()调用
 2       toData(e) {
 3         this.showUpdate = true
 4         this.popstu_Id = e.stu_Id
 5         this.popstu_name = e.stu_name
 6         this.popstu_sex = e.stu_sex
 7         this.popstu_college = e.stu_college
 8         this.popstu_class = e.stu_class
 9       },
10
11       // 修改数据,在弹出层调用toData()里的数据
12       updateStu() {
13         this.$axios.post(
14             this.IP + 'updateStu', {
15               stu_Id: this.popstu_Id,
16               stu_name: this.popstu_name,
17               stu_sex: this.popstu_sex,
18               stu_college: this.popstu_college,
19               stu_class: this.popstu_class
20             }
21           )
22           .then(response => {
23             this.showStu()
24           })
25         this.showUpdate = false
26       },
以上就说了增删改查4个接口的调用,调用查询接口时,涉及关键字高亮,所以就不在这里展开了,具体代码感兴趣的朋友可以点赞向我获取
创作不易,一键三连,嘿嘿~
需要代码的小伙伴点赞后向我私聊哦