Zabbix监控系统详解
1、介绍
zabbix是一个基于WEB界面的提供分布式系统监视以及网络监视功能的企业级的开源解决方案。
zabbix能监视各种网络参数,保证服务器系统的安全运营;并提供灵活的通知机制以让系统管理员快速定位/解决存在的各种问题。
zabbix由2部分构成,zabbix server与可选组件zabbix agent。
zabbix server可以通过SNMP,zabbix agent,ping,端口监视等方法提供对远程服务器/网络状态的监视,数据收集等功能,它可以运行在Linux,Solaris,HP-UX,AIX,Free BSD,Open BSD,OS X等平台上。
要想搭建一个Zabbix的工作环境,需要从服务器入手。与服务器通信,管理员需要使用一个Zabbix前端界面,与Zabbix服务器和数据库进行通信。三个关键(界面、服务器和数据库)可以安装在同一台服务器上,但是如果你拥有一个更大更复杂的环境,将它们安装在不同的主机上也是一个选项。Zabbix服务器能够直接监控到同一网络中的设备,如果其他网络的设备也需要被监控,那还需要一台Zabbix代理服务器。
2、虚拟机vmware 的安装。(不详细介绍)
3、在vmware 中安装ubuntu 18.04.3(不详细介绍)
(1)、安装增强功能
(2)、更换阿里云软件源
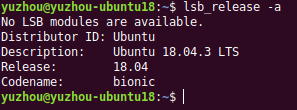
查看系统代号:
备份软件源:

更换软件源
deb http://mirrors.aliyun.com/ubuntu/ bionic main restricted universe multiverse
deb http://mirrors.aliyun.com/ubuntu/ bionic-security main restricted universe multiverse
deb http://mirrors.aliyun.com/ubuntu/ bionic-updates main restricted universe multiverse
deb http://mirrors.aliyun.com/ubuntu/ bionic-proposed main restricted universe multiverse
deb http://mirrors.aliyun.com/ubuntu/ bionic-backports main restricted universe multiverse
deb-src http://mirrors.aliyun.com/ubuntu/ bionic main restricted universe multiverse
deb-src http://mirrors.aliyun.com/ubuntu/ bionic-security main restricted universe multiverse
deb-src http://mirrors.aliyun.com/ubuntu/ bionic-updates main restricted universe multiverse
deb-src http://mirrors.aliyun.com/ubuntu/ bionic-proposed main restricted universe multiverse
deb-src http://mirrors.aliyun.com/ubuntu/ bionic-backports main restricted universe multiverse

更新系统

4、安装 apache、mysql、php
sudo apt-get install apache2 libapache2-mod-php mysql-server -y a
sudo apt-get install php php-mbstring php-gd php-xml php-bcmath php-ldap php-mysql
5、修改php时区,配置文件路径:/etc/php/PHP_VERSION/apache2/php.ini
[Date]
; Defines the default timezone used by the date functions
; http://php.net/date.timezone
date.timezone ='Asia/Shanghai'
6、下载zabbix版本文件,并安装
wget https://repo.zabbix.com/zabbix/4.4/ubuntu/pool/main/z/zabbix-release/zabbix-release_4.4-1%2Bbionic_all.deb
sudo dpkg -i zabbix-release_4.4-1+bionic_all.deb
7、安装zabbix服务端
sudo apt-get update -y
sudo apt-get install zabbix-server-mysql zabbix-frontend-php zabbix-agent -y
8、创建zabbix数据库
执行一下命令
mysql -u root -p

出现此错误,因为安装mysql软件时,未提示输入密码。解决方案如下:
sudo cat /etc/mysql/debian.cnf
执行上述命令,然后查看client里面的用户名和密码,实例如下:

输入一下命令
mysql -u debian-sys-maint -p
然后输入上述的密码
show databases;
use mysql;
update mysql.user set authentication_string=password('输入设置的密码') where user='root' and Host ='localhost';
update user set plugin="mysql_native_password";
flush privileges;
quit;
重新启动mysql 服务
sudo service mysql restart
mysql -u root -p // 启动后输入已经修改好的密码:root
登录到mysql 之后输入如下命令:
CREATE DATABASE zabbixdb; //创建数据库zabbixdb
GRANT ALL on zabbixdb.* to zabbix@localhost IDENTIFIED BY '设置的密码';
GRANT ALL PRIVILEGES ON zabbixdb.* TO 'zabbix'@'localhost' WITH GRANT OPTION;
FLUSH PRIVILEGES;//更新授权信息
操作如示例:

9、初始化数据库
cd /usr/share/doc/zabbix-server-mysql
zcat create.sql.gz | mysql -u zabbix -p zabbixdb
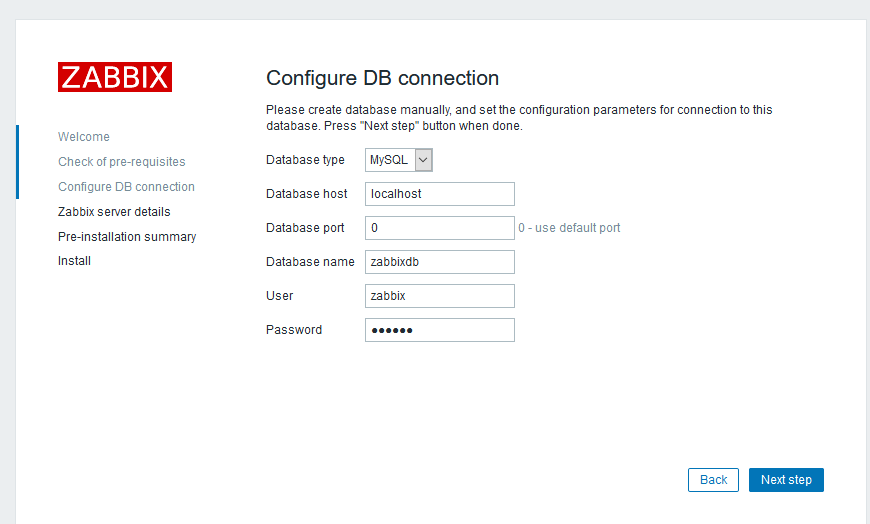
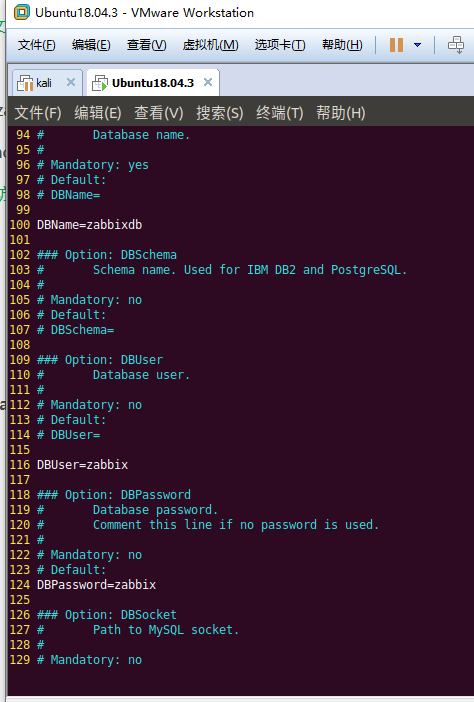
10、修改zabbix数据库配置文件,打开/etc/zabbix/zabbix_server.conf文件,修改一下信息:
DBHost=localhost
DBName=zabbixdb
DBUser=zabbix
DBPassword=password
sudo service apache2 restart
sudo service zabbix-server restart
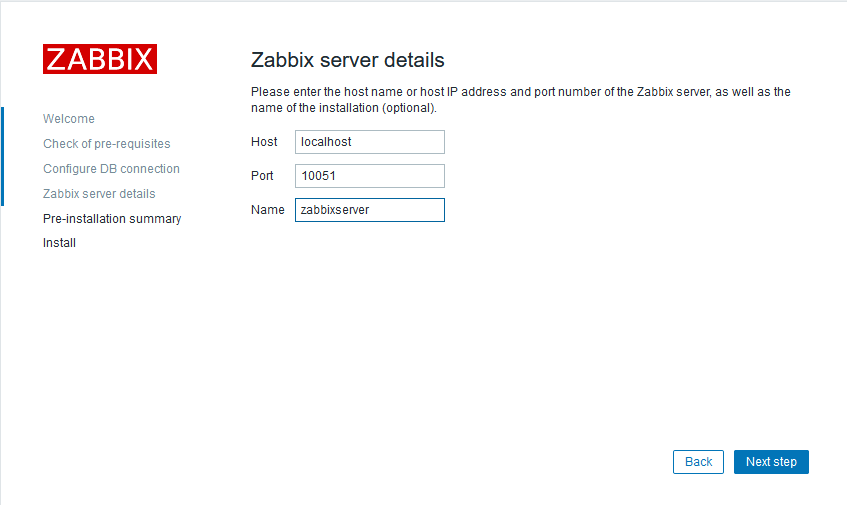
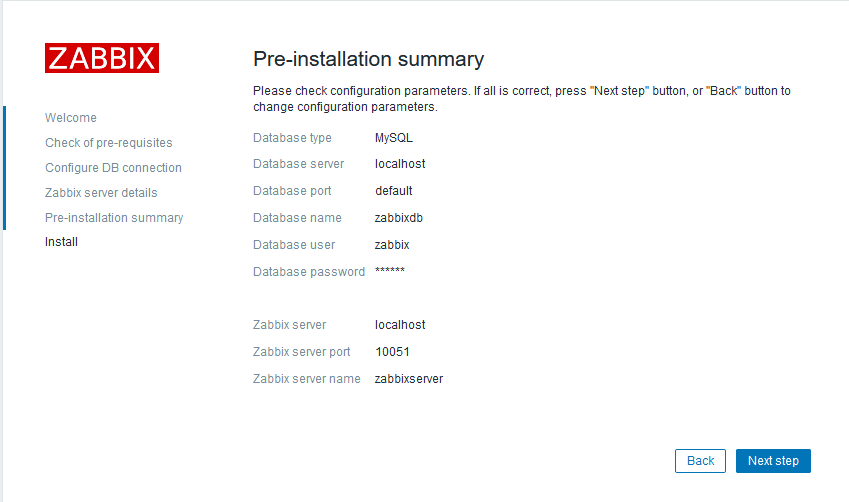
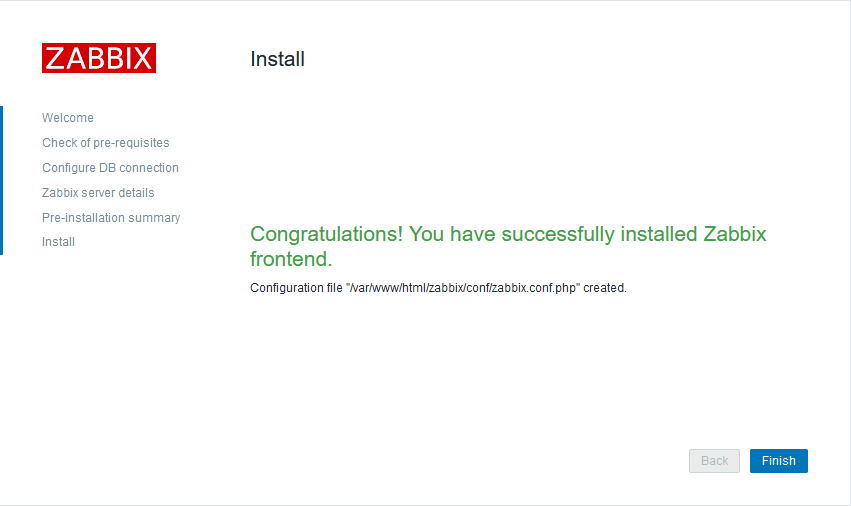
11、进入web页面完成安装,web访问地址http://localhost/zabbix/
完成安装后web登陆的用户是admin,密码zabbix
11、重启apache 和zabbix
sudo service apache2 restart
sudo service zabbix-server restart
sudo cp -r /usr/share/zabbix/ /var/www/html
12、进入web页面完成安装,web访问地址http://localhost/zabbix/
完成安装后web登陆的用户是admin,密码zabbix
13、打开网页


处理里面的Fail问题。
14、修改php.ini配置
sudo vim /etc/php/7.2/apache2/php.ini
post_max_size = 32M
max_execution_time = 600
max_input_time = 600
重启apache2
sudo service apache2 restart
15、配置数据库以及链接