- 数据来源
框架中的数据源是指作为测试框架执行时,输入的相关配置数据、测试用例数据等。配置数据一般使用后缀为.ini的文件进行配置,主要对比如测试主机地址、测试日志和报告路径等进行配置。在实际的框架设计中,测试用例数据我们可以使用不同方式的文件来构造数据源,只要该方式能完成接口自动化测试框架的易操作和维护即可。
如excel、xml、yaml、json、数据库等。把测试需要用到的数据录入到上述相应文件或数据库中,然后使用代码把数据读取并进行加工处理。
处理config配置文件
- config.ini文件
我们讲config.ini文件作为我们整个项目的配置文件,接下来我会讲解如何处理ini文件
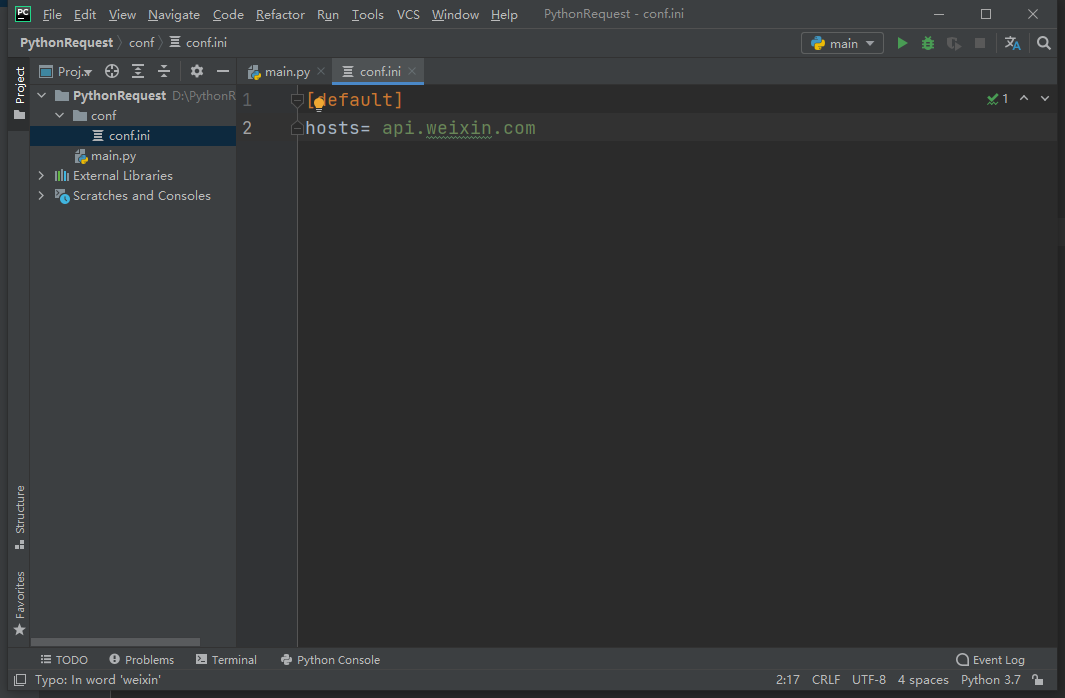
ini文件结构需要注意以下几点:键值对可用=或者:进行分隔section的名字是区分大小写的,而key的名字是不区分大小写的键值对中头部和尾部的空白符会被去掉值可以为多行配置文件可以包含注释,注释以#或者;为前缀
1.新建一个python项目,从头开始

2.新建conf文件,然后添加conf.ini

3.新建[default] 节点
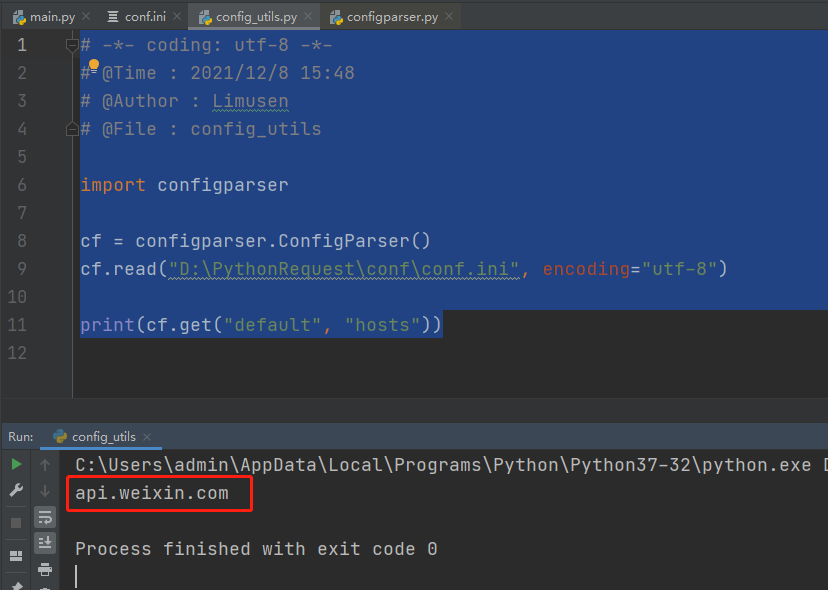
- config_utils文件 读取conf.ini文件中的值
1.在项目根目录新建一个common包 用来存放config_utils

2.先进行简单的读取文件


# -*- coding: utf-8 -*-
# @Time : 2021/12/8 15:48
# @Author : Limusen
# @File : config_utils

import configparser

cf = configparser.ConfigParser()
cf.read("D:\PythonRequest\conf\conf.ini", encoding="utf-8")

print(cf.get("default", "hosts"))
- 封装config_utils类下的方法
- config_utils.py
# -*- coding: utf-8 -*-
# @Time : 2021/12/8 15:48
# @Author : Limusen
# @File : config_utils

import os
import configparser

# 优化获取文件路径的方式
current_path = os.path.dirname(os.path.abspath(__file__))
# 这里分开写是为了适配mac跟windows之间的// 转义,这样更兼容
conf_file_path = os.path.join(current_path, '..', 'conf', 'conf.ini')

"""
# 优化前
# cf = configparser.ConfigParser()
# cf.read("D:\PythonRequest\conf\conf.ini", encoding="utf-8")
# print(cf.get("default", "hosts"))

# 优化后
# cf = configparser.ConfigParser()
# cf.read(conf_file_path, encoding="utf-8")
# print(cf.get("default", "hosts"))

# 接下来封装成类方法
"""


class ConfigUtils:

    def __init__(self, conf_path=conf_file_path):
        # 做一个默认传入配置文件的路径
        self.cf = configparser.ConfigParser()
        self.cf.read(conf_path, encoding="utf-8")

    @property  # 将类方法变成类属性 方便调用
    def get_hosts(self):
        hosts = self.cf.get("default", "hosts")
        return hosts


local_config = ConfigUtils()

if __name__ == '__main__':
    # 两种方法均可使用
    # 方法一
    cf = ConfigUtils()
    print(cf.get_hosts)
    # 方法二
    print(local_config.get_hosts)
处理excel文件之合并单元格模块
首先我们准备一个excel文件,大概长这个样子.然后我们需要用到的第三方库是 xlrd3

不多说 直接上示例代码
- excel_demo_01.py
# -*- coding: utf-8 -*- # @Time : 2021/12/8 16:17 # @Author : Limusen # @File : excel_demo_01 import os import xlrd3 # 优化获取文件路径的方式 current_path = os.path.dirname(os.path.abspath(__file__)) # 这里分开写是为了适配mac跟windows之间的// 转义,这样更兼容 excel_file_path = os.path.join(current_path, '..', 'testcase_data', '做饭秘籍.xlsx') # 1.创建工作蒲对象 workbook_object = xlrd3.open_workbook(excel_file_path) # 2.创建表对象 用的是表Sheet1 sheet_object = workbook_object.sheet_by_name("Sheet1") # 3.获取指定的行列值 cell_value = sheet_object.cell_value(0, 0) print(cell_value) # 4.获取合并单元格的值 cell_value = sheet_object.cell_value(1, 0) print("获取合并单元格首行的值:", cell_value) # 获取合并单元格首行的值 cell_value = sheet_object.cell_value(2, 0) print("获取合并单元格非首行的值: ", cell_value) # 此时会发现获取不到单元格的值 # 这里会有一个问题 我们有单元格的情况下 获取不到其他格的值
#合并单元格的读取操作
#table.merged_cells
#获取当前文档中的所有合并单元格的位置信息它返回的是一个列表,
#每一个元素是合并单元格的位置信息的数组,数组包含四个元素(起始行,结束行,起始列,结束列)合并单元格默认不处理的情况下,返回为null
#一般是希望所有被合并的每个单元格都返回合并单元格的内容。可以用判断来实现
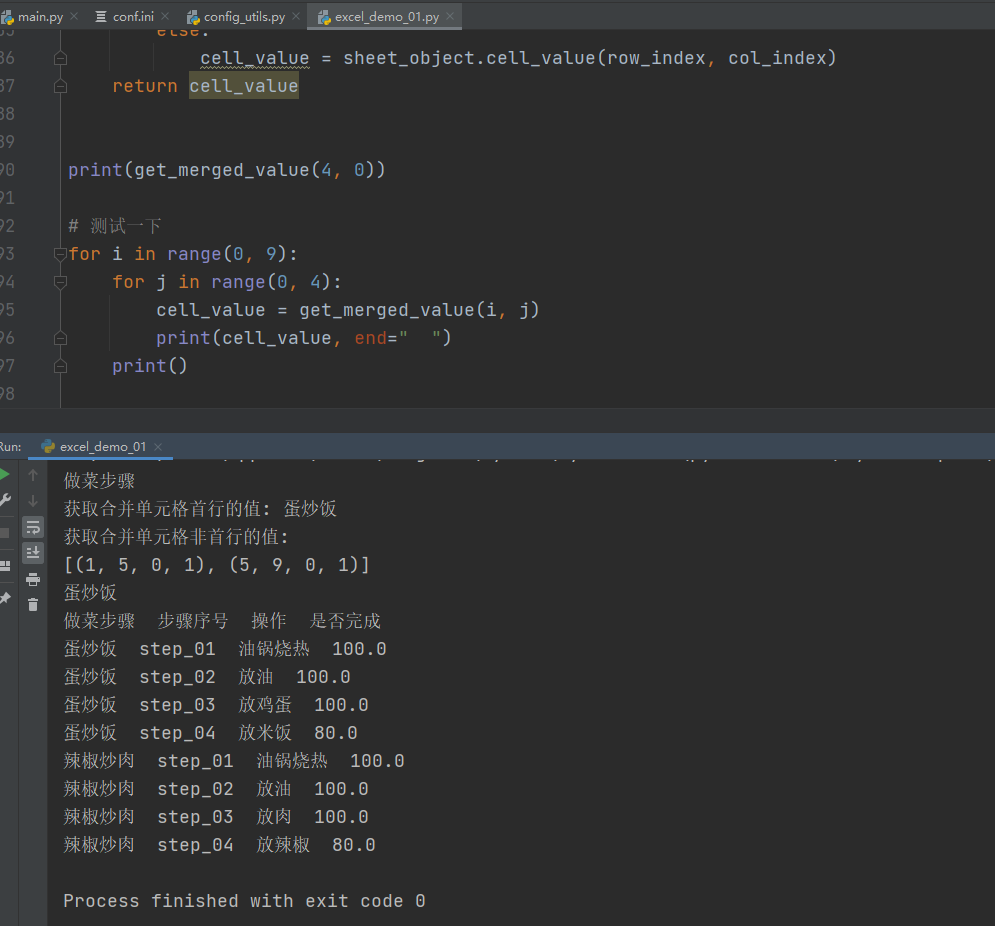
# 5.那我们首先获取这个表格里面有多少个合并单元格 merged_count = sheet_object.merged_cells # [(1, 5, 0, 1)] [(起始行,结束行/包前不包后,起始列,结束列)] 结束行/结束列都会多1 print(merged_count) # 会发现在这个表格当中有两个合并单元格 # 5.1举个小例子 来判断这几个数值是否为合并单元格 # x = 2 # y = 0 # # 由此可以看出只有在 x在 1-5之间 y在 0-0之间的才是合并单元格 # if x >= 1 and x < 5: # if y >= 0 and y < 1: # print("是合并单元格") # else: # print("不是合并单元格") # else: # print("不是合并单元格-最外层") # # 就可以将上面的判断改造成for循环 # for (min_row, max_row, min_col, max_col) in sheet_object.merged_cells: # print(min_row, max_row, min_col, max_col) # 6.再次改造 x = 5 y = 0 for (min_row, max_row, min_col, max_col) in sheet_object.merged_cells: if x >= min_row and x < max_row: if y >= min_col and y < max_col: # 是合并单元格,单元格的值等于 合并单元格中的第一个单元格的值 cell_value = sheet_object.cell_value(min_row, min_col) break else: cell_value = sheet_object.cell_value(x, y) else: cell_value = sheet_object.cell_value(x, y) # 7.封装成一个小方法 def get_merged_value(row_index, col_index): for (min_row, max_row, min_col, max_col) in sheet_object.merged_cells: if row_index >= min_row and row_index < max_row: if col_index >= min_col and col_index < max_col: # 是合并单元格,单元格的值等于 合并单元格中的第一个单元格的值 cell_value = sheet_object.cell_value(min_row, min_col) break else: cell_value = sheet_object.cell_value(row_index, col_index) else: cell_value = sheet_object.cell_value(row_index, col_index) return cell_value print(get_merged_value(4, 0)) # 测试一下 for i in range(0, 9): for j in range(0, 4): cell_value = get_merged_value(i, j) print(cell_value, end=" ") print()
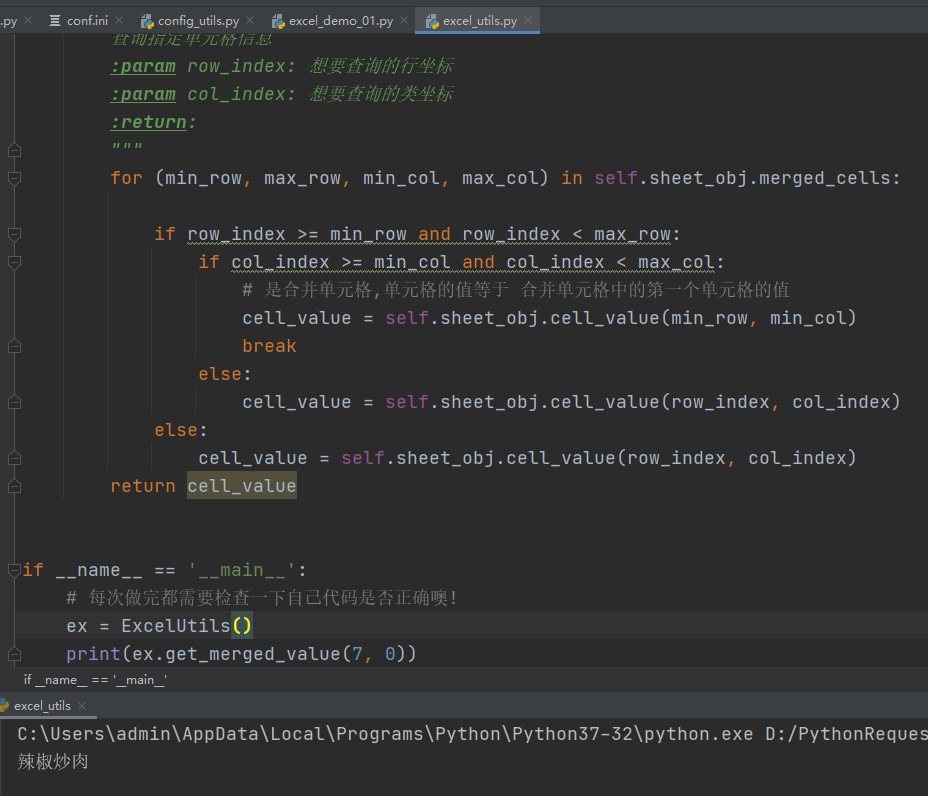
- common模块中新增excel_utils
- excel_utils.py
# -*- coding: utf-8 -*-
# @Time : 2021/12/8 16:40
# @Author : Limusen
# @File : excel_utils

import os
import xlrd3

# 优化获取文件路径的方式
current_path = os.path.dirname(os.path.abspath(__file__))
# 这里分开写是为了适配mac跟windows之间的// 转义,这样更兼容
excel_file_path = os.path.join(current_path, '..', 'testcase_data', '做饭秘籍.xlsx')
sheet_name = "Sheet1"


class ExcelUtils:

    def __init__(self, excel_file_path=excel_file_path, sheet_name=sheet_name):
        self.workbook_obj = xlrd3.open_workbook(excel_file_path)
        self.sheet_obj = self.workbook_obj.sheet_by_name(sheet_name)

    def get_rol_count(self):
        """
        获取总行数
        :return:
        """
        return self.sheet_obj.nrows

    def get_col_count(self):
        """
        获取总列数
        :return:
        """
        return self.sheet_obj.ncols

    def get_merged_value(self, row_index, col_index):
        """
        查询指定单元格信息
        :param row_index: 想要查询的行坐标
        :param col_index: 想要查询的类坐标
        :return:
        """
        for (min_row, max_row, min_col, max_col) in self.sheet_obj.merged_cells:

            if row_index >= min_row and row_index < max_row:
                if col_index >= min_col and col_index < max_col:
                    # 是合并单元格,单元格的值等于 合并单元格中的第一个单元格的值
                    cell_value = self.sheet_obj.cell_value(min_row, min_col)
                    break
                else:
                    cell_value = self.sheet_obj.cell_value(row_index, col_index)
            else:
                cell_value = self.sheet_obj.cell_value(row_index, col_index)
        return cell_value


if __name__ == '__main__':
    # 每次做完都需要检查一下自己代码是否正确噢!
    ex = ExcelUtils()
    print(ex.get_merged_value(7, 0))
第二章先分享到这儿,下一章节我们继续改造excel类,改造成我们期望的效果