搭建Samba服务端之后,可以像访问普通文件一样访问树莓派的文件系统。
步骤:
1、安装samba:
sudo apt-get install samba samba-common-bin
2、设置pi用户的密码:
sudo passwd -a pi
3、修改配置:
sudo vim /etc/samba/smb.conf
[...省略]
[homes]
   comment = Home Directories
   browseable = no

# By default, the home directories are exported read-only. Change the
# next parameter to 'no' if you want to be able to write to them.
   read only = no                         # <-- 如果需要可读可写,改为no

# File creation mask is set to 0700 for security reasons. If you want to
# create files with group=rw permissions, set next parameter to 0775.
   create mask = 0700
[...省略]
默认read only = yes ,只能读,不能写,将此项设置为no,将可以进行读写,像访问普通文件一样访问树莓派的文件系统
4、重启服务
sudo systemctl restart smbd.service nmbd.service
root@raspberrypi:/etc/samba# ps aux | grep smb
root       526  0.0  3.1  40716 13948 ?        Ss   10:58   0:00 /usr/sbin/smbd
root       530  0.0  1.2  38700  5524 ?        S    10:58   0:00 /usr/sbin/smbd
root       531  0.0  1.1  38712  4980 ?        S    10:58   0:00 /usr/sbin/smbd
root       544  0.0  1.2  40704  5464 ?        S    10:58   0:00 /usr/sbin/smbd
root       730  0.1  3.1  41124 14016 ?        S    10:59   0:00 /usr/sbin/smbd
root       818  0.0  0.4   4364  1964 pts/0    S+   11:07   0:00 grep smb
5、Windows下访问:
右击网络->映射网络驱动器->
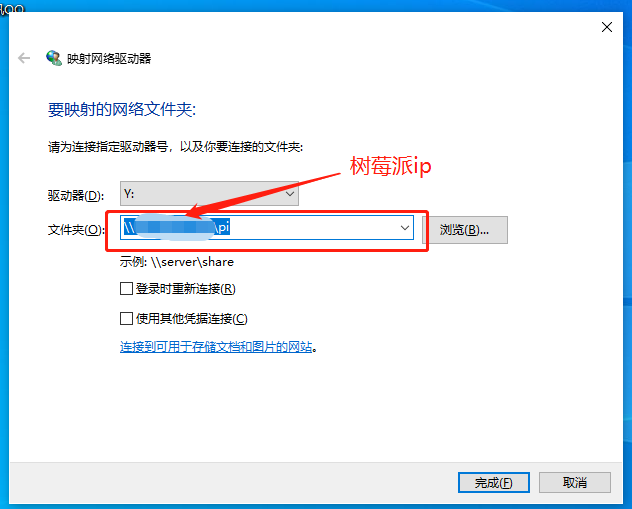

这样就可以访问了