使用工具
IntelliJ IDEA 2018专业版
步骤
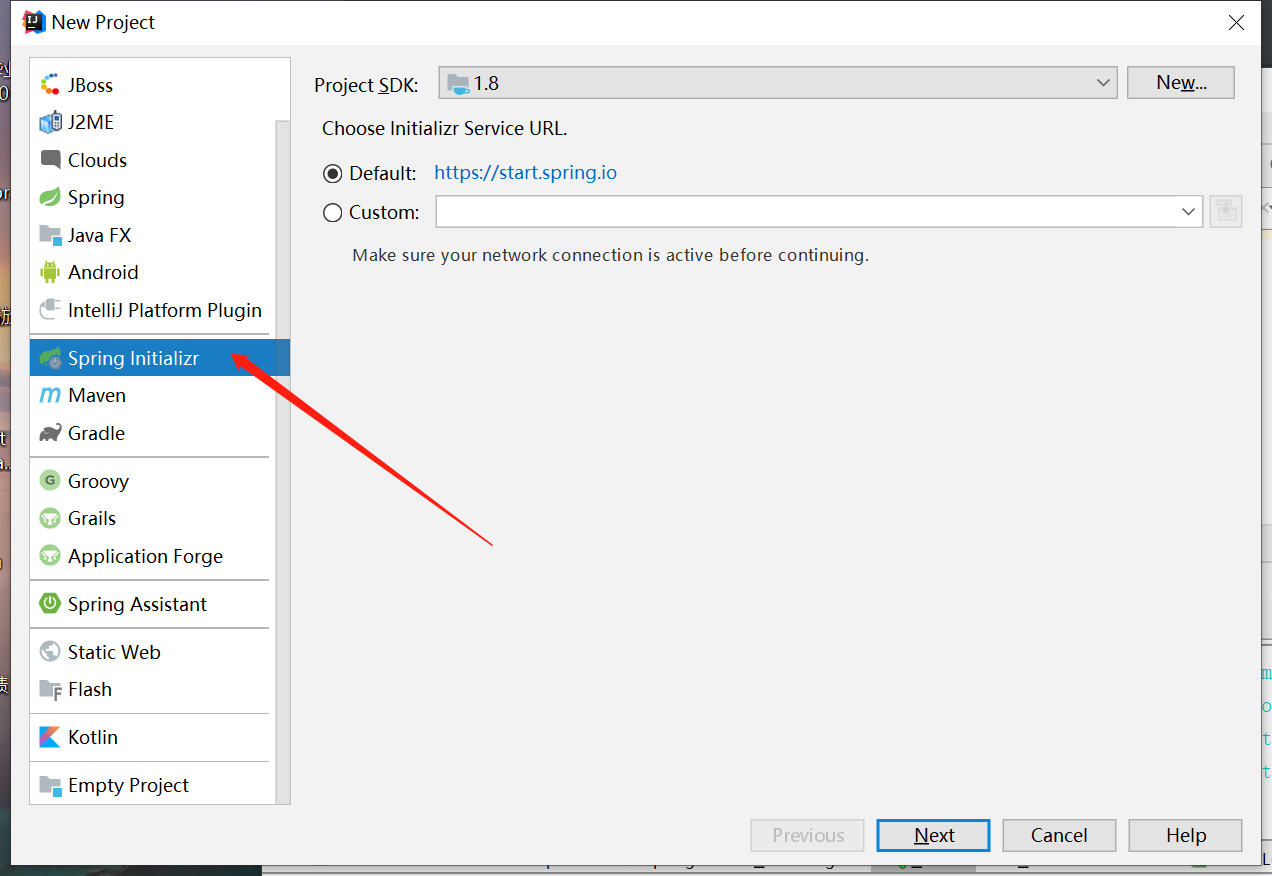
1、打开IDEA,新建项目,选择Spring Initializr,点击next:
2、使用默认配置,点击next:

3、添加一个 Spring web 依赖,点击next:

4、接下来是填写项目名和项目地址,默认即可,点击finish:

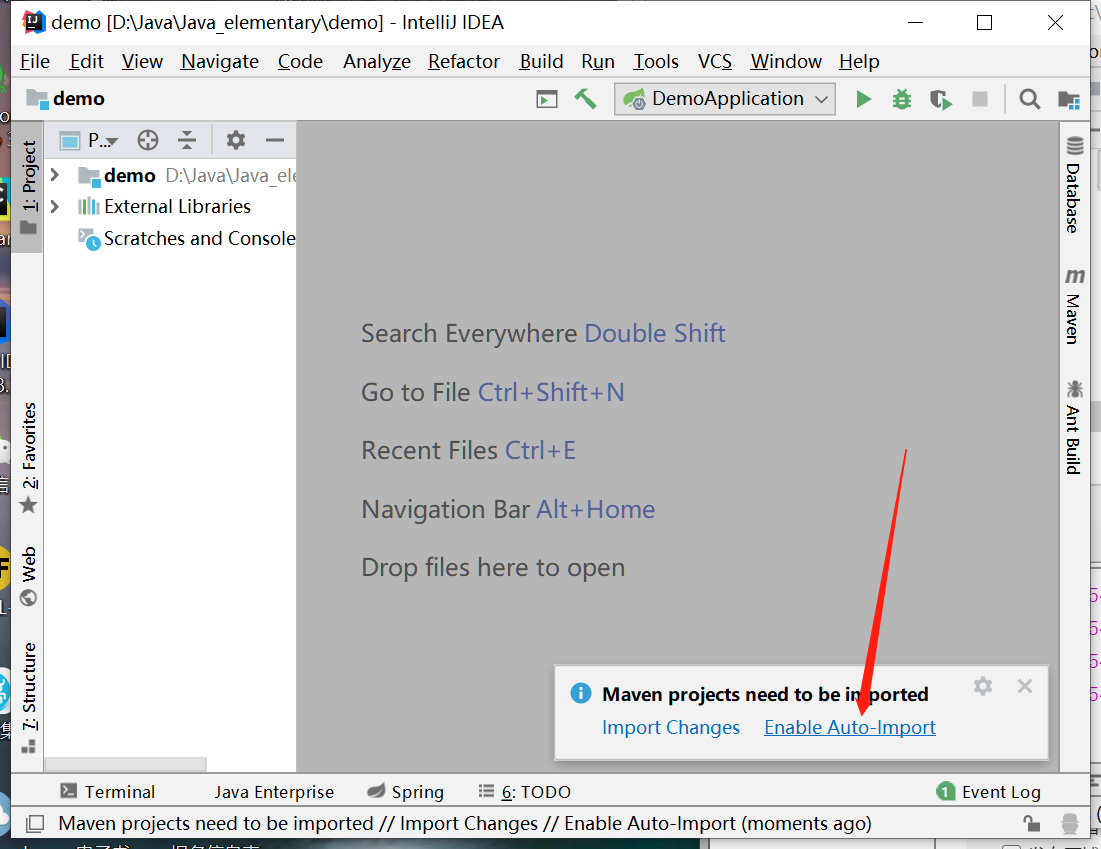
5、就这样,项目创建完成,点击右下角的enable Auto import,自动导入相关包文件,注意,一定要点击一下!!
此时,目录结构如下:

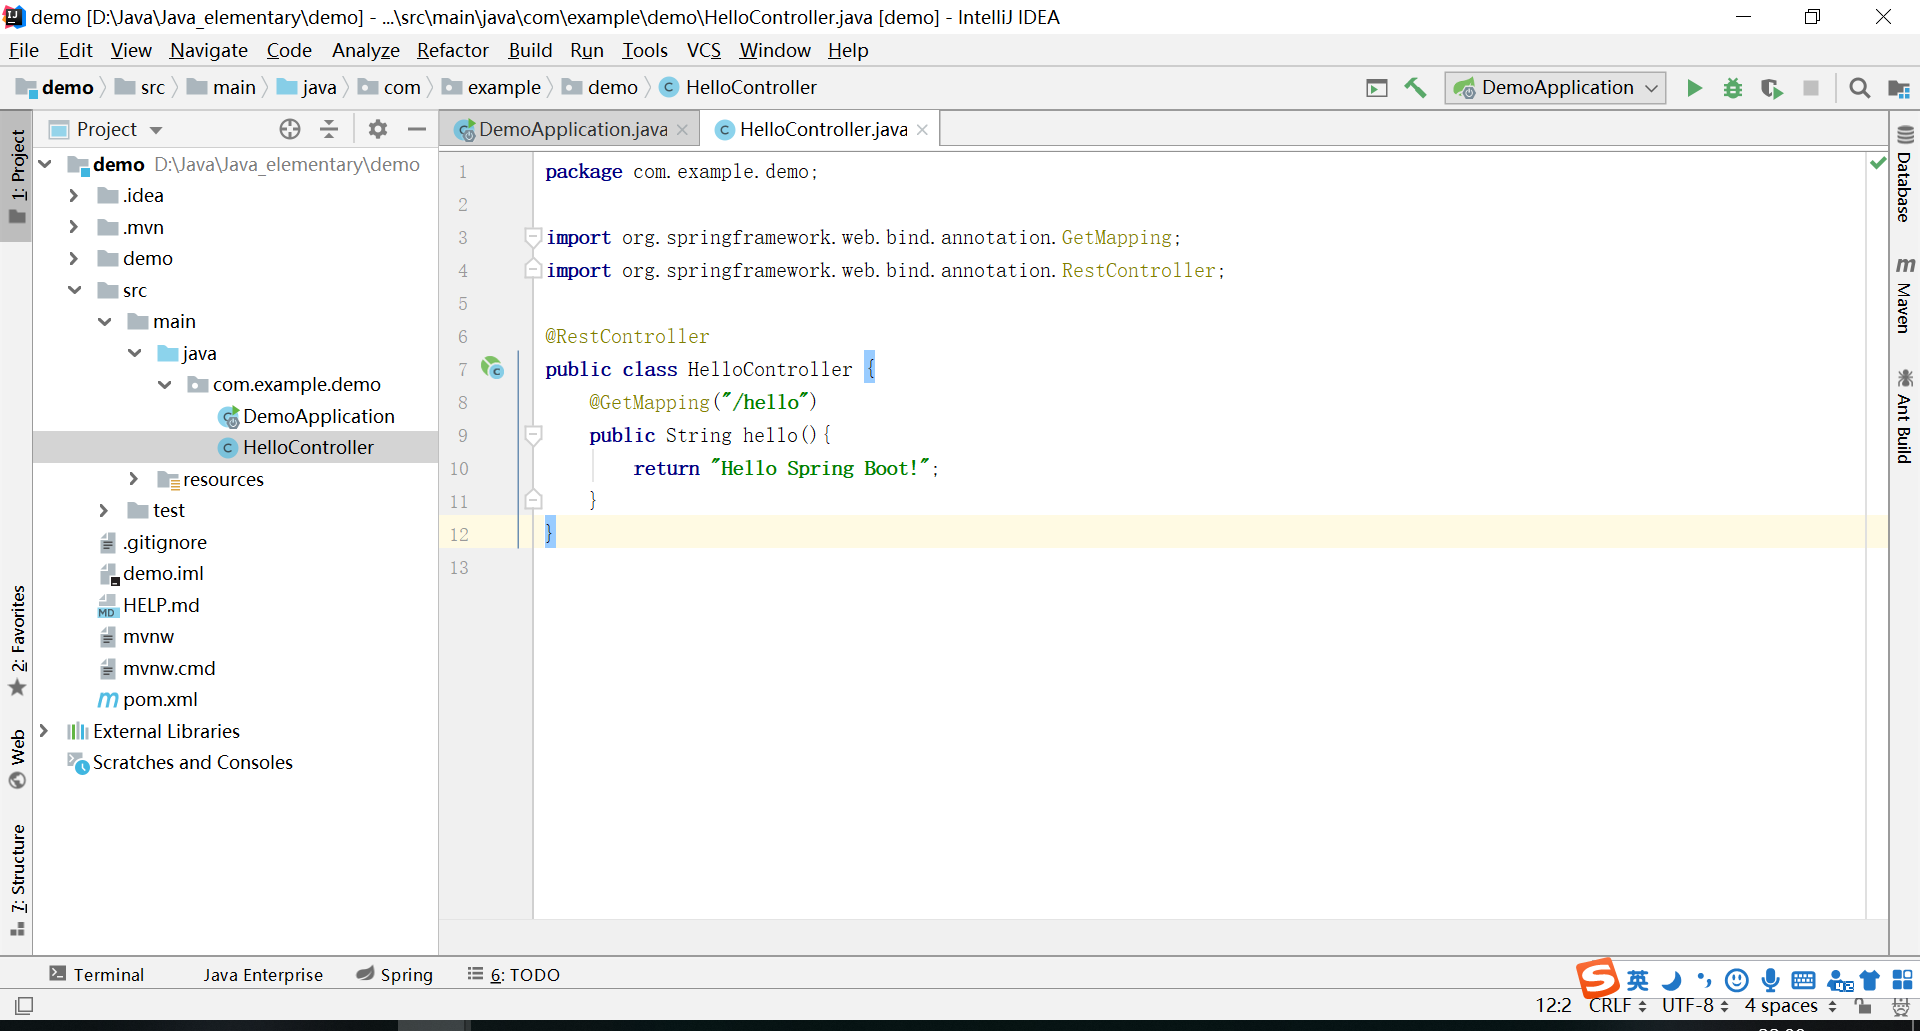
6、在包com.example.demo下,新建一个java文件,名字叫做HelloController
写入:
package com.example.demo01;


import org.springframework.web.bind.annotation.GetMapping;
import org.springframework.web.bind.annotation.RestController;

@RestController
public class HelloController {
    @GetMapping("/hello")
    public String hello(){
        return "Hello Spring Boot!";
    }
}
如下图:
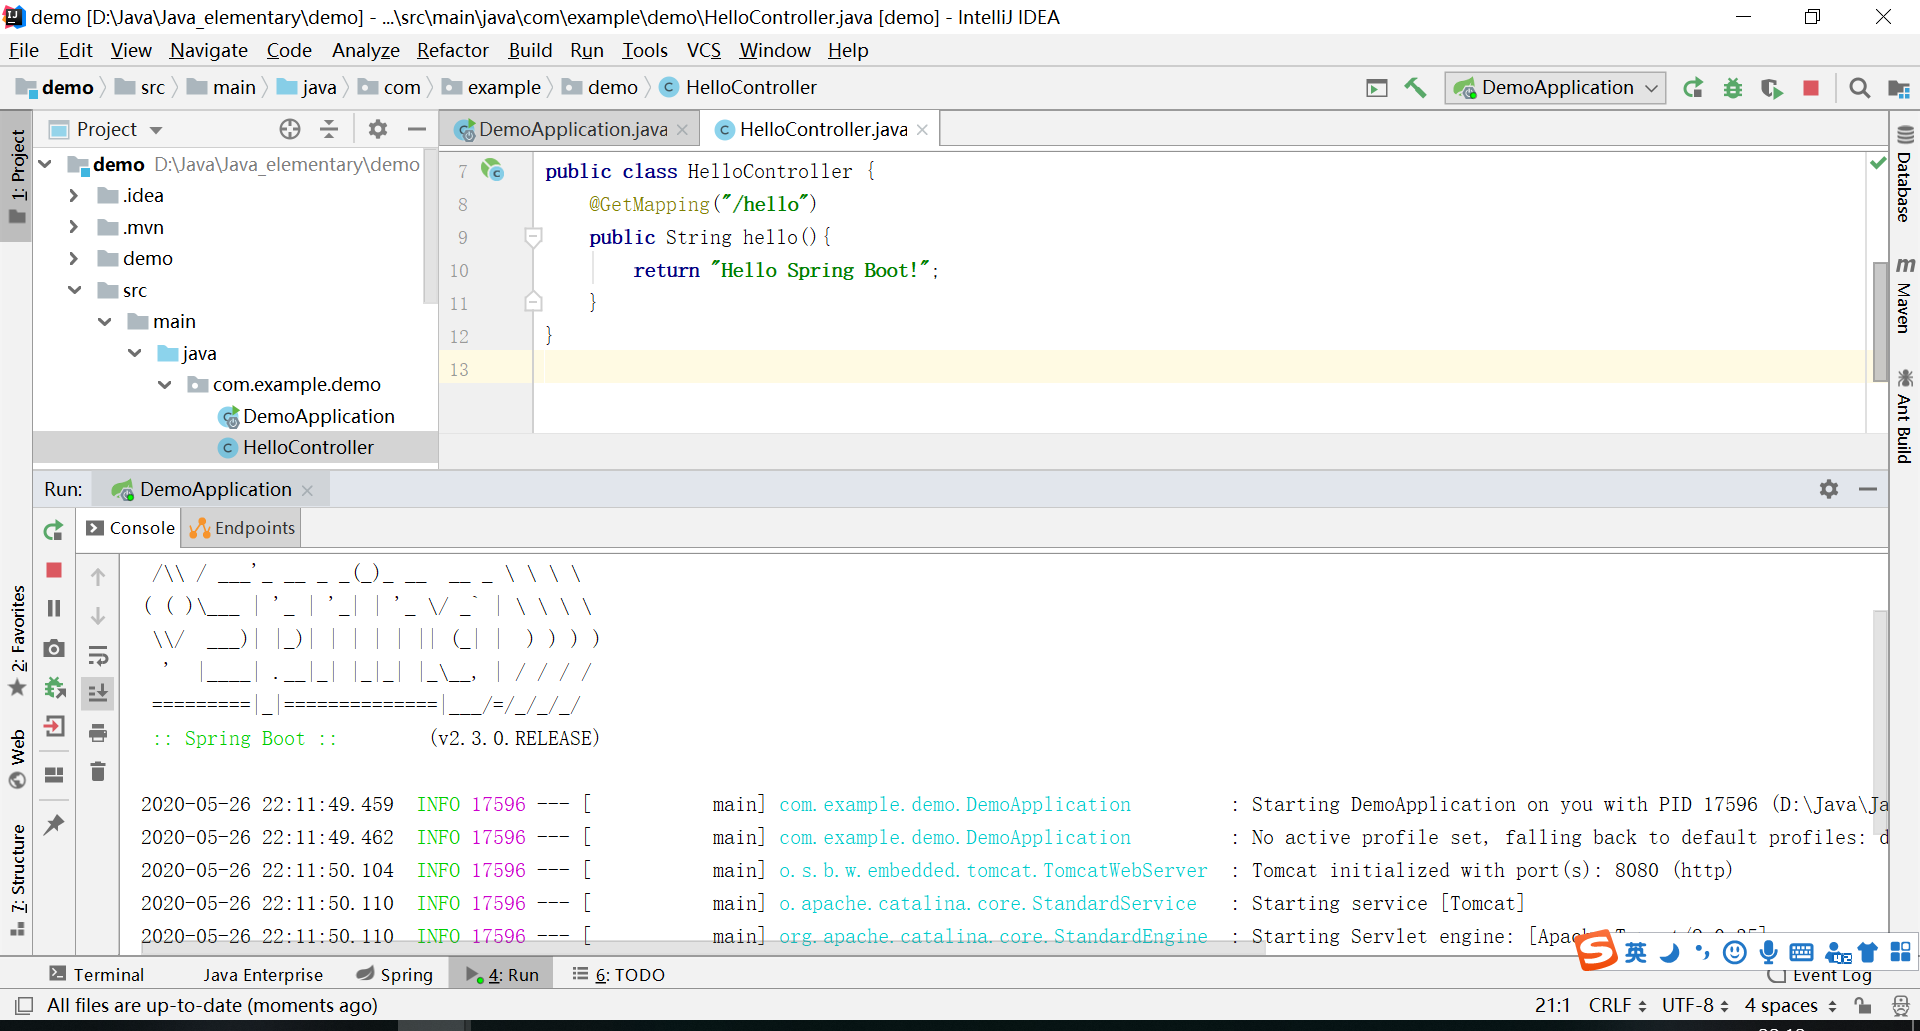
7、点击右上角绿色箭头,运行该项目:

效果如下:
8、此时打开浏览器,输入:localhost:8080/hello,回车:

就这样,成功运行了第一个 Spring boot 项目!
每天学习一点点,每天进步一点点。