Setting Up Oracle GoldenGate 12
madhuka udantha
Dec 24, 2019·6 min read
Oracle GoldenGate (OGG) enables enterprise solutions to exchange and manipulation of data at the transaction level among multiple, heterogeneous platforms/servers/ systems. It moves committed transactions with transaction integrity and minimal modifications to the existing infrastructure. Business continuance and high availability. It supports numerous business requirements such as initial load, database migration, data integration, and data warehousing.

Oracle GoldenGate
Its modular architecture gives you the flexibility to extract and replicate selected data records, transactional changes, and changes to DDL (data definition language) across a variety of topologies.
Oracle GoldenGate Supported Topologies
- Unidirectional
- Bi-Directional
- Peer to Peer
- Broadcast
- Consolidation
- Cascading
In this post explain how to prepare the oracle databases and how to setup GoldenGate for data replication between two Oracle 11g databases in two different servers.
Pre Request Software
Oracle database 11g setup and OGG setup 12.2. These are the versions is been used for this use-case, Oracle Database 11g Enterprise Edition Release 11.2.0.1.0–64bit and Oracle GoldenGate Version 12.2.0.2.
Pre Request Steps for Database
The GoldenGate replicates a table in the given database schema in server one orcl/DB1 to server two /DB2. As, in case of replication, you do not want to lose any transaction at least the source database needs to be set in force logging mode. Additionally, then database needs to be in archive log mode so that GoldenGate will be able to read the archived log files in case replication fails for some time.
Log to the oracle database using below command
sqlplus / as sysdba
Run below command to enable force logging mode, supplemental log data, and Archive log mode.
shutdown
startup mount
alter database archivelog;
alter database open;
select log_mode from v$database;

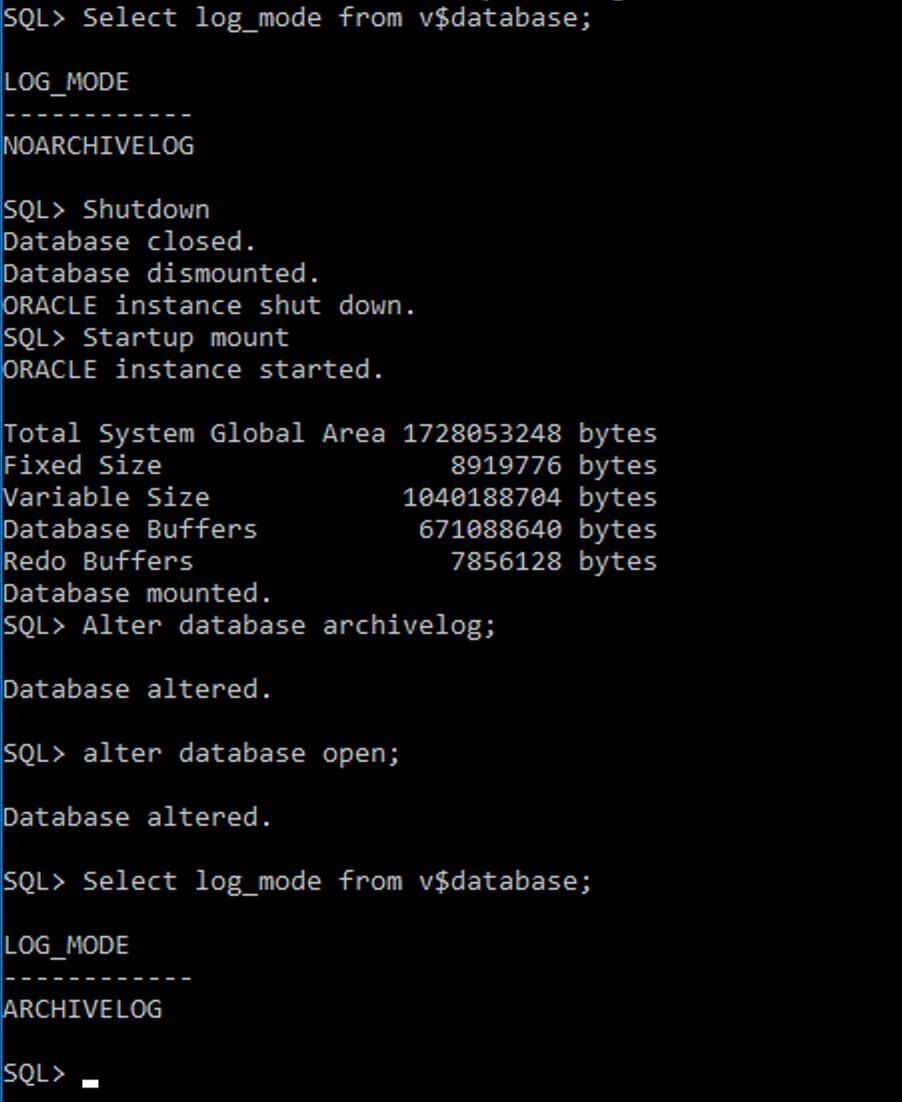
Setting archive log in oracle DB
If shut down did not work due to the bad setup used two commands to reset it.
SHUTDOWN IMMEDIATEstartup force
The force logging mode captures transactions even if logging is specified for some operations by the end-users or applications. The supplemantal log data is necessary so that GoldenGate is able to extract committed transactions out of the redo logs.
alter database add supplemental log data(all) columns;
select SUPPLEMENTAL_LOG_DATA_ALL from v$database;alter database force logging;
alter system switch logfile;
alter database add supplemental log data;


enable force logging


switch logfile
Creating User for testing
Create a new user called ‘ggtest’ with password ‘ggtest’. Grant below permissions for the new user.
Create user ggtest identified by ggtest ;
Grant resource, dba, connect to ggtest;
Creating Table to testing
Create a table under the newly created user.
connect ggtest/ggtestCREATE TABLE test( testst_Id INTEGER, test_name VARCHAR(100) );
INSERT INTO test VALUES(1,’James’);
INSERT INTO test VALUES(2,’Will’);
Starting Oracle Listener
Exit from the sqlplug by typing ‘exit’ and type blow to check the listener staus.
lsnrctl status
If it is not started start it by below command
lsnrctl start
Make sure you run all the above commands on both servers.
Install OGG 12.2
Run the installer.


In the wizard, you can select Oracle DB 11g as we going to used 11g for this use case.


OGG set up — page 1


OGG set up — page 2
Enable the manager on both servers. Select the DB location correctly.

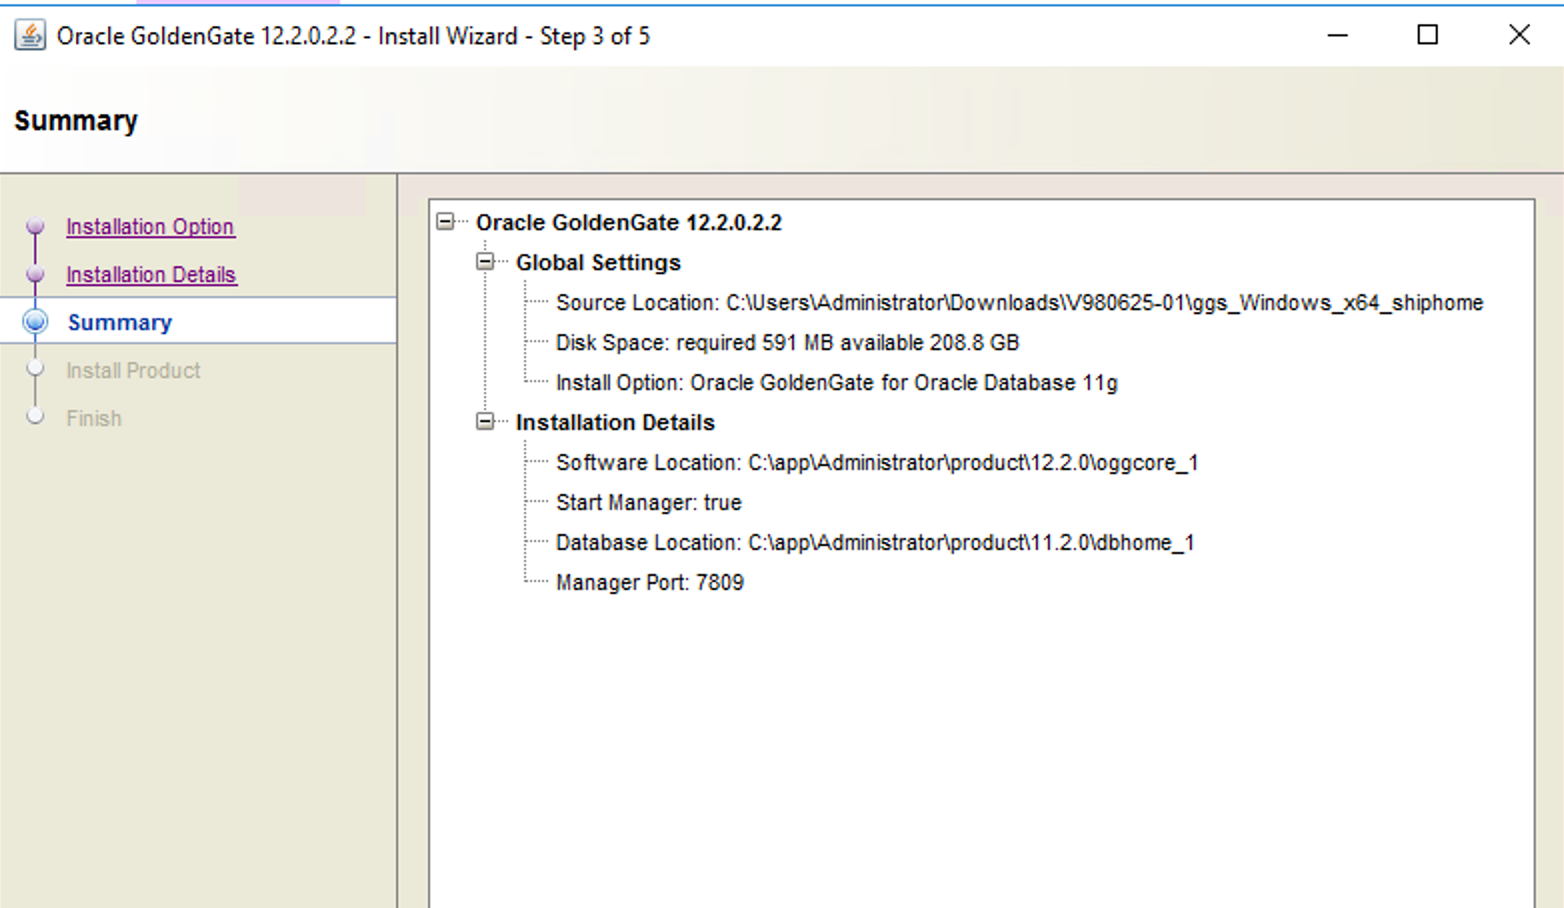
OGG — installer summary
Create OGG Admin and the Schema
The next step is to create a GoldenGate admin user both databases. Note that the dba role granted to ggowner is just a convenient way for getting all required privileges.
Username: ggowner
Password : ggowner
Create user ggowner identified by ggowner;
Grant resource, dba, connect to ggowner;
Create tablespace goldengate
Create tablespace goldengate
datafile ‘C:appAdministratororadataorclgoldengate01.dbf’
size 100m
autoextend on;
Setting table space for ggowner
alter user ggowner default tablespace goldengate;


Creating OGG admin — ggowner
Both servers above steps are needed to be carried.
Setting OGG Source
In OGG source we will have
- Manager
- Pump
- Extract
This is done directly with the GoldenGate command line interpreter ggsci
C:appAdministratorproduct12.2.0oggcore_1>ggsci.exe
Edit params ./GLOBALS
Add below line for that file and save it
GGSCHEMA ggowner
Setting OGG Roles
Now you have to set role for OGG. Exit from GGSCI.exe
exit
sqlplus / as sysdba
@role_setup.sql
Schema name : ggowner
GRANT GGS_GGSUSER_ROLE TO ggowner
Setting Extract
Now that the managers are configured we can continue with configuring the capture/extract process:
edit params extract
The following parameters are added to the extract configuration file:
EXTRACT extract
USERID ggowner, PASSWORD ggowner
EXTTRAIL ./dirdat/ex
CHECKPOINTSECS 1
TABLE ggtest.*;
Add Data Pump
It is recommended to use the GoldenGate data pump process to isolate the primary extract process from network latency. So, lets configure this:
Edit params pumpora
The following parameters are added to the data pump configuration file:
EXTRACT pumpora
PASSTHRU
RMTHOST 192.168.104.34, MGRPORT 7809
RMTTRAIL ./dirdat/RT
CHECKPOINTSECS 1
TABLE ggtest.*;
Note that the extract is still stopped. Let us create the local trail for the extract. We need to assign the datapump to the extract before starting the capture process. Try below command in the sequence order
ADD EXTRACT extract, TRANLOG, BEGIN now
ADD EXTTRAIL ./dirdat/ex, EXTRACT extract
ADD EXTRACT pumpora, EXTTRAILSOURCE ./dirdat/ex
Add RMTTRAIL ./dirdat/rt, EXTRACT pumpora
Finally, we can start the extract:
START EXTRACT EXTRACT
START EXTRACT PUMPORA
Setting the Target system
Both extracts are running which is what we expected. Now the counterpart, the apply/replicat process must be configured on the target system:
Add the checkpointtable for ggowner
add checkpointtable ggowner.checkpointtable


checkpoint table in OGG
Config the replicate
edit params repora
The parameters to add are:
REPLICAT repora
USERID ggowner, PASSWORD ggowner
DISCARDFILE ./dirdsc/replcat1.dsc, PURGE
ASSUMETARGETDEFS
MAP ggtest.*, TARGET ggtest.*;
As with the capture process on the source database, the apply process on the target needs to get registered with the database:
add replicat repora, EXTTRAIL ./dirdat/rt, checkpointtable ggowner.checkpointtable
Now, you can check the status of the systems by typing,
info all


OGG setting Replicat
Testing the OGG Use Case
Add data to the test table in ggtest user in server one, as below I have added three new rows as below.


adding data for OGG — SERVER ONE (source)
You will find some logs in the extract below.


extract summary in OGG
Now check the server two for new updates.


testing replication in OGG