作者:追梦1819
原文:https://www.cnblogs.com/yanfei1819/p/11007470.html
版权声明:本文为博主原创文章,转载请附上博文链接!
引言
前面的十四篇文介绍了 SpringBoot 的一些基本和常用的功能。后面,我们将介绍 SpringBoot 的高级的功能、框架原理以及使用技巧。
一个项目组可能由前端、后端、安卓、IOS等众多的开发人员或者众多开发团队组成。内部的 API 共同成本巨大。主要体现在几个方面:
- 接口多且复杂;
- 细节之处繁杂:通讯协议、参数、返回值、接口说明、路径等;
- 接口的维护。功能接口是随着时间迭代升级的,因此这增加了接口文档的管理成本。
因此,团队内部的沟通,一直都是开发人员的一个痛点。而手动编写 api 文档,不仅效率低,而且容易遗漏、不能及时同步更新。swagger 框架很好的解决了此问题。
swagger简介
swagger 优雅的解决了这个问题。它是一个功能强大的API框架,它的集成非常简单,不仅提供了在线文档的查阅,而且还提供了在线文档的测试。swagger 是一个规范和完整的框架,用于生成、描述、调用和可视化 RESTful 风格的 Web 服务。总体目标是使客户端和文件系统作为服务器以同样的速度来更新。文件的方法,参数和模型紧密集成到服务器端的代码,允许API来始终保持同步。swagger 让部署管理和使用功能强大的 API 从未如此简单。
版本信息
- JDK:1.8
- SpringBoot :2.1.4.RELEASE
- maven:3.3.9
- swagger2:2.4.0
- swagger-bootstrap-ui:1.7
- IDEA:2019.1.1
swagger 常用注解
swagger 通过注解表明该接口会生成文档,包括接口名、请求方法、参数、返回信息的等等。
-
@Api:修饰整个类,描述Controller的作用
-
@ApiOperation:描述一个类的一个方法,或者说一个接口
-
@ApiParam:单个参数描述
-
@ApiModel:用对象来接收参数
-
@ApiProperty:用对象接收参数时,描述对象的一个字段
-
@ApiResponse:HTTP响应其中1个描述
-
@ApiResponses:HTTP响应整体描述
-
@ApiIgnore:使用该注解忽略这个API
-
@ApiError :发生错误返回的信息
-
@ApiImplicitParam 一个参数
-
@ApiImplicitParams 多个参数
swagger使用
为了更加形象说明 swagger 的使用,下面创建一个实例项目以作演示。
首先,引入 maven 依赖:
<dependency>
    <groupId>org.springframework.boot</groupId>
    <artifactId>spring-boot-starter-web</artifactId>
</dependency>

<!-- swagger用于定义API文档 -->
<dependency>
    <groupId>io.springfox</groupId>
    <artifactId>springfox-swagger2</artifactId>
    <version>2.4.0</version>
</dependency>
<dependency>
    <groupId>io.springfox</groupId>
    <artifactId>springfox-swagger-ui</artifactId>
    <version>2.4.0</version>
</dependency>
然后,配置 swagger:
package com.yanfei1819.swaggerdemo;
import org.springframework.context.annotation.Bean;
import org.springframework.context.annotation.Configuration;
import springfox.documentation.builders.ApiInfoBuilder;
import springfox.documentation.builders.RequestHandlerSelectors;
import springfox.documentation.service.ApiInfo;
import springfox.documentation.service.Contact;
import springfox.documentation.spi.DocumentationType;
import springfox.documentation.spring.web.plugins.Docket;
import springfox.documentation.swagger2.annotations.EnableSwagger2;

@Configuration
@EnableSwagger2
public class Swagger2 {
	@Bean
    public Docket createRestApi() {
        return new Docket(DocumentationType.SWAGGER_2)
                .apiInfo(apiInfo())
                .select()
                .apis(RequestHandlerSelectors.basePackage("com.yanfei1819.swaggerdemo.controller"))
//                .paths(AppUtility.isProd() ? PathSelectors.none() : PathSelectors.any())
                .build();
    }
    private ApiInfo apiInfo() {
        return new ApiInfoBuilder()
                .title("测试swagger")
                .description("展示swagger界面")
                .termsOfServiceUrl("http://localhost:8084/swagger-ui.html")
                .contact(new Contact("追梦1819", "http://localhost:8084/swagger-ui.html", "xxx@163.com"))
                .version("1.0")
                .build();
    }
}
下一步,创建几个测试方法:
package com.yanfei1819.swaggerdemo.controller;
import io.swagger.annotations.Api;
import io.swagger.annotations.ApiImplicitParam;
import io.swagger.annotations.ApiImplicitParams;
import io.swagger.annotations.ApiOperation;
import org.springframework.stereotype.Controller;
import org.springframework.web.bind.annotation.GetMapping;
import org.springframework.web.bind.annotation.PostMapping;
import org.springframework.web.bind.annotation.RequestMapping;
import springfox.documentation.annotations.ApiIgnore;

/**
 * Created by 追梦1819 on 2019-05-06.
 */
@Controller
@RequestMapping("/swagger-a")
@Api(value = "测试第一个controller")
public class SwaggerAController {
    @ApiOperation(value = "controllerA的测试方法一",notes = "controllerA的测试方法一")
    @GetMapping("/test1")
    public void test1(){}

    @ApiOperation(value = "controllerA的测试方法二",notes = "controllerA的测试方法二")
    @ApiImplicitParams({
            @ApiImplicitParam(name = "name", value = "用户姓名", required = true, dataType = "String"),
            @ApiImplicitParam(name = "password", value = "用户密码", required = true, dataType = "String")
    })
    @PostMapping("/test2")
    public void test2(String name,String password){}

    @ApiOperation(value = "controllerA的测试方法三",notes = "controllerA的测试方法三")
    @ApiImplicitParam(name = "name", value = "用户姓名", required = true, dataType = "String")
    @GetMapping("/test3")
    public void test3(String name){}

    // 该接口忽略
    @ApiIgnore
    @GetMapping("/test4")
    public void test4(String name){}
}
最后,访问:http://localhost:8084/swagger-ui.htm,生成的相应的界面:
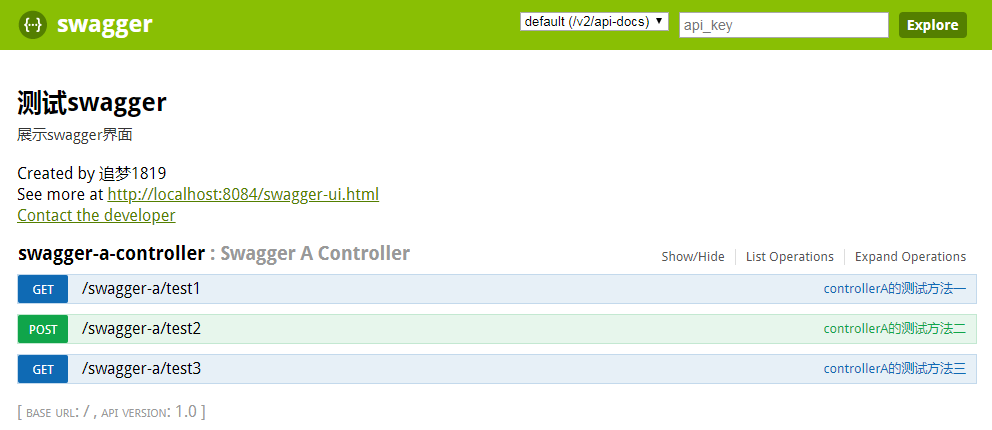

优化swagger界面
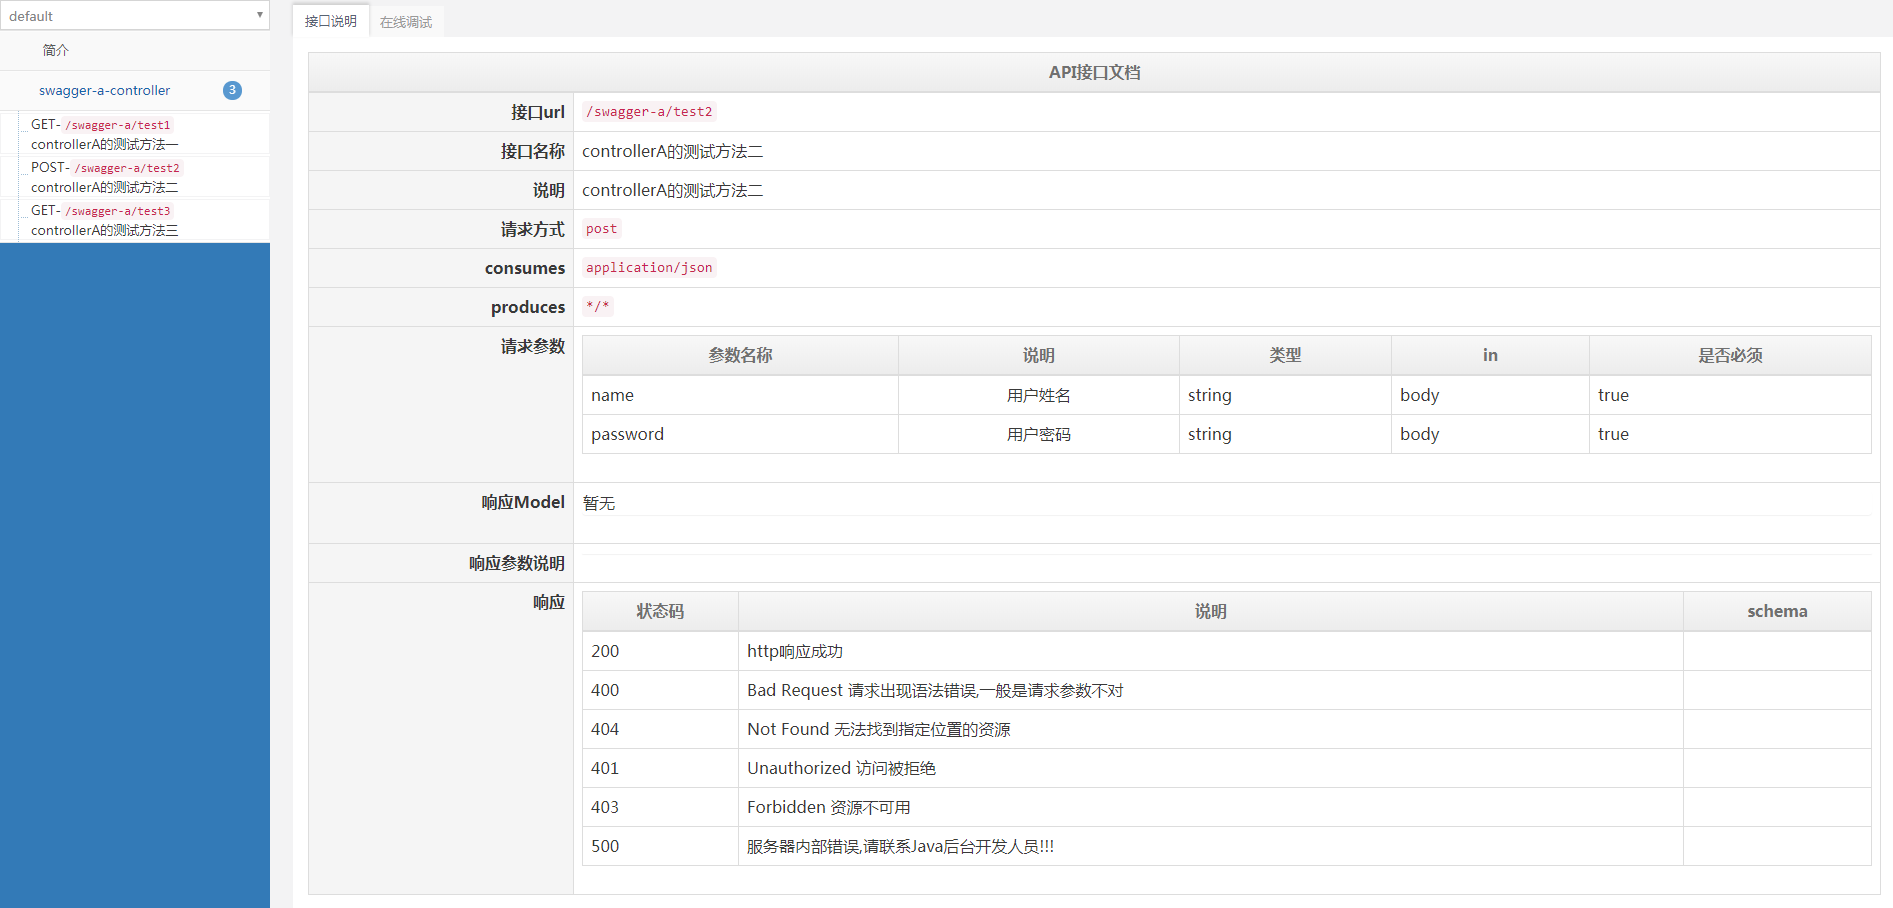
swagger 原生的界面谈不上美观。swagger-bootstrap-ui是springfox-swagger的增强UI实现,为Java开发者在使用 swagger 的时候,能拥有一份简洁、强大的接口文档体验。
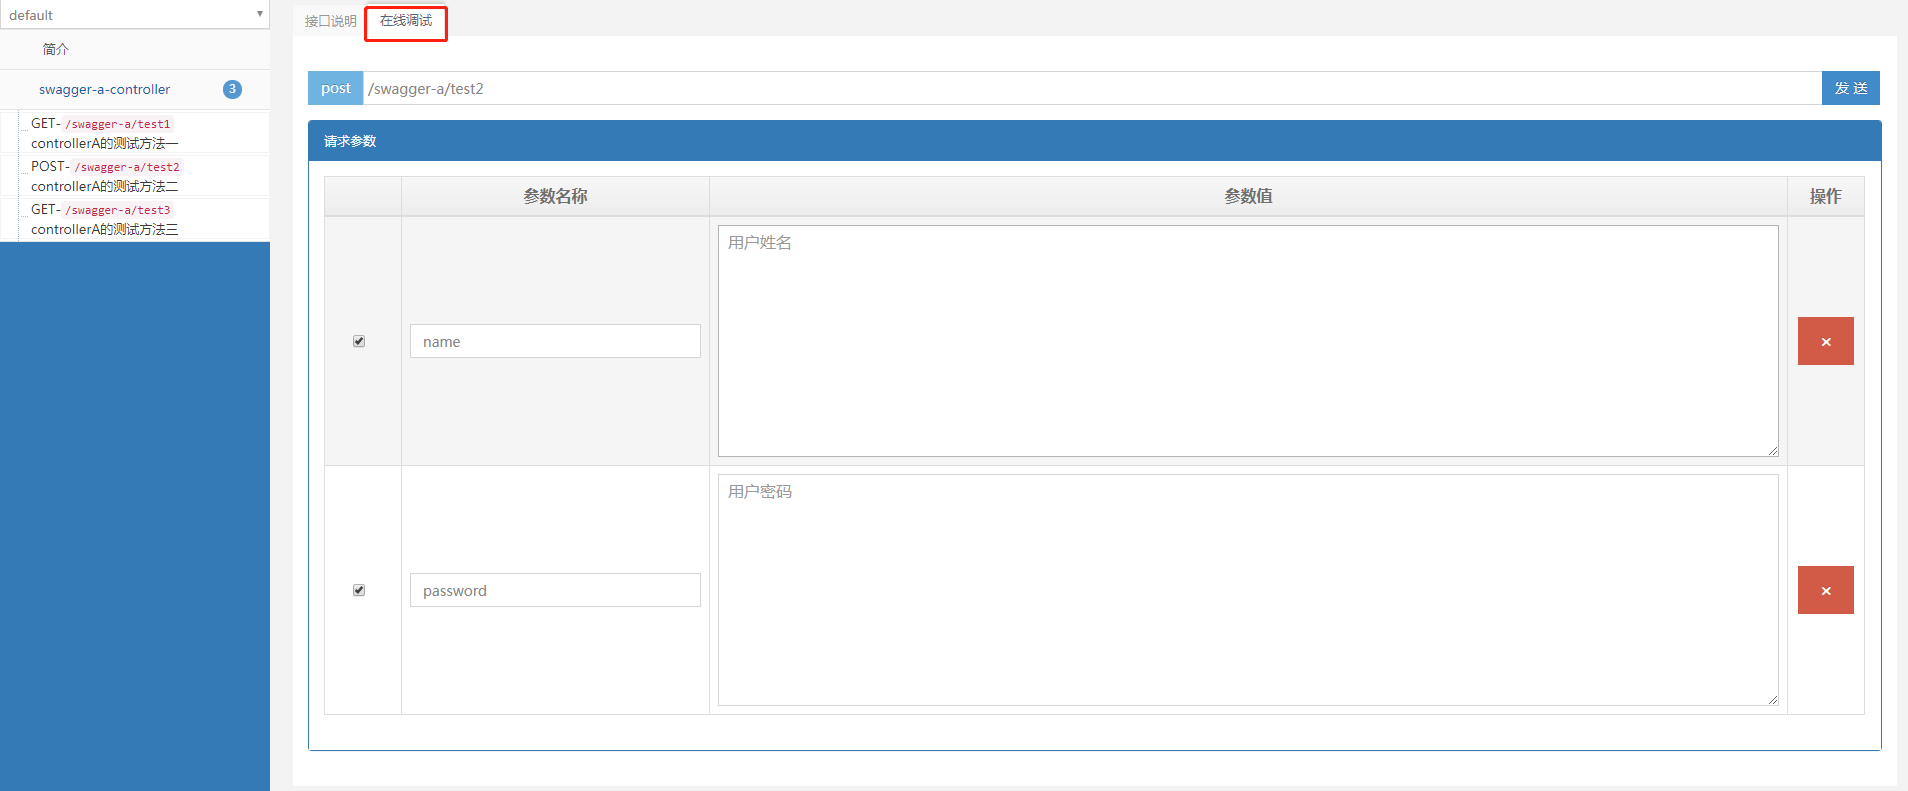
swagger-bootstrap-ui提供两大核心功能:文档说明 和 在线调试,以下作说明。
在以上实例的基础上,引入maven依赖即可:
<!--美化swagger-->
<dependency>
	<groupId>com.github.xiaoymin</groupId>
	<artifactId>swagger-bootstrap-ui</artifactId>
	<version>1.7</version>
</dependency>
然后,访问 http://localhost:8084/doc.html,看看效果:

总结
其实对于作者来说,我并不喜欢这种这种编码风格。虽然生成了 spi 文档,但是其注解对接口的污染较大。算是事有利弊吧,主要衡量利弊轻重。
源码:我的GitHub