1.导入context约束:spring-context-4.2.xsd
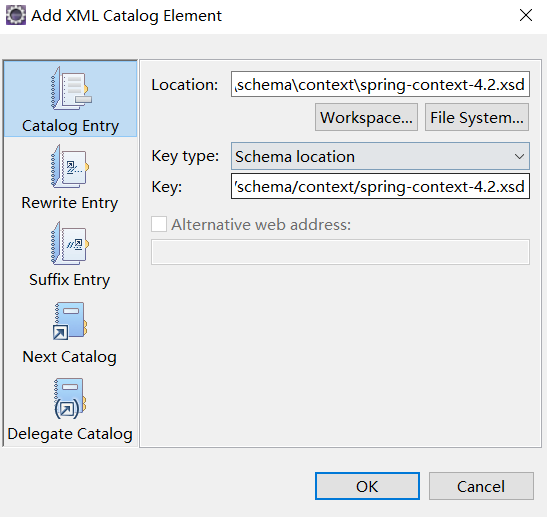
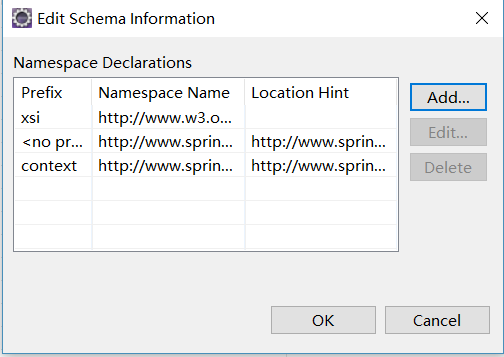
2.design模式打开xml配置文件,右键edit namespaces,点击add添加

完成后应该是这样:
配置文件中这样写即可:
<?xml version="1.0" encoding="UTF-8"?>
<beans xmlns:xsi="http://www.w3.org/2001/XMLSchema-instance" xmlns="http://www.springframework.org/schema/beans" xmlns:context="http://www.springframework.org/schema/context" xsi:schemaLocation="http://www.springframework.org/schema/beans http://www.springframework.org/schema/beans/spring-beans-4.2.xsd http://www.springframework.org/schema/context http://www.springframework.org/schema/context/spring-context-4.2.xsd ">
    <context:component-scan base-package="bean"></context:component-scan>
</beans>
在类中这样使用注解:
package bean;

import javax.annotation.PostConstruct;
import javax.annotation.PreDestroy;
import javax.annotation.Resource;

import org.junit.validator.PublicClassValidator;
import org.springframework.beans.factory.annotation.Autowired;
import org.springframework.beans.factory.annotation.Qualifier;
import org.springframework.beans.factory.annotation.Value;
import org.springframework.context.annotation.Scope;
import org.springframework.stereotype.Component;
import org.springframework.stereotype.Controller;
import org.springframework.stereotype.Repository;
import org.springframework.stereotype.Service;

//代替的配置文件内容<bean name="user" class="bean.User"/>
//  @Component("user")//四种本质相同,为了方便理解建议使用以下三种
//    @Service("user")//service层使用
//    @Controller("user")//web层使用
    @Repository("user")//dao层使用
//指定对象的作用范围
@Scope(scopeName="singleton")
public class User {
    @Value("Tom")//赋值
    private String name;

    private Integer age;

    //@Autowired//对象赋值,自动装配
    //存在问题:如果是多个类型一致的对象,无法分辨
    @Resource(name="car")//这种方式可以明确指定(推荐)
    private Car car;

    public Car getCar() {
        return car;
    }
    public void setCar(Car car) {
        this.car = car;
    }
    public String getName() {
        return name;
    }
    public void setName(String name) {
        this.name = name;
    }
    public Integer getAge() {
        return age;
    }
    @Value("20")//也可以在set方法赋值,效果一样,但不破坏封装性
    public void setAge(Integer age) {
        this.age = age;
    }
    @Override
    public String toString() {
        return "User [name=" + name + ", age=" + age + ", car=" + car + "]";
    }

    @PostConstruct//初始化方法,当相于配置文件中的init-mothod
    public void init(){
        System.out.println("初始化");
    }
    @PreDestroy//销毁方法
    public void destory(){
        System.out.println("销毁");
    }

}
Car类:
package bean;

import org.springframework.beans.factory.annotation.Value;
import org.springframework.stereotype.Component;

@Component("car")
public class Car {
    @Value("car2")
    private String  name;
    private String color;

    public String getName() {
        return name;
    }
    public void setName(String name) {
        this.name = name;
    }
    public String getColor() {
        return color;
    }
    public void setColor(String color) {
        this.color = color;
    }
    @Override
    public String toString() {
        return "Car [name=" + name + ", color=" + color + "]";
    }


}
测试可以写成以前的测试类,如果安装了STS插件,就可以这样:
package annotation;

import javax.annotation.Resource;

import org.junit.Test;
import org.junit.runner.RunWith;
import org.springframework.test.context.ContextConfiguration;
import org.springframework.test.context.junit4.SpringJUnit4ClassRunner;

import bean.User;

@RunWith(SpringJUnit4ClassRunner.class)
@ContextConfiguration("classpath:applicationContext.xml")
public class Demo {
    @Resource(name="user")
    private User u;

    @Test
    public void fun1(){
        System.out.println(u);
    }

}