摘要
Consul 有以下几个关键特性:
- 服务发现:支持服务发现。你可以通过 DNS 或 HTTP 的方式获取服务信息。
- 健康检查:支持健康检查。可以提供与给定服务相关联的任何数量的健康检查(如 web 状态码或 cpu 使用率)。
- K/V 存储:键/值对存储。你可用通过 consul 存储如动态配置之类的相关信息。
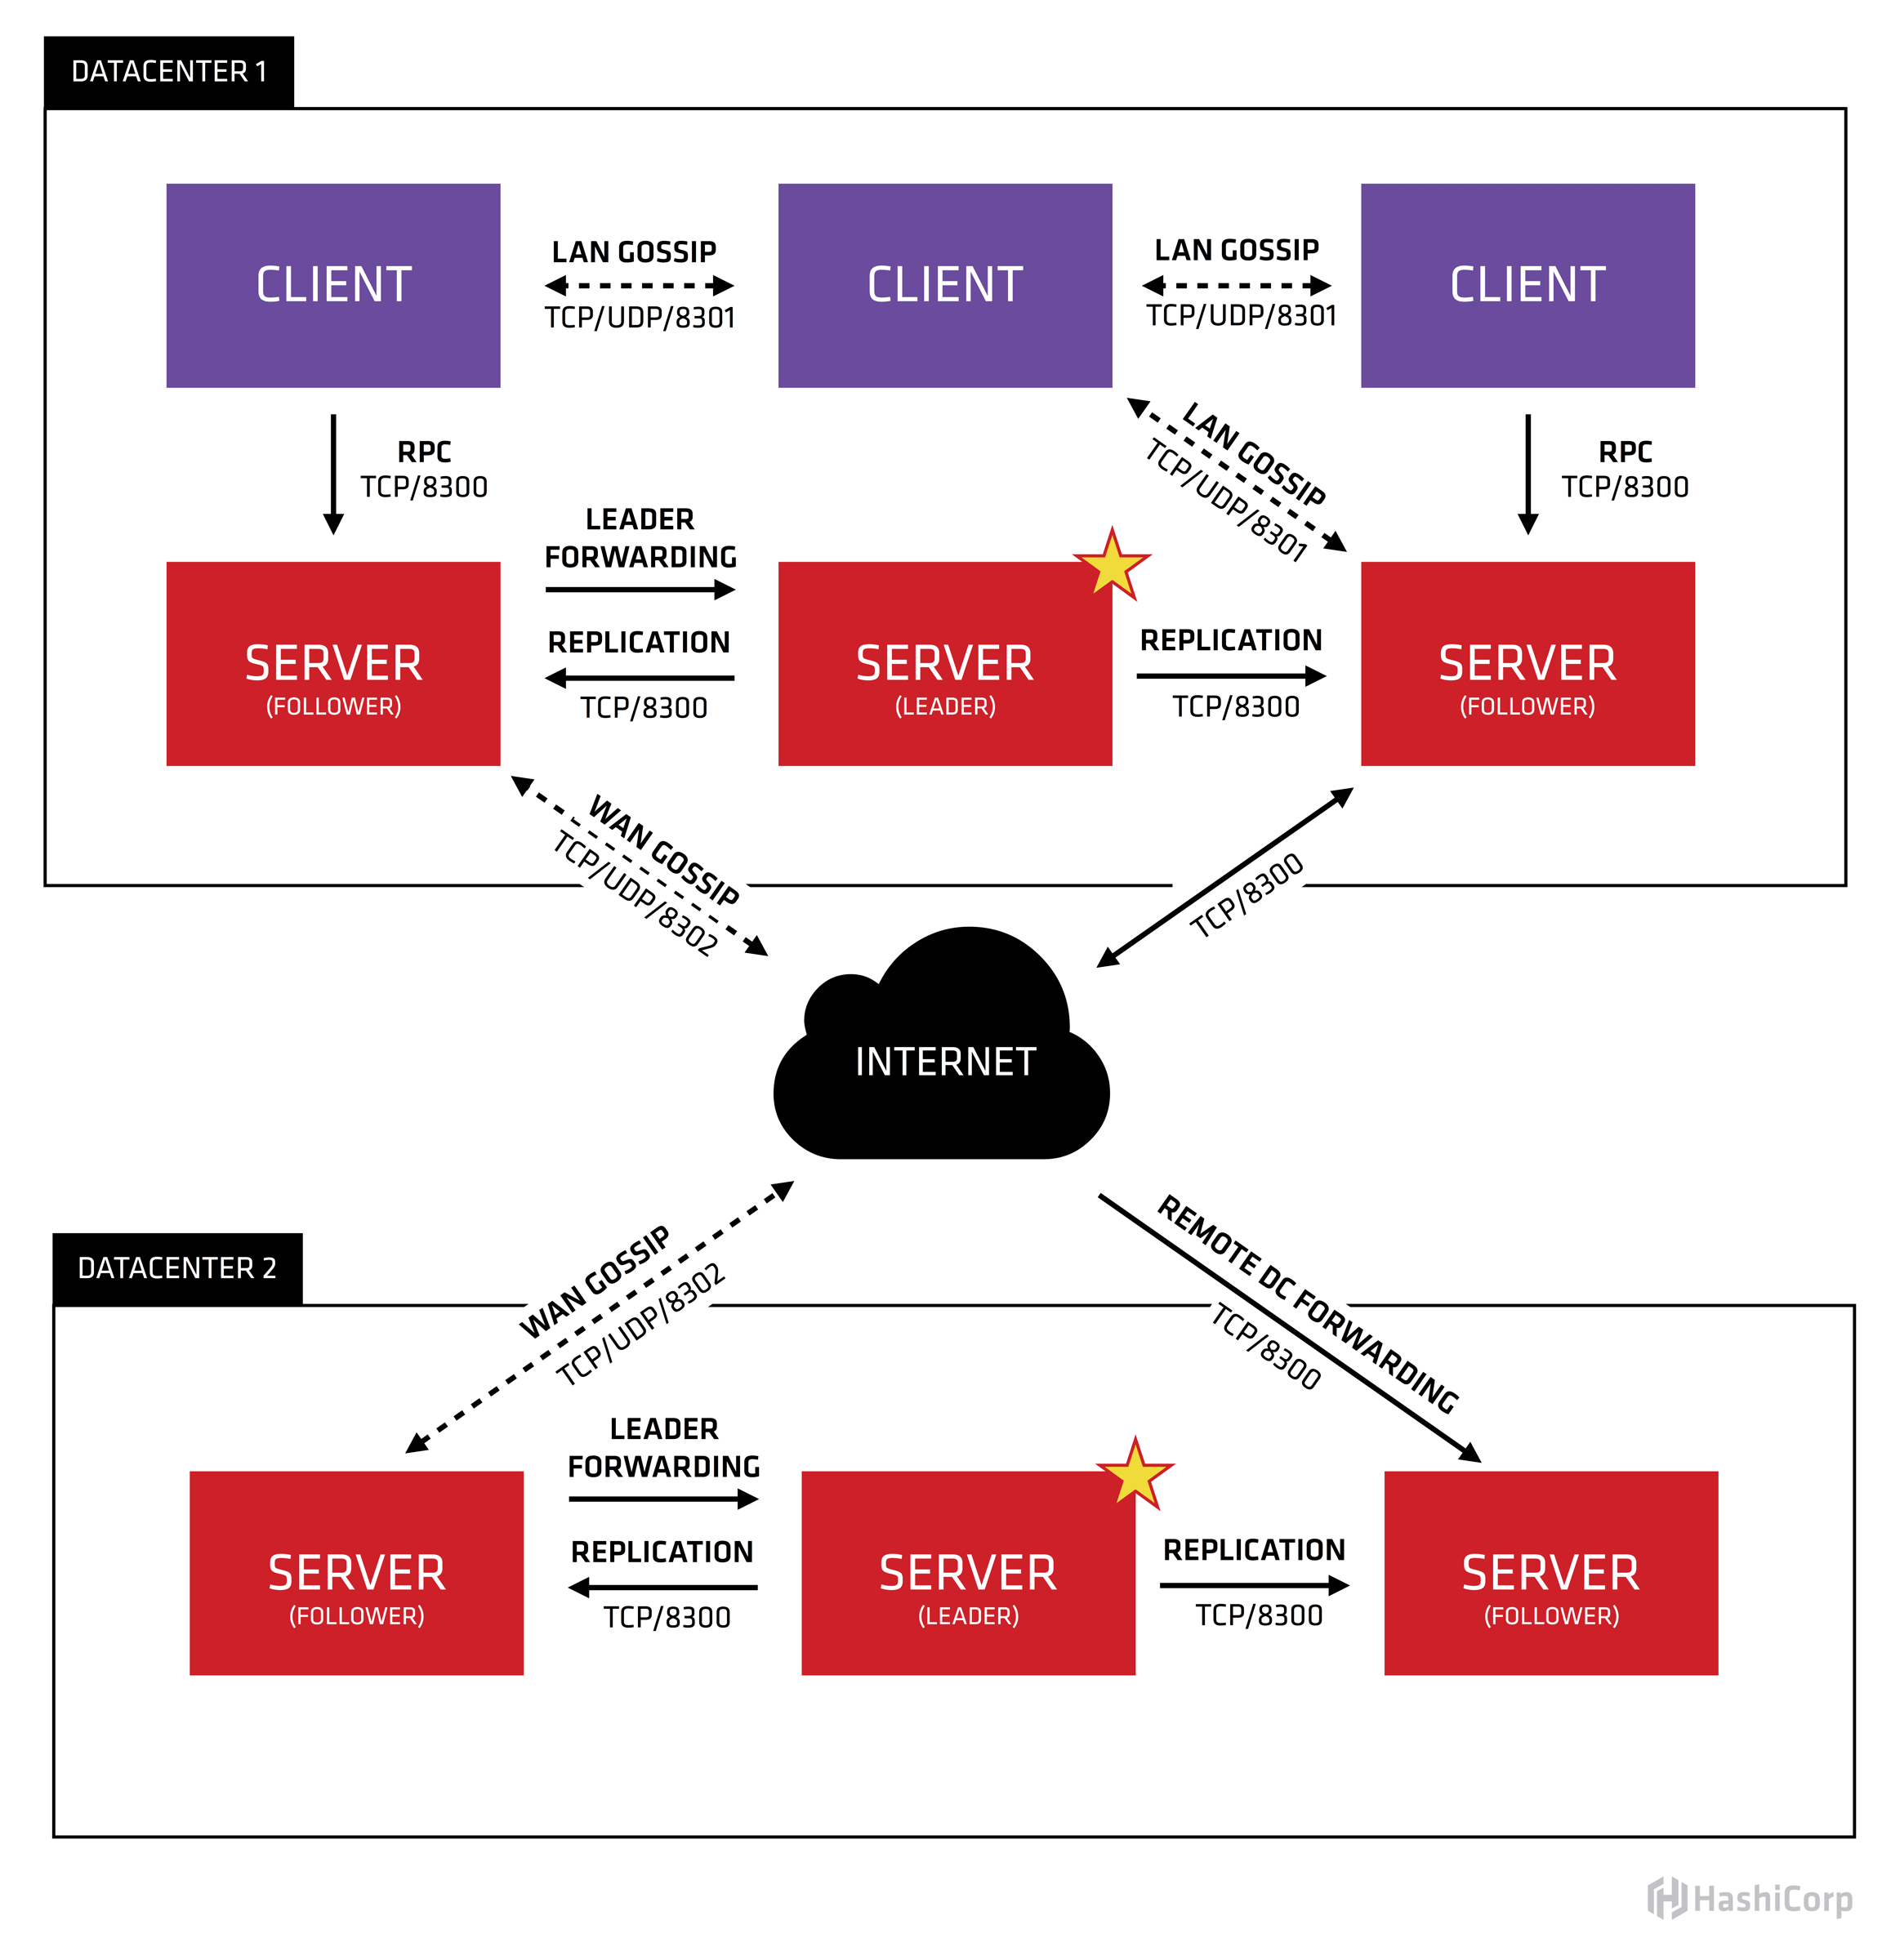
- 多数据中心:支持多数据中心,开箱即用。
- WEB-UI:支持 WEB-UI。点点点,你就能够了解你的服务现在的运行情况,一目了然,对开发运维是非常友好的。
一、案例概述
公司提出一个新需求,使用Docker将Consul、Consul Template、Registrator和Nginx组装成一个值得信任且可扩展的服务框架,可在这个框架中添加和移除服务,不需要重写任何配置,也不需要重启任何服务,一切都能正常运行
1.1、Docker Compose
1.1.1、Docker Compose的前身是Fig,它是一个定义及运行多个Docker容器的工具
1.1.2、使用Docker Compose不再需要使用Shell脚本来启动容器
1.1.3、Docker Compose非常适合组合多个容器进行开发的场景
1.2、Consul
1.2.1、Consul是HashiCorp公司推出的开源工具,用于实现分布式系统的服务发现与配置
1.2.2、Consul的特性
支持健康检查,允许存储键值对
基于Golong语言,可移植性强
支持ACL访问控制
1.2.3、与Docker等轻量级容器可无缝配合
二、使用docker-compose搭建consul集群环境
2.1、案例环境
|
主机 |
操作系统 |
主机名/IP地址 |
主要软件及版本 |
|
服务器 server1 |
Centos 7.4 |
Consul/20.0.0.10 |
Docker、Compose Consul、Consul-template |
|
服务器 server2 |
Centos 7.4 |
Registrator/20.0.0.20 |
Docker、registrator |
2.2、案例需求
- 实现单机网络下容器与容器之间互通
- 使用Docker Compose创建容器
- 搭建Consul服务实现自动发现和更新
2.3、Docker Compose容器编排
2.3.1、YAML是一种标记语言很直观的数据序列化格式
2.3.2、文件格式及编写注意事项
- 不支持制表符tab键缩进,需要使用空格缩进
- 通常开头缩进2个空格
- 字符后缩进1个空格,如冒号、逗号、横杆
- 用#号注释
- 如果包含特殊字符用单引号引起来
- 布尔值必须用引号括起来
2.4、Docker Compose配置常用字段
|
字段 |
描述 |
|
build dockerfile context |
指定Dockerfile文件名构建镜像上下文路径 |
|
image |
指定镜像 |
|
command |
执行命令,覆盖默认命令 |
|
container name |
指定容器名称,由于容器名称是唯一的,如果指定自定义名称,则无法scale |
|
deploy |
指定部署和运行服务相关配置,只能在Swarm模式使用 |
|
environment |
添加环境变量 |
|
networks |
加入网络 |
|
ports |
暴露端口号,与-p相同,但端口号不能低于60 |
|
volume |
挂载宿主机路径或命令卷 |
|
restart |
重启策略,默认no,always,no-failure,unless-stoped |
|
hostname |
容器主机名 |
2.5、Docker Compose常用命令
|
字段 |
描述 |
|
build |
重新构建服务 |
|
ps |
列出容器 |
|
up |
创建和启动容器 |
|
exec |
在容器里面执行命令 |
|
scale |
指定一个服容器启动数量 |
|
top |
显示容器进程 |
|
logs |
查看容器输出 |
|
down |
删除容器、网络、数据卷和镜像 |
|
stop/start/restart |
停止/启动/重启服务 |
2.6、Compose命令说明
2.6.1、基本的使用格式
1 docker-compose [options] [COMMAND] [ARGS...]
2.6.2、docker-compose选项
- --verbose 输出更多调试信息
- --version 打印版本并退出
- -f,--file FILE使用特定的compose模板文件,默认为docker-compose.yml
- -p,--project-name NAME 指定项目名称,默认使用目录名称
三、案例部署
3.1、server1和server2安装docker(server1上演示)
3.1.1、安装依赖包
1 [root@server1 yum.repos.d]# yum -y install yum-utils device-mapper-persistent-data lvm2
2
3 #yum-utils 提供了 yum-config-manager
4 #device mapper 存储驱动程序需要 device-mapper-persistent-data 和 lvm2
5 #device mapper 是 linux2.6 内核中支持逻辑卷管理的通用设备映射机制,它为实现用于存储资源管理的块设备驱动提供了一个高度模块化的内核架构
3.1.2、设置阿里云镜像源并重建元数据库
1 [root@server1 yum.repos.d]# yum-config-manager --add-repo https://mirrors.aliyun.com/docker-ce/linux/centos/docker-ce.repo
2
3 [root@server1 yum.repos.d]# yum clean all
4
5 [root@server1 yum.repos.d]# yum makecache
3.1.3、安装docker-ce并设置环境
1 [root@server1 yum.repos.d]# systemctl stop firewalld.service
2 [root@server1 yum.repos.d]# setenforce 0
3 [root@server1 yum.repos.d]# yum -y install docker-ce
4 [root@server1 yum.repos.d]# systemctl start docker.service
5 [root@server1 yum.repos.d]# systemctl enable docker.service
3.1.4、网络优化
1 [root@server1 yum.repos.d]# echo 'net.ipv4.ip_forward=1' >> /etc/sysctl.conf     #开启路由功能
2 [root@server1 yum.repos.d]# sysctl -p     #配置生效
3 net.ipv4.ip_forward = 1
4 [root@server1 yum.repos.d]# systemctl restart network
5 [root@server1 yum.repos.d]# systemctl restart docker
3.1.5、镜像加速(到阿里云镜像加速寻找自己的加速器,具体操作查看Docker基本操作)
1 [root@server1 yum.repos.d]# tee /etc/docker/daemon.json <<-'EOF'
2 > {
3 > "registry-mirrors": ["https://......"]
4 > }
5 > EOF
6
7 [root@server1 yum.repos.d]# systemctl daemon-reload
8 [root@server1 yum.repos.d]# systemctl restart docker
3.2、server1上安装Compose
1 上传docker-compose到/root目录下
2
3 将docker-compose移动到/usr/local/bin
4 [root@server1 ~]# cp -p docker-compose /usr/local/bin/
5 [root@server1 ~]# chmod +x /usr/local/bin/docker-compose
6 [root@server1 ~]# mkdir compose
7
8 将需要的文件放入compose目录内
9 [root@server1 compose]# yum -y install tree
10 [root@server1 compose]# tree ./
11 ./
12 ├── docker-compose.yml #创建模板脚本
13 └── nginx #nginx目录
14 ├── Dockerfile #复制容器脚本
15 ├── nginx-1.12.2.tar.gz #复制源码包
16 └── run.sh #启动服务脚本
17
18 [root@server1 compose]# vim docker-compose.yml
19 version: '3'
20 services:
21 nginx:
22 hostname: nginx
23 build:
24 context: ./nginx
25 dockerfile: Dockerfile
26 ports:
27 - 2222:80
28 - 3333:443
29 networks:
30 - xuhao
31 volumes:
32 - ./wwwroot:/usr/local/nginx/html
33 networks:
34 xuhao:
35
36 查看docker-compose版本
37 [root@server1 compose]# docker-compose -v
38 docker-compose version 1.21.1, build 5a3f1a3
39
40 发布服务
41 [root@server1 compose]# docker-compose -f docker-compose.yml up -d
42
43 [root@server1 compose]# docker ps -a
44 CONTAINER ID IMAGE COMMAND CREATED STATUS NAMES
45 83df4fbe0ec7 compose_nginx "/run.sh" 7 seconds ago Up 6 seconds tcp, 0.0.0.0:3333->443/tcp compose_nginx_1
46
47 [root@server1 compose]# tree ./
48 ./
49 ├── docker-compose.yml
50 ├── nginx
51 │ ├── Dockerfile
52 │ ├── nginx-1.12.2.tar.gz
53 │ └── run.sh
54 └── wwwroot #发布后会创建一个wwwroot目录
55
56 在wwwroot目录下创建一个网页
57 [root@server1 compose]# cd wwwroot/
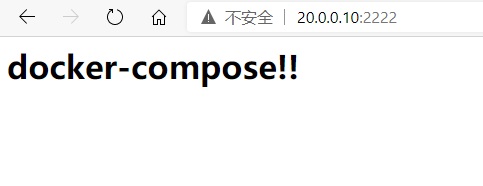
58 [root@server1 wwwroot]# echo '<h1>docker-compose!!</h1>' > index.html
59 [root@server1 wwwroot]# cat index.html
60 <h1>docker-compose!!</h1>
测试
3.3、在server1上安装consul
 1 上传consul_0.9.2_linux_amd64.zip到/root目录下
 2
 3 [root@server1 ~]# mkdir consul
 4 [root@server1 ~]# cp consul_0.9.2_linux_amd64.zip /root/consul
 5 [root@server1 ~]# cd consul/
 6 [root@server1 consul]# unzip consul_0.9.2_linux_amd64.zip
 7 Archive:  consul_0.9.2_linux_amd64.zip
 8   inflating: consul
 9 [root@server1 consul]# ll
10 总用量 51772
11 -rwxr-xr-x. 1 root root 42777946 8月  10 2017 consul
12 -rw-r--r--. 1 root root 10233177 11月 30 15:54 consul_0.9.2_linux_amd64.zip
13
14 将consul移动到/usr/local/bin
15 [root@server1 consul]# mv consul /usr/local/bin/
16 [root@server1 consul]# consul agent      #使用代理功能
17 > -server
18 > -bootstrap           #参与选举为领袖
19 > -ui
20 > -data-dir=/var/lib/consul-data     #数据文件存放位置
21 > -bind=20.0.0.10                #监听地址
22 > -client=0.0.0.0                  #所有网段
23 > -node=consul-server01 &> /var/log/consul.log &
24 [1] 90519
25
26 [root@server1 consul]# jobs      #查看后台运行情况
27 [1]+  运行中               consul agent -server -bootstrap -ui -data-dir=/var/lib/consul-data -bind=20.0.0.10 -client=0.0.0.0 -node=consul-server01 &>/var/log/consul.log &
28
29 [root@server1 consul]# consul members  #查看集群信息
30 Node             Address         Status  Type    Build  Protocol  DC
31 consul-server01  20.0.0.10:8301  alive   server  0.9.2  2         dc1
 1 [root@server1 consul]# consul info | grep leader
 2     leader = true
 3     leader_addr = 20.0.0.10:8300
 4
 5 进入容器
 6 [root@server1 consul]# docker exec -it 83df4fbe0ec7 /bin/bash
 7
 8 安装tools工具
 9 [root@nginx nginx-1.12.2]# yum -y install net-tools
10
11 查看网络状态
12 [root@nginx nginx-1.12.2]# ifconfig
13 eth0: flags=4163<UP,BROADCAST,RUNNING,MULTICAST>  mtu 1500
14         inet 172.18.0.2  netmask 255.255.0.0  broadcast 172.18.255.255    #使用compose时,地址是172.18.0.2,因为docker-compose.yml重新定义了network
15         ether 02:42:ac:12:00:02  txqueuelen 0  (Ethernet)
16         RX packets 235  bytes 327727 (320.0 KiB)
17         RX errors 0  dropped 0  overruns 0  frame 0
18         TX packets 169  bytes 9587 (9.3 KiB)
19         TX errors 0  dropped 0 overruns 0  carrier 0  collisions 0
通过httpd api 获取集群信息
 1 查看集群server成员
 2 [root@server1 consul]# curl 127.0.0.1:8500/v1/status/peers
 3 集群Raf leader
 4 [root@server1 consul]# curl 127.0.0.1:8500/vi/status/leader
 5 注册的所有服务
 6 [root@server1 consul]# curl 127.0.0.1:8500/vi/catalog/services
 7 查看nginx服务信息
 8 [root@server1 consul]# curl 127.0.0.1:8500/vi/catalog/nginx
 9 集群节点详细信息
10 [root@server1 consul]# curl 127.0.0.1:8500/vi/catalog/nodes
3.5、在server2上安装Gliderlabs/Registrator
 1 安装registrator
 2 [root@server2 ~]# docker run -d
 3 > --name=registrator    #容器名称
 4 > --net=host           #指定网络
 5 > -v /var/run/docker.sock:/tmp/docker.sock    #挂载
 6 > --restart=always
 7 > gliderlabs/registrator:latest               #镜像名称
 8 > -ip=20.0.0.20
 9 > consul://20.0.0.10:8500
10
11 查看镜像
12 [root@server2 ~]# docker images
13 REPOSITORY               TAG                 IMAGE ID            CREATED             SIZE
14 gliderlabs/registrator   latest              3b59190c6c80        4 years ago         23.8MB
15
16 查看容器
17 [root@server2 ~]# docker ps -a
18 CONTAINER ID        IMAGE                           COMMAND                  CREATED              STATUS              PORTS               NAMES
19 928b8c8580ad        gliderlabs/registrator:latest   "/bin/registrator -i…"   About a minute ago   Up About a minute                       registrator
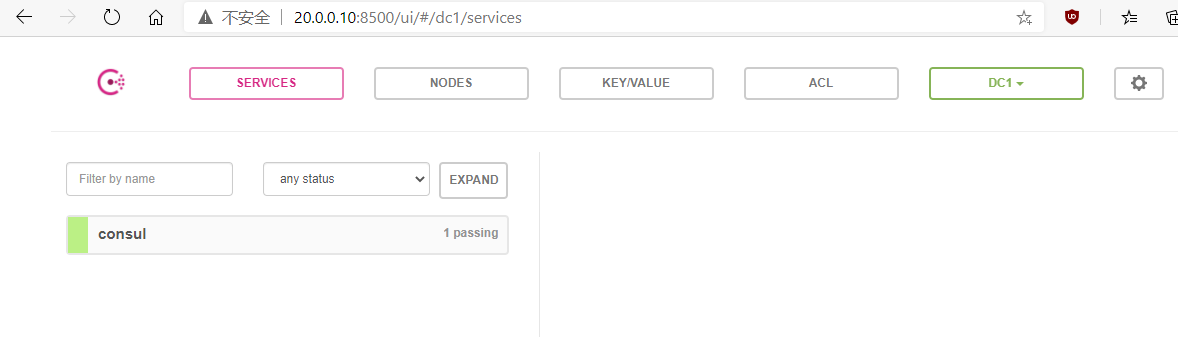
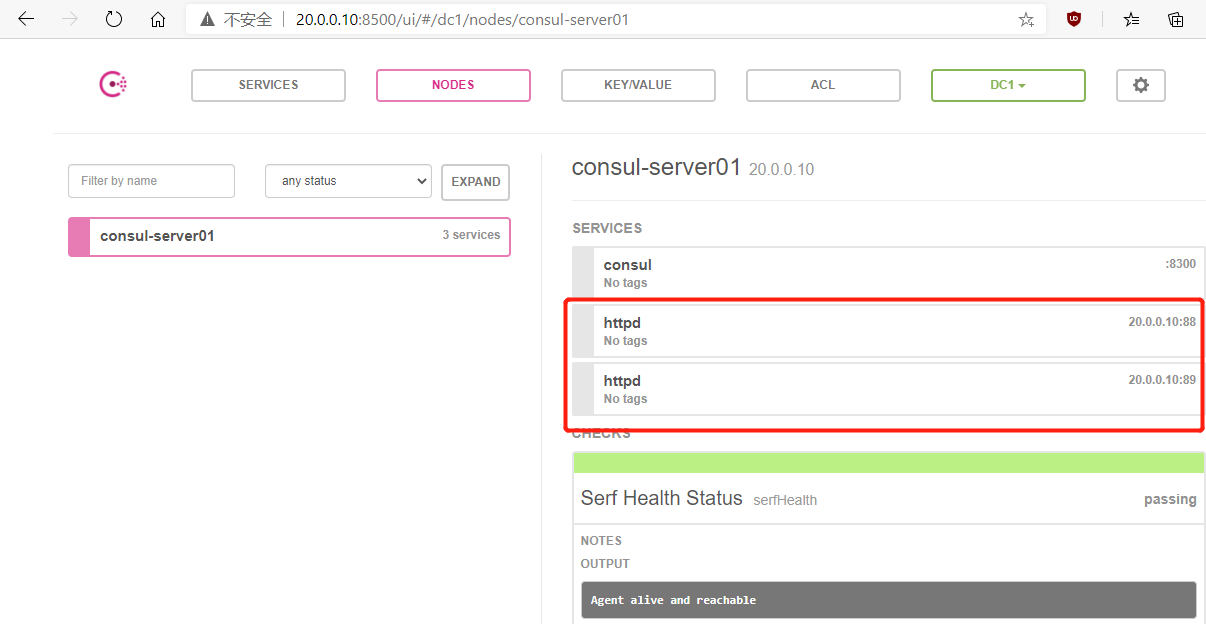
网页登录http://20.0.0.10:8500,查看节点服务状态
3.6、在server2上安装两个httpd及nginx容器
 1 [root@server2 ~]# docker run -dit -p 83:80 --name test1 -h test1 nginx
 2 [root@server2 ~]# docker run -dit -p 84:80 --name test1 -h test2 nginx
 3 [root@server2 ~]# docker run -dit -p 88:80 --name test3 -h test3 httpd
 4 [root@server2 ~]# docker run -dit -p 89:80 --name test4 -h test4 httpd
 5
 6 查看容器状态
 7 [root@server2 ~]# docker ps -a
 8 CONTAINER ID        IMAGE                           COMMAND                  CREATED              STATUS              PORTS                NAMES
 9 178332ffa010        httpd                           "httpd-foreground"       6 seconds ago        Up 4 seconds        0.0.0.0:89->80/tcp   test4
10 140f0c57c15a        httpd                           "httpd-foreground"       47 seconds ago       Up 46 seconds       0.0.0.0:88->80/tcp   test3
11 37b796ddca46        nginx                           "/docker-entrypoint.…"   About a minute ago   Up About a minute   0.0.0.0:84->80/tcp   test2
12 f47a5aaf1e4d        nginx                           "/docker-entrypoint.…"   2 minutes ago        Up 2 minutes        0.0.0.0:83->80/tcp   test1
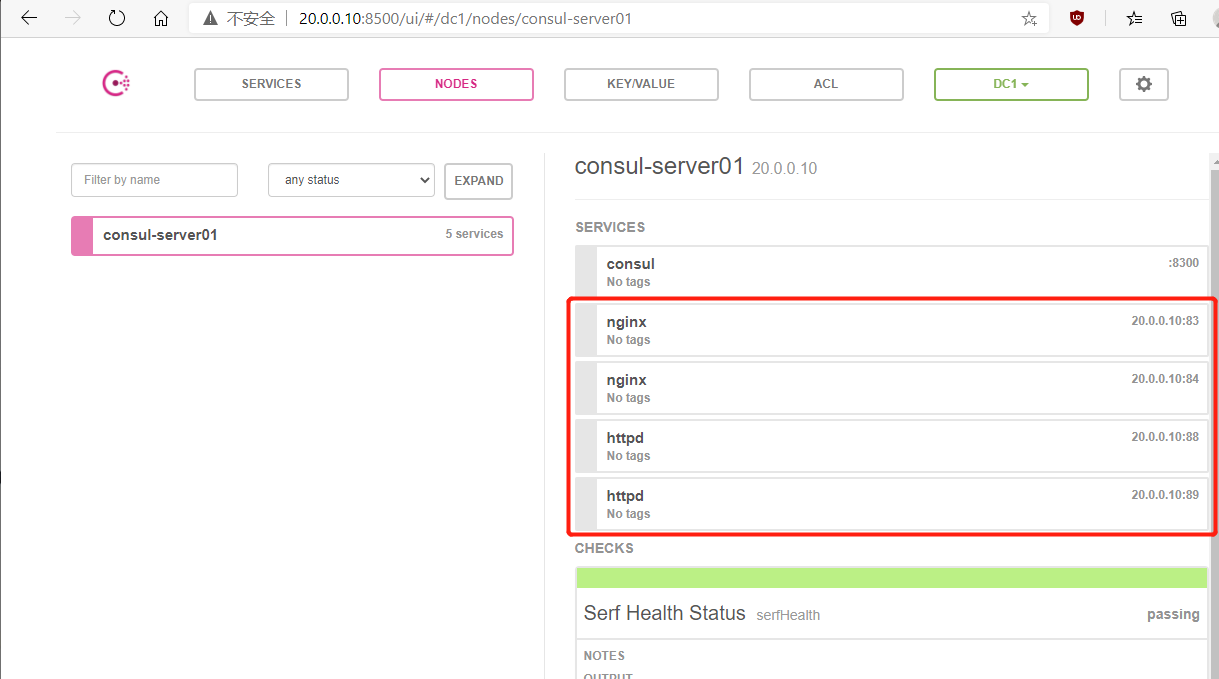
网页登录http://20.0.0.10:8500,查看节点服务状态
将两个nginx服务移除查看,网页监控服务也被移除
 1 [root@server2 ~]# docker stop 37b796ddca46
 2 37b796ddca46
 3 [root@server2 ~]# docker rm 37b796ddca46
 4 37b796ddca46
 5 [root@server2 ~]# docker stop f47a5aaf1e4d
 6 f47a5aaf1e4d
 7 [root@server2 ~]# docker rm f47a5aaf1e4d
 8 f47a5aaf1e4d
 9 [root@server2 ~]# docker ps -a
10 CONTAINER ID        IMAGE                           COMMAND                  CREATED             STATUS              PORTS                NAMES
11 178332ffa010        httpd                           "httpd-foreground"       5 minutes ago       Up 5 minutes        0.0.0.0:89->80/tcp   test4
12 140f0c57c15a        httpd                           "httpd-foreground"       6 minutes ago       Up 6 minutes        0.0.0.0:88->80/tcp   test3
3.7、在server1上安装consul-template
consul-template是一个守护进程,用于实时查询consul集群信息,并更新文件系统上任意数量的指定模板,生成配置文件,更新完成以后,可以选择运行shell命令执行更新操作,重新加载Nginx。consul-template可以查询consul中的服务目录、Key、Key-values等。这种强大的抽象功能和查询语言模板可以使consul-template特别适合动态的创建配置文件
 1 准备template nginx 模板文件
 2 [root@server1 consul]# vim nginx.ctmpl
 3 upstream http_backend {
 4   {{range service "nginx"}}
 5    server {{.Address}}:{{.Port}};
 6     {{end}}
 7 }
 8
 9 server {
10   listen 83;
11   server_name localhost 20.0.0.10;
12   access_log /var/log/nginx/aa-access.log;
13   index index.html index.php;
14   location / {
15     proxy_set_header HOST $host;
16     proxy_set_header X-Real-IP $remote_addr;
17     proxy_set_header Client-IP $remote_addr;
18     proxy_set_header X-Forwarded-For $proxy_add_x_forwarded_for;
19     proxy_pass http://http_backend;
20    }
21 }
22
23 编译安装nginx(将nginx上传到/root目录下)
24 [root@server1 consul]# yum -y install gcc gcc-c++ make pcre-devel zlib-devel
25 [root@server1 ~]# tar zxvf nginx-1.12.2.tar.gz -C /opt
26 [root@server1 ~]# cd /opt/nginx-1.12.2/
27 [root@server1 nginx-1.12.2]# ./configure --prefix=/usr/local/nginx
28 [root@server1 nginx-1.12.2]# make && make install
29
30 配置nginx
31 [root@server1 nginx-1.12.2]# vim /usr/local/nginx/conf/nginx.conf
32 http {
33     include       mime.types;
34     include       vhost/*.conf;        #添加虚拟主机目录
35     default_type  application/octet-stream;
36
37 创建虚拟主机目录
38 [root@server1 nginx-1.12.2]# mkdir /usr/local/nginx/conf/vhost
39
40 创建日志文件目录
41 [root@server1 nginx-1.12.2]# mkdir /var/log/nginx
42
43 启动nginx并查看端口
44 [root@server1 nginx-1.12.2]# /usr/local/nginx/sbin/nginx
45 [root@server1 nginx-1.12.2]# netstat -anpt | grep nginx
46 tcp        0      0 0.0.0.0:80              0.0.0.0:*               LISTEN      69573/nginx: master
47
48 配置并启动template(上传template到/root目录下)
49 [root@server1 ~]# unzip consul-template_0.19.3_linux_amd64.zip      #解压缩
50 Archive:  consul-template_0.19.3_linux_amd64.zip
51   inflating: consul-template
52 [root@server1 ~]# mv consul-template /usr/local/bin    #移动
53 [root@server1 ~]# consul-template -consul-addr 20.0.0.10:8500 -template "/root/consul/nginx.ctmpl:/usr/local/nginx/conf/vhost/xh.conf:/usr/local/nginx/sbin/nginx -s reload" --log-level=info
54
55 再开一个server1终端查看
56 [root@server1 ~]# cd /usr/local/nginx/conf/vhost/
57 [root@server1 vhost]# cat xh.conf
58 upstream http_backend {
59
60     server 20.0.0.20:83;    #会自动识别并添加,等会将容器服务关闭后查看
61
62  }
63
64  server {
65    listen 83;
66    server_name localhost 20.0.0.10;
67    access_log /var/log/nginx/aa-access.log;
68    index index.html index.php;
69     location / {
70       proxy_set_header HOST $host;
71       proxy_set_header X-Real-IP $remote_addr;
72       proxy_set_header Client-IP $remote_addr;
73       proxy_set_header X-Forwarded-For $proxy_add_x_forwarded_for;
74     proxy_pass http://http_backend;
75    }
76 }
网页访问然后查看日志
 1 server2上再启动一个nginx服务容器
 2 [root@server2 ~]# docker run -dit -p 89:80 --name test6 -h test6 nginx
 3 [root@server2 ~]# docker run -dit -p 88:80 --name test6 -h test6 nginx
 4 在server1上查看
 5 [root@server1 vhost]# cat xh.conf
 6 upstream http_backend {
 7
 8      server 20.0.0.20:83;
 9
10      server 20.0.0.20:88;
11
12      server 20.0.0.20:89;       #节点自动添加
13
14 }
15
16 server {
17        listen 83;
18        server_name localhost 20.0.0.10;
19        access_log /var/log/nginx/aa-access.log;
20        index index.html index.php;
21        location / {
22           proxy_set_header HOST $host;
23           proxy_set_header X-Real-IP $remote_addr;
24           proxy_set_header Client-IP $remote_addr;
25           proxy_set_header X-Fprwarded-For $proxy_add_x_forwarded_for;
26           proxy_pass http://http_backend;
27                  }
28        }
29
30 在server2上查看日志(访问20.0.0.10可以访问后面的节点)
31 [root@server2 ~]# docker logs -f test5
32 /docker-entrypoint.sh: /docker-entrypoint.d/ is not empty, will attempt to perform configuration
33 /docker-entrypoint.sh: Looking for shell scripts in /docker-entrypoint.d/
34 /docker-entrypoint.sh: Launching /docker-entrypoint.d/10-listen-on-ipv6-by-default.sh
35 10-listen-on-ipv6-by-default.sh: Getting the checksum of /etc/nginx/conf.d/default.conf
36 10-listen-on-ipv6-by-default.sh: Enabled listen on IPv6 in /etc/nginx/conf.d/default.conf
37 /docker-entrypoint.sh: Launching /docker-entrypoint.d/20-envsubst-on-templates.sh
38 /docker-entrypoint.sh: Configuration complete; ready for start up
39 20.0.0.10 - - [01/Dec/2020:05:45:42 +0000] "GET / HTTP/1.0" 200 612 "-" "Mozilla/5.0 (Windows NT 10.0; Win64; x64) AppleWebKit/537.36 (KHTML, like Gecko) Chrome/87.0.4280.67 Safari/537.36 Edg/87.0.664.47" "-"
40
41 [root@server2 ~]# docker logs -f test6
42 /docker-entrypoint.sh: /docker-entrypoint.d/ is not empty, will attempt to perform configuration
43 /docker-entrypoint.sh: Looking for shell scripts in /docker-entrypoint.d/
44 /docker-entrypoint.sh: Launching /docker-entrypoint.d/10-listen-on-ipv6-by-default.sh
45 10-listen-on-ipv6-by-default.sh: Getting the checksum of /etc/nginx/conf.d/default.conf
46 10-listen-on-ipv6-by-default.sh: Enabled listen on IPv6 in /etc/nginx/conf.d/default.conf
47 /docker-entrypoint.sh: Launching /docker-entrypoint.d/20-envsubst-on-templates.sh
48 /docker-entrypoint.sh: Configuration complete; ready for start up
49 20.0.0.10 - - [01/Dec/2020:05:48:53 +0000] "GET / HTTP/1.0" 304 0 "-" "Mozilla/5.0 (Windows NT 10.0; Win64; x64) AppleWebKit/537.36 (KHTML, like Gecko) Chrome/87.0.4280.67 Safari/537.36 Edg/87.0.664.47" "-"
删除一个容器查看能否自动移除
 1 删除容器
 2 [root@server2 ~]# docker stop 601bce2a82e6
 3 601bce2a82e6
 4 [root@server2 ~]# docker rm 601bce2a82e6
 5 601bce2a82e6
 6
 7 查看会发现节点自动移除
 8 [root@server1 vhost]# cat xh.conf
 9 upstream http_backend {
10
11      server 20.0.0.20:83;
12
13      server 20.0.0.20:88;
14
15 }
16
17 server {
18        listen 83;
19        server_name localhost 20.0.0.10;
20        access_log /var/log/nginx/aa-access.log;
21        index index.html index.php;
22        location / {
23           proxy_set_header HOST $host;
24           proxy_set_header X-Real-IP $remote_addr;
25           proxy_set_header Client-IP $remote_addr;
26           proxy_set_header X-Fprwarded-For $proxy_add_x_forwarded_for;
27           proxy_pass http://http_backend;
28                  }
29        }
3.8、consul多节点
 1 上传consul压缩包到server3上
 2
 3 解压缩
 4 [root@server3 ~]# unzip consul_0.9.2_linux_amd64.zip
 5 Archive:  consul_0.9.2_linux_amd64.zip
 6   inflating: consul
 7 [root@server3 ~]# mv consul /usr/local/bin/
 8
 9 加入已有的群集中
10 [root@server3 ~]# consul agent
11 > -bootstrap
12 > -ui
13 > -data-dir=/var/lib/consul-data
14 > -server
15 > -bind=20.0.0.30
16 > -client=0.0.0.0
17 > -node=consul-server3
18 > -enable-script-checks=true
19 > -datacenter=dc1
20 > join 20.0.0.10 &> /var/log/consul.log &
21 [1] 17753
22
23 查看运行状态
24 [root@server3 ~]# jobs
25 [1]+  运行中               consul agent -bootstrap -ui -data-dir=/var/lib/consul-data -server -bind=20.0.0.30 -client=0.0.0.0 -node=consul-server3 -enable-script-checks=true -datacenter=dc1 join 20.0.0.10 &>/var/log/consul.log &