参考
- dpkg用管道批量删除deb
- Mysql官网下载地址(可以选择小版本)
- Ubuntu Linux 下tar unzip解压压缩文件
- Ubuntu18.04国内源安装MySQL8.0
- 二进制包安装Mysql
- Ubuntu下彻底卸载MySQL
起因
- 因为我本地的mysql环境为8.0.18,线上通过apt自动安装的mysql为8.0.26,导致springboot的mysql扩展版本不一致而连接数据库失败。
- 然后使用 apt 搜索mysql 的指定版本找不到,所以只能通过手动下载deb进行安装指定小版本的mysql
环境
- Ubuntu 20.04 (未安装过mysql的服务器)
- Mysql8.0.18
本文用到的命令
# 下载 mysql bundle-deb(选择bundle是因为包含了所有要安装的软件)
wget https://downloads.mysql.com/archives/get/p/23/file/mysql-server_8.0.18-1ubuntu19.10_amd64.deb-bundle.tar

#  解压下载的 bundle-deb,默认解压到当前文件夹
tar -xvf mysql-server_8.0.18-1ubuntu19.10_amd64.deb-bundle.tar

# 批量安装 mysql deb
# 安装的时候第一次会提示输入密码,第二次选择 1强密码 还是 2弱密码 (建议强密码 输入1)
sudo dpkg -i *.deb

# 因为有些依赖没有,所以第一次安装会报错,安装依赖
sudo apt-get -f -y install

# 我这边测试,安装依赖之后还是会报错,所以卸载刚刚安装的mysql
dpkg -l |grep mysql|awk '{print $2}'|xargs sudo dpkg -P

# 再次安装
# 这里重新设置密码与选择密码强度,与上面的安装步骤一致
sudo dpkg -i *.deb

# 查看mysql 状态, mysql.service 前面的点显示绿色就代表正常
# ● mysql.service - MySQL Community Server
service  mysql status

# 进入mysql,输入密码即可
mysql -uroot -p
正文
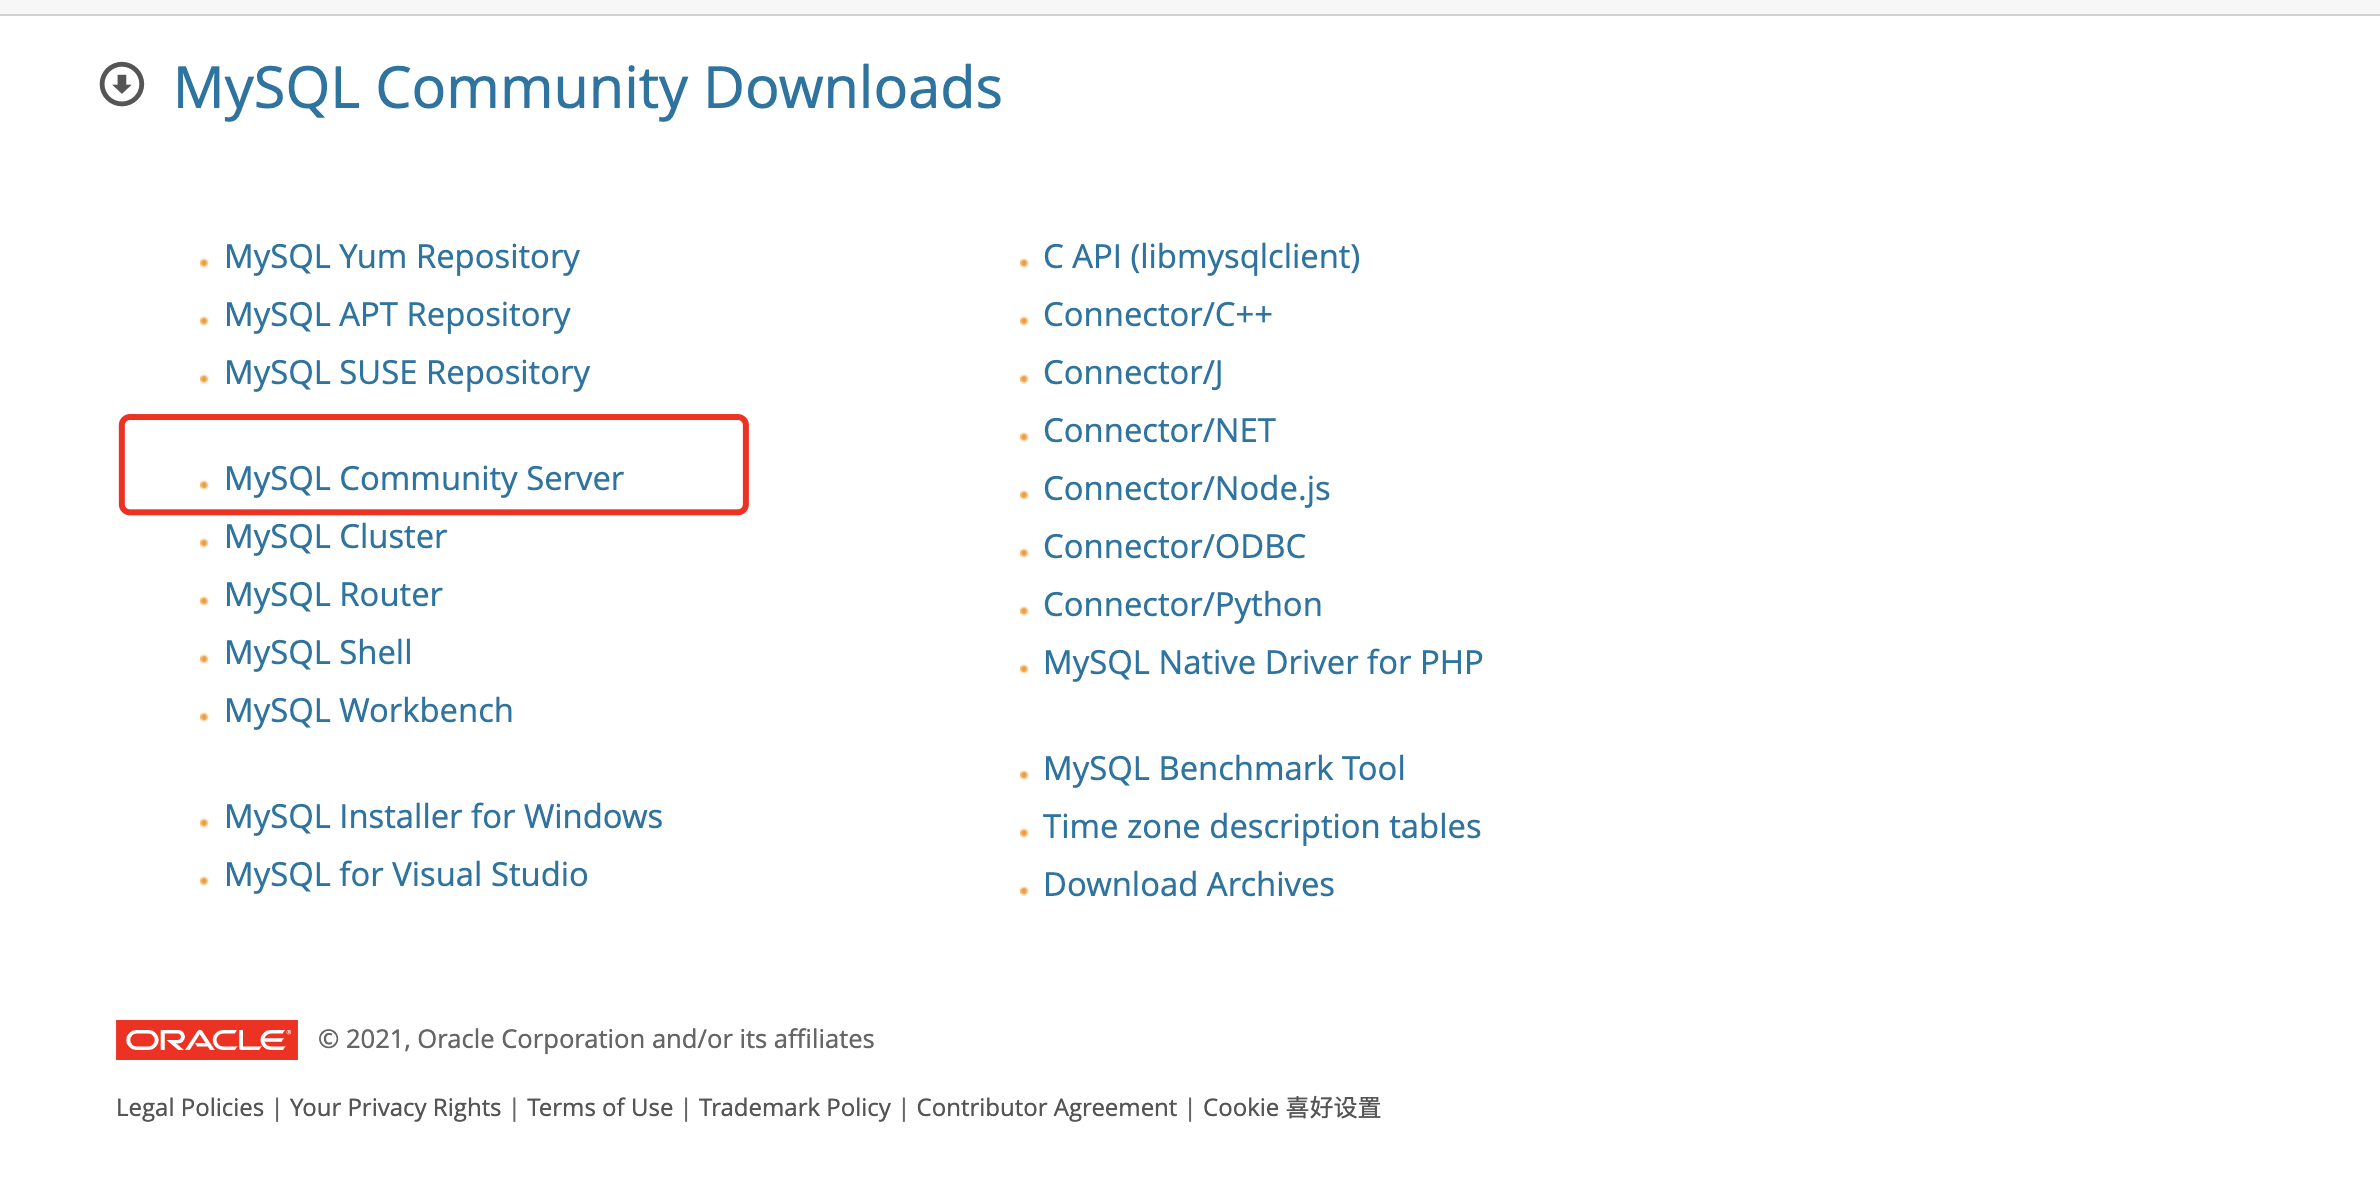
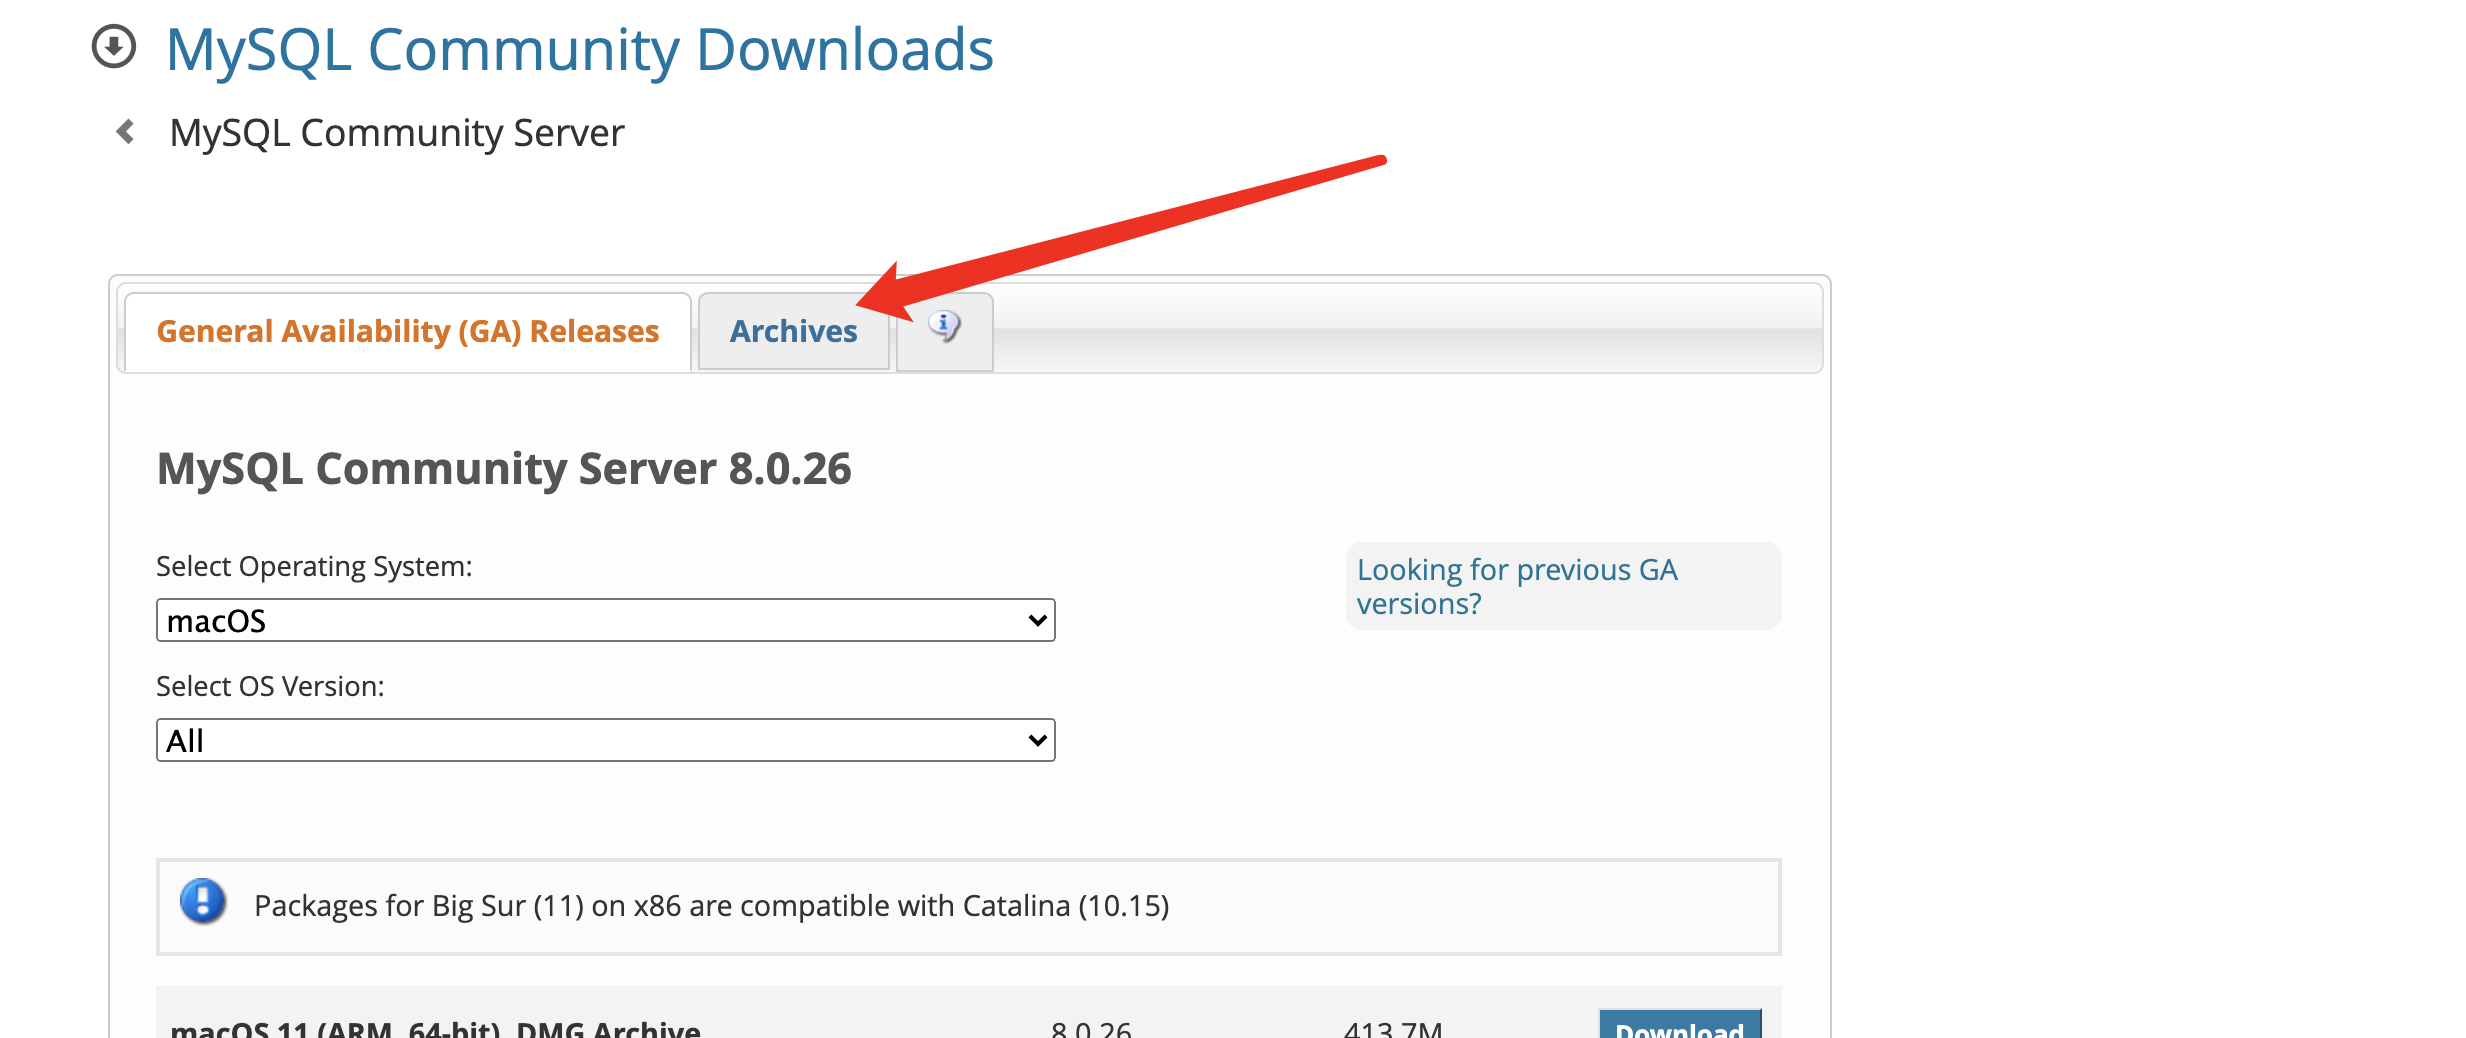
-
前往 https://dev.mysql.com/downloads/ 选择
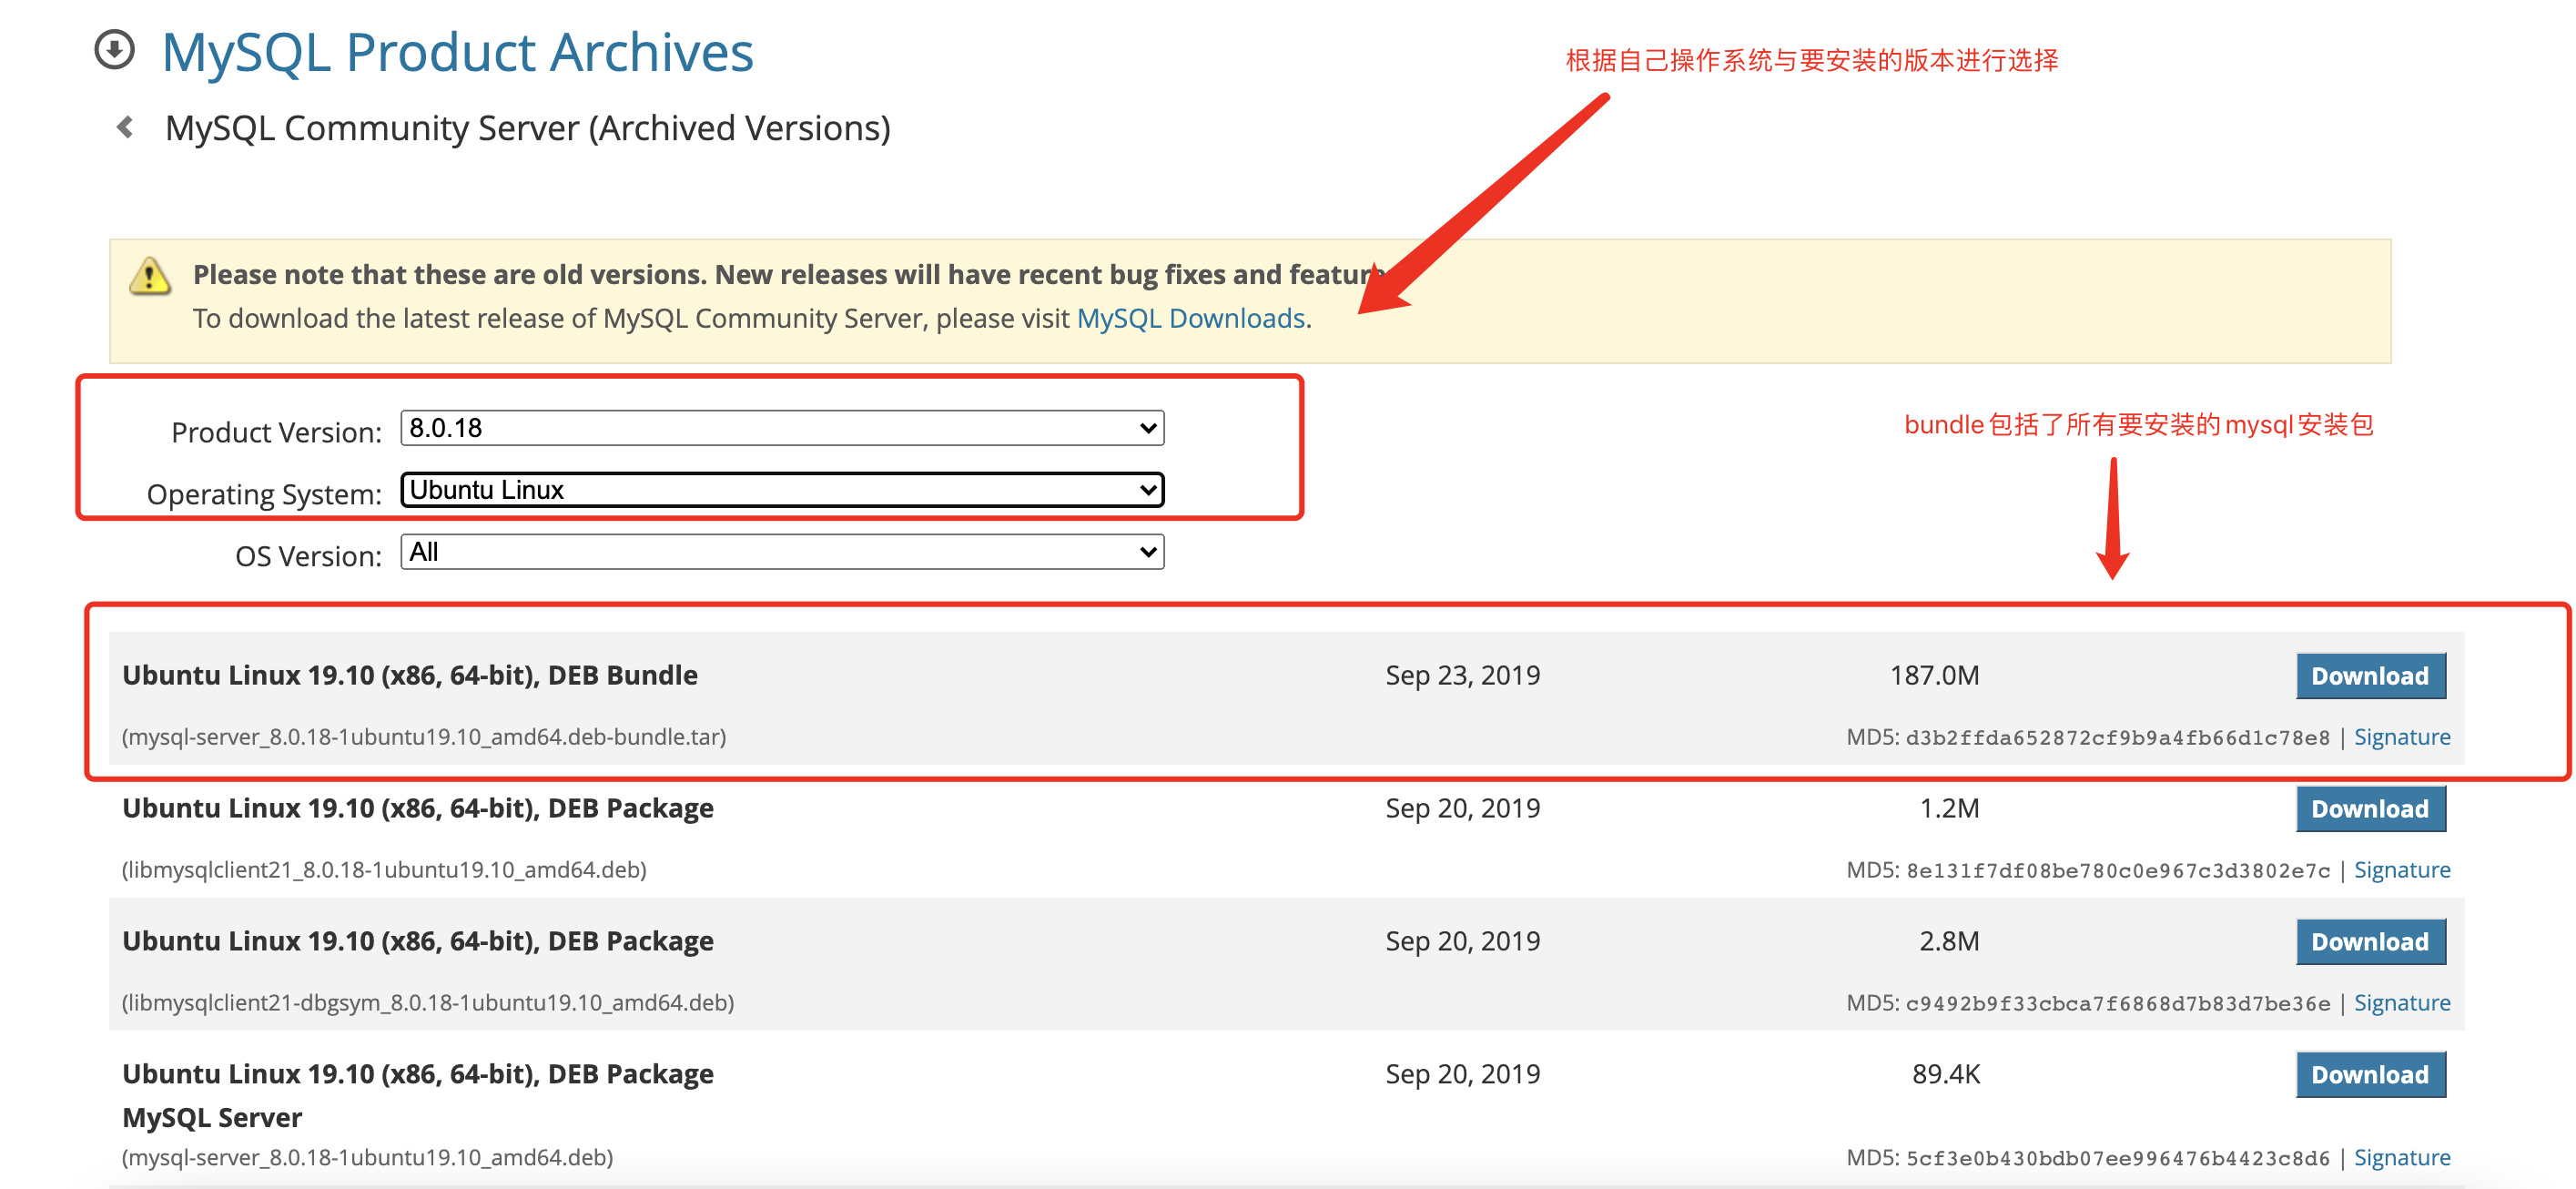
- 复制3的下载链接,使用命令下载到ubuntu服务器,我这里选择的是 ubuntu 8.0.18
wget https://downloads.mysql.com/archives/get/p/23/file/mysql-server_8.0.18-1ubuntu19.10_amd64.deb-bundle.tar
- 下载完毕后进行解压,默认解压到当前文件夹
tar -xvf mysql-server_8.0.18-1ubuntu19.10_amd64.deb-bundle.tar
- 使用命令进行安装,因为有些依赖不会自动安装,
sudo dpkg -i *.deb

...
# 显示 [More] 的时候按回车键就可以

...

# 会提示安装密码
Now that you have selected a password for the root account, please confirm by typing it again. Do not share the password with anyone.

Re-enter root password:

...

# 会提示设置密码强度(这里我选择1)
After installation, the default can be changed by setting the default_authentication_plugin server setting.

  1. Use Strong Password Encryption (RECOMMENDED)  2. Use Legacy Authentication Method (Retain MySQL 5.x Compatibility)

...

# 因为有些依赖不存在,会报错(应该是因为之前没有安装过mysq,所以会出现依赖不存在的问题)

Job for mysql.service failed because the control process exited with error code.
See "systemctl status mysql.service" and "journalctl -xe" for details.
Setting up mysql-server (8.0.18-1ubuntu19.10) ...
Processing triggers for libc-bin (2.31-0ubuntu9) ...
Processing triggers for man-db (2.9.1-1) ...
Errors were encountered while processing:
 mysql-community-test
 mysql-community-test-debug
 mysql-testsuite
- 使用apt自动安装依赖
sudo apt-get -f -y install
- 实测安装依赖后也会报错,所以卸载重装
dpkg -l |grep mysql|awk '{print $2}'|xargs sudo dpkg -P
- 重装,同步骤6(显示下面的内容就成功安装了)
...

Created symlink /etc/systemd/system/multi-user.target.wants/mysql.service → /lib/systemd/system/mysql.service.
Setting up mysql-community-test (8.0.18-1ubuntu19.10) ...
Setting up mysql-community-test-debug (8.0.18-1ubuntu19.10) ...
Setting up mysql-server (8.0.18-1ubuntu19.10) ...
Setting up mysql-testsuite (8.0.18-1ubuntu19.10) ...
Processing triggers for libc-bin (2.31-0ubuntu9) ...
Processing triggers for man-db (2.9.1-1) ...
- 查看mysql 状态, mysql.service 前面的点显示绿色就代表正常
...
● mysql.service - MySQL Community Server
...
结束