LAMP架构调整添加memcached缓存
环境:centos7.6、php7、mariadb5.5、memcached1.4.15
by newrain
环境部署
# 安装memcached
[root@memcached ~]# yum install memcached -y
[root@memcached ~]# systemctl start memcached  #启动
[root@memcached ~]# cat /etc/sysconfig/memcached
PORT="11211"  # 监听端口
USER="memcached"  # 用户
MAXCONN="1024"    # 最大并发数
CACHESIZE="64"    # 分配内存大小
OPTIONS=""        # 监听网络地址

[root@memcached ~]# yum install -y telnet   #安装telent
[root@memcached ~]# telnet 192.168.246.188 11211
Trying 192.168.246.188...
Connected to 192.168.246.188.
Escape character is '^]'.
set name 0 60 8    #设置名称为name的key
newrain        #给name的值
STORED         #出现stoped表示已经存储成功。
get name       #查询key值
VALUE name 0 8
newrain
END

# 安装php7
[root@memcached ~]# rpm -Uvh https://mirror.webtatic.com/yum/el7/epel-release.rpm
[root@memcached ~]# rpm -Uvh https://mirror.webtatic.com/yum/el7/webtatic-release.rpm
[root@memcached ~]# yum install php70w.x86_64 php70w-cli.x86_64 php70w-common.x86_64 php70w-gd.x86_64 php70w-ldap.x86_64 php70w-mbstring.x86_64 php70w-mcrypt.x86_64 php70w-mysql.x86_64 php70w-pdo.x86_64 php70w-devel zlib-devel  -y
[root@memcached ~]# yum -y install php70w-fpm
[root@memcached ~]# yum install -y make gcc zlib-devel libmemcached-devel git
下载PHP Memcache 扩展包
[root@memcached ~]# git clone https://github.com/websupport-sk/pecl-memcache   #php7的mem扩展
[root@memcached ~]# cd pecl-memcache/
[root@memcached pecl-memcache]# /usr/bin/phpize
Configuring for:
PHP Api Version:         20151012
Zend Module Api No:      20151012
Zend Extension Api No:   320151012
[root@memcached pecl-memcache]# ./configure --with-php-config=/usr/bin/php-config
[root@memcached pecl-memcache]# make && cp modules/memcache.so  /usr/lib64/php/modules/
[root@memcached pecl-memcache]# vim /etc/php.ini
添加  extension=memcache.so
[root@memcached pecl-memcache]# systemctl restart php-fpm
# 安装数据库 mariadb
[root@memcached ~]# yum install -y mariadb mariadb-server
[root@memcached ~]# systemctl start mariadb
[root@memcached ~]# mysqladmin password 123456
# 导入测试数据
https://blog.csdn.net/NewRain_wang/article/details/103541196
# 安装apache 服务
[root@memcached ~]# yum install -y httpd
[root@memcached ~]# vim /etc/httpd/conf/httpd.conf
修改下列配置,支持php
DirectoryIndex index.html index.php
[root@memcached ~]# systemctl start httpd
# 部署完成
缓存数据测试
[root@memcached html]# vim /var/www/html/test.php
<?php
$memcachehost = '127.0.0.1'; # 配置memcached
$memcacheport = 11211;
$memcachelife = 60;
$memcache = new Memcache;
$memcache->connect($memcachehost,$memcacheport) or die ("Could not connect");
$query="select emp_no,salary from salaries where emp_no = 10001";
$key=md5($query);
if(!$memcache->get($key))
{
                $conn=mysqli_connect("localhost","root","123456","employees"); # 配置mysql
                $result=mysqli_query($conn,$query);
                while ($row=mysqli_fetch_assoc($result))
                {
                        $arr[]=$row;
                }
                $f = 'mysql';
                $memcache->add($key,serialize($arr),0,30);
                $data = $arr ;
}
else{
        $f = 'memcache';
        $data_mem=$memcache->get($key);
        $data = unserialize($data_mem);
}
echo $f;
echo "<br>";
echo "$key";
echo "<br>";
foreach($data as $a)
{
                echo "key is  <b><font color=#FF0000>$a[emp_no]</font></b>";
                echo "<br>";
                echo "value is <b><font color=#FF0000>$a[salary]</font></b>";
                echo "<br>";
}
?>
# 源代码出处 https://my.oschina.net/kcw/blog/311411 感谢
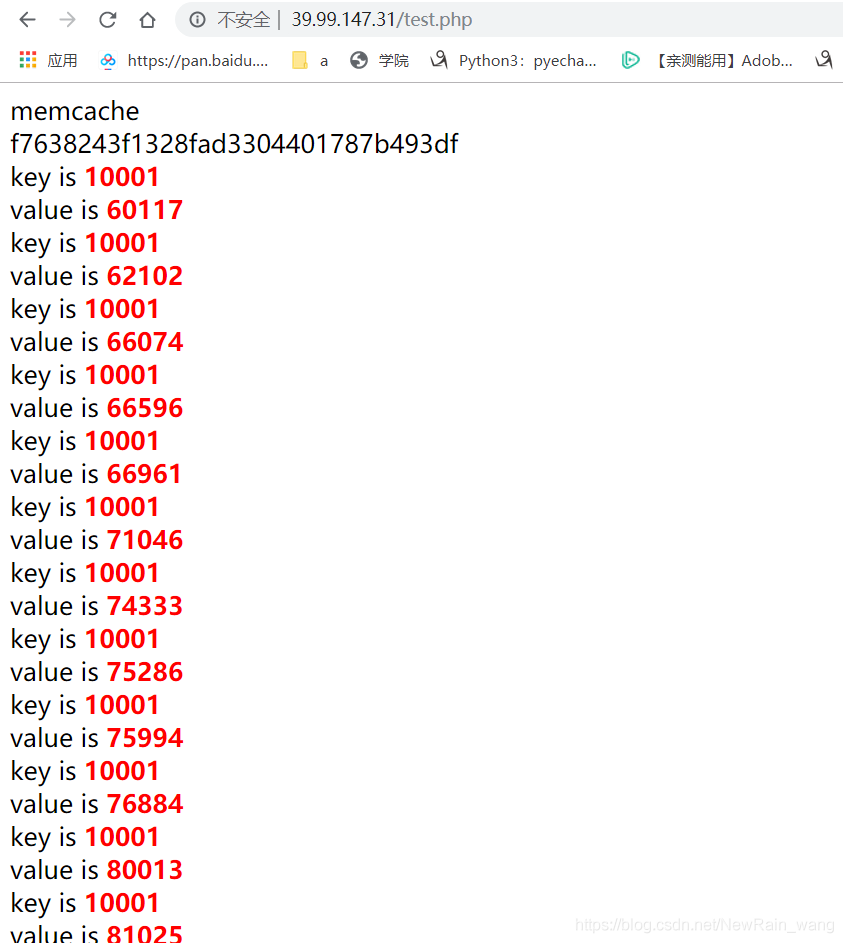
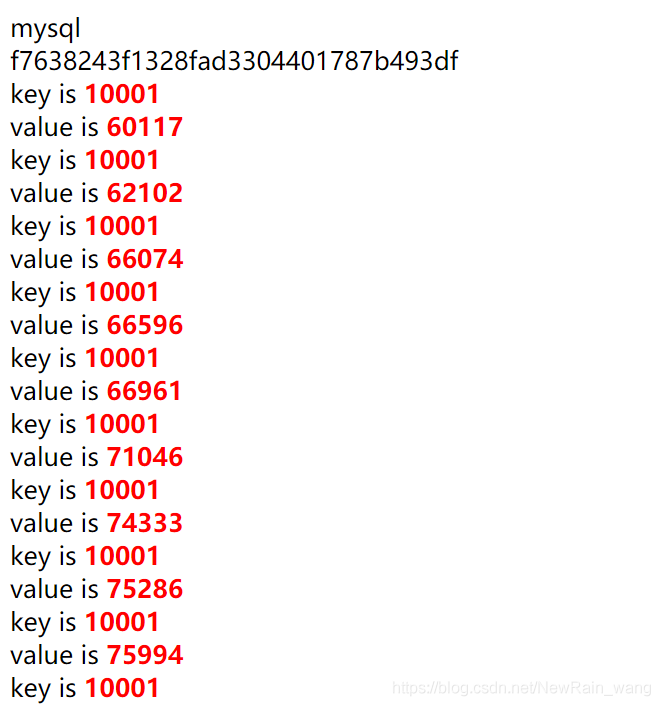
浏览器访问
当从数据库中访问数据时
当从缓存数据库中访问数据时