前言
之所以考虑从springfox迁移到springdoc是因为我的开源项目hoteler在升级到spring boot 2.6之后,UT的CI/CD挂了:
HotelerApplicationTests > contextLoads() FAILED
    java.lang.IllegalStateException at DefaultCacheAwareContextLoaderDelegate.java:132
        Caused by: org.springframework.context.ApplicationContextException at DefaultLifecycleProcessor.java:181
            Caused by: java.lang.NullPointerException at WebMvcPatternsRequestConditionWrapper.java:56

ErrorPropTest > setErrors() FAILED
    java.lang.IllegalStateException at DefaultCacheAwareContextLoaderDelegate.java:132
        Caused by: org.springframework.context.ApplicationContextException at DefaultLifecycleProcessor.java:181
            Caused by: java.lang.NullPointerException at WebMvcPatternsRequestConditionWrapper.java:56

... more
在一番定位和谷歌之后,在Spring 5.3/Spring Boot 2.4 support和spring boot升级2.6.0。启动报错 原因详见:springfox/springfox#3462中的提示下,猜测是springfox未升级导致的不兼容导致的问题。本来计划等待springfox官方自行升级,结果一看github的提价记录,springfox从2020年10月14号之后就在也没有更新代码了,因此决定,从springfox迁移到springdoc。
备注
如果仍然想在spring 2.6之后使用springfox,建议在配置文件中添加:
spring.mvc.pathmatch.matching-strategy=ant_path_matcher
更多信息可以参考https://github.com/lWoHvYe/eladmin。
删除springfox依赖和相关代码
首先删除springfox的依赖:
# gradle
io.springfox:springfox-boot-starter:3.0.0`

# maven
<dependency>
    <groupId>io.springfox</groupId>
    <artifactId>springfox-boot-starter</artifactId>
    <version>3.0.0</version>
</dependency>
删除Controller下的swagger的注解,
删除自定的swagger的配置类,
删除@EnableOpenApi
导入springdoc依赖
对于gradle用户:
implementation 'org.springdoc:springdoc-openapi-ui:1.5.12'
对于maven用户:
<dependency>
    <groupId>org.springdoc</groupId>
    <artifactId>springdoc-openapi-ui</artifactId>
    <version>1.5.12</version>
</dependency>
OpenApi配置
创建OpenApi配置类
@Configuration
public class OpenApiConfig {

}
定义License:
private License license() {
      return new License()
              .name("MIT")
              .url("https://opensource.org/licenses/MIT");
}
注: 这里我采用MIT的开源协议,更多协议,请访问https://opensource.org/licenses。
定义Open Api的基本信息:
private Info info() {
      return new Info()
              .title("Hoteler Open API")
              .description("大明二代")
              .version("v0.0.1")
              .license(license());
}
定义外部文档信息:
private ExternalDocumentation externalDocumentation() {
    return new ExternalDocumentation()
            .description("大明二代的Hoteler")
            .url("https://github.com/damingerdai/hoteler");
}
定义OpenAPI的spring bean:
@Bean
public OpenAPI springShopOpenAPI() {
    return new OpenAPI()
            .info(info())
            .externalDocs(externalDocumentation());
}
在配置文件中定义openapi的扫描策略:
- 基于指定接口包扫描
springdoc:
  packagesToScan: org.daming.hoteler.api.web (这是我自己的web包)
- 基于接口路由扫描
springdoc:
  pathsToMatch: /api/**, /dev/**
在controler添加@Tag注解
在controler方法上添加@Operation注解
在 @Operation 注解上添加@Parameters 和 @Parameter 说明,用于springdoc解析controler方法的参数
在的请求体类添加@Schema注解
示例:
package org.daming.hoteler.api.web;

import io.swagger.v3.oas.annotations.Operation;
import io.swagger.v3.oas.annotations.Parameter;
import io.swagger.v3.oas.annotations.enums.ParameterIn;
import io.swagger.v3.oas.annotations.security.SecurityRequirement;
import io.swagger.v3.oas.annotations.tags.Tag;
...more

/**
 * customer constoller
 *
 * @author gming001
 * @create 2020-12-25 22:13
 **/
@Tag(name = "客户", description = "客户 API")
@RestController
@RequestMapping("api/v1")
public class CustomerController {

    private ICustomerService customerService;

    private IErrorService errorService;

    @Operation(
            summary = "创建客户信息"},
            parameters = {
                    @Parameter(name = "body", description = "创建用户信息的请求体")
            }
    )
    @PostMapping("customer")
    public CommonResponse create(@RequestBody CreateCustomerRequest request) {
        var customer = new Customer().setName(request.getName()).setGender(request.getGender()).setCardId(request.getCardId()).setPhone(request.getPhone());
        var id =  this.customerService.create(customer);
        return new DataResponse<>(id);
    }

    @Operation(summary = "更新客户信息")
    @PutMapping("customer")
    public CommonResponse update(@RequestBody UpdateCustomerRequest request) {
        var customer = new Customer().setId(request.getId()).setName(request.getName()).setGender(request.getGender()).setCardId(request.getCardId()).setPhone(request.getPhone());
        this.customerService.update(customer);
        return new CommonResponse();
    }

    @Operation(summary = "获取所有的客户信息")
    @GetMapping("customers")
    public CommonResponse list() {
        var list = this.customerService.list();
        return new ListResponse<>(list);
    }


    @Operation(summary = "删除客户信息")
    @DeleteMapping("customer/{id}")
    public CommonResponse delete(@PathVariable("id") String customerId) throws HotelerException {
        try {
            var id = Long.valueOf(customerId);
            this.customerService.delete(id);
        } catch (NumberFormatException nfe) {
            var params = new Object[] { nfe.getMessage() };
            throw errorService.createHotelerException(ErrorCodeConstants.BAD_REQUEST_ERROR_CODEE, params, nfe);
        } catch (Exception ex) {
            throw errorService.createHotelerException(ErrorCodeConstants.SYSTEM_ERROR_CODEE, ex);
        }

        return new CommonResponse();
    }

    public CustomerController(
            ICustomerService customerService,
            IErrorService errorService) {
        super();
        this.customerService = customerService;
        this.errorService = errorService;
    }
}

/**
 * create customer request
 *
 * @author gming001
 * @create 2020-12-25 22:15
 **/
@Schema(name = "创建客户请求")
public class CreateCustomerRequest implements Serializable {

    private static final long serialVersionUID = -7819607546063963266L;

    @Schema(name = "名字")
    private String name;

    private Gender gender;

    private String cardId;

    private long phone:

    ...more
}
添加对JWT对token的支持(本步骤可选)
在添加OpenApiConfig类上添加Components信息:
private Components components() {
    return new Components()
            .addSecuritySchemes("bearer-key", new SecurityScheme().type(SecurityScheme.Type.HTTP).scheme("bearer").bearerFormat("JWT"));
}
然后在OpenApi中注册Components:
@Bean
public OpenAPI springShopOpenAPI() {
    return new OpenAPI()
            .info(info())
            .components(components())
            .externalDocs(externalDocumentation());
}
在需要使用Authorization的接口上添加:
@Operation(security = { @SecurityRequirement(name = "bearer-key") })
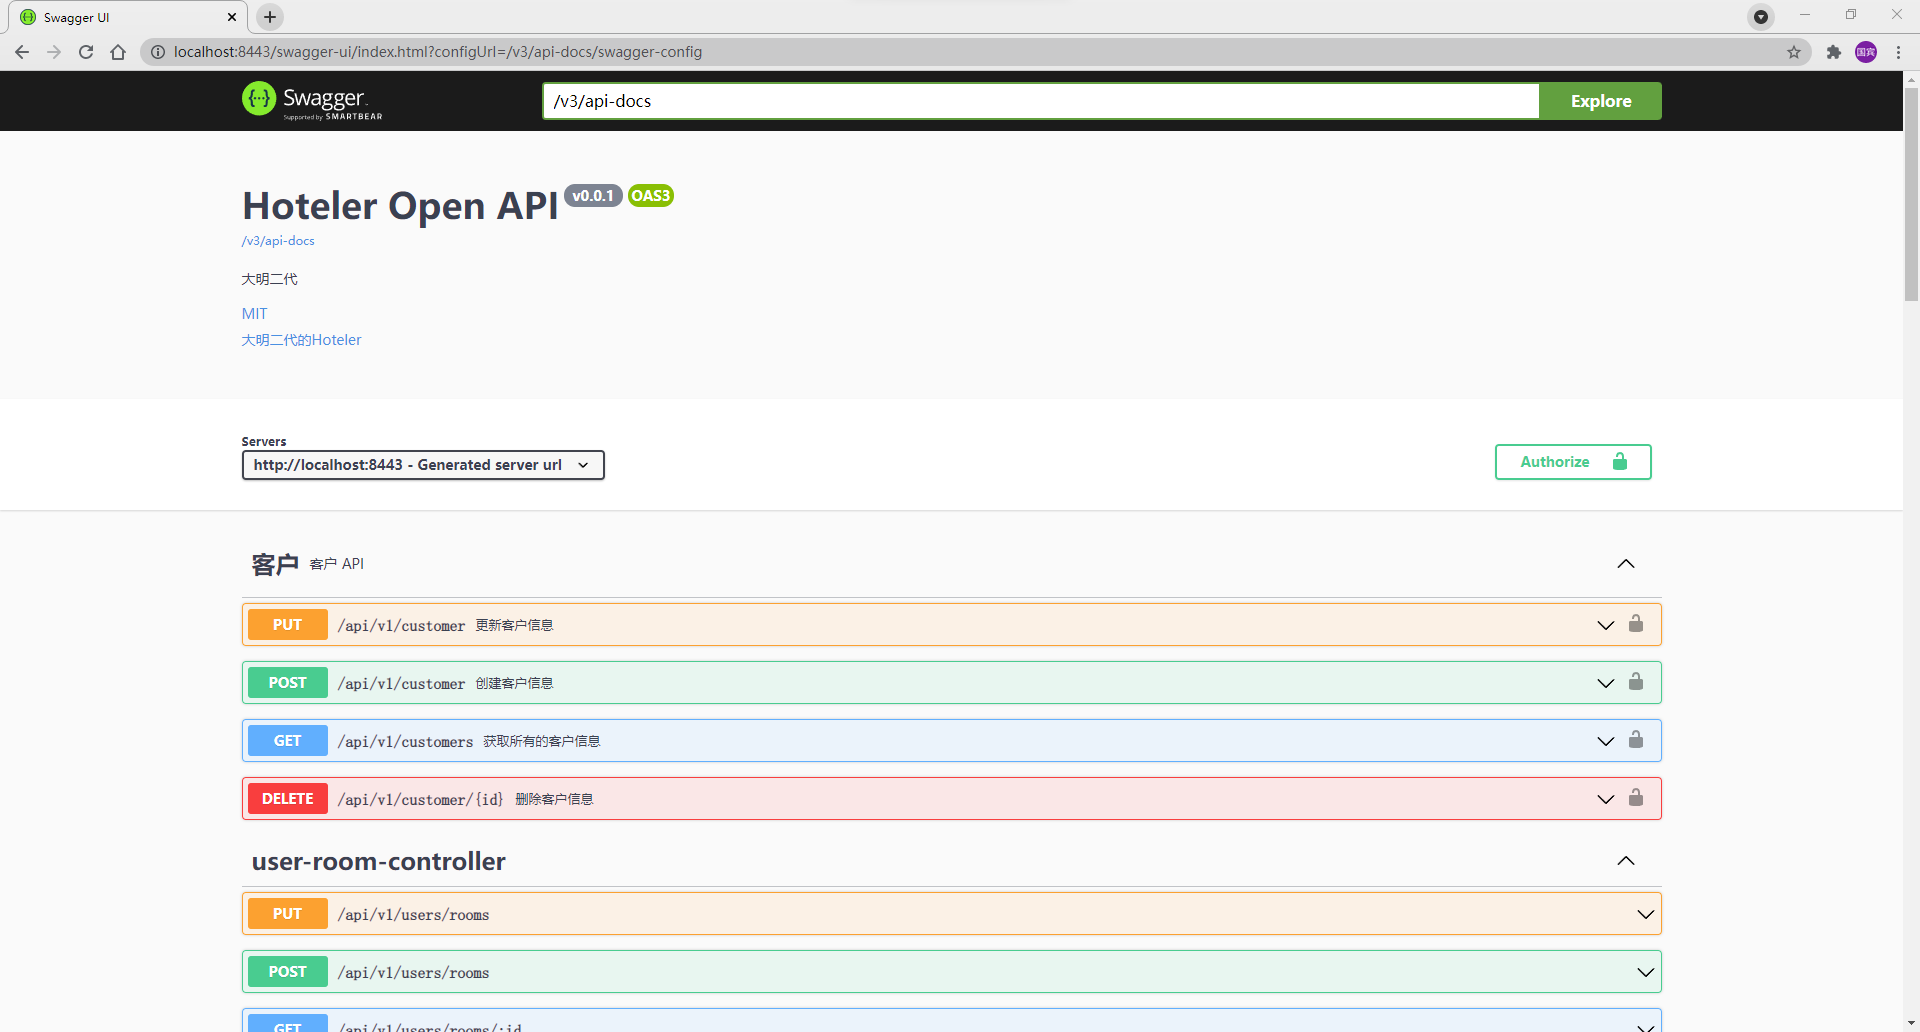
swagger-ui
在浏览器中输入http://127.0.0.1:8443/swagger-ui.html或者http://localhost:8443/swagger-ui/index.html?configUrl=/v3/api-docs/swagger-config
注: 8443是我个人比较喜欢的web开发的端口占用,一般人使用8080比较多。
效果