图片即文件,在jsp中文件上传很简单,一个type为file的input,一个form指定enctype为multipart/form-data,通过post提交到后台利用apache的commons-fileupload.XXjar即可实现。EasyUI的filebox组件也是用来进行文件上传的,但我这里的业务需求不仅仅是图片上传,还有其他文本框的提交,所以需要文件上传后再点击保存。界面展示图片是在数据列表中,因此需要小图,点击图片后再展示大图。
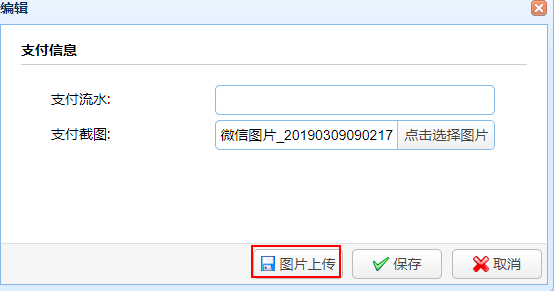
因为这里支付截图上传后需跟另一个支付流水的文本框一起在form里提交,因此需要多加一个文件上传按钮来先进行图片的上传:

选好图片后点击图片上传:

传好后点击保存,支付流水和截图将一起入库。再看数据列表的展示:

鼠标点击小图展示大图:
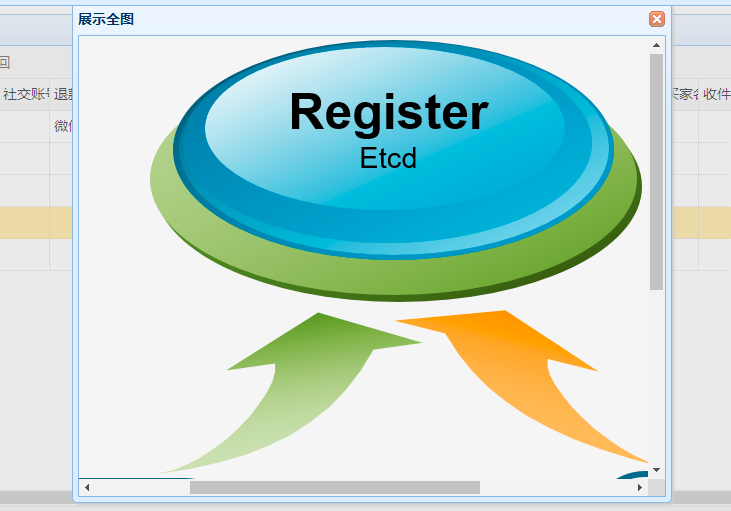
这里上传和展示就一起说明了:
先看html,首先datagrid中我们设置列头时执行支付截图需要通过imgFormatter方法进行格式化:
<th field="payFlow" width="3%">支付流水</th>
<th field="photoUrl" width="3%" data-options="formatter:imgFormatter">支付截图</th>
再看点击编辑时弹出的form:
<div id="dlg" class="easyui-dialog" style="560px;height:300px;padding:10px 20px"
     closed="true" buttons="#dlg-buttons">
    <div class="ftitle">支付信息</div>
    <form id="fm" method="post" novalidate>
        <div class="fitem">
            <label>支付流水:</label>
            <input name="payFlow" class="easyui-numberbox">
        </div>
        <div class="fitem">
            <label>支付截图:</label>
            <input id="photoUrl" name="photoUrl">
        </div>
    </form>
</div>
<div id="dlg-buttons">
    <a href="javascript:void(0)" class="easyui-linkbutton c6" iconCls="icon-save" onclick="saveFile()"
       style="90px">图片上传</a>
    <a href="javascript:void(0)" class="easyui-linkbutton c6" iconCls="icon-ok" onclick="saveFlow()"
       style="90px">保存</a>
    <a href="javascript:void(0)" class="easyui-linkbutton" iconCls="icon-cancel"
       onclick="javascript:$('#dlg').dialog('close')" style="90px">取消</a>
</div>
再看下js,展示图片、上传图片和保存信息都在这里:
    var url;
    var uploadPath;

    $(function () {
        $('#photoUrl').filebox({
            prompt: '请选择一张图片...',
             '280px',
            buttonText: '点击选择图片'
        })
        $('#photoUrl').filebox({
            onChange: function () {
                var fileObj = $("input[name='photoUrl']")[0];
                var allowExtention = ".jpg,.bmp,.gif,.png,.jpeg";
                var extention = fileObj.value.substring(fileObj.value.lastIndexOf(".") + 1).toLowerCase();
                if (allowExtention.indexOf(extention) == -1) {
                    $.messager.show({    // show error message
                        title: '错误',
                        msg: "只支持以下格式图片:" + allowExtention + "."
                    });
                    $('#photoUrl').filebox('reset');
                    $('#photoUrl').filebox('setValue', "");
                    $('#photoUrl').filebox('disableValidation');
                }
            }
        })
    });

    function imgFormatter(value, row, index) {
        if ('' != value && null != value) {
            var imgResult = "<img onclick=download("" + value + "") style='30px; height:30px;margin-left:3px;' src='" + value
                + "' title='点击查看全图'/>";
            return imgResult;
        }
    }

    function download(img) {
        var imgTemp = "http://localhost:8888" + img;
        $('#dlgImg').dialog({
            title: '展示全图',
             600,
            height: 500,
            resizable: true,
            closed: false,
            cache: false,
            modal: true
        });
        $('#imgTemp').attr("src", imgTemp);
    }

    function editFlow() {
        var row = $('#dg').datagrid('getSelected');
        if (row) {
            $('#dlg').dialog('open').dialog('setTitle', '编辑');
            $('#fm').form('load', row);
            url = 'update_pay?id=' + row.id;
        }
    }

    function saveFile() {
        // 异步提交文件
        $.ajaxFileUpload({
            url: 'uploadFile',
            secureuri: false,
            fileElementId: $("input[name='photoUrl']").attr("id"),
            type: 'post',
            success: function (data) {
                var reg = /<pre.+?>(.+)</pre>/g;
                var temp = data.match(reg);
                temp = RegExp.$1;
                var data = eval('(' + temp + ')');
                if (data.resultPath) {
                    uploadPath = data.resultPath;
                    $.messager.show({    // show error message
                        title: '成功',
                        msg: '图片上传成功.'
                    });
                }
            },
            error: function () {
                $.messager.show({    // show error message
                    title: '错误',
                    msg: "图片上传失败."
                });
            }
        });

        $('#photoUrl').filebox('reset');
        $('#photoUrl').filebox('setValue', "");
        $('#photoUrl').filebox('disableValidation');
    }

    function saveFlow() {
        if (uploadPath) {
            url = url + '&photoUrl=' + uploadPath;
        }
        $('#fm').form('submit', {
            url: url,
            onSubmit: function () {
                return $(this).form('validate');
            },
            success: function (result) {
                var result = eval('(' + result + ')');
                if (result.errorMsg) {
                    $.messager.show({
                        title: '错误',
                        msg: "保存失败."
                    });
                } else {
                    $('#dlg').dialog('close');        // close the dialog
                    $('#dg').datagrid('reload');    // reload the user data
                }
            }
        });
    }
头文件里引入ajaxfileupload.js
<script src="ajaxfileupload.js" type="text/javascript"></script>
ajaxfileupload.js直接放在静态文件目录下即可,当然你也可以自己找地方,上面的引入路径能匹配到即可:
jQuery.extend({
    createUploadIframe: function (d, b) {
        var a = "jUploadFrame" + d;
        var c = '<iframe id="' + a + '" name="' + a + '" style="position:absolute; top:-9999px; left:-9999px"';
        if (window.ActiveXObject) {
            if (typeof b == "boolean") {
                c += ' src="' + "javascript:false" + '"'
            } else {
                if (typeof b == "string") {
                    c += ' src="' + b + '"'
                }
            }
        }
        c += " />";
        jQuery(c).appendTo(document.body);
        return jQuery("#" + a).get(0)
    }, createUploadForm: function (a, j, d) {
        var h = "jUploadForm" + a;
        var c = "jUploadFile" + a;
        var b = jQuery('<form  action="" method="POST" name="' + h + '" id="' + h + '" enctype="multipart/form-data"></form>');
        if (d) {
            for (var e in d) {
                if (d[e].name != null && d[e].value != null) {
                    jQuery('<input type="hidden" name="' + d[e].name + '" value="' + d[e].value + '" />').appendTo(b)
                } else {
                    jQuery('<input type="hidden" name="' + e + '" value="' + d[e] + '" />').appendTo(b)
                }
            }
        }
        var f = jQuery("#" + j);
        var g = jQuery(f).clone();
        jQuery(f).attr("id", c);
        jQuery(f).before(g);
        jQuery(f).appendTo(b);
        jQuery(b).css("position", "absolute");
        jQuery(b).css("top", "-1200px");
        jQuery(b).css("left", "-1200px");
        jQuery(b).appendTo("body");
        return b
    }, ajaxFileUpload: function (k) {
        k = jQuery.extend({}, jQuery.ajaxSettings, k);
        var a = new Date().getTime();
        var b = jQuery.createUploadForm(a, k.fileElementId, (typeof (k.data) == "undefined" ? false : k.data));
        var i = jQuery.createUploadIframe(a, k.secureuri);
        var h = "jUploadFrame" + a;
        var j = "jUploadForm" + a;
        if (k.global && !jQuery.active++) {
            jQuery.event.trigger("ajaxStart")
        }
        var c = false;
        var f = {};
        if (k.global) {
            jQuery.event.trigger("ajaxSend", [f, k])
        }
        var d = function (l) {
            var p = document.getElementById(h);
            try {
                if (p.contentWindow) {
                    f.responseText = p.contentWindow.document.body ? p.contentWindow.document.body.innerHTML : null;
                    f.responseXML = p.contentWindow.document.XMLDocument ? p.contentWindow.document.XMLDocument : p.contentWindow.document
                } else {
                    if (p.contentDocument) {
                        f.responseText = p.contentDocument.document.body ? p.contentDocument.document.body.innerHTML : null;
                        f.responseXML = p.contentDocument.document.XMLDocument ? p.contentDocument.document.XMLDocument : p.contentDocument.document
                    }
                }
            } catch (o) {
                jQuery.handleError(k, f, null, o)
            }
            if (f || l == "timeout") {
                c = true;
                var m;
                try {
                    m = l != "timeout" ? "success" : "error";
                    if (m != "error") {
                        var n = jQuery.uploadHttpData(f, k.dataType);
                        if (k.success) {
                            k.success(n, m)
                        }
                        if (k.global) {
                            jQuery.event.trigger("ajaxSuccess", [f, k])
                        }
                    } else {
                        jQuery.handleError(k, f, m)
                    }
                } catch (o) {
                    m = "error";
                    jQuery.handleError(k, f, m, o)
                }
                if (k.global) {
                    jQuery.event.trigger("ajaxComplete", [f, k])
                }
                if (k.global && !--jQuery.active) {
                    jQuery.event.trigger("ajaxStop")
                }
                if (k.complete) {
                    k.complete(f, m)
                }
                jQuery(p).unbind();
                setTimeout(function () {
                    try {
                        jQuery(p).remove();
                        jQuery(b).remove()
                    } catch (q) {
                        jQuery.handleError(k, f, null, q)
                    }
                }, 100);
                f = null
            }
        };
        if (k.timeout > 0) {
            setTimeout(function () {
                if (!c) {
                    d("timeout")
                }
            }, k.timeout)
        }
        try {
            var b = jQuery("#" + j);
            jQuery(b).attr("action", k.url);
            jQuery(b).attr("method", "POST");
            jQuery(b).attr("target", h);
            if (b.encoding) {
                jQuery(b).attr("encoding", "multipart/form-data")
            } else {
                jQuery(b).attr("enctype", "multipart/form-data")
            }
            jQuery(b).submit()
        } catch (g) {
            jQuery.handleError(k, f, null, g)
        }
        jQuery("#" + h).load(d);
        return {
            abort: function () {
            }
        }
    }, uploadHttpData: function (r, type) {
        var data = !type;
        if (!type) {
            data = r.responseText
        }
        if (type == "xml") {
            data = r.responseXML
        }
        if (type == "script") {
            jQuery.globalEval(data)
        }
        if (type == "json") {
            data = r.responseText;
            var start = data.indexOf(">");
            if (start != -1) {
                var end = data.indexOf("<", start + 1);
                if (end != -1) {
                    data = data.substring(start + 1, end)
                }
            }
            eval("data = " + data)
        }
        if (type == "html") {
            jQuery("<div>").html(data).evalScripts()
        }
        return data
    }, handleError: function (b, d, a, c) {
        if (b.error) {
            b.error.call(b.context || b, d, a, c)
        }
        if (b.global) {
            (b.context ? jQuery(b.context) : jQuery.event).trigger("ajaxError", [d, b, c])
        }
    }
});
通过ajaxfileupload.js进行异步调用获取到的json响应会多一些文本(其实就是一个<pre>标签),所以上面在点击保存时saveFile()通过正则过滤才能真正拿到图片路径。
最后看下后台,文件上传Controller:
    @ResponseBody
    @RequestMapping(value = "uploadFile", method = RequestMethod.POST)
    public Object uploadFile(@RequestParam(value = "photoUrl") MultipartFile file,
                             HttpServletRequest request) {
        Map<String, Object> resultMap = new HashMap<>();
        String error = null;

        // 获取文件名
        String fileName = file.getOriginalFilename();

        // 根据文件后缀生成新的文件名
        String type = fileName.substring(fileName.lastIndexOf(".") + 1);

        String newFileName = Utils.createFileName(type);

        fileName = newFileName != null ? newFileName : fileName;

        // 上传文件并返回相对路径
        String resultPath = null;
        try {
            resultPath = flowService.uploadFile(file.getBytes(), filePath, fileName);
        } catch (Exception e) {
            LOGGER.error("--uploadFile-- error: {}", e);
            error = e.getMessage();
        }
        if (error != null) {
            resultMap.put("errorMsg", error);
        } else {
            resultMap.put("resultPath", resultPath);
        }

        return resultMap;
    }
这里MultipartFile是spring自带的,在spring boot中我们无需引入额外的jar包,看下导入的包路径即可明了:
org.springframework.web.multipart.MultipartFile
再看调用的service:
    /**
     * 上传文件
     *
     * @param file
     * @param filePath
     * @param fileName
     * @return
     * @throws Exception
     */
    public String uploadFile(byte[] file, String filePath, String fileName) throws Exception {

        // 判断文件目录是否存在,不存在则新建
        File targetFile = new File(filePath);
        if (!targetFile.exists()) {
            targetFile.mkdir();
        }

        // 新文件路径
        String fullPath = filePath + "/" + fileName;
        FileOutputStream out = new FileOutputStream(fullPath);
        out.write(file);
        out.flush();
        out.close();

        // 入库路径
        return fullPath.substring(fullPath.indexOf("/"));
    }
上传是不是很简单?但有两点需要注意:一个是文件上传大小限制,一个是文件存储目录必须要跟js中的展示url建立映射,这两点都需要在application.properties中配置:
#图片保存路径
imgUpload.file.savePath=D:/imgUpload
#上传文件大小设置10M,默认是1M
spring.servlet.multipart.maxFileSize=10485760
文件路径在上面的Controller里通过定义全局变量filePath,而filePath则是通过注解从application.properties获取
@Value("${imgUpload.file.savePath}")
private String filePath;
通过新增java配置来映射物理文件地址和web访问url:
import org.springframework.context.annotation.Configuration;
import org.springframework.web.servlet.config.annotation.ResourceHandlerRegistry;
import org.springframework.web.servlet.config.annotation.WebMvcConfigurer;

@Configuration
public class WebConfigurer implements WebMvcConfigurer {
    @Override
    public void addResourceHandlers(ResourceHandlerRegistry registry) {
        registry.addResourceHandler("/imgUpload/**").addResourceLocations("file:D:/imgUpload/");
    }
}
我将存放在D盘的imgUpload映射给tomcat下webapps的/imgUpload,这样在dataGrid中展示的/imgUpload/test.jpg(后台入库时存储的图片路径)就能通过本机地址http://localhost:8888/imgUpload/test.jpg访问到并展示出来了。