一,工具与环境介绍
1.1 ansible简介
批量管理服务器的工具
无需部署agent,通过ssh进行管理
流行的自动化运维工具:https://github.com/ansible/ansible
1.2 jenkins简介
可视化运维(主要用在可视化部署)
持续构建,可以和git,svn结合
可结合ssh实现可视化运维
可结合ansible实现可视化运维
1.3 环境说明
Centos7.5(yum -y install net-tools vim)
关闭防火墙(systemctl stop firewalld,systemctl disable firewalld)
关闭selinux
二,Python3与ansible的安装
2.1 使用源码安装Python3.5
安装支持包
[root@ansibel ~]# yum -y install lrzsz vim net-tools gcc gcc-c++ ncurses ncurses-d
evel unzip zlib-devel zlib openssl-devel openssl
源码编译Python3.5
源码编译Python3.5[root@ansibel ~]# tar xf Python-3.5.2.tgz -C /usr/src/
[root@ansibel ~]# cd /usr/src/Python-3.5.2/
[root@ansibel Python-3.5.2]# ./configure --prefix=/usr/local/python/
[root@ansibel Python-3.5.2]# make && make install
[root@ansibel Python-3.5.2]# ln -s /usr/local/python/bin/python3 /usr/bin/python3
[root@ansibel Python-3.5.2]# which python3
/usr/bin/python3
[root@ansibel Python-3.5.2]# python3 -V
Python 3.5.2
2.2 使用pip3安装ansible
安装ansible最新版本
[root@ansibel Python-3.5.2]# /usr/local/python/bin/pip3 install --upgrade pip
[root@ansibel Python-3.5.2]# /usr/local/python/bin/pip3 install ansible
静心等待ansible安装完毕后
[root@ansibel Python-3.5.2]# ln -s /usr/local/python/bin/ansible /usr/local/bin/
[root@ansibel Python-3.5.2]# which ansible
/usr/local/bin/ansible
[root@ansibel Python-3.5.2]# ansible --version
ansible 2.7.5
config file = /etc/ansible/ansible.cfg
configured module search path = ['/root/.ansible/plugins/modules', '/usr/share/a
nsible/plugins/modules'] ansible python module location = /usr/local/python/lib/python3.5/site-packages/a
nsible executable location = /usr/local/bin/ansible
python version = 3.5.2 (default, Dec 25 2018, 19:07:10) [GCC 4.8.5 20150623 (Red
Hat 4.8.5-36)]
2.3 ansible查看帮助
[root@ansible ~]# /usr/local/python/bin/ansible-doc -l 查看总帮助
[root@ansible ~]# /usr/local/python/bin/ansible-doc -s shell 查看shell模块的帮助
[root@ansible ~]# /usr/local/python/bin/ansible-doc -s raw 查看raw模块的帮助
三,使用公私钥实现ssh无密码登陆
ansible是无agent的,无agent是怎么批量管理服务器的?主要是借用ssh来批量管理服务器。
ssh默认登陆是需要密码的,所以管理起来比较麻烦,本次实验主要是介绍ssh的无密码登陆。
ssh无密码登陆实现以后,使用ansible批量管理服务器就变得简单了。
| Host | IP |
|---|---|
| ansible | 10.1.1.131 |
| web01 | 10.1.1.132 |
| web02 | 10.1.1.133 |
生成秘钥对
[root@ansibel python]# ssh-keygen -t rsa -f ~/.ssh/id_rsa -P ""
Generating public/private rsa key pair.
Created directory '/root/.ssh'.
Your identification has been saved in /root/.ssh/id_rsa.
Your public key has been saved in /root/.ssh/id_rsa.pub.
The key fingerprint is:
SHA256:xxnEp0IW6w0wuI6oPA5TOp/m0pRo/X7TTHXRl9EkoeY root@ansibel
The key's randomart image is:
+---[RSA 2048]----+
| .o .o. ++=|
| . ooo. .o +o|
| . oo .oo . .|
| . ..+.* . |
| oo+ S.* E |
|o++.. o |
|Oo . + |
|+*o. . o o |
|.== ... . |
+----[SHA256]-----+
分发秘钥
[root@ansibel python]# ssh-copy-id -i ~/.ssh/id_rsa.pub "-o StrictHostKeyChecking=
no" 10.1.1.132
进行免密码登录测试
[root@ansibel python]# ssh 10.1.1.132
Last login: Tue Dec 25 18:52:58 2018 from 10.1.1.1
[root@web01 ~]# hostname -I
10.1.1.132
[root@web01 ~]# exit
logout
Connection to 10.1.1.132 closed.
[root@ansibel python]# hostname -I
10.1.1.131
四,ansible的简单配置和ping模块
4.1 ansible的配置文件
通过pip安装的ansible是没有配置文件的。我们需要创建一个
特别提示:Web01 ===> 主机名ansible_ssh_host ===>主机IPansible_ssh_port ===>ssh的默认端口ansible_ssh_user ===>ssh的用户名ansible_ssh_pass ===>ssh的用户的连接密码
[root@ansibel python]# mkdir -p /etc/ansible
[root@ansibel python]# > /etc/ansible/hosts
[root@ansibel python]# vim /etc/ansible/hosts
[root@ansibel python]# cat /etc/ansible/hosts #ansible主机管理配置文件
[nginx] #被管理的主机组名称
web01 ansible_ssh_host=10.1.1.132 #第一台主机
web02 ansible_ssh_host=10.1.1.133 ansible_ssh_port=22 ansible_ssh_user=root ansibl
e_ssh_pass=666666 #第二台主机
如果我们已经设置了ssh免密钥了。那么就不需要写密码了。例如:web01
我们要是没有设置免密钥,那么就需要安装sshpass工具,并在/etc/ansible/hosts文件里写上主机的连接密码。例如web02
#下载epel源安装sshpass
[root@ansible python]# wget -O /etc/yum.repos.d/epel.repo http://mirrors.aliyun.com/repo/epel-7.repo
[root@ansible python]# yum -y install sshpass
[root@ansible python]# which sshpass
/usr/bin/sshpass
4.2 进行ansible远程执行命令测试
语法:
ansible chensiqi -m command -a 'uptime'
ansible 主机组 -m ansible内置功能模块名 -a 命令
进行命令测试:
[root@ansibel ansible]# ansible web01 -m command -a 'uptime'
web01 | CHANGED | rc=0 >>
19:53:13 up 1:04, 3 users, load average: 0.00, 0.01, 0.05
[root@ansibel ansible]# ansible web02 -m command -a 'uptime'
web02 | CHANGED | rc=0 >>
19:53:19 up 1:04, 3 users, load average: 0.00, 0.01, 0.05
[root@ansibel ansible]# ansible web01 -m command -a 'hostname -I'
web01 | CHANGED | rc=0 >>
10.1.1.132
[root@ansibel ansible]# ansible web02 -m command -a 'hostname -I'
web02 | CHANGED | rc=0 >>
10.1.1.133
[root@ansibel ansible]# ansible nginx -m ping
web01 | SUCCESS => {
"changed": false,
"ping": "pong"
}
web02 | SUCCESS => {
"changed": false,
"ping": "pong"
}
4.3 ansible的简单使用方式
ansible -i /etc/ansible/hosts 主机或主机组 -m 指定模块 -a 命令
不用-i指定配置文件默认为/etc/ansible/hosts
4.4 使用ping模块用来查看服务器是否连接正常,ping模块不需要-a指定参数
ansible all -m ping
主机组,主机,all代表所有
主机和主机组注意事项:
|
主机组范围 |
解释 |
|
all |
代表所有主机 |
|
Web01:web02 |
可以指定多台主机 |
|
all:!web01 |
指定all但不包含web01,注意!前需要加转意符号 |
[root@ansibel ansible]# ansible all -m ping
web01 | SUCCESS => {
"changed": false,
"ping": "pong"
}
web02 | SUCCESS => {
"changed": false,
"ping": "pong"
}
五,ansible的三个命令模块
5.1 ansible模块command(不支持管道,不建议使用)
#command支持直接回显命令的执行结果
[root@ansibel ansible]# ansible all -m command -a "pwd"
web01 | CHANGED | rc=0 >>
/root
web02 | CHANGED | rc=0 >>
/root
#command模块不支持管道符操作
[root@ansibel ansible]# ansible all -m command -a "echo test | grep t"
web01 | CHANGED | rc=0 >>
test | grep t
web02 | CHANGED | rc=0 >>
test | grep t
#command模块不支持重定向操作
[root@ansibel ansible]# ansible all -m command -a "echo bb >> /tmp/testansible"
web01 | CHANGED | rc=0 >>
bb >> /tmp/testansible
web02 | CHANGED | rc=0 >>
bb >> /tmp/testansible
5.2 ansible模块shell(支持管道,支持重定向)
#shell模块支持管道符
[root@ansibel ansible]# ansible all -m shell -a "echo test | grep t"
web02 | CHANGED | rc=0 >>
test
web01 | CHANGED | rc=0 >>
test
#shell支持重定向
[root@ansibel ansible]# ansible all -m shell -a "echo bb >> /tmp/testansible"
web01 | CHANGED | rc=0 >>
web02 | CHANGED | rc=0 >>
[root@web01 tmp]# ls
testansible
[root@web01 tmp]# cat testansible
bb
[root@web02 tmp]# ls
testansible
[root@web02 tmp]# cat testansible
bb
如果遇到特殊符号需要加入转义,这样子ansible才能正常运行
[root@ansibel ansible]# ansible web01 -m shell -a "cat /etc/passwd | awk -F":" '{p
rint $1}' "
web01 | CHANGED | rc=0 >>
root
bin
daemon
adm
lp
sync
shutdown
halt
mail
operator
games
ftp
nobody
systemd-network
dbus
polkitd
sshd
postfix
rpc
rpcuser
nfsnobody
5.3 ansible模块raw,最原始的方式运行命令(不依赖python,仅通过ssh实现)
两边都没有挂光盘,用ansible批量管理给他们一起挂光盘。
[root@ansibel ansible]# ansible all -m raw -a 'mount /dev/sr0 /media/cdrom'
web01 | CHANGED | rc=0 >>
mount: /dev/sr0 is write-protected, mounting read-only
Shared connection to 10.1.1.132 closed.
web02 | CHANGED | rc=0 >>
mount: /dev/sr0 is write-protected, mounting read-only
Shared connection to 10.1.1.133 closed.

用ansible批量搭建yum仓库
[root@ansibel ansible]# ansible all -m raw -a 'mv /etc/yum.repos.d/* /tmp/'
web01 | CHANGED | rc=0 >>
Shared connection to 10.1.1.132 closed.
web02 | CHANGED | rc=0 >>
Shared connection to 10.1.1.133 closed.
[root@ansibel ansible]# ansible all -m copy -a 'src=/etc/yum.repos.d/CentOS-Media.
repo dest=/etc/yum.repos.d/'
.............中间信息略..................................
测试安装nmap
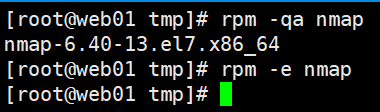

[root@ansibel ansible]# ansible all -m shell -a 'yum -y install nmap'


六,ansible的copy模块批量下发文件或文件夹
6.1 copy模块概述
copy模块的参数,ansible 主机组 -m 模块 -a 命令
- src:指定源文件或目录
- dest:指定目标服务器的文件或目录
- backup:是否要备份
- owner:拷贝到目标服务器后,文件或目录的所属用户
- group:拷贝到目标服务器后,文件或目录的所属群组
- mode:文件或目录的权限
6.2 copy模块拷贝文件
特别提示:如果目标路径不存在会自动创建
src===>源文件路径 dest=目标路径位置
[root@ansibel ansible]# cd /tmp
[root@ansibel tmp]# ls
[root@ansibel tmp]# echo "aaa" >> test
[root@ansibel tmp]# cat test
aaa
[root@ansibel ansible]# ansible all -m copy -a 'src=/tmp/test dest=/tmp/'


6.3 copy模块拷贝文件夹
特别提示:
如果目标路径里有与我拷贝的文件同名文件的话,会直接覆盖目标路径下的文件
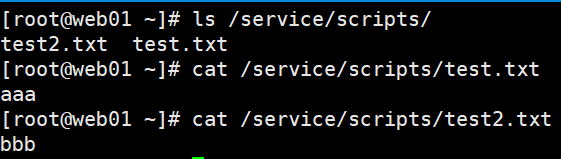
[root@ansible ~]# mkdir -p /service/scripts
[root@ansible ~]# echo "aaa" > /service/scripts/test.txt
[root@ansible ~]# echo "bbb" > /service/scripts/test2.txt
#拷贝/service/scripts/ 目录下所有内容到dest的路径下(注意两条命令的对比)
[root@ansible ~]# ansible web01 -m copy -a "src=/service/scripts/ dest=/service/sc
ripts/"
web01 | CHANGED => {
"changed": true,
"dest": "/service/scripts/",
"src": "/service/scripts/"
}
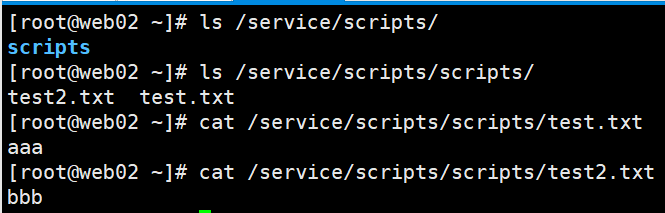
#拷贝/service/scripts目录本身及其内部的所有内容到dest的路径下(注意两条命令的对比)
[root@ansible ~]# ansible web02 -m copy -a "src=/service/scripts dest=/service/scr
ipts/"
web02 | CHANGED => {
"changed": true,
"dest": "/service/scripts/",
"src": "/service/scripts"
}
6.4 copy模块自动备份
特别提示:
参数:backup=yes ===>意思是,如果目标路径下,有与我同名但不同内容的文件时,在覆盖前,对目标文件先进行备份。
[root@ansible ansible]# echo "bbb" >> /tmp/test
[root@ansible ansible]# cat /tmp/test
aaa
bbb
[root@ansible ansible]# ansible all -m copy -a 'src=/tmp/test dest=/tmp/ backup=ye
s'


6.5 copy模块指定用户和属主,权限。
[root@ansible ansible]# ansible web01 -m copy -a 'src=/tmp/test dest=/tmp/ owner=n
obody group=nobody mode=0600'

七,ansible的script模块批量运行脚本
ansible的script模块能够实现远程服务器批量运行本地的shell脚本
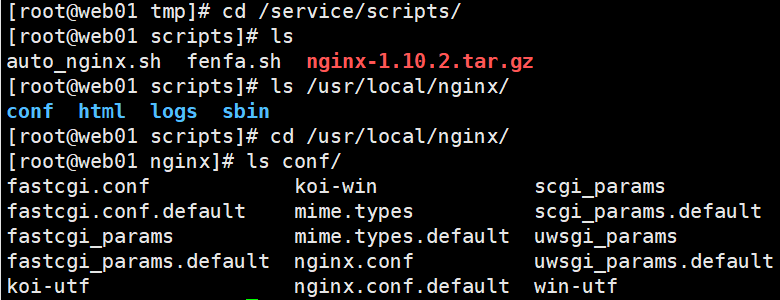
操作示例-->远程批量分发并自动部署nginx,所有被管理端需要挂载光盘,并创建本地yum配置文件
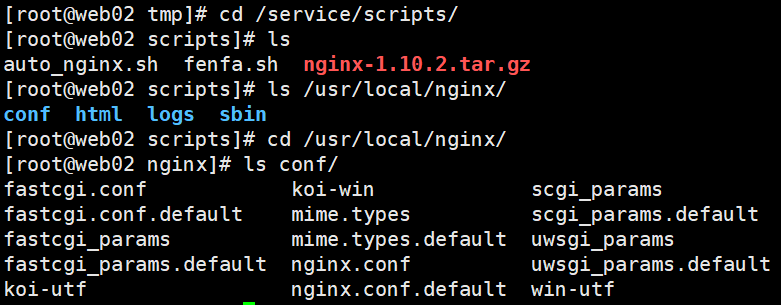
[root@ansible scripts]# pwd
/service/scripts
[root@ansible scripts]# vim auto_nginx.sh
[root@ansible scripts]# cat auto_nginx.sh
#!/bin/sh
#nginx install shell scripts
test -d /media/cdrom || mkdir -p /media/cdrom
mount /dev/sr0 /media/cdrom &>/dev/null
yum -y install gcc gcc-c++ make pcre pcre-devel zlib zlib-devel openssl openssl-d
evel &>/dev/nulltest -d /service/scripts || exit 3
cd /service/scripts/
tar xf nginx-1.10.2.tar.gz -C /usr/src/
cd /usr/src/nginx-1.10.2/
./configure --prefix=/usr/local/nginx --with-http_ssl_module --with-http_stub_stat
us_module &>/dev/nullmake &>/dev/null
make install &>/dev/null
exit 0
[root@ansible scripts]# vim fenfa.sh
[root@ansible scripts]# cat fenfa.sh
#!/bin/sh
Group=$1
ansible $Group -m copy -a "src=/service/scripts/ dest=/service/scripts/"
ansible $Group -m script -a "/service/scripts/auto_nginx.sh"
[root@ansible scripts]# ls
auto_nginx.sh fenfa.sh nginx-1.10.2.tar.gz
注:auto_nginx.sh #自动安装nginx脚本
fenfa.sh #批量分发脚本
nginx-1.10.2.tar.gz #nginx源码包
激活脚本
[root@ansible scripts]# sh fenfa.sh all
此脚本只是个演示示例,工作中需要写的尽量严谨一些。
八,ansible-playbook的初步使用
playbook的使用,playbook可以把ansible的模块进行组合
[root@ansible scripts]# ln -s /usr/local/python/bin/ansible-playbook /usr/local/bin
[root@ansible scripts]# which ansible-playbook
/usr/local/bin/ansible-playbook
ansible-playbook剧本,可以像拍戏一样把各个模块编成一个故事,设定一个剧本,什么情况下就去执行什么样的,甚至还可以吧if或者else的判断加进去。还能对他的某些结果进行判断。剧本用yaml结尾
用playbook执行shell模块
[root@ansible scripts]# mkdir bak
[root@ansible scripts]# mv *.sh bak/
[root@ansible scripts]# mv *.gz bak/
[root@ansible scripts]# ls
bak
8.1 playbook的简单shell模块的使用
黄色执行成功对对方电脑做出改变,绿色执行成功,不作出改变,红色失败。
模板说明:--- #开头必须有三个小-,顶格写- hosts: #正文配置代码的第一级,必须有两个空格(-占一个空格位)- host: web01 #web01是host参数的值,值和hosts:之间要有一个空格tasks: #tasks:表示接下来要执行的具体任务- name: #相对于tasks再多缩进两个格(-占一个空格位),表示属于tasks的下一级- name: test #test只是要执行的具体命令的名字可以随便写。name:后还是有一个空格要注意shell: #表示调用shell模块执行命令相对于tasks仍旧要多缩进两个空格shell: echo "xxx" >> xxx #shell:后边还是要有个空格,需要注意。
[root@ansible scripts]# vim test_shell.yaml
[root@ansible scripts]# cat test_shell.yaml
---
- hosts: web01
tasks:
- name: test
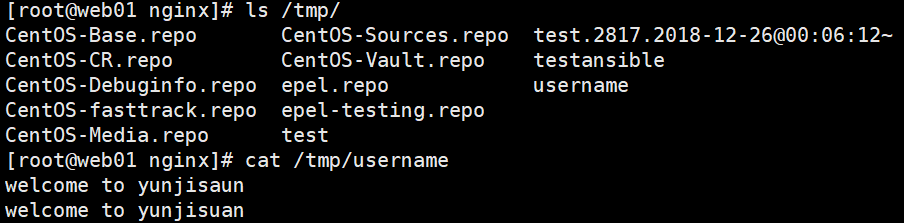
shell: echo "welcome to yunjisaun" >> /tmp/username
- name: test2
shell: echo "welcome to yunjisuan" >> /tmp/username
执行playbook配置文件
[root@ansible scripts]# ansible-playbook test_shell.yaml
8.2 playbook的简单copy模块的使用


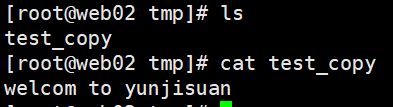
[root@ansible scripts]# echo "welcom to yunjisuan" >> /tmp/test_copy
[root@ansible scripts]# vim test_copy.yaml
[root@ansible scripts]# cat test_copy.yaml
---
- hosts: all
tasks:
- name: test copy
copy: src=/tmp/test_copy dest=/tmp/
[root@ansible scripts]# ansible-playbook test_copy.yaml
8.3 playbook使用register输出命令运行结果
我们在用playbook进行ansible模块操作的时候,并没有命令的执行结果输出,默认被隐藏了。
我们可以通过register模块最加输出命令的执行结果
[root@ansible scripts]# vim test_register.yaml
[root@ansible scripts]# cat test_register.yaml
---
- hosts: all
tasks:
- name: test register
shell: echo "welcome to yunjisuan"
register: print_result
- debug: var=print_result
register: print_result #将之前命令的输出结果保存在变量print_result里,变量名随便取。
- debug: var=print_result #将变量的值作为debug输出出来。var是固定的。调用debug模块·
Stdout标准屏幕输出。
[root@ansible scripts]# ansible-playbook test_register.yaml
PLAY [all] ***********************************************************************
TASK [Gathering Facts] ***********************************************************
ok: [web01]
ok: [web02]
TASK [test register] *************************************************************
changed: [web02]
changed: [web01]
TASK [debug] *********************************************************************
ok: [web01] => {
"print_result": {
"changed": true,
"cmd": "echo "welcome to yunjisuan"",
"delta": "0:00:00.004567",
"end": "2018-12-26 01:00:34.160829",
"failed": false,
"rc": 0,
"start": "2018-12-26 01:00:34.156262",
"stderr": "",
"stderr_lines": [],
"stdout": "welcome to yunjisuan",
"stdout_lines": [
"welcome to yunjisuan" #命令的执行结果有输出了
]
}
}
ok: [web02] => {
"print_result": {
"changed": true,
"cmd": "echo "welcome to yunjisuan"",
"delta": "0:00:00.004002",
"end": "2018-12-26 01:00:34.146846",
"failed": false,
"rc": 0,
"start": "2018-12-26 01:00:34.142844",
"stderr": "",
"stderr_lines": [],
"stdout": "welcome to yunjisuan",
"stdout_lines": [
"welcome to yunjisuan" #命令的执行结果有输出了
]
}
}
PLAY RECAP ***********************************************************************
web01 : ok=3 changed=1 unreachable=0 failed=0
web02 : ok=3 changed=1 unreachable=0 failed=0
8.4 nginx配置下发并检测
[root@ansible scripts]# vim test_nginx_conf.yaml
[root@ansible scripts]# cat test_nginx_conf.yaml
---
- hosts: all
tasks:
- name: copy nginx.conf
copy: src=/tmp/nginx.conf dest=/usr/local/nginx/conf/ backup=yes
- name:
shell: /usr/local/nginx/sbin/nginx -t
register: nginx_result
- debug: var=nginx_result
九,playbook的自定义变量和内置变量
9.1 在Playbook中使用自定义变量
[root@ansible scripts]# vim test_vars.yaml
[root@ansible scripts]# cat test_vars.yaml
---
- hosts: all
vars: #定义变量
- name: "yunjisuan" #第一个name变量
age: "3" #第二个age变量
tasks:
- name: "{{ name }}" #{{}}两对大括号引用变量,变量名两头空格
shell: echo "myname {{ name }},myage {{ age }}"
register: var_result
- debug: var=var_result
特别提示:引用变量需要在双引号中引用。
[root@ansible scripts]# ansible-playbook test_vars.yaml
[WARNING]: Found variable using reserved name: name #这里提示,name是一个保留的内置变量,我们在自定义时不能用
................................中间信息略...........................................
有警告是因为自定义变量和系统的内置保留变量同名了,在使用自定义变量时,我们要特别注意不要和系统的内置保留变量同名,容易引发问题。
修改一下name这个变量再发送,就不会出警告了。
在使用自定义变量时,我们要特别注意不要和系统的内置保留变量同名,容易引发问题。
[root@ansible scripts]# vim test_vars.yaml
[root@ansible scripts]# cat test_vars.yaml
---
- hosts: all
vars:
- Name: "yunjisuan"
age: "3"
tasks:
- name: "{{ Name }}"
shell: echo "myname {{ Name }},myage {{ age }}"
register: var_result
- debug: var=var_result
[root@ansible scripts]# ansible-playbook test_vars.yaml 修改过之后就没有警告了
9.2 在playbook中使用ansible内置变量
我们可以使用ansible all -m setup | less查看ansible内置变量
ansible 127.0.0.1 -m setup | less 看自己的ansible内置变量。
[root@ansible scripts]# vim test_setupvars.yaml
[root@ansible scripts]# cat test_setupvars.yaml
---
- hosts: all
gather_facts: True #使用ansible内置变量
tasks:
- name: setup var
shell: echo "ip {{ ansible_all_ipv4_addresses[0] }} cpu {{ ansible_processor_c
ount }}" register: var_result
- debug: var=var_result
通过使用ansible的内置变量可以批量取服务器的许多内置信息
[root@ansible scripts]# ansible-playbook test_setupvars.yaml
PLAY [all] ***********************************************************************
TASK [Gathering Facts] ***********************************************************
ok: [web01]
ok: [web02]
TASK [setup var] *****************************************************************
changed: [web02]
changed: [web01]
TASK [debug] *********************************************************************
ok: [web01] => {
"var_result": {
"changed": true,
"cmd": "echo "ip 10.1.1.132 cpu 1"",
"delta": "0:00:00.004011",
"end": "2018-12-26 01:16:06.857398",
"failed": false,
"rc": 0,
"start": "2018-12-26 01:16:06.853387",
"stderr": "",
"stderr_lines": [],
"stdout": "ip 10.1.1.132 cpu 1",
"stdout_lines": [
"ip 10.1.1.132 cpu 1" #信息
]
}
}
ok: [web02] => {
"var_result": {
"changed": true,
"cmd": "echo "ip 10.1.1.133 cpu 1"",
"delta": "0:00:00.003761",
"end": "2018-12-26 01:16:06.835669",
"failed": false,
"rc": 0,
"start": "2018-12-26 01:16:06.831908",
"stderr": "",
"stderr_lines": [],
"stdout": "ip 10.1.1.133 cpu 1",
"stdout_lines": [
"ip 10.1.1.133 cpu 1" #信息
]
}
}
PLAY RECAP ***********************************************************************
web01 : ok=3 changed=1 unreachable=0 failed=0
web02 : ok=3 changed=1 unreachable=0 failed=0
简单演示一下ansible内置变量的取用方法ansible all -m setup | less
[root@ansible scripts]# vim test_setupvars.yaml
[root@ansible scripts]# cat test_setupvars.yaml
---
- hosts: all
gather_facts: True
tasks:
- name: setup var
shell: echo "ip {{ ansible_all_ipv4_addresses[0] }} cpu {{ ansible_processor_c
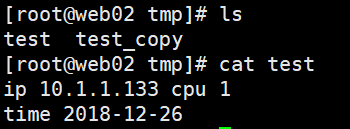
ount }}" >> /tmp/test - name: setup var2
shell: echo "time {{ ansible_date_time["date"] }}" >> /tmp/test
register: var_result
- debug: var=var_result
[root@ansible scripts]# vim test_setupvars.yaml
[root@ansible scripts]# cat test_setupvars.yaml
---
- hosts: all
gather_facts: True
tasks:
- name: setup var
shell: echo "ip {{ ansible_all_ipv4_addresses[0] }} cpu {{ ansible_processor_c
ount }}" >> /tmp/test - name: setup var2
shell: echo "time {{ ansible_date_time["date"] }}" >> /tmp/test
register: var_result
- debug: var=var_result
[root@ansible scripts]# ansible-playbook test_setupvars.yaml
十,Playbook下发可变配置文件
配置文件如果使用copy模块去下发的话,那配置都是一样的;
如果下发的配置文件里有可变的配置,需要用到template模块。
10.1 利用template模块下发可变的配置文件
copy模块分发的是不能变的模块
eg:变量原封不动没有改变。copy模块识别不了变量。
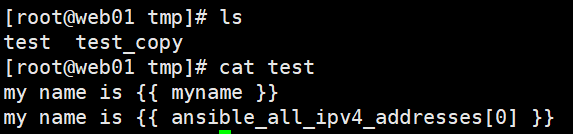
[root@ansible scripts]# vim /tmp/test
[root@ansible scripts]# cat /tmp/test
my name is {{ myname }} #自定义变量
my name is {{ ansible_all_ipv4_addresses[0] }} #系统变量
[root@ansible scripts]# ansible web01 -m copy -a 'src=/tmp/test dest=/tmp/'
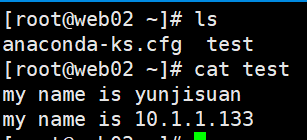
利用template模块下发可变的配置文件
[root@ansible scripts]# vim test_filevars.yaml
[root@ansible scripts]# cat test_filevars.yaml
---
- hosts: all
gather_facts: True #开启系统变量
vars:
- myname: "yunjisuan" #自定义变量
tasks:
- name: template test
template: src=/tmp/test dest=/root/test #使用template下发可变配置文件
[root@ansible scripts]# ansible-playbook test_filevars.yaml 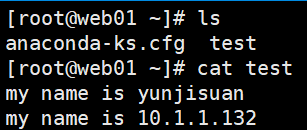
10.2 下发配置文件里面使用判断语法
[root@ansible scripts]# vim /tmp/if.j2
[root@ansible scripts]# cat /tmp/if.j2
{% if PORT %} #if PORT存在
ip=0.0.0.0:{{ PORT }}
{% else %} #否则的话
ip=0.0.0.0:80
{% endif %} #结尾
[root@ansible scripts]# vim test_ifvars.yaml
[root@ansible scripts]# cat test_ifvars.yaml
---
- hosts: all
gather_facts: True #开启系统内置变量
vars:
- PORT: 90 #自定义变量
tasks:
- name: jinja2 if test
template: src=/tmp/if.j2 dest=/root/test
[root@ansible scripts]# ansible-playbook test_ifvars.yaml

如果我们将变量PORT值为空的话,就会是另外的结果
[root@ansible scripts]# vim test_ifvars.yaml
[root@ansible scripts]# cat test_ifvars.yaml
---
- hosts: all
gather_facts: True
vars:
- PORT:
tasks:
- name: jinja2 if test
template: src=/tmp/if.j2 dest=/root/test
[root@ansible scripts]# ansible-playbook test_ifvars.yaml


十一,Playbook的notify通知和下发nginx配置
#实战下发可执行动作的可变的nginx配置文件
先把两边nginx服务开启


[root@ansible scripts]# vim test_nginxvars.yaml
[root@ansible scripts]# cat test_nginxvars.yaml
---
- hosts: all
gather_facts: True
vars:
- myname: yunjisuan
tasks:
- name: nginx conf
template: src=/tmp/test dest=/root/test
notify:
- stop nginx
handlers:
- name: reload nginx
shell: /usr/local/nginx/sbin/nginx -s reload
- name: stop nginx
shell: /usr/local/nginx/sbin/nginx -s stop
[root@ansible scripts]# ansible-playbook test_nginxvars.yaml
服务发生改变了。


把服务再次启动,再发就不会发生改变了。


[root@ansible scripts]# ansible-playbook test_nginxvars.yaml

