简介
在上一章中介绍了ABP微服务架构中授权服务的搭建,本篇将继续介绍ABP微服务架构的搭建。ABP微服务架构中授权服务仅用来管理client身份的授权和验证,并没有用户、角色、权限管理的业务,我们需要使用ABP搭建一个用来统一管理用户权限业务的服务,以下将介绍ABP用户模块的服务搭建。
新建项目
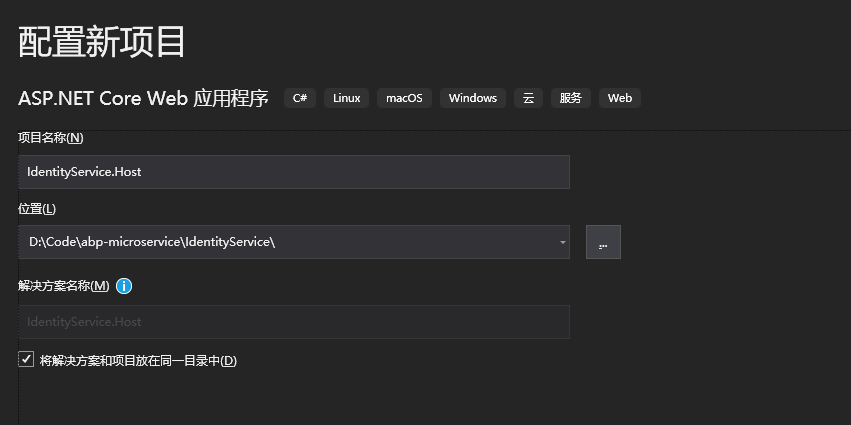
在IdentityService目录中创建一个新的 asp.net core项目IdentityService.Host
空项目结构如下

安装模块组件
在创建的空 asp.net core项目中安装 .net core、ef core、ids4、abp等官方组件。
PM> Install-Package Serilog.Extensions.Hosting -Version 3.0.0
PM> Install-Package Serilog.Sinks.File -Version 4.0.0
PM> Install-Package Serilog.Sinks.Elasticsearch -Version 6.5.0
PM> Install-Package Swashbuckle.AspNetCore -Version 5.0.0-rc4
PM> Install-Package IdentityServer4.AccessTokenValidation -Version 3.0.0
PM> Install-Package Microsoft.Extensions.Caching.StackExchangeRedis -Version 3.1.0
PM> Install-Package Microsoft.AspNetCore.DataProtection.StackExchangeRedis -Version 3.1.0
PM> Install-Package Volo.Abp.AspNetCore.MultiTenancy -Version 2.0.1
PM> Install-Package Volo.Abp.AuditLogging.EntityFrameworkCore -Version 2.0.1
PM> Install-Package Volo.Abp.Autofac -Version 2.0.1
PM> Install-Package Volo.Abp.EntityFrameworkCore.SqlServer -Version 2.0.1
PM> Install-Package Volo.Abp.Identity.Application -Version 2.0.1
PM> Install-Package Volo.Abp.Identity.EntityFrameworkCore -Version 2.0.1
PM> Install-Package Volo.Abp.Identity.HttpApi -Version 2.0.1
PM> Install-Package Volo.Abp.PermissionManagement.EntityFrameworkCore -Version 2.0.1
PM> Install-Package Volo.Abp.SettingManagement.EntityFrameworkCore -Version 2.0.1
PM> Install-Package Volo.Abp.TenantManagement.EntityFrameworkCore -Version 2.0.1
配置Module
添加IdentityServiceHostModule
在项目根目录下添加IdentityServiceHostModule.cs
引用依赖
在IdentityServiceHostModule中依次引用以下依赖:
AbpAutofacModule
AbpAspNetCoreMultiTenancyModule
AbpEntityFrameworkCoreSqlServerModule
AbpAuditLoggingEntityFrameworkCoreModule
AbpPermissionManagementEntityFrameworkCoreModule
AbpSettingManagementEntityFrameworkCoreModule
AbpTenantManagementEntityFrameworkCoreModule
AbpIdentityHttpApiModule
AbpIdentityEntityFrameworkCoreModule
AbpIdentityApplicationModule
注册服务与初始化应用
注册认证方式、swagger、redis等服务,代码如下:
    [DependsOn(
        typeof(AbpAutofacModule),
        typeof(AbpAspNetCoreMultiTenancyModule),
        typeof(AbpEntityFrameworkCoreSqlServerModule),
        typeof(AbpAuditLoggingEntityFrameworkCoreModule),
        typeof(AbpPermissionManagementEntityFrameworkCoreModule),
        typeof(AbpSettingManagementEntityFrameworkCoreModule),
        typeof(AbpTenantManagementEntityFrameworkCoreModule),
        typeof(AbpIdentityHttpApiModule),
        typeof(AbpIdentityEntityFrameworkCoreModule),
        typeof(AbpIdentityApplicationModule)
    )]
    public class IdentityServiceHostModule : AbpModule
    {
        public override void ConfigureServices(ServiceConfigurationContext context)
        {
            var configuration = context.Services.GetConfiguration();

            context.Services.AddAuthentication("Bearer")
                .AddIdentityServerAuthentication(options =>
                {
                    options.Authority = configuration["AuthServer:Authority"];
                    options.ApiName = configuration["AuthServer:ApiName"];
                    options.RequireHttpsMetadata = false;
                });

            context.Services.AddSwaggerGen(options =>
            {
                options.SwaggerDoc("v1", new OpenApiInfo { Title = "Identity Service API", Version = "v1" });
                options.DocInclusionPredicate((docName, description) => true);
                options.CustomSchemaIds(type => type.FullName);
            });

            Configure<AbpLocalizationOptions>(options =>
            {
                options.Languages.Add(new LanguageInfo("en", "en", "English"));
            });

            Configure<AbpDbContextOptions>(options =>
            {
                options.UseSqlServer();
            });

            context.Services.AddStackExchangeRedisCache(options =>
            {
                options.Configuration = configuration["Redis:Configuration"];
            });

            Configure<AbpAuditingOptions>(options =>
            {
                options.IsEnabledForGetRequests = true;
                options.ApplicationName = "IdentityService";
            });

            var redis = ConnectionMultiplexer.Connect(configuration["Redis:Configuration"]);
            context.Services.AddDataProtection()
                .PersistKeysToStackExchangeRedis(redis, "DataProtection-Keys");
        }

        public override void OnApplicationInitialization(ApplicationInitializationContext context)
        {
            var app = context.GetApplicationBuilder();

            app.UseCorrelationId();
            app.UseVirtualFiles();
            app.UseRouting();
            app.UseAuthentication();

            app.Use(async (ctx, next) =>
            {
                var currentPrincipalAccessor = ctx.RequestServices.GetRequiredService<ICurrentPrincipalAccessor>();
                var map = new Dictionary<string, string>()
                {
                    { "sub", AbpClaimTypes.UserId },
                    { "role", AbpClaimTypes.Role },
                    { "email", AbpClaimTypes.Email },
                };
                var mapClaims = currentPrincipalAccessor.Principal.Claims.Where(p => map.Keys.Contains(p.Type)).ToList();
                currentPrincipalAccessor.Principal.AddIdentity(new ClaimsIdentity(mapClaims.Select(p => new Claim(map[p.Type], p.Value, p.ValueType, p.Issuer))));
                await next();
            });

            app.UseAbpRequestLocalization();
            app.UseSwagger();
            app.UseSwaggerUI(options =>
            {
                options.SwaggerEndpoint("/swagger/v1/swagger.json", "Identity Service API");
            });
            app.UseAuditing();
            app.UseMvcWithDefaultRouteAndArea();
        }
    }
添加swagger路由
将服务index首页配置为swagger页面,方便获取api文档。配置十分简单,将Home控制器的Index页跳转至swagger路由:
    public class HomeController : AbpController
    {
        public ActionResult Index()
        {
            return Redirect("/swagger");
        }
    }
种子文件和配置文件
授权服务中已经加入了所有ABP服务的种子信息,该服务无需再添加。配置文件如下:
{
  "AuthServer": {
    "Authority": "http://localhost:53362",
    "ApiName": "IdentityService"
  },
  "ConnectionStrings": {
    "Default": "Server=localhost;Database=ABP;User Id=sa;Password=123456;"
  },
  "ElasticSearch": {
    "Url": "http://localhost:9200"
  },
  "Redis": {
    "Configuration": "localhost"
  },
  "Logging": {
    "LogLevel": {
      "Default": "Warning"
    }
  },
  "AllowedHosts": "*"
}
授权地址配的是上篇文章中搭建的授权服务地址,自己搭建需要根据授权服务host地址进行修改。
启动
无需迁移数据库,直接Ctrl+F5运行

可以看到启动成功并成功跳转swagger页面。此时再Ctrl+F5运行授权服务,然后获取token测试Identity Service API

请求结果可以看出Identity Service已经认证通过并返回角色信息。
代码地址:https://github.com/WilliamXu96/ABP-MicroService
文章目录:https://www.cnblogs.com/william-xu/p/12537155.html