在做项目的时候,常常需要对数据进行保存,Android为我们提供了五种数据存储的方法,分别是:
- 使用SharedPreferences存储数据
- 文件存储数据
- SQLite数据库存储数据
- 使用ContentProvider存储数据
- 网络存储数据
在开发的过程中,我们可以根据需要,选择合适的存储方式,下面对前三种方式进行详细的介绍。
一、使用SharedPreferences存储数据
SharedPreference类提供了一个总体框架,使您可以保存和检索的任何基本数据类型( boolean, float, int, long, string)的持久键-值对(基于XML文件存储的“key-value”键值对数据)。通常用来存储程序的一些配置信息。其存储在“data/data/程序包名/shared_prefs目录下。
1、我们可以通过以下两种方法获取SharedPreferences对象(通过Context):
getSharedPreferences (String name, int mode)
->当我们有多个SharedPreferences的时候,根据第一个参数name获得相应的SharedPreferences对象。
getPreferences (int mode)
->如果你的Activity中只需要一个SharedPreferences的时候使用。
这里的mode有四个选项:
Context.MODE_PRIVATE :该SharedPreferences数据只能被本应用程序读、写。
Context.MODE_WORLD_READABLE:该SharedPreferences数据能被其他应用程序读,但不能写。
Context.MODE_WORLD_WRITEABLE:该SharedPreferences数据能被其他应用程序读和写。
Context.MODE_MULTI_PROCESS:sdk2.3后添加的选项,当多个进程同时读写同一个SharedPreferences时它会检查文件是否修改。
2、如何存数据
1 //将数据保存到SharedPreferences中
2  SharedPreferences sp = this.getSharedPreferences("config",this.MODE_PRIVATE);
3 SharedPreferences.Editor editor = sp.edit();
4 editor.putString("qq", "2432123");
5 editor.putString("password", "whys");
6 editor.commit();//提交数据,类似关闭流事物
3、如何取数据
1 SharedPreferences sp = this.getSharedPreferences("config", this.MODE_PRIVATE);
2 String qq = sp.getString("qq", "");
3 String password = sp.getString("password", "");
可以看出来Preferences是很轻量级的应用,使用起来也很方便,简洁。但存储数据类型比较单一(只有基本数据类型),无法进行条件查询,只能在不复杂的存储需求下使用,比如保存配置信息等。
二、文件存储数据
文件存储又分为内部存储和外部存储。
【1】内部存储
应用安装后都会在Android 根目录生成 /data/data/packagename,文件默认存储位置:/data/data/包名/files/文件名。当前应用读取不需要读写权限。也就是说,如果我们将创建的文件放置于内部存储中,那么文件默认只能被本应用访问到,且一个应用所创建的所有文件都在和应用包名相同的目录下。也就是说应用创建于内部存储的文件,与这个应用是关联起来的。当这个应用被卸载之后,内部存储中的这些文件也将会被删除。从技术上来讲如果你在创建内部存储文件的时候将文件属性设置成可读,其他app能够访问自己应用的数据,前提是他知道你这个应用的包名,如果一个文件的属性是私有(private),那么即使知道包名其他应用也无法访问。Shared Preferences和SQLite数据库都是存储在内部存储空间上的。内部存储一般用Context来获取和操作。
第一种存取方法:
将数据写入文件中
1 //FileOutputStream用于将字节数据写出到文件
2 File file = new File(this.getFilesDir(), "info.txt");
3 FileOutputStream fos = new FileOutputStream(file);
4 String info = qq + "##" + password;
5 fos.write(info.getBytes());
6 fos.close();
从文件中读取数据
 1 File file = new File(this.getFilesDir(), "info.txt");
 2 //如果文件存在并且有内容,就读取出来
 3 if (file.exists() && file.length() > 0){
 4       try {
 5             //FileInputStream 用于读取本地文件中的字节数据
 6             FileInputStream fis = new FileInputStream(file);
 7             BufferedReader br = new BufferedReader(new InputStreamReader(fis));
 8             String info = br.readLine();
 9             String qq = info.split("##")[0]; //分割
10             String password = info.split("##")[1];
11
12             } catch (Exception e) {
13                 e.printStackTrace();
14             }
15        }
第二种存取方法:
将数据写入文件
 1 String qq = et_qqnumber.getText().toString().trim();
 2 String password = et_password.getText().toString().trim();
 3      try{
 4           String result = qq + "##" + password;
 5           OutputStream outputStream = openFileOutput("info.txt", MainActivity.this.MODE_PRIVATE);
 6            outputStream.write(result.getBytes());
 7            outputStream.close();
 8         } catch(Exception e) {
 9            e.printStackTrace();
10         }
11     }
在 openFileOutput(String name, int mode)方法中,mode参数:用于指定操作模式,分为四种:
Context.MODE_PRIVATE = 0 :为默认操作模式,代表该文件是私有数据,只能被应用本身访问,在该模式下,写入的内容会覆盖原文件的内容。
Context.MODE_APPEND = 32768 :该模式会检查文件是否存在,存在就往文件追加内容,否则就创建新文件。
Context.MODE_WORLD_READABLE = 1 :表示当前文件可以被其他应用读取。
MODE_WORLD_WRITEABLE :表示当前文件可以被其他应用写入。
从文件中读取数据
 1 try {
 2          FileInputStream inStream = openFileInput("info.txt");
 3          int len = 0;
 4          byte[] buf = new byte[1024];
 5          StringBuilder sb = new StringBuilder();
 6          while ((len = inStream.read(buf)) != -1) {
 7              sb.append(new String(buf, 0, len));
 8              String info = sb.toString();
 9              String qq = info.split("##")[0]; //分割
10              String password = info.split("##")[1];
11             }
12             inStream.close();
13         } catch (Exception e) {
14             e.printStackTrace();
15         }
其他一些经常用到的方法:
-
getFilesDir(): 得到内存储文件的绝对路径/data/data/包名/files/目录
-
getDir(): 在内存储空间中创建或打开一个已经存在的目录
-
deleteFile(): 删除保存在内部存储的文件。
-
fileList(): 返回当前由应用程序保存的文件的数组(内存储目录下的全部文件)。
- getCacheDir(): 用于获取/data/data//cache目录
【2】外部存储
因为内部存储容量限制,有时候需要存储数据比较大的时候需要用到外部存储。首先,要在AndroidManifest.xml中加入访问SDCard的权限,如下:
1 <!— 在SDCard中创建与删除文件权限 —>
2     <uses-permission android:name="android.permission.MOUNT_UNMOUNT_FILESYSTEMS"/>
3
4    <!— 往SDCard写入数据权限 —>
5     <uses-permission android:name="android.permission.WRITE_EXTERNAL_STORAGE"/>
下面是对数据的操作
 1 if(Environment.getExternalStorageState().equals(Environment.MEDIA_MOUNTED)){
 2        //获取SDCard目录  "/sdcard"
 3        File sdCardDir = Environment.getExternalStorageDirectory();
 4        File saveFile = new File(sdCardDir,"a.txt");
 5        //写数据
 6       try {
 7              FileOutputStream fos= new FileOutputStream(saveFile);
 8              fos.write("wangming".getBytes());
 9              fos.close();
10            } catch (Exception e) {
11                e.printStackTrace();
12            }
13
14        //读数据
15        try {
16            FileInputStream fis= new FileInputStream(saveFile);
17            int len =0;
18            byte[] buf = new byte[1024];
19            StringBuffer sb = new StringBuffer();
20            while((len=fis.read(buf))!=-1){
21                sb.append(new String(buf, 0, len));
22                System.out.println("我是:" + sb.toString());
23             }
24                fis.close();
25             } catch (Exception e) {
26                 e.printStackTrace();
27             }
28         }
【3】获取存储空间大小
 1         //获取存储空间
 2         File file = Environment.getDataDirectory(); //数据的内部存储空间
 3         File sdFile = Environment.getExternalStorageDirectory(); //sd卡存储空间
 4
 5         //获取空间大小
 6         long dataSize = file.getTotalSpace();
 7         long sdSize = sdFile.getTotalSpace();
 8
 9         TextView textView = (TextView)findViewById(R.id.text_save);
10         textView.setText("内部存储:" + Formatter.formatFileSize(this ,dataSize) +
11                 "
" + "外部存储:" + Formatter.formatFileSize(this ,sdSize));
【4】在开发的过程中,会遇到XML解析和JSON解析,其实XML和JSON也是用来保存数据的方式,下面就用一个小案例来介绍用XML文件来保存数据。
 1  //保存
 2             StringBuffer sb = new StringBuffer();
 3             sb.append("<?xml version='1.0' encoding='utf-8' standalone='yes' ?>");
 4             sb.append("<info>");
 5             sb.append("<student id=" + idS + ">");
 6             sb.append("<name name=" + name + ">");
 7             sb.append("<age age=" + age + ">");
 8             sb.append("</student>");
 9             sb.append("</info>");
10
11             try {
12                 //第一种保存方法
13                 /*
14                 File file = new File(Environment.getExternalStorageDirectory(), "info.xml");
15                 FileOutputStream fos = new FileOutputStream(file);
16                 fos.write(sb.toString().getBytes());
17                 fos.close();
18                 Toast.makeText(Main4Activity.this, "保存学生信息成功", Toast.LENGTH_SHORT).show();
19                 */
20
21                 //第二种方法保存方法
22                 //1,创建一个XML文件的序列化器
23                 XmlSerializer serializer = Xml.newSerializer();
24                 FileOutputStream fos = null;
25
26                 fos = new FileOutputStream(new File(Environment.getExternalStorageDirectory(), "info.xml"));
27                 //2,设置文件的输出和编码方式
28                 serializer.setOutput(fos, "utf-8");
29                 //3,写XML文件的头
30                 serializer.startDocument("utf-8", true);
31                 //4,写info节点
32                 serializer.startTag(null, "info");
33                 //5,写student节点
34                 serializer.startTag(null, "student");
35                 //6,写属性
36                 serializer.attribute(null, "id", idS);
37
38                 serializer.startTag(null, "name");
39                 serializer.text(name);
40                 serializer.endTag(null, "name");
41
42                 serializer.startTag(null, "age");
43                 serializer.text(age);
44                 serializer.endTag(null, "age");
45
46                 serializer.endTag(null, "student");
47                 serializer.endTag(null, "info");
48                 serializer.endDocument();
49                 fos.close();
50                 Toast.makeText(Main4Activity.this, "保存学生信息成功", Toast.LENGTH_SHORT).show();
51
52
53             } catch (Exception e) {
54                 e.printStackTrace();
55                 Toast.makeText(Main4Activity.this, "保存学生信息失败", Toast.LENGTH_SHORT).show();
56             }
从XML文件中读取数据
 1  try {
 2             InputStream stream = this.getAssets().open("info.xml");
 3             //解析xml文件
 4             //1,得到xml文件的解析器
 5             XmlPullParser pullParser = Xml.newPullParser();
 6             //2,设置输入流和编码
 7             pullParser.setInput(stream, "utf-8");
 8             //3,解析xml文件获取当前文件的事件类型
 9             int type = pullParser.getEventType();
10             while (type != XmlPullParser.END_DOCUMENT){
11                 System.out.println(pullParser.getEventType() + "--" + pullParser.getName() + "--" + pullParser.getText());
12                 type = pullParser.next();
13             }
14             stream.close();
15
16         } catch (Exception e) {
17             e.printStackTrace();
18         }
三、SQLite数据库存储数据
在 Android 应用程序中使用 SQLite,必须自己创建数据库,然后创建表、索引,填充数据。Android 提供了 SQLiteOpenHelper 帮助你创建一个数据库,你只要继承 SQLiteOpenHelper 类根据开发应用程序的需要,封装创建和更新数据库使用的逻辑就行了。
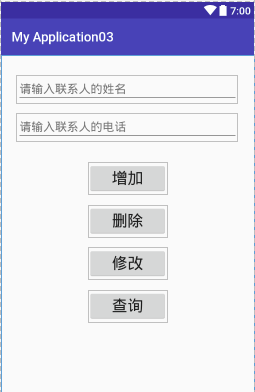
下面就以保存一个联系人的小案例来介绍对数据库的增加、删除、修改、查询。
XML文件布局样式


 1 <?xml version="1.0" encoding="utf-8"?>
 2 <android.support.constraint.ConstraintLayout xmlns:android="http://schemas.android.com/apk/res/android"
 3     xmlns:app="http://schemas.android.com/apk/res-auto"
 4     xmlns:tools="http://schemas.android.com/tools"
 5     android:layout_width="match_parent"
 6     android:layout_height="match_parent"
 7     tools:context="com.example.whs.myapplication03.MainActivity">
 8
 9     <EditText
10         android:id="@+id/editText_phone"
11         android:layout_width="0dp"
12         android:layout_height="wrap_content"
13         android:layout_marginEnd="24dp"
14         android:layout_marginLeft="24dp"
15         android:layout_marginRight="24dp"
16         android:layout_marginStart="24dp"
17         android:layout_marginTop="15dp"
18         android:ems="10"
19         android:hint="请输入联系人的电话"
20         android:inputType="textPersonName"
21         app:layout_constraintHorizontal_bias="0.0"
22         app:layout_constraintLeft_toLeftOf="parent"
23         app:layout_constraintRight_toRightOf="parent"
24         app:layout_constraintTop_toBottomOf="@+id/editText2_name" />
25
26     <EditText
27         android:id="@+id/editText2_name"
28         android:layout_width="0dp"
29         android:layout_height="wrap_content"
30         android:layout_marginEnd="24dp"
31         android:layout_marginLeft="24dp"
32         android:layout_marginRight="24dp"
33         android:layout_marginStart="24dp"
34         android:layout_marginTop="30dp"
35         android:ems="10"
36         android:hint="请输入联系人的姓名"
37         android:inputType="textPersonName"
38         android:textSize="18sp"
39         app:layout_constraintHorizontal_bias="0.503"
40         app:layout_constraintLeft_toLeftOf="parent"
41         app:layout_constraintRight_toRightOf="parent"
42         app:layout_constraintTop_toTopOf="parent" />
43
44     <Button
45         android:id="@+id/button"
46         android:layout_width="120dp"
47         android:layout_height="wrap_content"
48         android:layout_marginTop="16dp"
49         android:onClick="deleteDataMethod"
50         android:text="删除"
51         android:textSize="24sp"
52         app:layout_constraintLeft_toLeftOf="parent"
53         app:layout_constraintRight_toRightOf="parent"
54         app:layout_constraintTop_toBottomOf="@+id/button2" />
55
56     <Button
57         android:id="@+id/button4"
58         android:layout_width="120dp"
59         android:layout_height="wrap_content"
60         android:layout_marginTop="16dp"
61         android:onClick="updateDataMethod"
62         android:text="修改"
63         android:textSize="24sp"
64         app:layout_constraintLeft_toLeftOf="parent"
65         app:layout_constraintRight_toRightOf="parent"
66         app:layout_constraintTop_toBottomOf="@+id/button" />
67
68     <Button
69         android:id="@+id/button3"
70         android:layout_width="120dp"
71         android:layout_height="wrap_content"
72         android:layout_marginTop="16dp"
73         android:onClick="queryDataMethod"
74         android:text="查询"
75         android:textSize="24sp"
76         app:layout_constraintLeft_toLeftOf="parent"
77         app:layout_constraintRight_toRightOf="parent"
78         app:layout_constraintTop_toBottomOf="@+id/button4" />
79
80     <Button
81         android:id="@+id/button2"
82         android:layout_width="120dp"
83         android:layout_height="wrap_content"
84         android:layout_marginTop="32dp"
85         android:onClick="addDataMethod"
86         android:text="增加"
87         android:textSize="24sp"
88         app:layout_constraintLeft_toLeftOf="parent"
89         app:layout_constraintRight_toRightOf="parent"
90         app:layout_constraintTop_toBottomOf="@+id/editText_phone" />
91 </android.support.constraint.ConstraintLayout>
自定义一个继承自SQLiteOpenHelper的类MyDBOpenHelper02,在这里需要实现一些方法:
 1 package com.example.whs.myapplication03;
 2
 3 import android.content.Context;
 4 import android.database.DatabaseErrorHandler;
 5 import android.database.sqlite.SQLiteDatabase;
 6 import android.database.sqlite.SQLiteOpenHelper;
 7 import android.util.Log;
 8
 9 /**
10  * Created by whs on 2017/9/11.
11  */
12
13 public class MyDBOpenHelper02 extends SQLiteOpenHelper {
14     /*
15     * context:上下文
16     * name:数据库名称
17     * factory:游标工厂,null表示默认
18     * version:版本
19     * */
20     public MyDBOpenHelper02(Context context) {
21         super(context, "glandroid", null, 1);
22     }
23
24     /*
25     * 当数据库第一次被创建时调用
26     * 适合把数据库的表结构定义出来
27     * */
28     @Override
29     public void onCreate(SQLiteDatabase db) {
30         Log.d("DB", "数据库被创建了");
31
32         db.execSQL("create table contactinfo (id integer primary key autoincrement, name char(20), phone varchar(20));");
33
34
35     }
36     /*
37     * 数据路被更新时调用
38     * */
39     @Override
40     public void onUpgrade(SQLiteDatabase db, int oldVersion, int newVersion) {
41         Log.d("DB", "数据库被更新了");
42         db.execSQL("alter table contactinfo add account varchar(20);");
43     }
44 }
当然,我们可以将对数据库的操作方法直接放入MyDBOpenHelper02,不过为了方便,通常会另外定义一个类用来对数据库的操作。这里我们用ContactInfoDao类来实现:
 1 package com.example.whs.myapplication03.Dao;
 2
 3 import android.content.ContentValues;
 4 import android.content.Context;
 5 import android.database.Cursor;
 6 import android.database.sqlite.SQLiteDatabase;
 7
 8 import com.example.whs.myapplication03.MyDBOpenHelper02;
 9
10 /**
11  * Created by whs on 2017/9/11.
12  */
13
14 public class ContactInfoDao {
15     MyDBOpenHelper02 helper02;
16     public ContactInfoDao(Context context) {
17
18         helper02 = new MyDBOpenHelper02(context);
19     }
20
21     /*
22     * 添加一条记录
23     * */
24     public long add(String name, String phone){
25         SQLiteDatabase db = helper02.getWritableDatabase();
26         //db.execSQL("insert into contactinfo (name, phone) values (?, ?);", new Object[]{name, phone});
27         //db.close();
28         //第二种添加方法
29         ContentValues values = new ContentValues();
30         values.put("name", name);
31         values.put("phone", phone);
32         long rowId = db.insert("contactinfo", null, values);
33
34         db.close();
35
36         return rowId; //返回增加的行ID
37     }
38
39     /*
40     * 删除一条记录
41     * */
42     public int delete(String name){
43         SQLiteDatabase db = helper02.getWritableDatabase();
44         //db.execSQL("delete from contactinfo where name = ?;", new Object[]{name});
45
46         int rowCount = db.delete("contactinfo", "name = ?", new String[]{name});
47         db.close();
48
49         return rowCount; //删除了几条数据
50     }
51
52     /*
53     * 修改一条记录
54     * */
55     public int update(String name, String newPhone){
56         SQLiteDatabase db = helper02.getWritableDatabase();
57         //db.execSQL("update contactinfo set phone = ? where name = ?;", new Object[]{newPhone, name});
58         ContentValues values = new ContentValues();
59         values.put("phone", newPhone);
60         int rowCount = db.update("contactinfo", values, "name = ?", new String[]{name});
61         db.close();
62         return rowCount; //更新的行数
63     }
64
65     /*
66     * 查询一条记录
67     * */
68     public String query(String name){
69         SQLiteDatabase db = helper02.getWritableDatabase();
70         //Cursor cursor = db.rawQuery("select phone from contactinfo where name = ?;", new String[]{name});
71         Cursor cursor = db.query("contactinfo", new String[]{"phone"}, "name = ?", new String[]{name}, null, null, null);
72         String phone = null;
73         if (cursor.moveToNext()){
74             phone = cursor.getString(0);
75         }
76         db.close();
77         return phone;
78     }
79
80
81 }
对数据库的操作及布局都已经实现了,这样就可以在Activity中具体的应用了:
 1 package com.example.whs.myapplication03;
 2
 3 import android.support.v7.app.AppCompatActivity;
 4 import android.os.Bundle;
 5 import android.view.View;
 6 import android.widget.EditText;
 7 import android.widget.Toast;
 8
 9 import com.example.whs.myapplication03.Dao.ContactInfoDao;
10
11 public class MainActivity extends AppCompatActivity {
12
13     EditText et_name, et_phone;
14     ContactInfoDao dao;
15
16     @Override
17     protected void onCreate(Bundle savedInstanceState) {
18         super.onCreate(savedInstanceState);
19         setContentView(R.layout.activity_main);
20
21         //MyDBOpenHelper helper = new MyDBOpenHelper(this);
22         //helper.getWritableDatabase();
23
24         et_name = (EditText)findViewById(R.id.editText2_name);
25         et_phone = (EditText)findViewById(R.id.editText_phone);
26
27         MyDBOpenHelper02 helper02 = new MyDBOpenHelper02(this);
28         helper02.getWritableDatabase();
29
30         //new一个Dao出来
31         dao = new ContactInfoDao(this);
32
33     }
34
35
36     /*
37     * 数据库增、删、改、查操作
38     * */
39     public void addDataMethod(View view){
40         String name = et_name.getText().toString().trim();
41         String phone = et_phone.getText().toString().trim();
42         if (name.isEmpty() || phone.isEmpty()){
43             Toast.makeText(MainActivity.this, "不能为空", Toast.LENGTH_SHORT).show();
44             return;
45         }else {
46             dao.add(name, phone);
47             Toast.makeText(MainActivity.this, "添加成功", Toast.LENGTH_SHORT).show();
48
49         }
50     }
51
52     public void deleteDataMethod(View view){
53
54         String name = et_name.getText().toString().trim();
55         if (name.isEmpty()){
56             Toast.makeText(MainActivity.this, "不能为空", Toast.LENGTH_SHORT).show();
57             return;
58         }else {
59             dao.delete(name);
60             Toast.makeText(MainActivity.this, "删除成功", Toast.LENGTH_SHORT).show();
61         }
62
63     }
64
65     public void updateDataMethod(View view){
66
67         String name = et_name.getText().toString().trim();
68         String phone = et_phone.getText().toString().trim();
69         if (name.isEmpty() || phone.isEmpty()){
70             Toast.makeText(MainActivity.this, "不能为空", Toast.LENGTH_SHORT).show();
71             return;
72         }else {
73             dao.update(name, phone);
74             Toast.makeText(MainActivity.this, "更新成功", Toast.LENGTH_SHORT).show();
75
76         }
77
78     }
79
80     public void queryDataMethod(View view){
81
82         String name = et_name.getText().toString().trim();
83         if (name.isEmpty()){
84             Toast.makeText(MainActivity.this, "name不能为空", Toast.LENGTH_SHORT).show();
85             return;
86         }else {
87             String phone = dao.query(name);
88             Toast.makeText(MainActivity.this, "查询成功phone是:" + phone, Toast.LENGTH_SHORT).show();
89
90         }
91
92     }
93
94 }