转:https://www.jb51.net/article/139119.htm
springboot区分开发、测试、生产多环境的应用配置(二)
这篇文章主要给大家介绍了关于maven profile自动切换环境参数的2种方法,文中通过示例代码将这两种方法介绍的非常详细,对大家的学习或者工作具有一定的参考学习价值,需要的朋友们下面随着小编来一起学习学习吧。
一、前言
在开发过程中,我们经常会根据不同的环境配置不同的参数,如数据源的ip,username,password、url、秘钥等都会不同,传统方式是在一个配置文件中通过修改properties文件中的参数值或者通过注释解注释来达到目的,这样不仅容易出错,还浪费不必要的时间,更重要的是把代码发布到测试环境或者生产环境还容易忘记改。为解决这种问题,maven提供了一种解决方案,就是profile。
profile定义的位置
- 针对于特定项目的profile配置我们可以定义在该项目的pom.xml中。
- 针对于特定用户的profile配置,我们可以在用户的settings.xml文件中定义profile。该文件在用户目录下的“.m2”目录下。
- 全局的profile配置。全局的profile是定义在Maven安装目录下的“conf/settings.xml”文件中的。
二、filter方式实现
第一步:分别定义application-dev.properties、application-test.properties、application-pro.properties三个文件
application-dev.properties
jdbc.username=dev jdbc.password=123456application-test.properties
jdbc.username=test jdbc.password=888888application-pro.properties
jdbc.username=root jdbc.password=666666第二步:定义总的属性文件application.properties,该文件中的值去引用application-<env>.properties中的key
application.properties
第三步:配置profile
<profiles>
<profile>
<!-- 开发环境 -->
<id>dev</id>
<properties>
<env>dev</env><!-- env 名字可以自行定义-->
</properties>
<activation>
<!-- 设置默认激活这个配置 -->
<activeByDefault>true</activeByDefault>
</activation>
</profile>
<profile>
<!-- 测试环境 -->
<id>test</id>
<properties>
<env>test</env>
</properties>
</profile>
<profile>
<!-- 发布环境 -->
<id>pro</id>
<properties>
<env>pro</env>
</properties>
</profile>
</profiles>
第四步:配置filter和resource
${env}就是在mvn package -P <env>的名字,这样就告诉application.properties中应用的key是那个属性文件的key了
打包运行
|
1
2
3
4
5
|
// 如果不指定环境,默认是activeByDefault=true的环境,当前是指开发环境mvn package// 打包指定的环境通过-P 参数,注意p是大写的mvn package -P <env> |
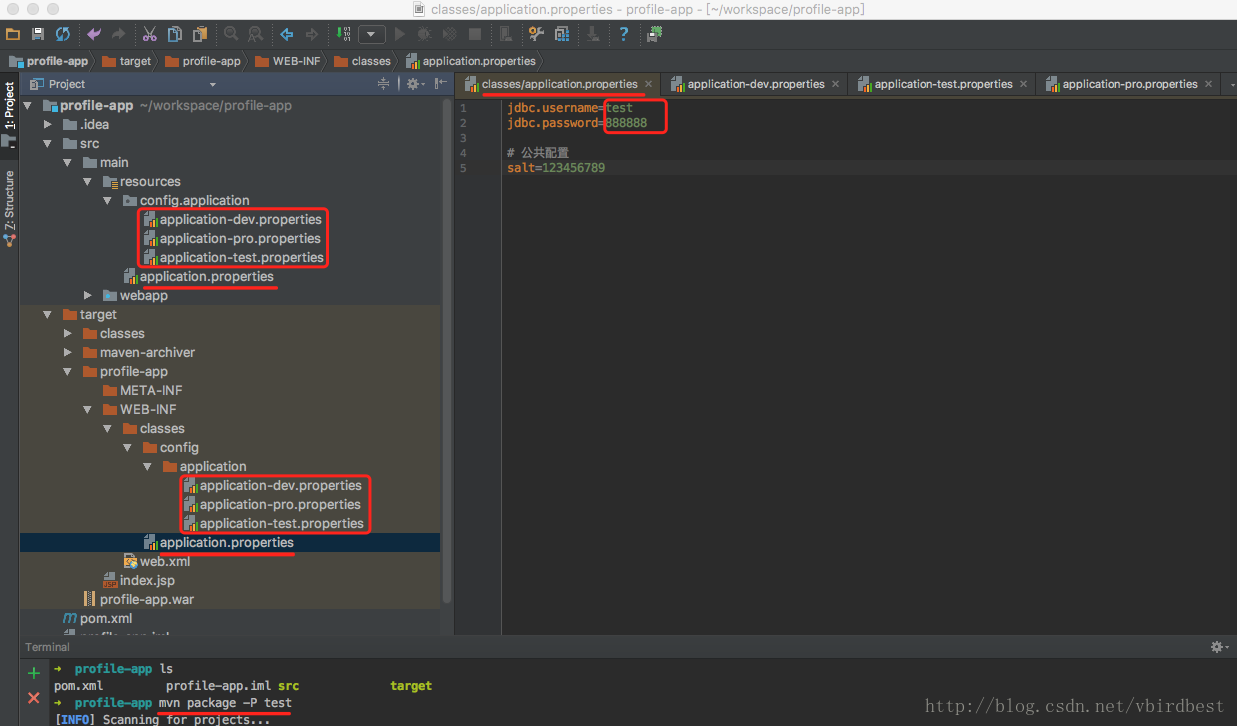
从mvn packege -P test运行的结果中可以看到生成的target目录下classes/application.perperties中的jdbc.username和jdbc.password 就是application-test.properties中配置的env.jdbc.username和env.jdbc.password的值。
实现原理:
在pom.xml中为每个不同的环境定义不同的profile,每个profile都有一个环境名称,然后为不同环境定义不同的配置文件(如application-<env>.properties), 再定义一个总的属性文件(如application.properties), 然后让application.properties的value去引用application-<env>.properties中对应的key,在打包时指定要打包的环境的名称即可,这样application.properties中的key的值就是相对应环境application-<env>.properties对应的值了。
三、多resource实现方式
步骤
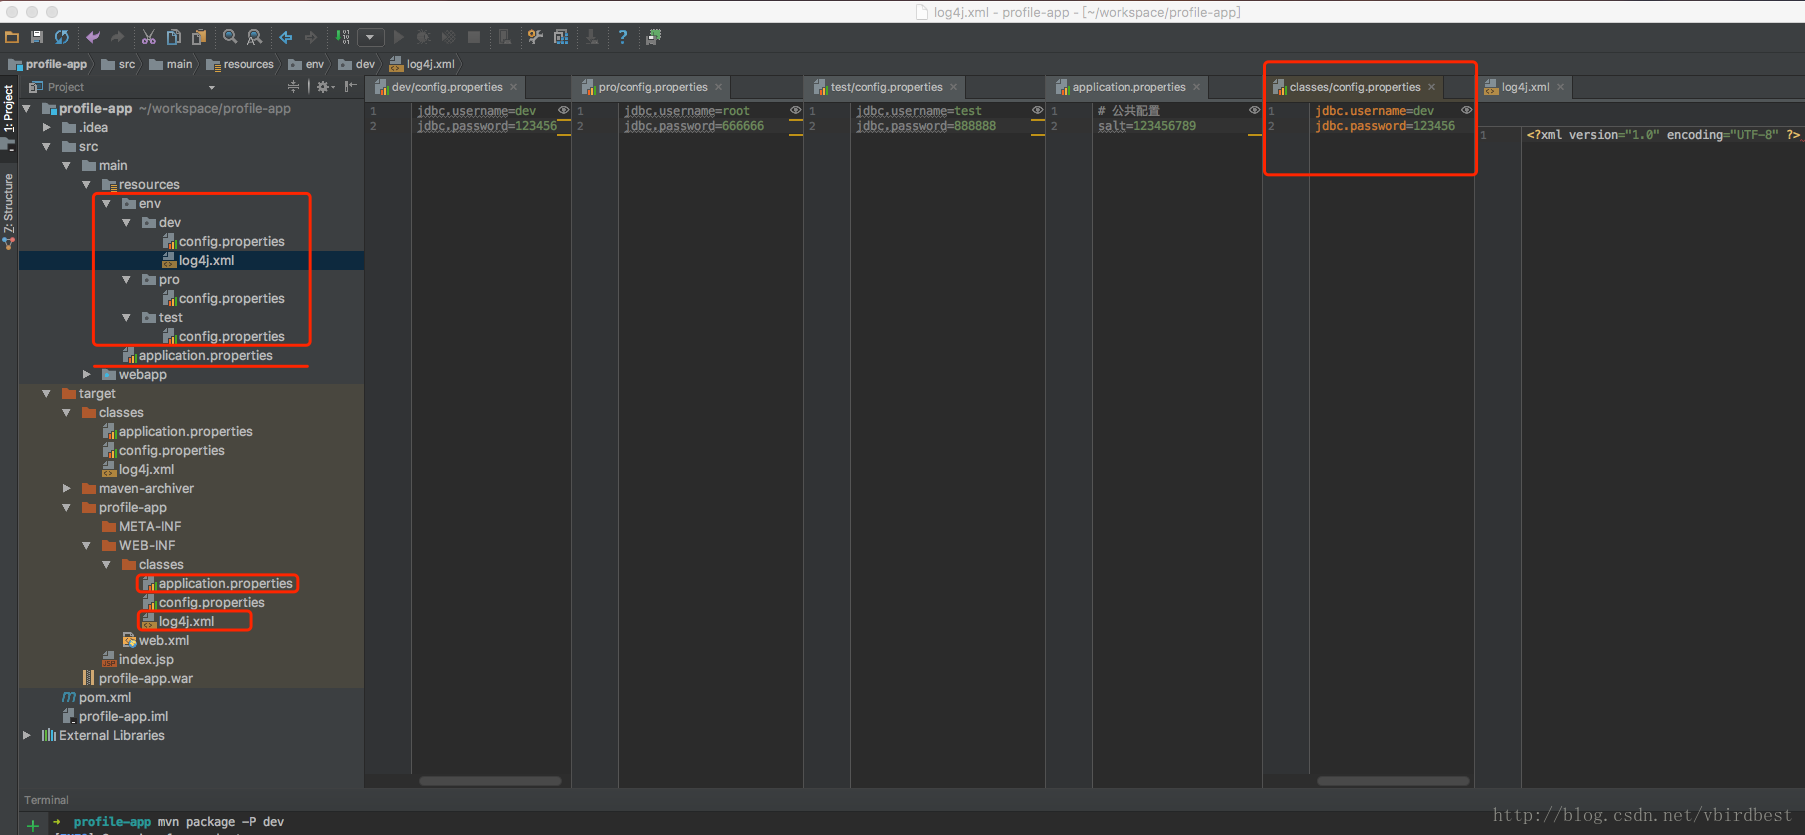
第一步:在src/main/resource创建一个env目录,再创建各个环境的子目录,再再各个环境子目录下创建名为config.properties的文件,每个键相同,值不同。
env/dev/config.properties
|
1
2
|
jdbc.username=devjdbc.password=123456 |
env/test/config.properties
|
1
2
|
jdbc.username=testjdbc.password=888888 |
env/pro/config.properties
|
1
2
|
jdbc.username=rootjdbc.password=666666 |
第二步:创建一个与环境无关的application.properties
application.properties
|
1
2
|
# 公共配置salt=123456789 |
第三步:配置profiles
|
1
2
3
4
5
6
7
8
9
10
11
12
13
14
15
16
17
18
19
20
21
22
23
24
25
26
27
|
<profiles> <profile> <!-- 开发环境 --> <id>dev</id> <properties> <env>dev</env> </properties> <activation> <!-- 设置默认激活这个配置 --> <activeByDefault>true</activeByDefault> </activation> </profile> <profile> <!-- 测试环境 --> <id>test</id> <properties> <env>test</env> </properties> </profile> <profile> <!-- 发布环境 --> <id>pro</id> <properties> <env>pro</env> </properties> </profile></profiles> |
第四步:配置resource
|
1
2
3
4
5
6
7
8
9
10
11
12
13
14
15
16
17
18
19
20
21
22
23
24
25
26
27
28
29
30
31
|
<build> <finalName>profile-app</finalName> <!-- 定义了变量配置文件的地址 --> <resources> <resource> <directory>src/main/resources</directory> <excludes> <exclude>env/dev/*</exclude> <exclude>env/test/*</exclude> <exclude>env/pro/*</exclude> </excludes> <filtering>true</filtering> </resource> <resource> <directory>src/main/resources/env/${env}</directory> <includes> <include>*.*</include> <include>**/*.xml</include> <include>**/*.properties</include> </includes> <filtering>true</filtering> </resource> </resources> <plugins> <plugin> <groupId>org.apache.maven.plugins</groupId> <artifactId>maven-war-plugin</artifactId> </plugin> </plugins></build> |
第五步:运行 mvn package -P test
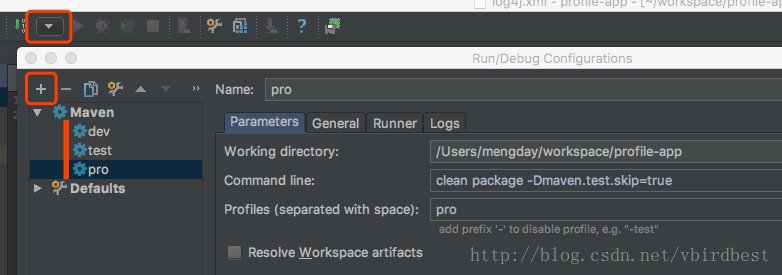
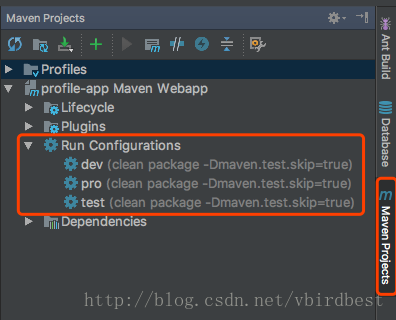
如果经常使用mvn package -P <env>可以在idea中配置一些maven, 步骤为:Edit Configurations… —– + —- Maven —- 分别为每个环境添加maven 命令,以后双击Run Configureations中的任意一个就是相当于运行mvn package -P <env>命令了
两种方式比较
filter方式会把所有的application-dev.properties、application-test.properties、application-pro.properties文件都会打包进去,而且此种方式只能针对属性文件,如果有其他文件(如.xml)也根据不同的环境有不同的配置,这种方式是不好处理。
多resource方式在打包时只打包指定环境的配置文件,可以将各种文件放到各自的环境文件夹中,在打包的时候会将整个文件夹都打包进去。推荐此种方式