方法一(inotify+rsync):
1.安装inotify-tools(客户端)【监听工具】,实现数据属实备份检查目录是否有如下文档,没有表示操作系统不支持
ls -l /proc/sys/fs/inotify

2、安装inotify-tools软件
yum install inotify-tools -y

如果安装失败,可能是源包的问题,需要安装第三方的源(wget -O /etc/yum.repos.d/epel.repo http://mirrors.aliyun.com/repo/epel-6.repo)
3、新开一个窗口(原网址),进行测试
一个窗口进行监听另外一个创建创建文件:
inotifywait -mrq --timefmt '%d/%m/%y %H:%M' --format '%T %w%f' -e create,delete /backup

4、确保服务端及客户端的rsync正常的情况下,可以下如下脚本进行实时推送
#!/bin/bash
Path=/data
IP=172.16.1.99
/usr/bin/inotifywait -mrq --format '%w%f' -e close_write,delete $Path
|while read file
do
cd $Path &&
rsync -az ./ --delete rsync_backup@$IP::nfsbackup/ --password-file=/etc/rsync.password
done
注:客户端为/data目录,服务端为/nfsbackup目录
5、将其设置成一个服务
在/etc/init.d/syncd目录下写入如下代码执行或开机自启等操作,然后执行chkconfig --add syncd
#!/bin/bash
#chkconfig: 2345 38 46
. /etc/init.d/functions
if [ $# -ne 1 ]
then
echo "usage: $0 {start|stop|status}"
exit 1
fi
case "$1" in
start)
if [ -e "/var/run/inotify.pid" ]
then
action "inotify service start fail" /bin/false
echo "sync server is running......"
sleep 1
exit 1
fi
/bin/bash /server/scripts/inotify.sh &
echo $$ >/var/run/inotify.pid
if [ `ps -ef|grep inotify|wc -l` -gt 2 ]
then
action "inotify service is started" /bin/true
else
action "inotify service is started" /bin/false
fi
;;
stop)
if [ `ps -ef|grep inotify|grep -v grep|wc -l` -a -e "/var/run/inotify.pid" ]
then
rm -f /var/run/inotify.pid >/dev/null 2>&1
pkill inotifywait
else
action "inotify service stop fail" /bin/false
echo "sync server is not running"
sleep 1
exit 1
fi
sleep 1
if [ `ps -ef|grep inotify|grep -v grep|wc -l` -eq 0 -a ! -e "/var/run/inotify.pid" ]
then
action "inotify service is stoped" /bin/true
else
action "inotify service is stoped" /bin/false
fi
;;
status)
if [ `ps -ef|grep inotify|wc -l` -gt 2 ]
then
action "inotify service is running"
else
action "inotify service is stoped"
fi
;;
*)
echo "usage: $0 {start|stop|status}"
exit 1
esac
方法二(sersync+rsync):
1、新建一个/application/目录,网上下载个sersync文件,即解压(客户端配置)
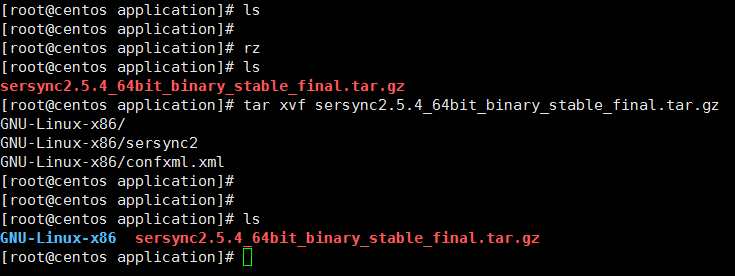
2、查看GNU-Linux-x86/confxml.xml配置文件信息
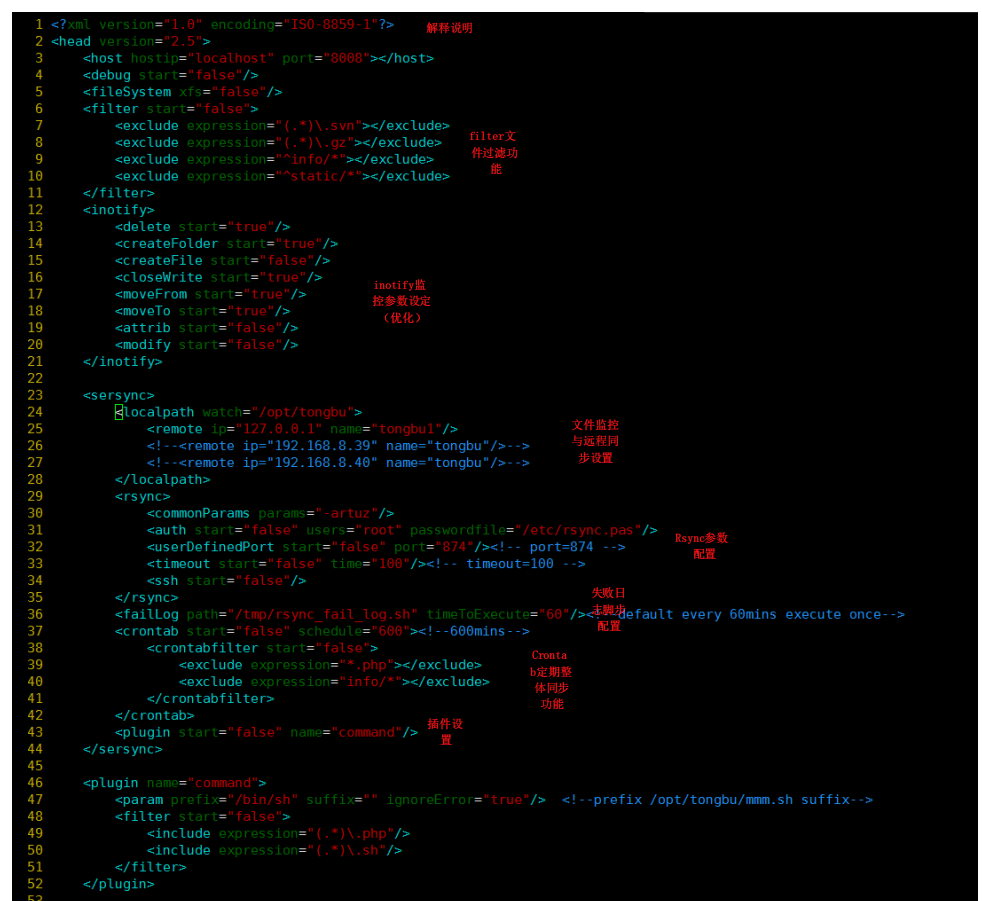
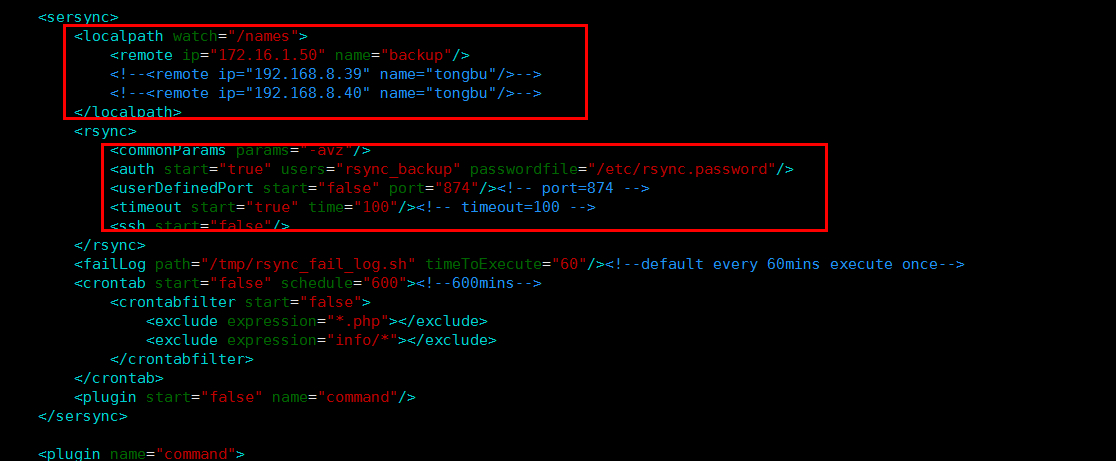
3、修改GNU-Linux-x86/confxml.xm配置信息
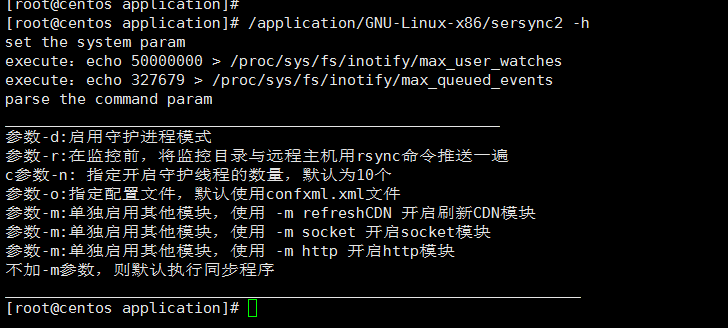
4、查看启动文件的属性
/application/GNU-Linux-x86/sersync2 -h
5、执行测试
/application/GNU-Linux-x86/sersync2 -d -r -n 8 -o /application/GNU-Linux-x86/confxml.xml
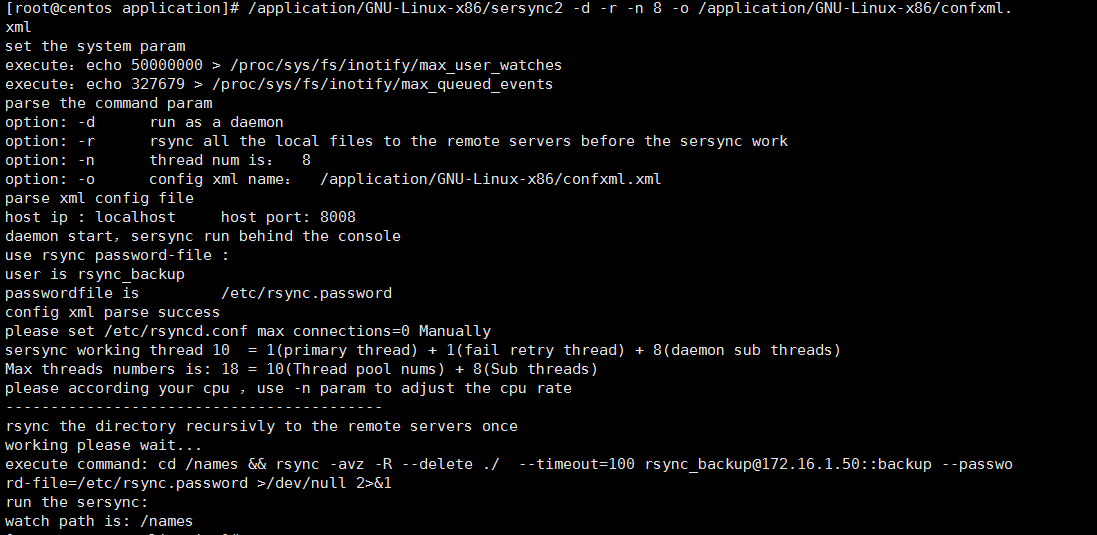
6、测试如上述提示表成功写入(/etc/rc.local)开机自启即可
echo '/application/GNU-Linux-x86/sersync2 -d -r -n 8 -o /application/GNU-Linux-x86/confxml.xml' >>/etc/rc.local
小结:
服务器端通过命令也可实现监听(watch),但是延迟两秒。