re模块常用方法:
import re
ret = re.findall('a','qas fds asfwa') #返回所有满足条件的结果,放在列表里
print(ret) #结果:['a','a','a']
ret = re.search('a','qas fds asfwa').group() #只找到第一个符合匹配的然后返回,一定要加group返回匹配的字符串,如果没有则返回None 结果:a
ret = re.match('a','abc').group() #跟search差不多,不过只在字符串开始处进行匹配,开头不是会报错 结果:a
ret = re.split('[ab]','abcd') #先按'a'分割得到''和'bcd',在对''和‘bcd’分别按'b'分割 结果:['','','cd']
ret = re.sub('d','H','fdsf32cs3fds1' ,2) #将数字替换成 ’H',只替换前2个值,不写则全部替换
ret = re.subn('d','H','fdsf32cs3fds1' ) #返回的是元组,不写值替换所有
obj = re.compile('d{3}') #编译成一个正则表达式对象,匹配连续3个数字,可以多次调用这个对象
ret = obj.search('a324e') #正则表达式对象调用search,参数为待匹配的字符串
print(ret.group()) #需要用group(),结果:324
ret = re.finditer('d','afd2312a') #返回一个迭代器,里面存放匹配结果
print(ret) #内存地址
print(next(ret).group()) #查看第一个结果
print(next(ret).group()) #查看第二个结果
print([i.group() for i in ret]) #查看剩余的左右结果
findall的优先级查询:
ret = re.findall('www.(badi|sohu).com','www.sohu.com')
print(ret) #结果:['sohu'] 因为findall会优先把匹配结果组里内容返回,如果想要匹配结果,取消权限即可
ret = re.findall('www.(?:badi|sohu).com','www.sohu.com')
print(ret) #结果:['www.sohu.com']
split的优先级查询:
ret = re.split('d+','asdf2fa43fd')
print(ret) #结果:['asdf', 'fa', 'fd']
ret = re.split('(d+)','asdf2fa43fd')
print(ret) #结果:['asdf', '2', 'fa', '43', 'fd']
在匹配部分加上()之后所切出的结果是不同的,
没有()的没有保留所匹配的项,但是有()的却能够保留了匹配的项,
这个在某些需要保留匹配部分的使用过程是非常重要的。
collections模块:
在内置数据类型(dict、list、set、tuple)的基础上增加了额外的数据类型:Counter、deque、defaultdict、namedtuple和OrderedDict等
1.namedtuple:生成可以使用名字来访问元素内容的tuple
2.deque:双端队列,可以快速的从另外一侧追加和推出对象
3.Counter:计算器,主要用来计数
4.OrderedDict:有序字典
5.defaultdict:带有默认值的字典
namedtuple
设置一个坐标,设置x,y,传值时必须传2个值。
from collections import namedtuple
point = namedtuple('point',['x','y'])
p = point(1,2)
print(p.x)
print(p.y)
deque
deque是双向列表,可以插入和删除操作,适合用于队列和栈。
from collections import deque
q = deque([])
q.append('x')      #从后面放入
q.appendleft('y')    #从前面放入
q.insert(1,'z')      #从中间第几个索引前放
print(q.pop())      #从后面输出
print(q.popleft())    #从前面输出
print(q)
OrderedDict
使用dict时,Key是无序的,在对dict做迭代时无法确定key的顺序。
要保持Key的顺序,可以用这个字典。
from collections import OrderedDict
d = OrderedDict([('a',1),('c',2),('b',3)])
print(d)
#如果要往ordereddict字典里插入,也会按照顺序插入
od = OrderedDict()
od['z'] = 1
od['c'] = 3
print(od.keys())
defaultdict
[11, 22, 33,44,55,77,88,99,90] 把列表中大于66的放入字典k1中,小于66的放入字典k2中
from collections import defaultdict
l = [11, 22, 33,44,55,77,88,99,90]
my_dic = defaultdict(list)
def func():
    for i in l:
        if i > 66:
            my_dic['k1'].append(i)
        else:
            my_dic['k2'].append(i)
func()
print(my_dic)
使用dict时,如果引用的Key不存在,就会抛出keyerror,如果希望key不存在时,返回一个默认值,就可以用这个
from collections import defaultdict
d = defaultdict(lambda : 'None')
d['key1'] = 'abc'
print(d['key1'])
print(d['key2'])
Counter
用途:告诉你在这个字符串中这个字母有几个。
Counter({'a': 4, 'f': 4, 'd': 3, 's': 1}) #a有4个,f有4个,d有3个,s有1个
from collections import Counter
c = Counter('adfsafdfafda')
print(c)
时间模块time
常用方法:
1.time.sleep(secs) #睡几秒
2.time.time() #获取当前时间戳
表示时间的三种方式
在python中,通常有这三种方式来表示时间:时间戳、元组(struct_time)、格式化时间字符串。
1.时间戳(timestamp:通常来说,时间戳表示的是从1970年1月1日00:00:00开始按秒计算的偏移量。我们运行type(time.time()),返回的是float类型。
2.格式化的时间字符串(Format String:2000:12:24


%y 两位数的年份表示(00-99)
%Y 四位数的年份表示(000-9999)
%m 月份(01-12)
%d 月内中的一天(0-31)
%H 24小时制小时数(0-23)
%I 12小时制小时数(01-12)
%M 分钟数(00=59)
%S 秒(00-59)
%a 本地简化星期名称
%A 本地完整星期名称
%b 本地简化的月份名称
%B 本地完整的月份名称
%c 本地相应的日期表示和时间表示
%j 年内的一天(001-366)
%p 本地A.M.或P.M.的等价符
%U 一年中的星期数(00-53)星期天为星期的开始
%w 星期(0-6),星期天为星期的开始
%W 一年中的星期数(00-53)星期一为星期的开始
%x 本地相应的日期表示
%X 本地相应的时间表示
%Z 当前时区的名称
%% %号本身
3.元组(struct_time):struct_time元组共有9个元素(年,月,日,时,分,秒,一年中第几周,一年中第几天等)
| 索引(Index) | 属性(Attribute) | 值(Values) |
|---|---|---|
| 0 | tm_year(年) | 比如2011 |
| 1 | tm_mon(月) | 1 - 12 |
| 2 | tm_mday(日) | 1 - 31 |
| 3 | tm_hour(时) | 0 - 23 |
| 4 | tm_min(分) | 0 - 59 |
| 5 | tm_sec(秒) | 0 - 60 |
| 6 | tm_wday(weekday) | 0 - 6(0表示周一) |
| 7 | tm_yday(一年中的第几天) | 1 - 366 |
| 8 | tm_isdst(是否是夏令时) | 默认为0 |
时间模块的三种格式
import time
print(time.time())
#1515573303.2250295
print(time.strftime('%Y-%m-%d %X'))
#2018-01-10 16:35:03
print(time.localtime())
#time.struct_time(tm_year=2018, tm_mon=1, tm_mday=10, tm_hour=16, tm_min=35, tm_sec=3, tm_wday=2, tm_yday=10, tm_isdst=0)
总结:时间戳是计算机能够识别的时间,时间字符是人能够看懂的时间,元组则是用来操作时间的
几种格式之间的转换:
#时间戳 ---> 结构化时间
#time.gmtime   UTC时间
#time.localtime 当地时间
print(time.gmtime(1515573303))
print(time.localtime(1515573303))
#结果化时间 ---> 时间戳
time_tuple = time.localtime(1515573303)
print(time.mktime(time_tuple))
#结构化时间 ---> 字符串时间
print(time.strftime('%Y-%m-%d %X'))
print(time.strftime('%Y-%m-%d %X',time.localtime(1515573303)))
#字符串时间 ---> 结构化时间
print(time.strptime('2018-01-10','%Y-%m-%d'))
#结构化时间 ---> 时间字符串
print(time.asctime(time.localtime(1515573303)))
print(time.asctime())

#时间字符串 ---> 结构化时间
print(time.ctime())
print(time.ctime(1515573303))
RANDOM模块
import random
#随机小数
print(random.random())     #大于0且小于1之前的小数
print(random.uniform(1,3)) #大于1小于3的小数

#随机整数
print(random.randint(1,5))     #大于等于1且小于等于5之间的整数
print(random.randrange(1,10,2))  #大于等于1且小于10之间的奇数

#随机返回
print(random.choice([1,'23',[4,5]]))    #随机返回,可以为列表
print(random.sample([1,'23',[4,5]],2))  #随机返回任意2个元素
#打乱列表顺序(洗牌)
l = [1,3,5,7,9]
print(random.shuffle(l))
print(l)
print(random.shuffle(l))
print(l)
写一个4位随机英文数字的验证码 :
def func():
    code = ''
    for i in range(4):
        num = random.randint(0,9)
        alt = chr(random.randint(65,90))
        add = random.choice([num,alt])
        code = ''.join([code,str(add)])
    return code
print(func())
OS模块
与操作系统交互的一个接口
print(os.getcwd())  #获取当前python所在的目录
os.chdir(r'C:Users70775PycharmProjectsstart')  #cd 进入某个目录
print(os.curdir)    #获取当前目录(.)
print(os.pardir)   #获取当前目录的父目录(..)
os.makedirs('ss/aa')    #在当前目录下创建一个ss目录,在ss目录下创建aa目录 (mkdir -p )
os.removedirs('ss/aa')    #删除ss目录下的aa目录,如果aa上一级目录为空则一起删除,直到有文件停止
os.mkdir('ss')    #创建单级目录
os.rmdir('ss')    #删除这个目录
print(os.listdir(os.getcwd()))  #查找目录下的所有文件和子目录,包括隐藏文件
os.remove('stat')        #删除一个文件
os.rename('file','stat')    #文件改名,file更为stat
print(os.sep)    #输出当前平台的路径分隔符,windows下为 linnux下为/
print(os.linesep)  #输出当前平台的行终止符,windows下为
  linux下为

print(os.pathsep)  #输出当前平台分割文件路径的字符串,windows下为; linux下为:
print(os.name)    #输出当前平台操作系统接口,windows下为nt linux下为posix
os.system("bash command")      #使用shell命令
os.popen('bash command').read()  #运行shell命令,获取执行结果
print(os.environ)           #获取系统环境变量
print(os.stat(os.getcwd()))      #文件或目录详细信息
os.path
print(os.path.abspath(os.getcwd()))    #输出规范化路径
print(os.path.split(os.getcwd()))      #路径切割,分成目录和文件名
print(os.path.basename(os.getcwd()))    #路径切割的第一部分 目录路径
print(os.path.dirname(os.getcwd()))     #路径切割的第二部分  文件路径

print(os.path.exists(os.getcwd()))         #路径是规范径返回True,不是返回False
print(os.path.isabs(os.getcwd()))          #路径是绝对路径返回True,不是返回False
print(os.path.isfile('file'))            #路径是文件返回True,不是返回False
print(os.path.isdir('file'))             #路径是目录返回True,不是返回False
print(os.path.join('path1','path2','path3'))     #第1个写绝对路径目录,后面写1下的子目录或文件
print(os.path.getatime('file'))           #输出文件最后访问时间
print(os.path.getmtime('file'))           #输出文件最后的修改时间
print(os.path.getsize('file'))            #返回文件大小
os.stat('path/filename')获取文件/目录信息的结构说明
stat 结构:

st_mode: inode 保护模式
st_ino: inode 节点号。
st_dev: inode 驻留的设备。
st_nlink: inode 的链接数。
st_uid: 所有者的用户ID。
st_gid: 所有者的组ID。
st_size: 普通文件以字节为单位的大小;包含等待某些特殊文件的数据。
st_atime: 上次访问的时间。
st_mtime: 最后一次修改的时间。
st_ctime: 由操作系统报告的"ctime"。在某些系统上(如Unix)是最新的元数据更改的时间,在其它系统上(如Windows)是创建时间(详细信息参见平台的文档)。
sys模块
sys模块是与python解释器交互的一个接口
sys.argv           命令行参数List,第一个元素是程序本身路径
sys.exit(n)        退出程序,正常退出时exit(0),错误退出sys.exit(1)
sys.version        获取Python解释程序的版本信息
sys.path           返回模块的搜索路径,初始化时使用PYTHONPATH环境变量的值
sys.platform       返回操作系统平台名称

import sys
try:
    sys.exit(1)
except SystemExit as e:
    print(e)
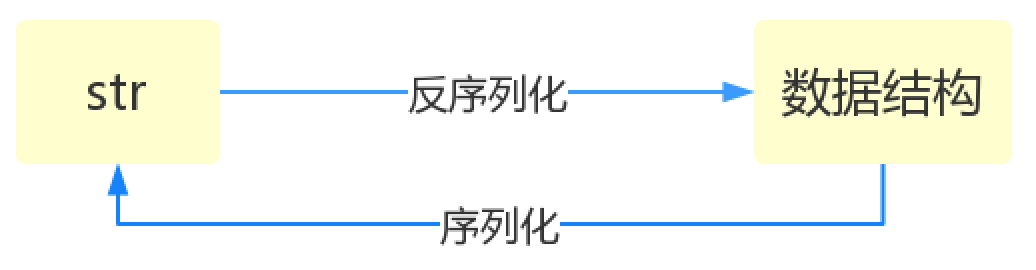
序列化模块
将原本的字典、列表、元组等内容转换成一个字符串的过程就叫做序列化。
序列化的目的:
1.以某种存储形式使自定义对象持久化。
2.将对象从一个地方传递到另一个地方。
3.使程序更具维护性
常用的序列化模块分为:json、 pickle 、shelve
json模块:
优点:通用的序列化格式,很多语言通用。
缺点:只有很少一部分数据类型能够通过Json转化成字符串。(数字,字符串,列表,字典,元组)
pickle模块:
优点:所有的python中的数据类型都可以转化成字符串形式。
缺点:内容只有python能理解,且部分反序列化依赖python代码和库。
shelve模块:
优点:使用句柄直接操作,非常方便。
缺点:python3新出的,所有用的人不多,有坑,写文件时会生产3个文件,而且每个都很重要不能丢。
json模块
四个功能:dumps、dump、loads、load
dumps、loads功能:
import json
dic = {'a':1,'b':2}
str_dic = json.dumps(dic)      #序列化:将一个字典转换成字符串
print(type(str_dic),str_dic)
dic_2 = json.loads(str_dic)     #反序列化:将一个字符串格式的字典转换成字典
print(type(dic_2),dic_2)

list_dic = [1,['a','b','c'],3,{'k1':'v1','k2':'v2'}]  #处理嵌套的数据类型,转换成集合
str_dic = {json.dumps(list_dic)}
print(type(str_dic),str_dic)          #集合不能再转换成字符串
dump、load功能:
import json
dic = {'a':1,'b':2}
with open('file','w',encoding='utf-8')as f:
    json.dump(dic,f)  #dump方法接收一个文件句柄,直接将字典转换成json字符串写入文件,要追加多行需要加/n换行

with open('file')as a:
    dic2 = json.load(a)  #load方法接收一个文件句柄,直接将文件中的json字符串转换成数据结构返回
    print(type(dic2),dic2)
import json
f = open('file','w')
json.dump({'国籍':'中国'},f)
ret = json.dumps({'国籍':'中国'})
f.write(ret+'
')
json.dump({'国籍':'美国'},f,ensure_ascii=False)
ret = json.dumps({'国籍':'美国'},ensure_ascii=False)
f.write(ret+'
')
f.close()
Serialize obj to a JSON formatted str.(字符串表示的json对象)
Skipkeys:默认值是False,如果dict的keys内的数据不是python的基本类型(str,unicode,int,long,float,bool,None),设置为False时,就会报TypeError的错误。此时设置成True,则会跳过这类key
ensure_ascii:,当它为True的时候,所有非ASCII码字符显示为uXXXX序列,只需在dump时将ensure_ascii设置为False即可,此时存入json的中文即可正常显示。)
If check_circular is false, then the circular reference check for container types will be skipped and a circular reference will result in an OverflowError (or worse).
If allow_nan is false, then it will be a ValueError to serialize out of range float values (nan, inf, -inf) in strict compliance of the JSON specification, instead of using the JavaScript equivalents (NaN, Infinity, -Infinity).
indent:应该是一个非负的整型,如果是0就是顶格分行显示,如果为空就是一行最紧凑显示,否则会换行且按照indent的数值显示前面的空白分行显示,这样打印出来的json数据也叫pretty-printed json
separators:分隔符,实际上是(item_separator, dict_separator)的一个元组,默认的就是(‘,’,’:’);这表示dictionary内keys之间用“,”隔开,而KEY和value之间用“:”隔开。
default(obj) is a function that should return a serializable version of obj or raise TypeError. The default simply raises TypeError.
sort_keys:将数据根据keys的值进行排序。
To use a custom JSONEncoder subclass (e.g. one that overrides the .default() method to serialize additional types), specify it with the cls kwarg; otherwise JSONEncoder is used.
好看的格式
import json
data = {'username':['李华','二愣子'],'sex':'male','age':16}
json_dic2 = json.dumps(data,sort_keys=True,indent=2,separators=(',',':'),ensure_ascii=False)
print(json_dic2)
json && pickle模块
用于序列化的两个模块
json用于字符串和python数据类型间进行转换
pickle用于python特有的类型和python的数据类型间进行转换
pickle模块提供了四个功能:dumps、dump(序列化,存)、loads(反序列化、读)、load(不仅可以序列化字典,列表 可以把python中任意的数据类型序列化。)
import pickle
dic = {'a':1,'b':2}
str_dic = pickle.dumps((dic))
print(str_dic)     #二进制内容

dic2 = pickle.loads(str_dic)
print(dic2)       #字典

import time
struct_time = time.localtime(1000000000)
print(struct_time)
with open('file','wb') as f:      #二进制文件所以需要加b
    pickle.dump(struct_time,f)

with open('file','rb')as a:       #二进制文件所以需要加b
    struct_time2 = pickle.load(a)
    print(struct_time2.tm_year)
shelve模块:
shelve也是python提供给我们的序列化工具,比pickle用起来更简单一些。
shelve只提供给我们一个open方法,是用key来访问的,使用起来和字典类似。
import shelve
f = shelve.open('shelve_file')
f['key'] = {'int':10, 'float':9.5, 'string':'Sample data'}
f.close()

f1 = shelve.open('shelve_file')
existing = f1['key']
f1.close()
print(existing)
这个模块有个限制,它不支持多个应用同一时间往同一个DB进行写操作。所以当我们知道我们的应用如果只进行读操作,我们可以让shelve通过只读方式打开DB
import shelve
f = shelve.open('shelve_file', flag='r')
existing = f['key']
f.close()
print(existing)
由于shelve在默认情况下是不会记录待持久化对象的任何修改的,所以我们在shelve.open()时候需要修改默认参数,否则对象的修改不会保存。
import shelve
f1 = shelve.open('shelve_file')
print(f1['key'])
f1['key']['new_value'] = 'this was not here before'
f1.close()

f2 = shelve.open('shelve_file', writeback=True)
print(f2['key'])
f2['key']['new_value'] = 'this was not here before'
f2.close()
writeback方式有优点也有缺点。优点是减少了我们出错的概率,并且让对象的持久化对用户更加的透明了;但这种方式并不是所有的情况下都需要,首先,使用writeback以后,shelf在open()的时候会增加额外的内存消耗,并且当DB在close()的时候会将缓存中的每一个对象都写入到DB,这也会带来额外的等待时间。因为shelve没有办法知道缓存中哪些对象修改了,哪些对象没有修改,因此所有的对象都会被写入。