GITHUB WINDOWS客户端下载与安装
1.GITHUB DESKTOP https://desktop.github.com/
下载MSI版本:https://central.github.com/deployments/desktop/desktop/latest/win32?format=msi
相关教程:
GITHUB DESKTOP 简易教程:
https://www.cnblogs.com/opsprobe/p/9893325.html
GIT和GITHUB DESKTOP的教程:
https://blog.csdn.net/qq_41782425/article/details/85183250
GITHUB下载项目并安装
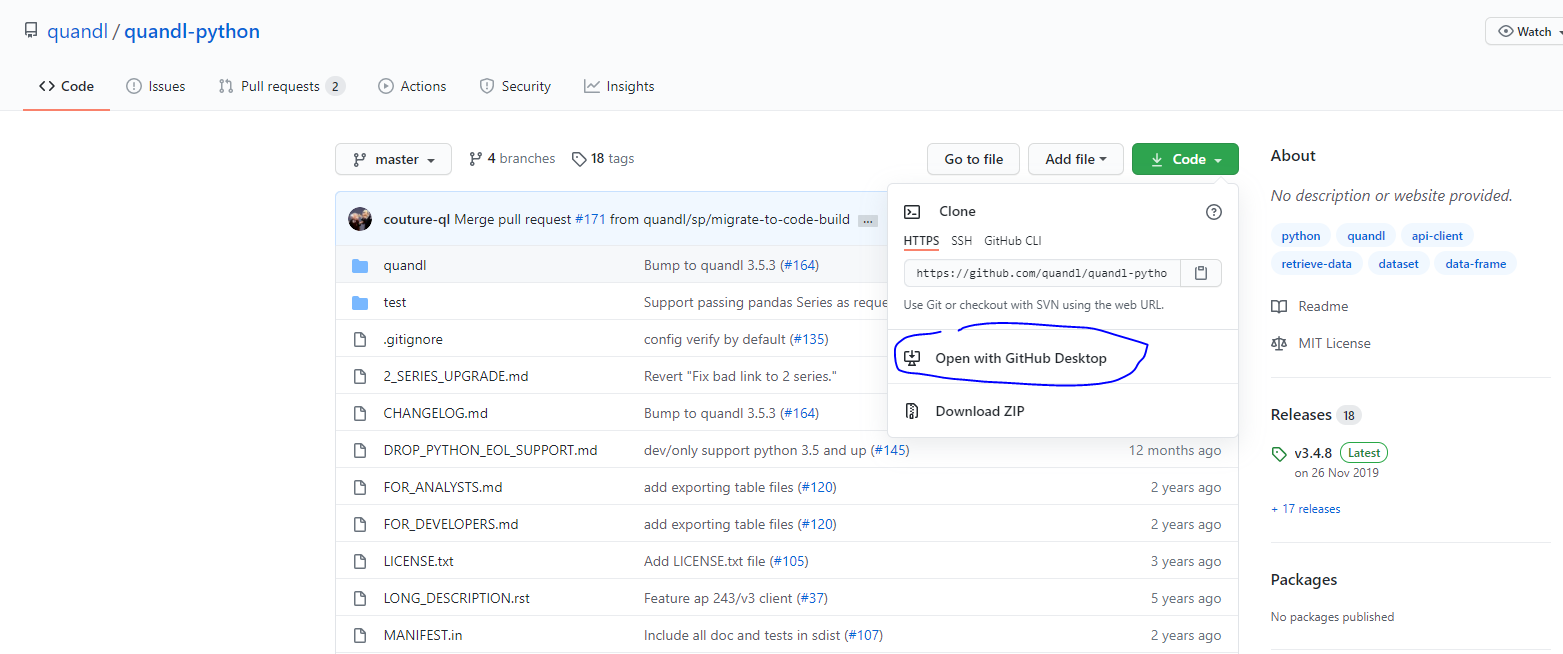
1.首先,找到自己要的项目地址(这里以quandl为例),选择CLONE,
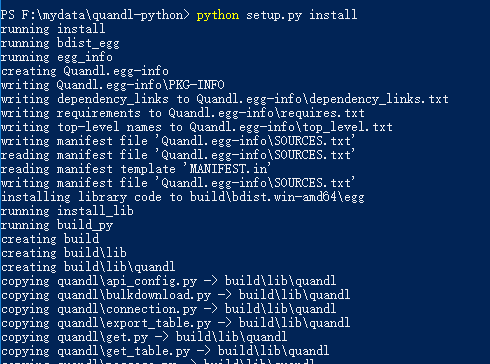
2.打开CMD,进入下载好的项目目录, 运行python setup.py install

3.安装过程
中间可能还会安装其它一些支持库
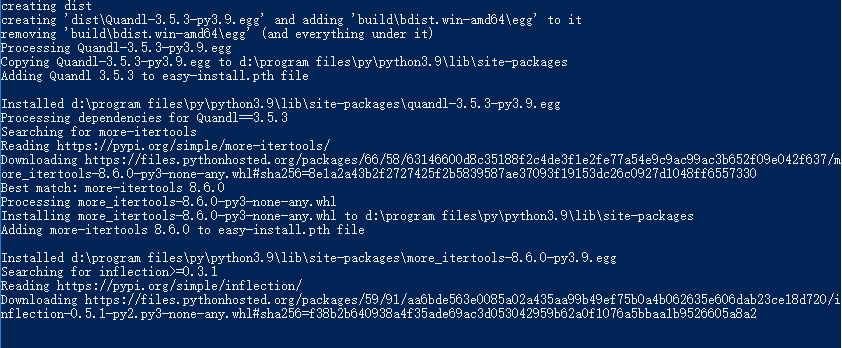
直到安装完成

其它案例 plotnine的安装
https://plotnine.readthedocs.io/en/stable/installation.html
plotnine can be can be installed in a couple of ways, depending on purpose.
Official release installation
For a normal user, it is recommended to install the official release. You can choose one these two commands:
# Using pip
$ pip install plotnine         # 1. should be sufficient for most
$ pip install 'plotnine[all]'  # 2. includes extra/optional packages

# Or using conda
$ conda install -c conda-forge plotnine
The second pip command also installs packages that are required for some specific functionality that may not be frequently used. Those packages are:

scikit-misc - For loess smoothing

scikit-learn - For Gaussian process smoothing

Development installation
To do any development you have to clone the plotnine source repository and install the package in development mode. These commands do all of that:

$ git clone https://github.com/has2k1/plotnine.git
$ cd plotnine
$ pip install -e .
If you only want to use the latest development sources and do not care about having a cloned repository, e.g. if a bug you care about has been fixed but an official release has not come out yet, then use this command:

$ pip install git+https://github.com/has2k1/plotnine.git
.gitconfig设置命令
git config --global http.sslVerify false
git config --global https.sslVerify false
git config --global http.proxy http://user:pass@yourproxy:port
git config --global https.proxy http://user:pass@yourproxy:port